Mini Wreath Place Setting Tutorial with Michelle

With family so far away, our Easter Dinner is a quiet gathering where we use our everyday plates. This year, I (Michelle) decided to make dinner fun with some Mini Paper Wreaths.

Lori Whitlock Easter Rabbit Place Setting Svg

Making the mini wreaths was fairly easy with my Silhouette Cameo, but I have a couple hints and tricks to make it really easy! I started with Lori’s Circle Monogram Frame (Silhouette Design Store or Lori Whitlock SVG Shop) to make the wreath. This is possibly my favorite SVG file. The wreath is actually 6 seperate pieces. Since I am making a small wreath, I’m going to release the compound path and make all of the leaves filled in, which is easier for me to cut.

Release Compound Path

I’m also going to cut a 5-inch circle to fit my plate. (Hint: When making a circle hold down the shift key and your circle will be perfect each time.) I recommend cutting three or four monogram wreaths to make your mini wreath nice and full.

Next, I cut some BRAND NEW Bunnies. This Easter Bunny Silhouette is absolutely darling! I love his little tail cut-out. He’s new in the shops and you can find him in the Lori Whitlock SVG Shop and the Silhouette Design Store. I cut two 4-inches bunnies and glued them back to back, but one would’ve been enough. I wanted to add a cute sentiment, and I found exactly what I was looking for in the Bunny Dingbats Font. You can find this in the Silhouette Design Store and the Lori Whitlock SVG Shop. You will find additional bunny silhouettes in the font. They would be cute too. With the bunnies so small, I had trouble getting the sentiment cut cleanly with paper, so I used vinyl instead. It came out perfect the first time!

Lori Whitlock custom vinyl SVG sticker on paper

Yes! Paper crafters can use vinyl too! I love how it came out.

I topped off my wreath with a cute paper bow found in the Silhouette Design Store or at the Lori Whitlock SVG Shop and my project was finished. This would be a great project to try new techniques such as releasing the compound path and using vinyl. if you would like even more information, I would encourage you to check out Lori’s class on Craftsy. With the class, Lori explains numerous techniques for getting the most out of your Silhouette Cameo.

I hope that you’ve enjoyed my Mini Wreath Tutorial. Happy Easter!

Michelle

Spring & Easter projects by Christine & Natalie

Today we have 2 different Creative Team members sharing their talents with us. First is Christine, she says…
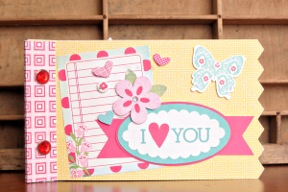
I have created a mini book using the Mini Album Pinking Edge and some papers and embellishments from Sweet Girl by Lori Whitlock for Echo Park.  These are just a few of the pages.  You can see the rest at my blog.

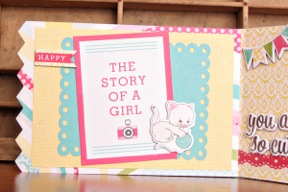
The front page of the mini book has a banner title that is part of the Sweet Girl collection by Echo Park in the Silhouette store.  I loved that I could make this banner larger so it really becomes the focus of the page.

I used another digital cutting file by Lori, called Scalloped Shapes for the background of this journaling card that is part of the paper pack.

You can see yet another frame on this page from Lori Whitlock.  It is called the 4×6 Frame in the Silhouette Store

Mini books are really so much fun, especially when you can cut out your own.  It easy to add as many pages as you want and even alter the size.  Have a great day and thanks for stopping by to see my project.
Supplies Used:
4×6 Frame- Silhouette Store #9783
Sweet Girl Paper Collection by Lori Whitlock for Echo Park
 Natalie has a beautiful Easter project to share with us. 
I’ve been know to make big signs for my front porch.  So when I brought this wooden pallet sign for my front door home from my local craft store, my son immediately said, “Mom, that isn’t nearly big enough for the front porch.”  I said, “silly, it’s for the front door.”  I had to figure out how to make it work, because I just had to bring the pallet looking sign home.  And since Easter is around the corner, I came up with this:

I first cut out the Easter saying out of vinyl, and placed it on the unpainted pallet.  Then I painted the wooden pallet blue, sanded and distressed it, removing the vinyl to reveal the color below.  I then cut out the Easter egg out of card stock, and using mod podge adhered it to foam core.  I then used plain old doilies, and cut circles and used the left over flowers that were cut to make the banner and stapled them to some twine and attached it to the pallet using hot glue.  It took me about an hour to make it.

I used the following files from Lori Whitlock’s store
Easter phrase – found here
Easter egg set – found here