Easter Basket Boxes

Hello there! Today I am  moving on from Valentine’s Day and on to Easter. I am looking forward to bunnies and chicks!

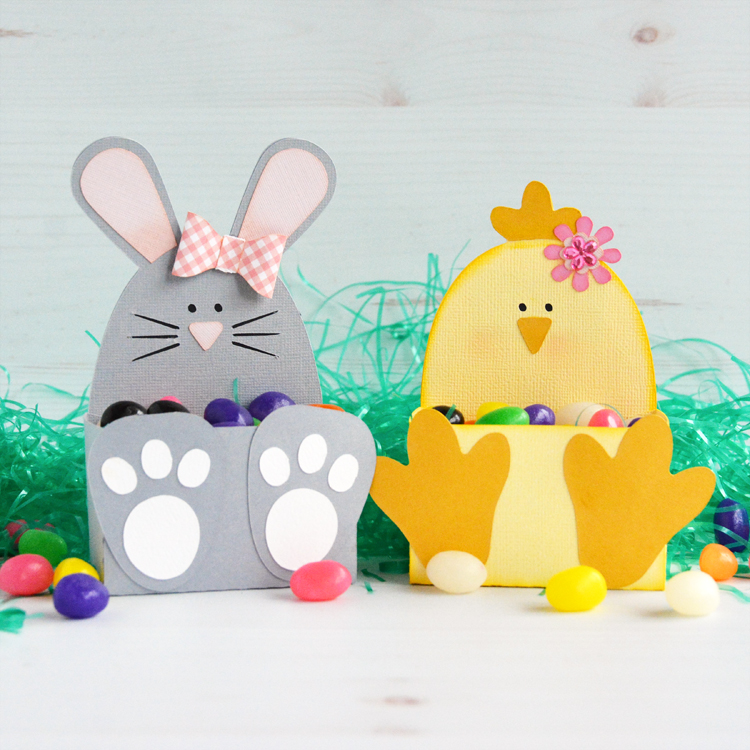
For my projects today I played with the new Lori Whitlock Easter Basket Collection!

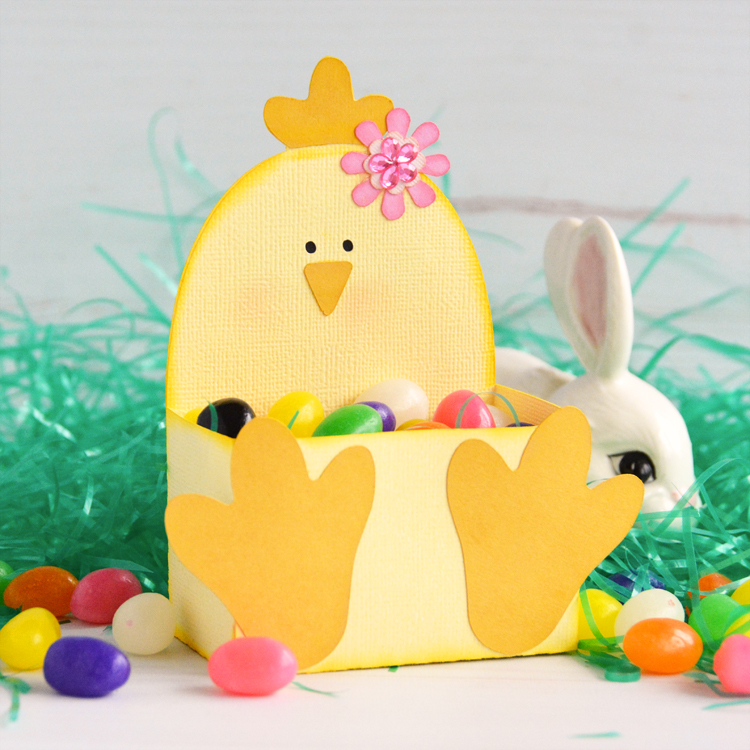
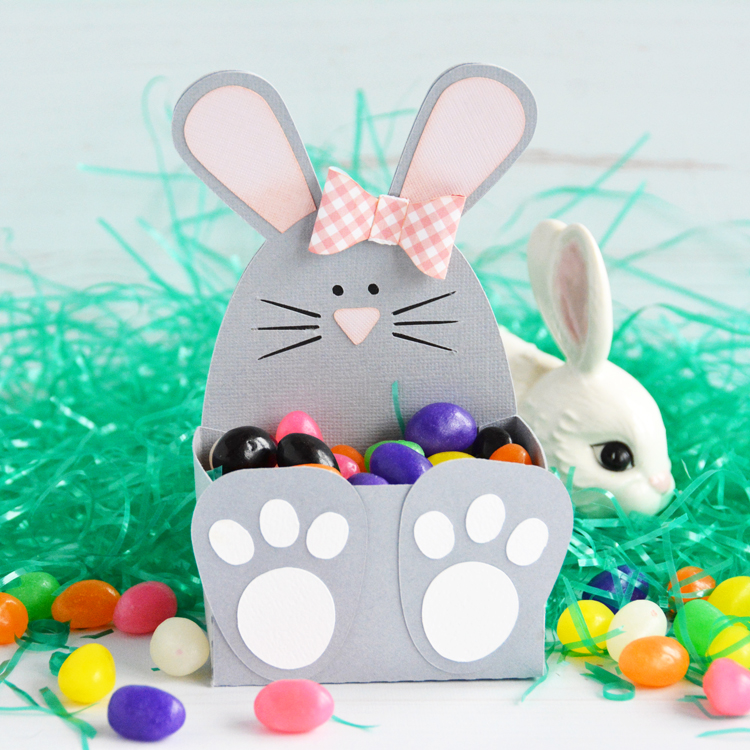
I cut several of Lori’s boxes and added all the fun Easter Basket elements. I spent an evening with my little Sidekick die cutter and die cut my self silly. When I am doing this, I put on a good movie and cut a bunch of pieces out of the different colors and just sort of mix and match away-always sure to have extra pieces because I tend to lose tiny pieces! I had fun adding the sticker elements to the finished boxes as a little extra special touch. Everything was just so fun! 

I die cut 3 baskets and lots of fun little eggs and flowers/leaves in all the different colors included in the new collection. I did cut out some grass from this file to use at the base of the boxes. I removed the scoring lines from the grass piece to cut one long strip and trimmed  pieces to fit each box at the base. As for the boxes themselves, I like to add a little extra matting to allow the patterned paper to pop a bit more. To do that, I open the offset panel and chose offset, distance of .050 and the square corner. In these projects I used white for the extra matting pieces. 

3d  No Glue Suitcase (SVGSilhouette )

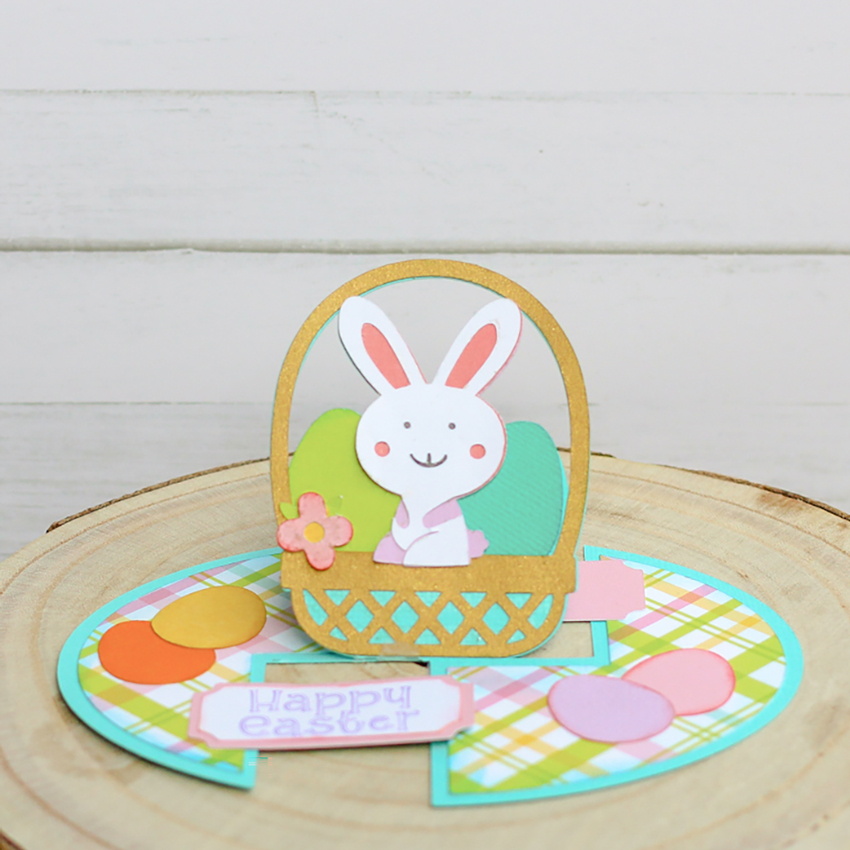
Box With Handle  (SVG, Silhouette)

***This tip will help you with these tiny dies.  I used washi tape to adhere the tiny dies on to my paper. I poked out the cut pieces but left the dies taped on to the paper. You can just put these on top of your next paper each time. Just keep the dies in place with the washi tape and store them that way as well. You won’t lose those tiny eyes or rosy cheeks that way! 

Easter Basket: Classic Bundle

Or other products purchased individually as well:

Easter Basket Collection Kit

Easter Basket Solid Kit

Easter Basket Element Stickers

Easter Enamel Dots

Easter Basket: Filled Easter Basket Medium Die Set


Hope you enjoyed these fun boxes!
 

Easter Belly Boxes

Hello everyone! Marcia here today. Since I have Spring fever but its still snowing here, I decided to get busy making some Easter Belly Boxes for my nieces and nephews. The belly boxes come in an array of animals and they are perfect for Easter baskets. I chose the Bunny (SVG, Silhouette) and the Chick (SVG, Silhouette) Belly Boxes. For a quick tutorial, you can see this blog post.

Not only are they adorable but their bellies hold plenty of candy!

Lori has lots of Easter ideas in her shop. Go check them all out and have some fun making your own Easter belly boxes!

Thanks so much for stopping by.
~Marcia

Impossible Easter Basket Card

Do you need some Easter Cards?  Lori has many adorable options in the shop.  I am sharing one of the new impossible cards. Find it in Lori’s SVG Shop or on Silhouette.

This card has several small elements, so it is great to use your stash of scraps.


Pro tip: Ink any edges before piecing together.  When piecing the basket and bunny, start with the eggs and build up. Lori has a video tutorial showing how to put together any of her impossible cards here.

Have a great week and Happy Crafting!

Hexagon Easter Basket Tutorial

Hello and happy crafty Thursday! Aimee here with you today sharing a tutorial on how to assemble the adorable Hexagon Easter Basket (Lori’s SVG ShopSilhouette). These little baskets are so cute and look great in a rainbow of colors!

First thing to do is match up some 12×12 papers for each basket. And pull the SVG file up on your screen.

This particular SVG file requires you to cut 2 each of the base of the basket and the layering pieces. I cut out 2 of the handles as well. I wanted the handle to be solid colored instead of being able to see the underside of the patterned paper.

Here are the pieces of the basket that I started assembling.

Adhere the two pieces that make the base of the basket. To make it easy, I adhered the side tabs on each piece and laid them flat to make sure that both pieces were even along the top edges. Then I added the layered pieces and then started assembling the bottom tabs to complete the bottom part of the basket.

Glue the two handle pieces together and lay aside to dry.

Adhere the bottom tabs of the basket to the hexagon piece to complete the base of the basket.

Attach the handle to the basket. There are holes in the handle and the basket to add a brad to attach the two together. Last thing to do is assemble the bow and adhere it to the handle.

Then you get to fill your baskets up with some Easter grass and something decorative or some Easter yummies! Add them to your Easter decor or to your Easter dinner table with a chocolate bunny.

Thanks for stopping by today! Hope you find these Easter baskets just as adorable as I do and give them a try!

Aimee

Easter Basket and Carrots by Corri

Corri is here today sharing an adorable Easter project with us, she says…

Lori Whitlock just added this adorable carrot box to the Silhouette Store. I just love it and couldn’t wait to cut it.

I cut the carrots as sized in the file.   I embossed the green tops with the Cuttlebug D’Vine Swirls embossing folder. I cut this adorable 3d Easter Basket at 10″ wide so I could fit the carrots inside.  I probably should have gone a little larger .  This basket it so cute…it just takes to brads to hold it together.

The paper on my project today is all from Echo Park – All about a Boy.