Santa Paws Shaker Tutorial

Welcome to the Thursday tutorial! Today I used one of Lori’s postage  frames and made it into a fun shaker card. Very easy and fast!  I used Lori’s new Here Comes Santa Paws Christmas Collection for my theme.
Santa Paws Shaker

Vintage Postcard 4×6
This is what the file looks like (in the Silhouette software) when you open it. (I did highlight the first piece in red.) You need to choose the first two pieces for this card and delete the rest.
Make a duplicate of the red striped piece. (Control + any arrow)
To get the frame without the cut outs, right click the frame and choose  Release Compound Path and remove the cut out pieces, leaving a solid frame. You can move the two rectangle and recenter if you find that easier.

This is what your two frames will look like.  

Final cut pieces

 The first piece you will cut is your background piece which will be my blue sky and a piece of acetate. The second piece, is the solid frame – I cut 3 per page out of 8.5×11 generic white cardstock (9 pieces total) – they won’t show so you can use less expensive white cardstock. You can cut only one of the solid frame is you want to use foam for the edges of your shaker.  My final top piece is cut  out of red. 


First Stack – red piece glued to one white frame and the acetate is glued on the bottom. 
The second stack – glue all the white frames together (use enough to make a good size stack). I used 7 frames because my snowflakes where a bit thick.
 
Assemble the second stack, add your shaker pieces inside and glue on  your top section.  I decorated the the top of the card with Lori’s new Santa Paws dies! Voila! You can then add it to a card base and call it good!
 
Products Used:
 
Cut File: 6 pc 4×6 Vintage Postcard
 
Here Comes Santa Paws: 6×6 paper pad, Christmas Puppy Pals Die Set, Embossed Christmas Tree Die Set, Ephemera
 
 
I love all of Lori’s frames, they are perfect for using as a great card base. 
 
I hope you give this a try!
 
🐕🐶🎄Sue Kment


Pop Up Dog House Card


I love how easy it is to personalize Lori’s files. I added my dog’s name to the bone and changed the sentiment as well. I also embossed the front piece of the dog house for a bit of added texture. 

 I have a sweet old doggie named Butters (obviously). I went on a mini vacation and my son traveled to my home to stay with her while we were gone. I made this as a thank you card-or as we say in our family FANKS! That’s how my sweet grandson used to say Thanks when he was little and its the lingo that stuck with all the family LOL! I added a pic of my Miss Butters inside to finish off my card! Note: (My black paper was fairly thin so I cut two pieces and glued together because I wanted that piece to be sturdier.)


Thanks for stopping in today!
 
Sue 🐕🦴🐶🐕‍🦺


Bone-A-Fide Birthday Bash Box

 I have a fun little project to share with you today, Birthday Explosion Box to celebrate my Cash’s Birthday.  I’ll get photos printed this week and add them to the tags in the box.  Lori has a brand new Party Animal Collection from Echo Park.  This is such a sweet line for Birthday’s of our precious pups.  Perfect colors and the cutest embellishments.

You can find the file here in Lori’s Shop and here in The Silhouette Design Store.  It is a really easy project to put together and it has WOW results.


Here is the Birthday Boy! He turned 5 just a few days ago.


We celebrated with a walk and a hamburger!


So I’ll walk you through a quick tutorial.  First, start by cutting out all your pieces and ink all the edges.
Next, fold your box shape and the score lines.
Easy peasy, put the lid of the box together.
Fold and glue your library pockets. There are four!
Add eyelets if you wish to your tags.
Then simply adhere the pockets with the tags to the inside of your box.


Now for the cake.  I used liquid glue to adhere these.  This little cake is a box, so you could add little trinkets or a little gift for the recipient. I’m not sure what I will put in there for Cash.
Make both the top and bottom pieces the same way.  Fold all the little tabs inward and adhere the ends together, as shown in step two.  There are two circles for each box, on the brown piece, one fits in the inside and the other on the bottom.  This makes a nice clean finish for the bottom of the cake.
Do exactly the same with the lid.  Lori’s file has a sweet little candle but I love to use embellishments from the line on my projects, so I picked a couple of candle stickers and placed them back to back.
Now adhere the box in the center of the box or you could just add it and your recipient can take it out.
That’s it, now fold up your box and put the lid on.
Of course, this is where the fun really begins.  You get to embellish and make it your own!


I love this so much!


And this sweet little tag…sit, stay and CELEBRATE!


Thanks for joining us today and I hope you check all of Lori’s Explosion Boxes!


5×7 Box Card Happy Birthday Dog

5×7 Box Card Happy Birthday Dog

 Hello Little Midge


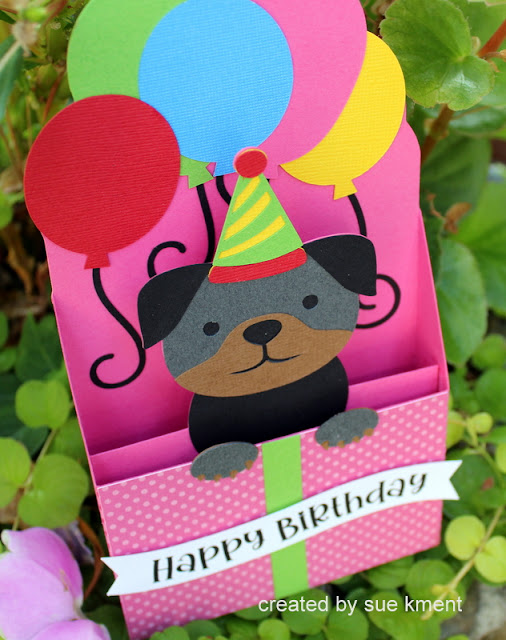
I am expecting a new little grand doggie coming into the family soon.  Her name is Midge and she is a little Frenchton. She’s mostly a black/brown brindle with a touch of white and is the cutest little roly poly pup!
 
My daughter Abby is anxiously awaiting the day when Midge can come to stay. It was Abby’s birthday recently so I made this card with a little “Midge” wishing her happy birthday!  It is a very easy box card with lots of colorful balloons!  (and very easy to mix it up by changing the colors) The sentiment is a print and cut that is provided in the file. Of course I always print about 10 so I can use the sentiments on other projects! 
I hope you enjoy this card.  It can be found in Lori’s shop (click on the top link at the very top) or can be found at the Silhouette store HERE

💕 Sue Kment

Flip Ears Card Dog

Peek-a-Boo!


Flip Ears Card Dog #268369
 
Pull his tongue and his ears flip up. How fun is that? This would be perfect for any occasion—birthday, missing you or just for fun. 


You can watch the Lori Whitlock You Tube tutorial HERE.
 
I hope you enjoyed this card and give one of these flip files a go!
 
💕Sue