Happy Thursday Everyone:
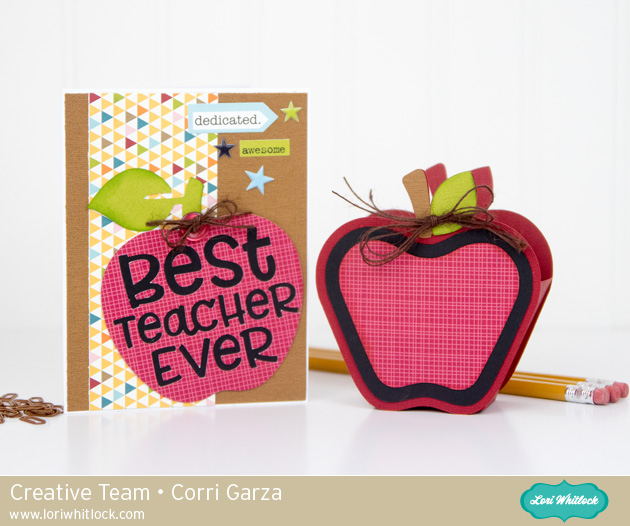
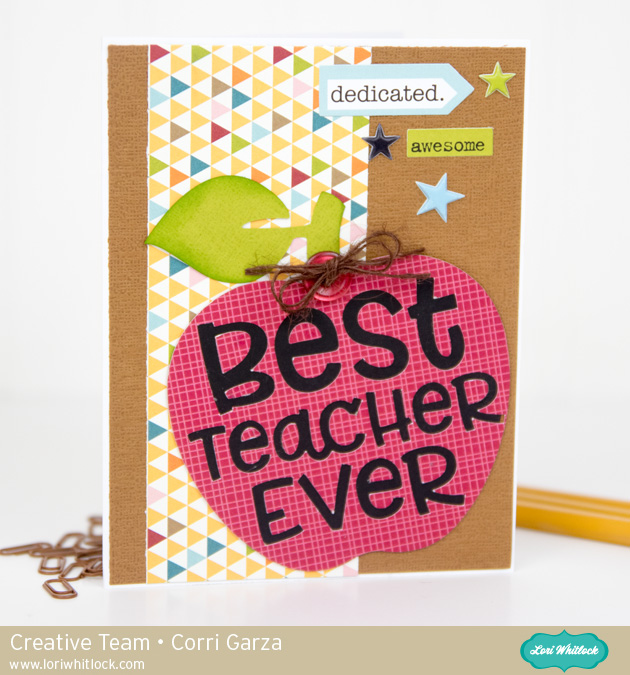
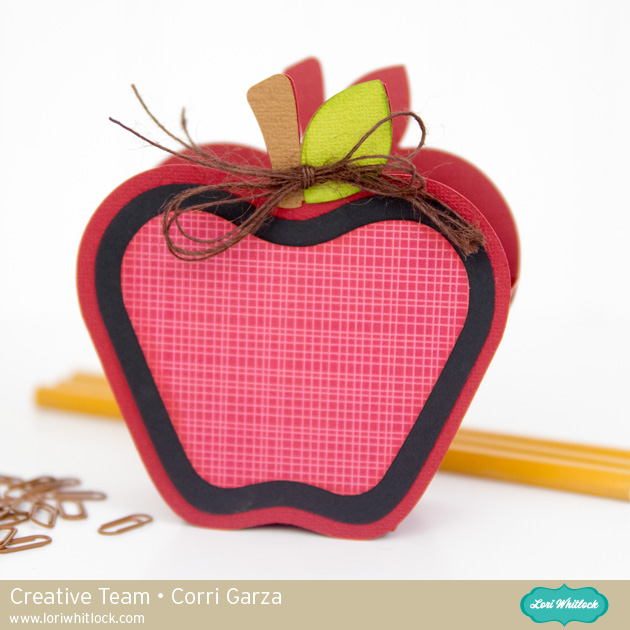
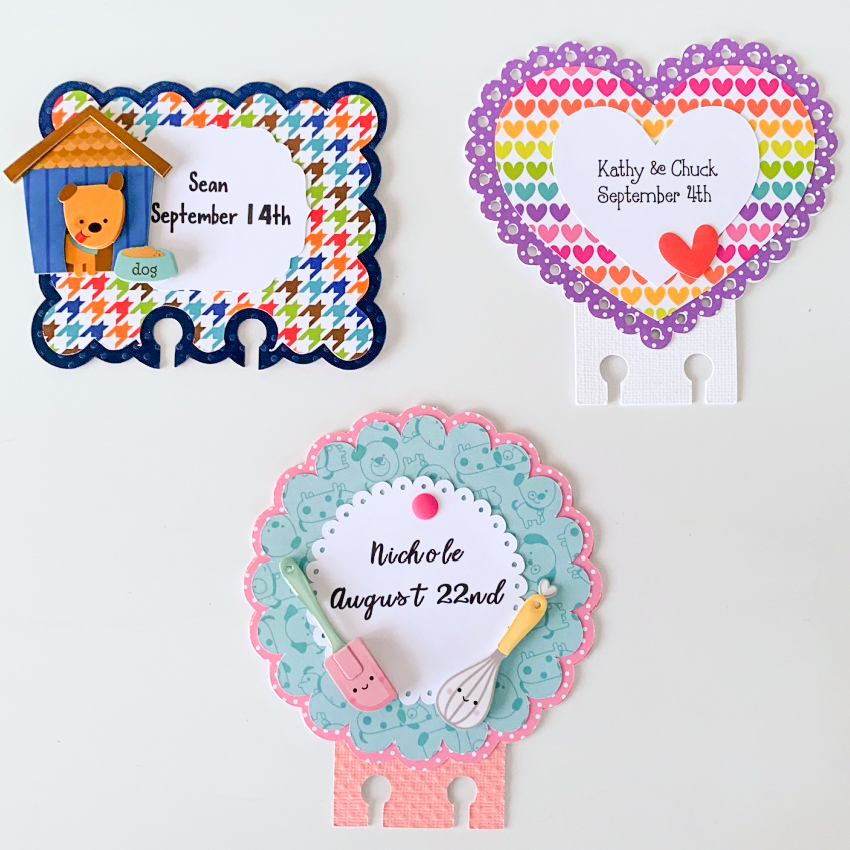
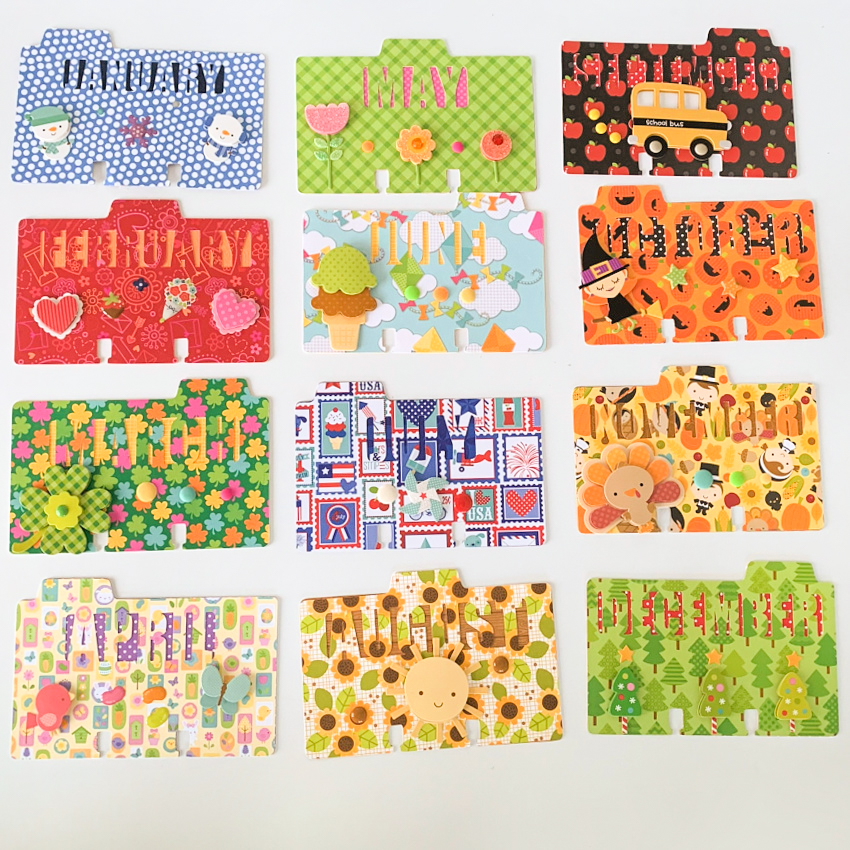
Anita here today with a tutorial for a Perpetual Celebration Calendar. I have a perpetual calendar which I have been using for years and wanted to replace it with something more fun. I decided to buy a rolodex and found some great files in Lori’s store that I used to create the pages for my calendar. I used Memorydex Scalloped Cards (SVG, Silhouette) and used all three included shapes. Male birthdays got the rectangle shape which can be found in the 4 Cute Tags file (SVG, Silhouette). I used 4 Scalloped Shapes (SVG, Silhouette) as the date reminder tags that went on the female birthday cards. And I used the Nested Hearts file (SVG, Silhouette) for the anniversary cards. For the files without the punch holes in the bottom, I used a memorydex punch to add them. Please note that each card also has an extra layer on the back of cardstock to give it a bit more stability and to help it to be more stable on the rolodex holder as it spins.
I used the Memorydex Box and Cards (SVG, Silhouette) for the month tab cards. You can find a tutorial to make the Memorydex Box and Cards here on Lori’s blog. I also used the Month 4X6 Journaling Cards (SVG, Silhouette) I resized them to fit on the card and then cut them out. I did my editing of this file on my Silhouette. I decorated the cards with ephemera from my stash.
That’s it for me today. I love how this came out and now each month I get to flip the pages to see who I will be celebrating that month.
Hugs,
Anita
 Hi Everyone:
 Hi Everyone:
 Here is a screen shot of the cut files on my mat. You will need to cut four of the outer box and the inner box as noted in black bold type near the boxes cut files.
 Here are the pieces that you will have once you have cut everything for your project.
 I always start my projects by folding the score lines as you can see by the photo above.
 For the inner box you are going to want to glue the tabs from the back of the box to the side of the box.
 Next you will glue the back flap into the box.
 Next you will glue down the front flap into the box.
 Lastly, you will glue in to the box the two last flaps and your inner box is done.
 There are flaps along the bottom of the box cut file and you will be gluing the tabbed pieces together and leaving the flaps alone for now.