Sticky Note Calendar 2021 Tutorial

Hi there paper crafting friends!  It’s Michelle Starcher, aka the Bookish Designer, popping in on the blog to walk you through the steps to create Lori’s Sticky Note Calendar 2021  (SVGSilhouette- coming soon). In this photo tutorial, I will break down the steps to create this super cute project to keep you on track in 2021.  I used papers from the Magical Adventure collection from Echo Park Paper Co.  The calendar goes perfectly with the organizers I made a few weeks ago.

After uploading the SVG file to the Cricut Design Studio, I needed to make a few changes, so that it would cut correctly with my Cricut Maker. Below you will find the steps I took to prepare the file for cutting.  I opened the “solid” version of the SVG in Cricut so I could use my score tool.

Ungroup the SVG file.  Change the Linetype of the fold lines on the calendar base and sticky note holder to score marks. Attach the score lines to calendar base and sticky note holder pieces.  For help on this process, see this video on Lori’s YouTube Channel.
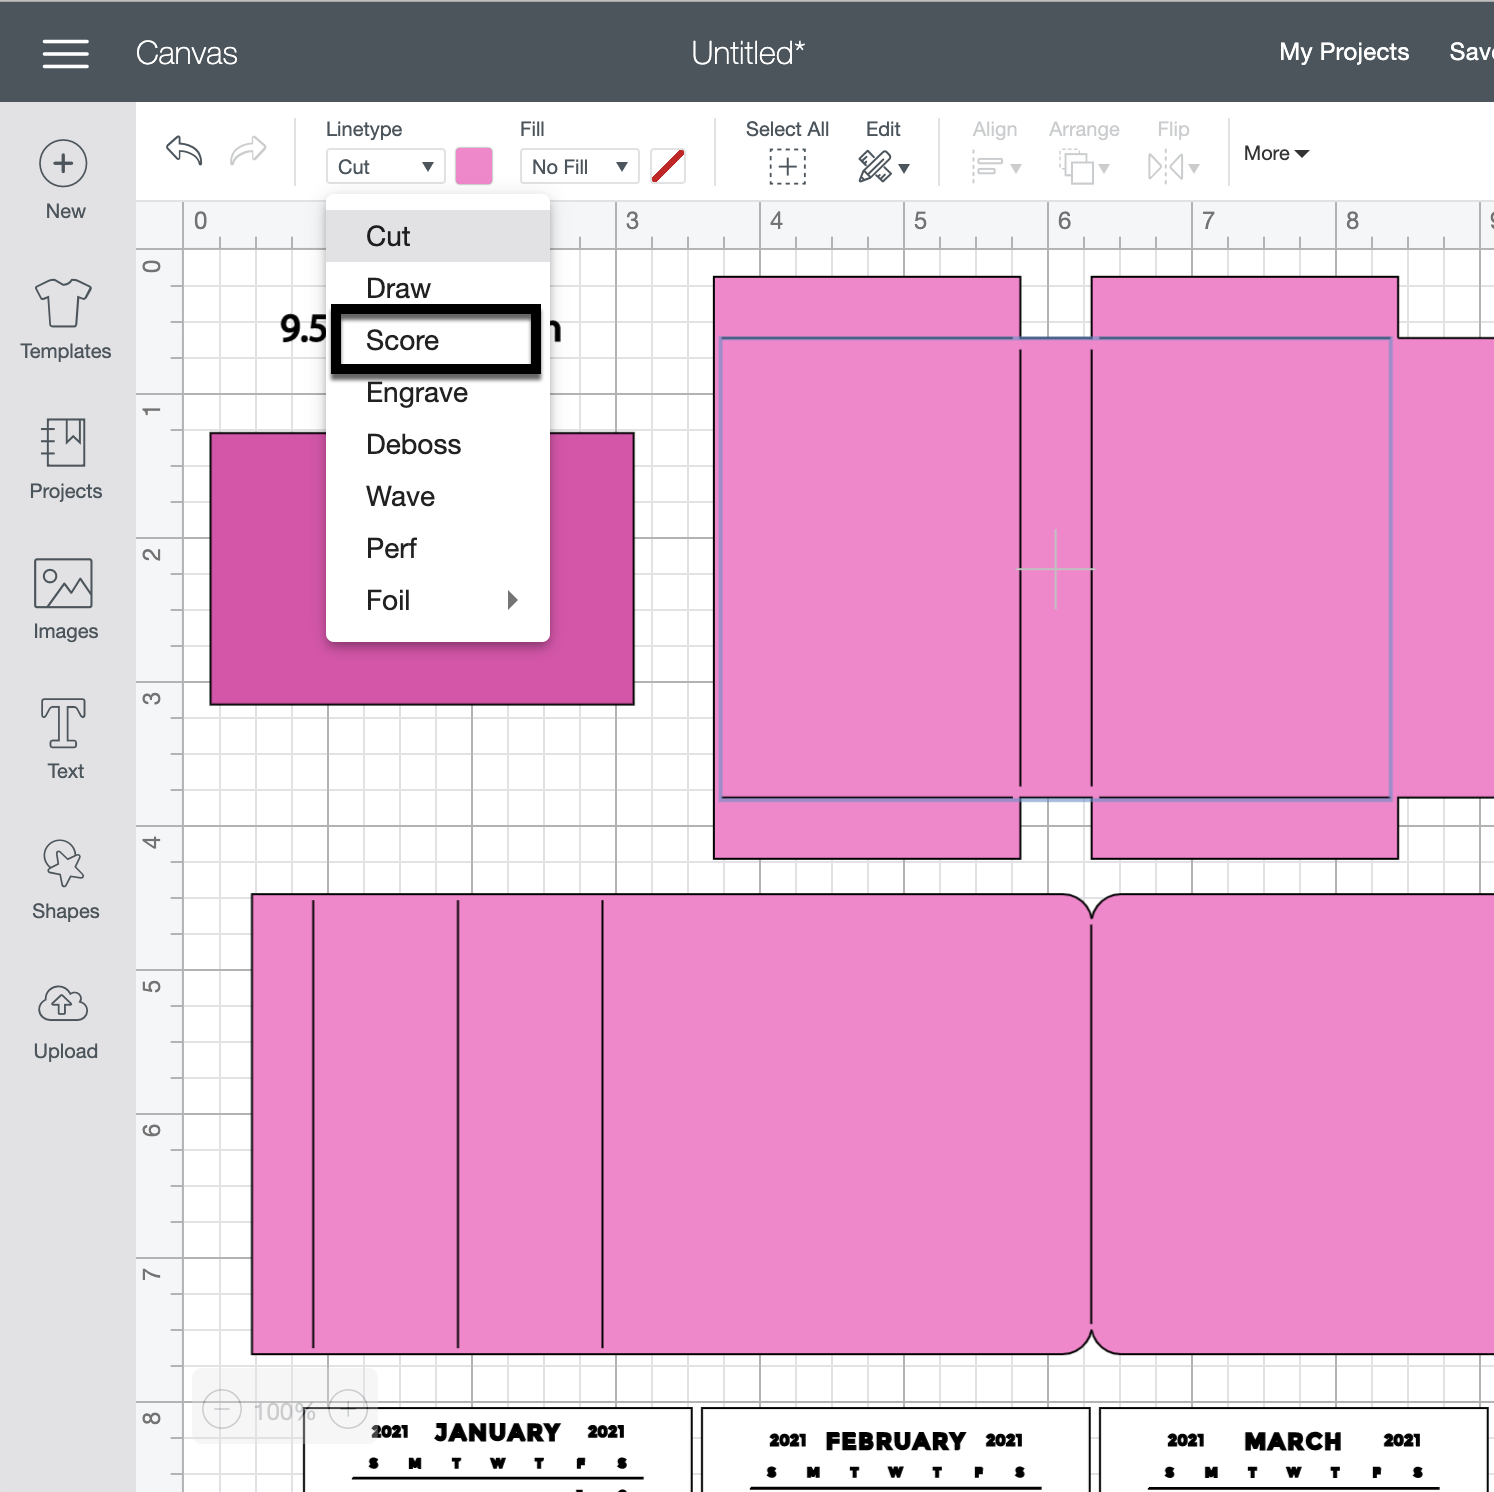
Next, change the Fill calendar pieces to Print.  You can save yourself some time by holding the control (PC) or command (Mac) key and clicking each month’s calendar.  Then change the Fill to Print for all 12 months at the same time.

The final step is to Flatten each calendar piece to the white rectangle below.  Unfortunately, you will need to do this 12 times.  Don’t forget to hide or delete the size note (9.5343 in =width).

You are ready to print and cut your project pieces.  Toggle off the Add Bleed option in the print window.  It will be grayed out when in the off position.  When I sent mine to the printer, it printed both pages.  After printing, it was time to cut all the pieces using my Cricut Maker.

After cutting all of the project pieces, I folded all the pieces with score marks and added adhesive to the joining tabs.

Then I adhered the calendar back (the red polka dot piece) to the front of the sticky note holder and added adhesive tape to the back of the sticky note holder.  Next, I assembled the stand and attached the sticky note holder to the stand.


I chose to attach the January 2021 calendar piece to the front of the sticky not holder and tucked the rest of the pieces behind my sticky notes.  I will add the new months to the front of the sticky note holder as the year progresses.  You can also staple the months together in a stack and add as a group to the front.
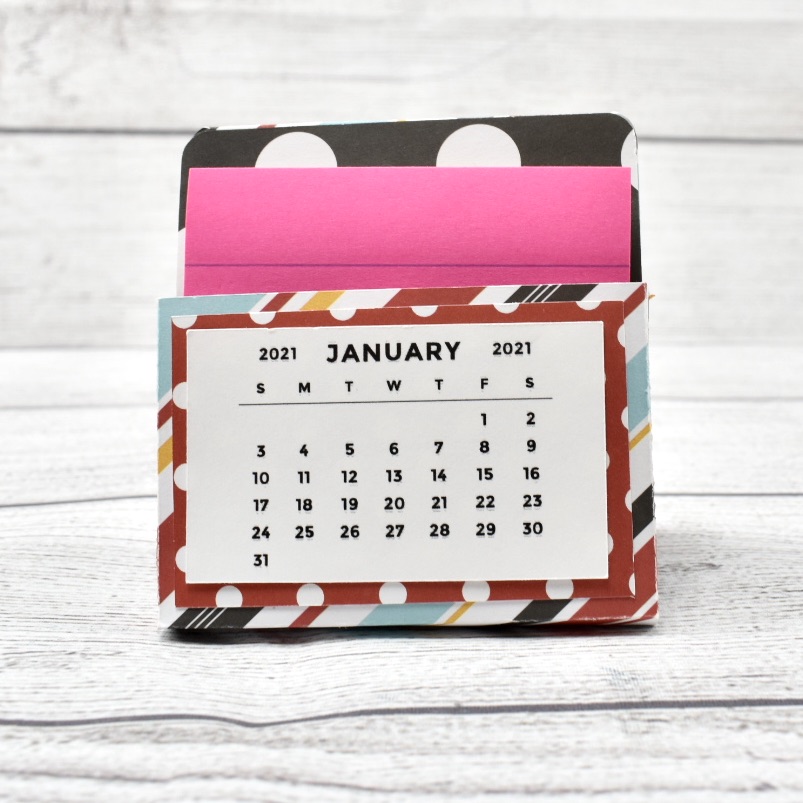
 

I hope you enjoyed making the Sticky Note Calendar 2021  (SVGSilhouette) as much as I did! Looking forward to 2021 and using my sticky note calendar.

Until next time,

Michelle

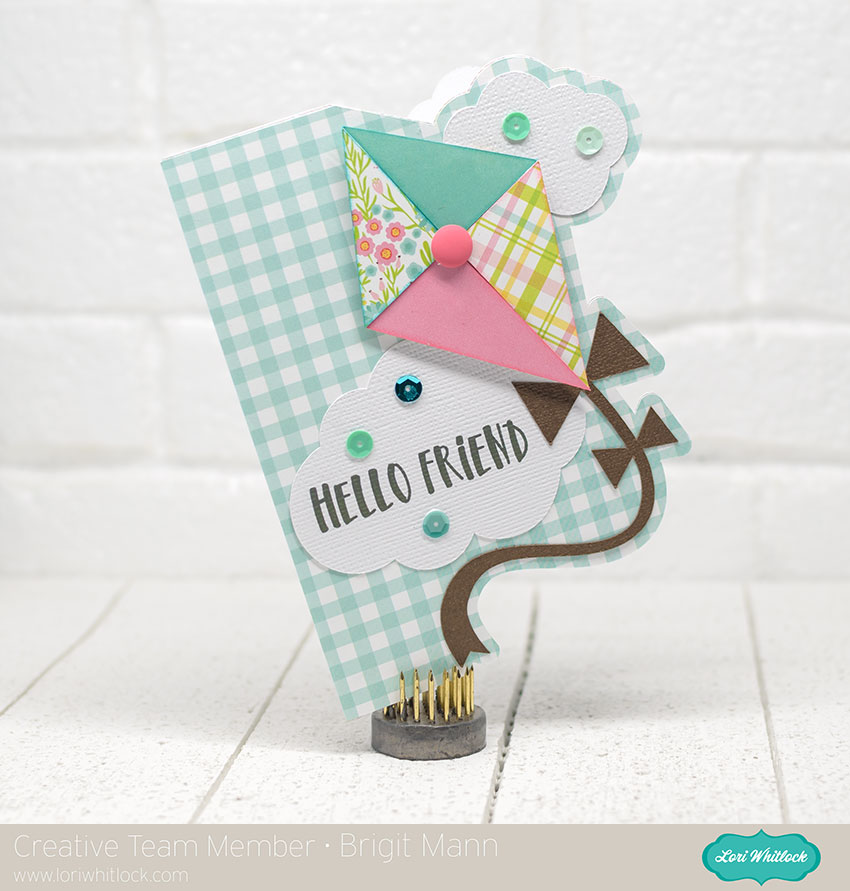
A2 Shaped Card Kite Tutorial with Brigit

I have a quick tutorial to share today using the A2 Shaped Card Kite file (svgsilhouette) and a sentiment from the Spring Easter Card Bundle from Lori’s shop. I used my Cricut Maker and Design Space to cut this project out.

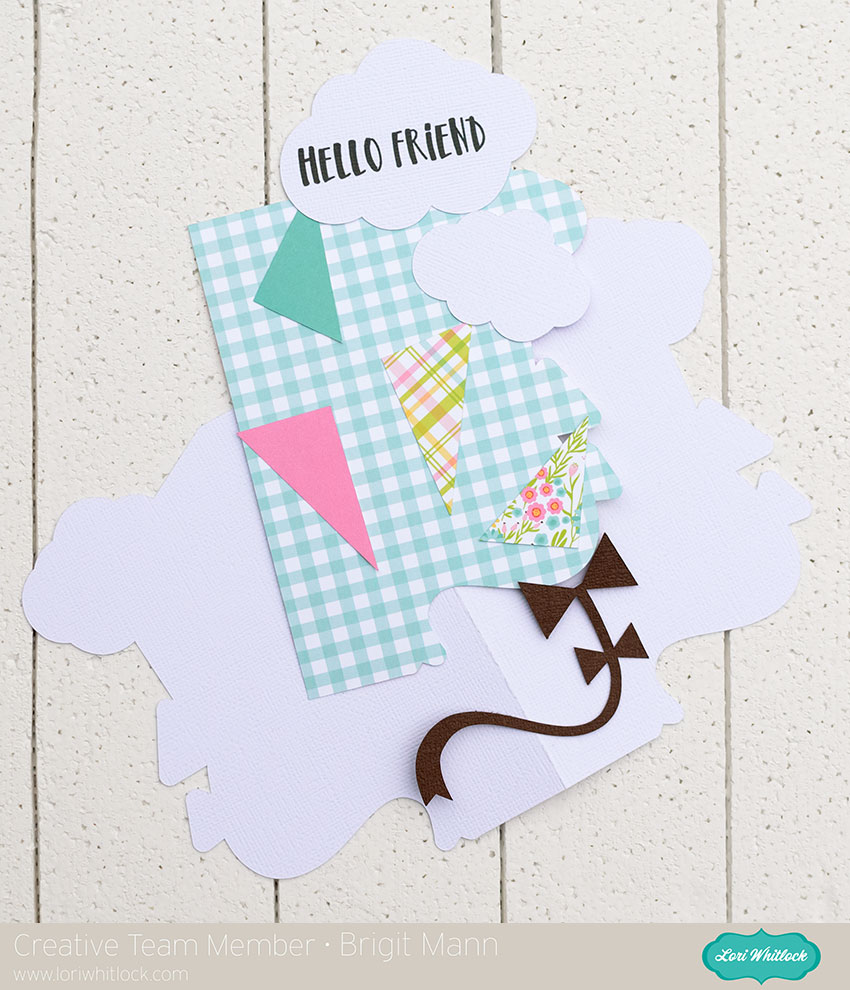
I uploaded both files and ungrouped all keeping just the hello friends sentiment I deleted all the other sentiments and their layers.

I placed the sentiment on the cloud where I wanted it and select both and flatten, this creates a print and cut. I also selected the card base and score lines and clicked attach to keep them together, I did the same for the envelope.

I cut out all my pieces using Echo Park’s Spring Fling paper collection and glued them all together.

Thanks for stopping by and have a wonderful day!

Blog – Pinterest – Instagram

Box Card Christmas Truck Tutorial with Brigit

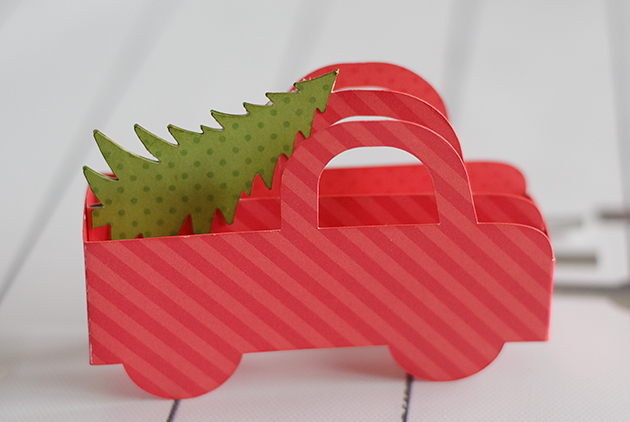
Here’s a tutorial of putting together this adorable Box Card Christmas Truck from Lori’s shop. I used Cricut Design Space and my Cricut Maker to cut this out but you can also get this file here at the  Silhouette Design Store.

Here’s my finished truck, I added some snow to the tree and a Santa from Doodlebug’s Christmas Town mini icon sticker sheet. The patterned paper is Doodlebug’s ladybug and limeade dot-stripe petite prints.

I uploaded the truck into Design Space and ungrouped.

Selecting the truck piece with score lines I clicked the Attach button on the bottom right, this keeps the score lines and cut piece together when you cut. I did the same to the other piece with the score lines.

Select the JOY and Flatten, do the same to the Farm Fresh Christmas Trees sign, this is so you can print and then cut.

This is how the print and cut will look, you print this page out, place it on your mat and the machine will scan the black box and cut around each one.

Here are all the pieces cut out, I folded the scoreline pieces and inked the edges of the patterned pieces.

I put together the tree on the middle section first then glued and assembled the main truck piece. Then glued the middle piece flaps to the inside of the main truck. If you want you can use solid cardstock for these pieces to save on patterned paper since the pieces in the next steps below will cover both sides.

I glued down the door first, then the silver running board, the tires on top of that and last pop dotted the fenders. Next, I glued each finished side to the truck base. Last I added the Joy to the back and the lights to the front.

Thanks for stopping by and have a wonderful day!

Gift Set Tutorial by Brigit

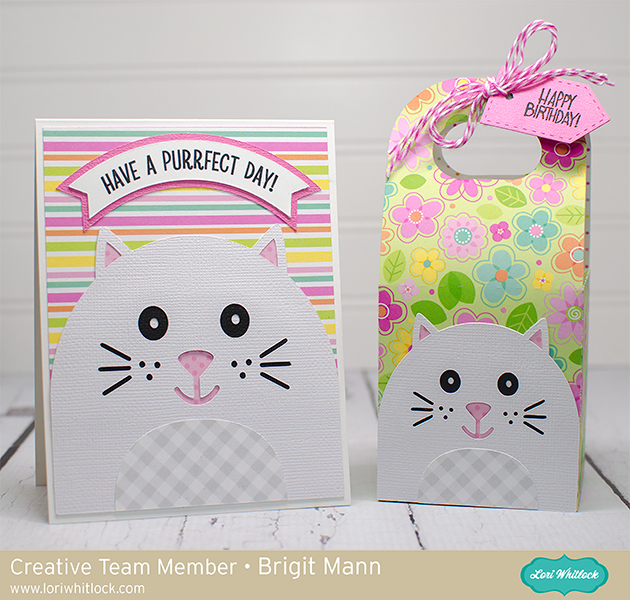
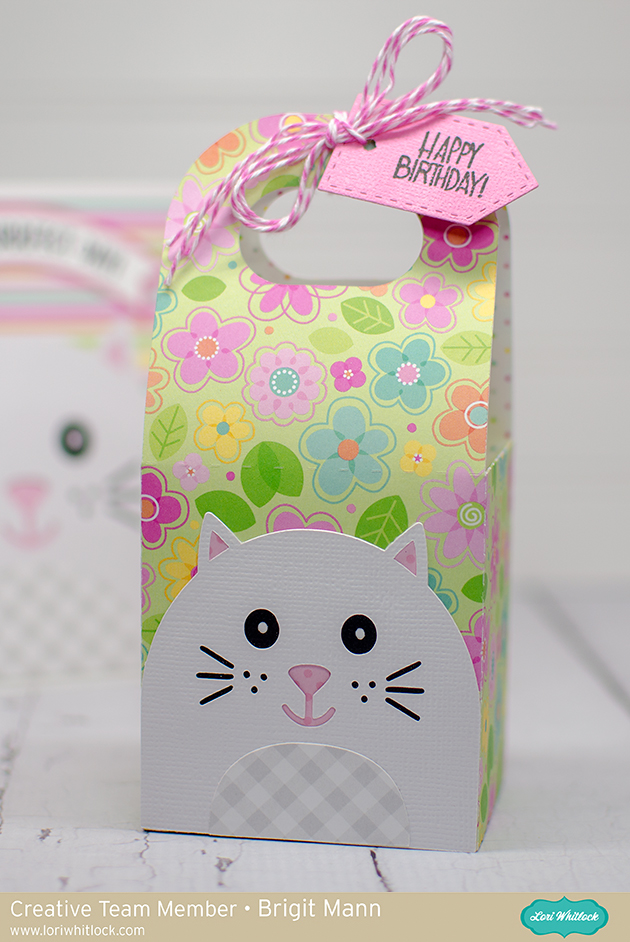
Hello there, it’s Brigit here today sharing a quick tutorial. I needed a gift bag for a friend and since she’s a cat lover I thought the cat on the pop up drawer birthday cat would be perfect for a gift set. You can get this file also from the Silhouette Design Store here.

I uploaded the pumpkin favor box and pop up drawer birthday cat into Cricut Design Space and deleted the pieces I didn’t need, leaving just the box and card with the cat. You can also get the pumpkin favor box from the Silhouette Design Store here.

I grouped the card with the cat and resized to 4″ x 5.25″ and then ungrouped. Since the sentiment is a print n cut I selected both the top banner and text to flatten, this turns it into a printable single image.

Next I duplicated the cat and sized it so it fit between the score lines on the front of the box. Then cut out the project using my Cricut Maker.

Hope you enjoyed this gift set, thanks for stopping by and have a wonderful day!!

Chalkboard Card for a Teacher Using Cricut Design Space with Karin

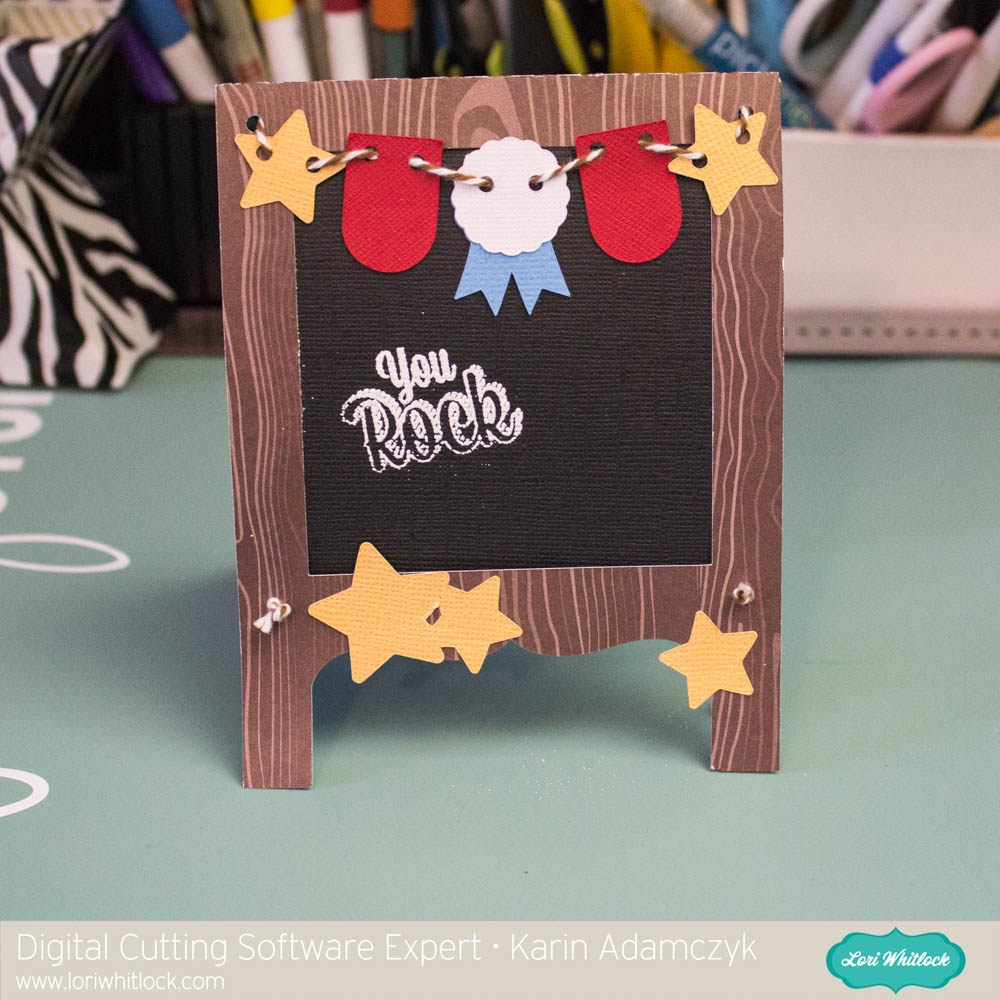
I made this adorable chalkboard card that you can use to give a special teacher a gift card.

20160517-2016-05-16_23-30-50
To make the card, I brought the files into Design Space by choosing Upload Image.
20160517-2016-05-16_23-33-57
I opened the image of the cutting file (JPG) in Preview on my Mac and just moved that window onto the screen next to the cutting file pieces so I could see the colours used in the original project. In this case, I loved the colours because they are nice and bright so I used all the same colours for my card. I even had a great piece of wood grain patterned paper.
20160517-2016-05-16_23-36-15
To change the colours of the components in Design Space, all I did was click the piece, that piece is highlighted in the Layers panel, then I clicked the scissors icon and then the colour I wanted for that piece.
20160517-2016-05-16_23-42-03
Here you can see that I changed the colour of these tabs to red.
20160517-Screenshot 2016-05-16 23.58.59
Before clicking Go, I selected the individual pieces by drawing a rectangle around them and then I right clicked and chose Attach. This is so that the little circular cuts and scoring lines stay in the right place on that particular piece.
20160517-_MG_5129
After I cut and assembled the pieces, I used some baker’s twine to string the banner pieces along.
20160517-_MG_5130
I put knots in the baker’s twine to attach the legs at the front and back.
20160517-_MG_5131
I just used my ATG gun to put adhesive on the back of the iTunes card and attached it to the back of the card.
20160517-_MG_5132
I stamped a sentiment on the front of the card. The You Rock stamp is from the Avery Elle Celebrate Stamp set. I used American Crafts Zing Embossing Powder in White Opaque Finish, my VersaMark watermark stamp pad and my Ranger Black Heat Tool for the sentiment.

20160517-_MG_5133-Edit-Edit

Thanks so much for stopping by. Please visit my blog for more fun projects. Also, if you would like to be informed whenever I upload a new Cricut video tutorial, you can sign up for my Cricut Tutorials mailing list.