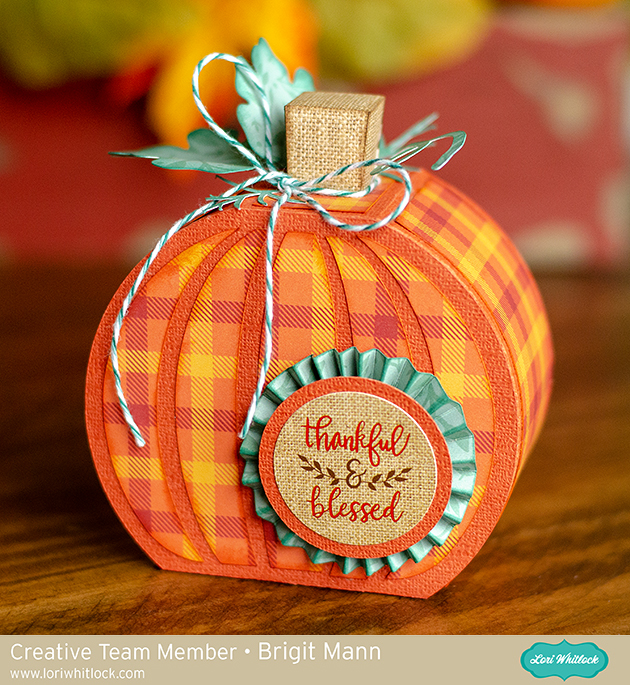
3D Pumpkin Box by Brigit

Hello everyone, I’m so happy fall is right around the corner, it’s my favorite season I just love making projects this time of year! Today I’m sharing the 3D Small Pumpkin box I made, it’s one of the items in the Kit of the Month for September at Lori’s shop, check the product description for details. You can pick up the Silhouette version of the file here.

The paper collection I used is called Celebrate Autumn by Echo Park, it’s designed by Lori, I absolutely love it! The orange cardstock and twine are from Doodlebug Design.

The stem comes with layer pieces but I wanted to show more of this burlap paper, it looks so real.

Sentiment sticker is also from the collection. There is also a 3D Large Pumpkin that matches this one, makes a nice set.

Thanks for stopping by and have a wonderful day!

Pencil Shaped Box 2 Assembly with Brigit

The pencil shaped box 2 makes a great gift for a student or teacher, just fill it with some treats or small school supplies, even a gift card. You can also get the file here from the Silhouette Design Store. The paper used is from Echo Park’s Back to School collection designed by Lori.

I change all my score lines  to solid in Silhouette Studio Business Edition and save the file as an svg to bring into Cricut Design Space so I can cut it out on my Cricut Maker. The new scoring wheel works great and it’s worth the extra step to fix my lines. I really like SSBE better than Design Space that’s why I do it this way but you can change the lines in Design Space also.

I actually change the lines an easier way now, I don’t know why I didn’t think of it before. I release compound path all the score marks and delete all but one in each row, I select that one and drag it to make it longer, works great.

Here’s all my pieces cut out, you can see how nice a job the cricut’s scoring wheel does. I forgot I had to do a tutorial so I had put together my project already I cut out these pieces using solid color cardstock, that’s why the difference in the competed project photo.

I bent all my score lines and put some scor tape on each tab, it gives a nice strong immediate hold, but you can use any glue that has a good hold.

For the bottom part of the box I cut out two octagon pieces, one to put inside which helps to form the box easier and one for the bottom. You can make the inside a tiny bit smaller then the bottom for a better fit.

Here’s the bottom glued on, the two pieces make it very sturdy, you really can put a bunch of treats inside this box.

Next I put the top of the pencil on, I raised all the tabs up and put the piece on all at once, I just held it in place and then put my hand inside and gently pushed each tab to the top.

Last is the pencil tip, glue the whole inside and place on top. I made sure all my seams lined up.

It really is a super simple box to put together and so cute, I just added a piece of twine and tag from the Back to School collection.

Thanks for stopping by and have a wonderful day!

Reindeer Petal Box Tutorial with Brigit

Hello everyone, I have a Silhouette Studio tutorial to share with you today on how I created this reindeer box. To make this I combined the Bunny Petal Box and Christmas Tag Reindeer svg files from Lori’s shop. You can also get both of these files here and here from the Silhouette Design Store.

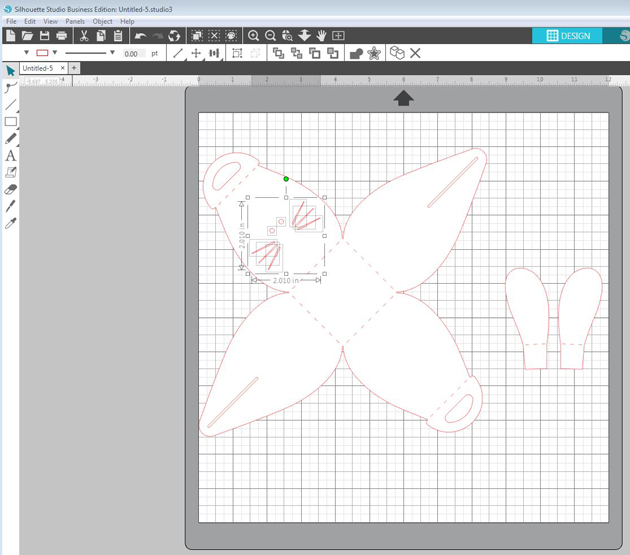
I started with the box, ungrouped and did a release compound path to get rid of the bunny face.

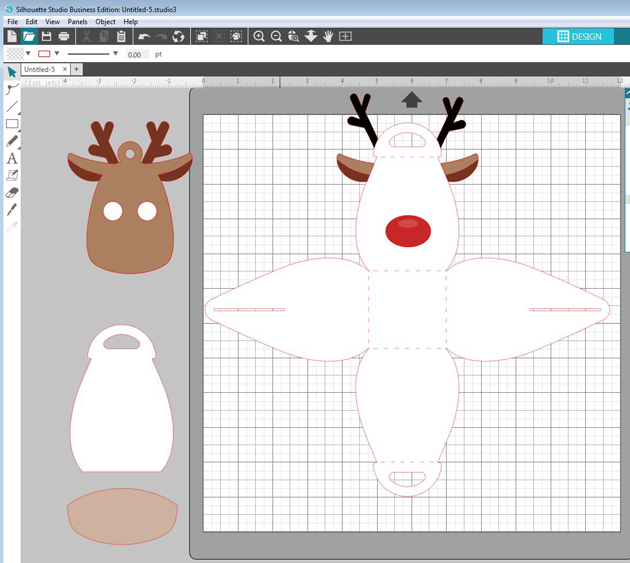
I grouped the box together again and rotated 45 degrees, added the tag and resized it to fit one of the box flaps.

I ungrouped the tag and separated the black layer and with the knife tool I cut off the antlers. I also cut off the ears from the brown and dark brown layer. (I always duplicate my piece first before I do any slicing just in case I mess up).

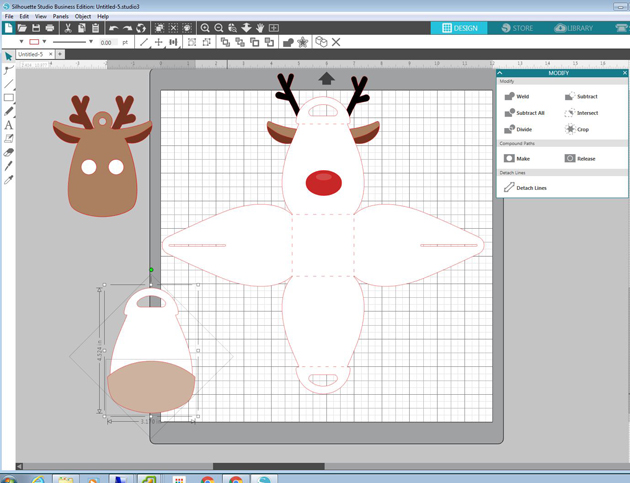
I duplicated the box and cut off one of the flaps with the handle and enlarged the deer’s muzzle from the tag placing it over the box flap and selected both and cropped.

For the ear, I selected both pieces and subtracted under modify menu, I wanted the bottom part as a layer instead of the top so I could weld the top piece to the box, you will see that below.

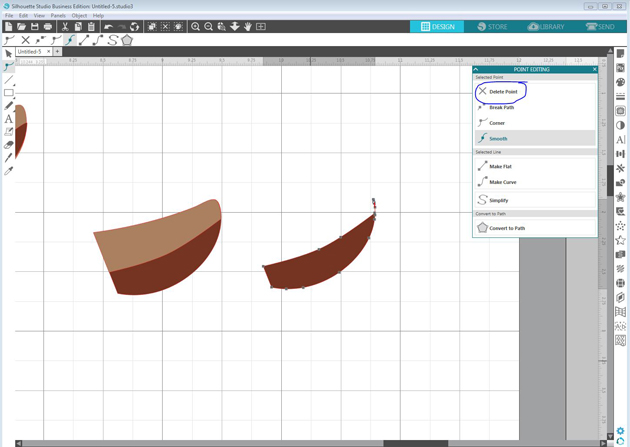
If you have little points left you can double-click on the piece and delete points.

Last I rotated the ears and welded them to the box as shown below. Now when I put the box together I just have to fold the ears out. I did make new solid score lines, I have the Silhouette Studio Business Edition and save my files as an svg so I can import them into Cricut Design Space and cut them out on my Cricut Maker.

It seems like a lot of steps but it really went together very quickly, makes a nice Christmas treat box!

Thanks for stopping by and have a wonderful day!

Blog – Pinterest – Instagram

Summer Shaped Cards by Brigit

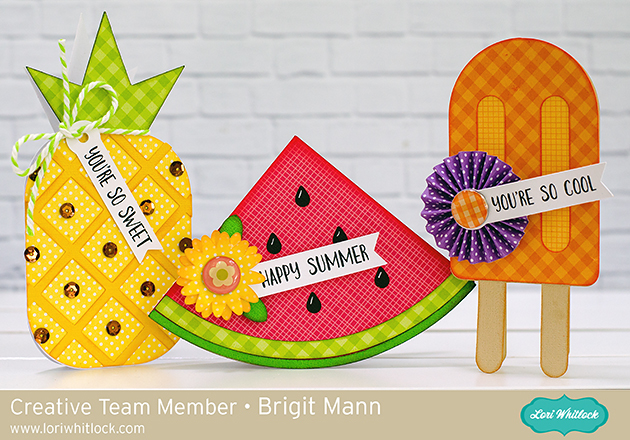
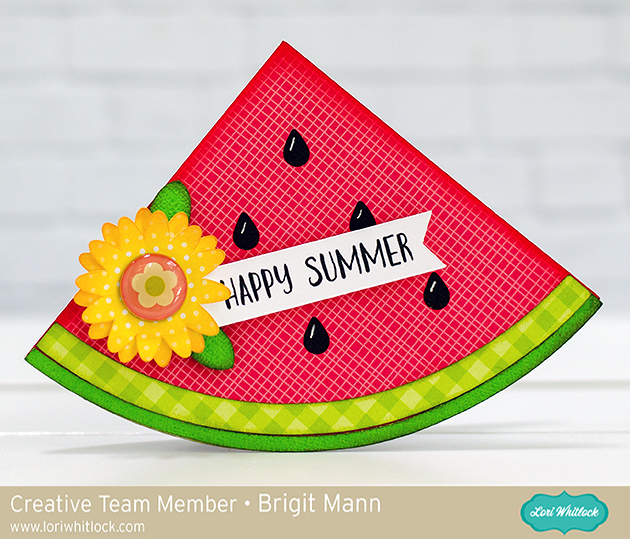
Hello there, I have a couple of summer shaped cards to share with you today. These came from the summer card bundle set which has a total of 8 shaped cards.

You can also get these individually from Lori’s shop, shaped card popsicleshaped card pineapple and shaped card watermelon, or from the Silhouette Design Store, popsiclepineapple and watermelon.

These were super quick, easy and fun to cut out and put together, just added a couple of simple embellishments.

All the cards were cut out and sentiments printed and cut using Cricut Design Space and my Cricut Maker.

Patterned paper and cardstock used is all from Doodlebug Design.

Thanks for stopping by and have a wonderful day!
Print n Cut Teacher Cards Tutorial with Brigit

Hello there, here’s a quick tutorial on how I print n cut these Teacher thank you sentiments for cards in Cricut Design Space.

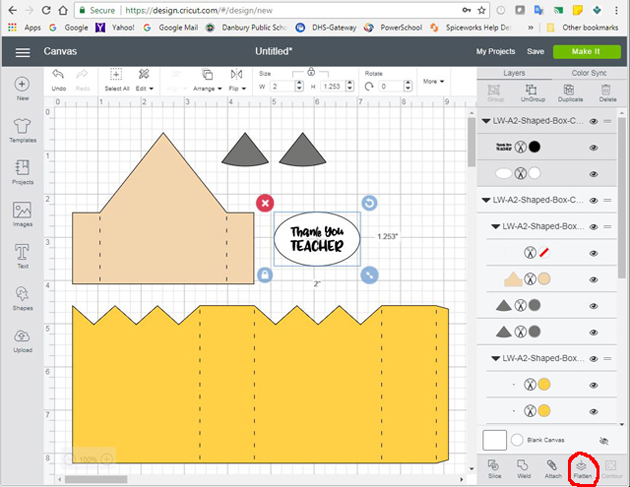
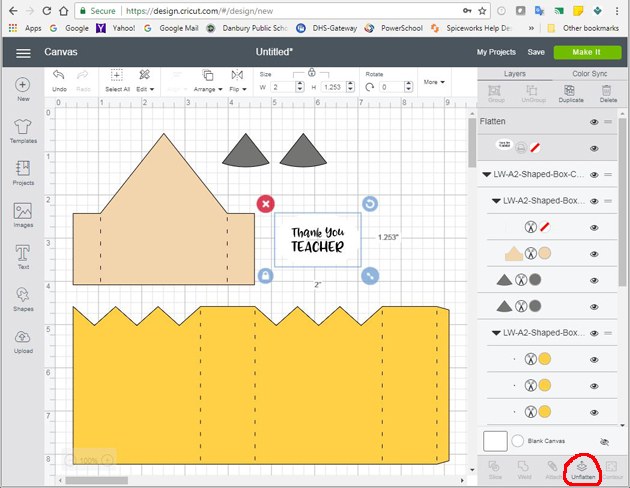
For the A2 shaped box card pencil I ungrouped the whole project, selected the thank you teacher and flatten it.

When it’s unflatten the outlines are gone, but it will still cut out just the oval.

When you make it, you will send to printer first and then place on mat to cut.

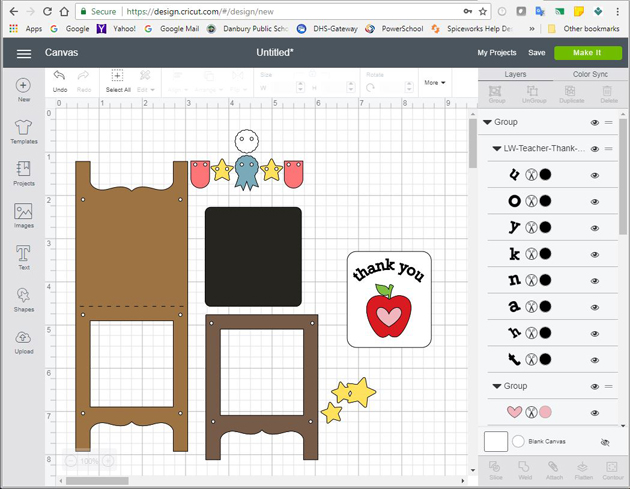
The A2 chalkboard teacher card I added one of the teacher thank you tags to the chalkboard piece. When I imported the tags they were black so I ungrouped, deleted the ones I wasn’t using, selected the top layer of the one I wanted, selected arrange at the top and moved to back and changed the color to white.

So now you can see everything on the tag.

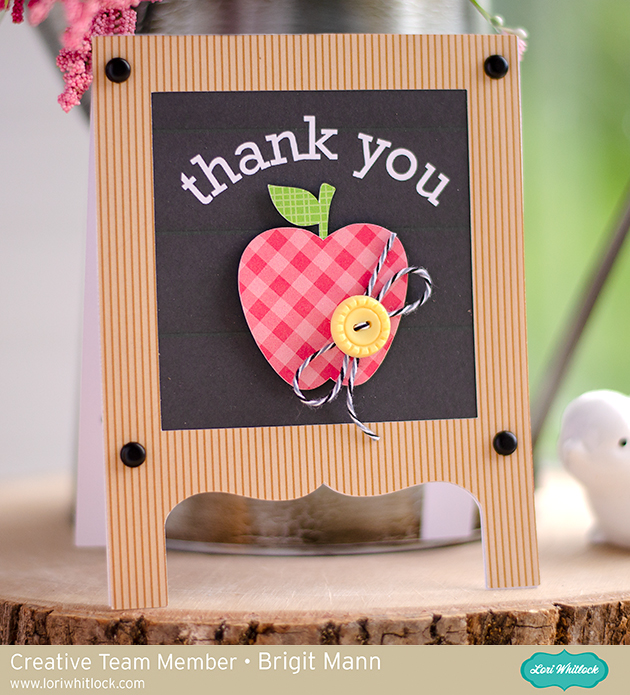
I just wanted the thank you to print out on the chalkboard so I moved the apple and deleted the tag, selected the thank you and attached, and changed one of the letters on the thank you to white which changed all of the letters.

I ungrouped the chalkboard card, deleted what I didn’t want to use, resized and center aligned the thank you over the chalkboard leaving room for the apple. I selected both and flatten, now it will print n cut.

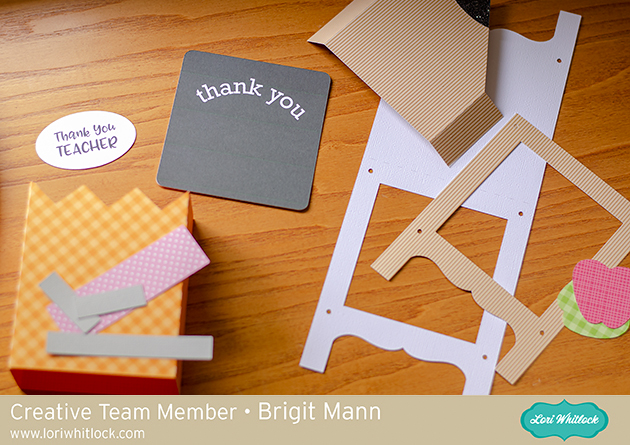
I cut out both projects together using my Cricut Maker, this way I could print both thank you sentiments at one time. You can see the two print n cuts below.

I love the ability to print n cut sentiments for my projects, you can create a nice custom fit and it’s super quick and easy.

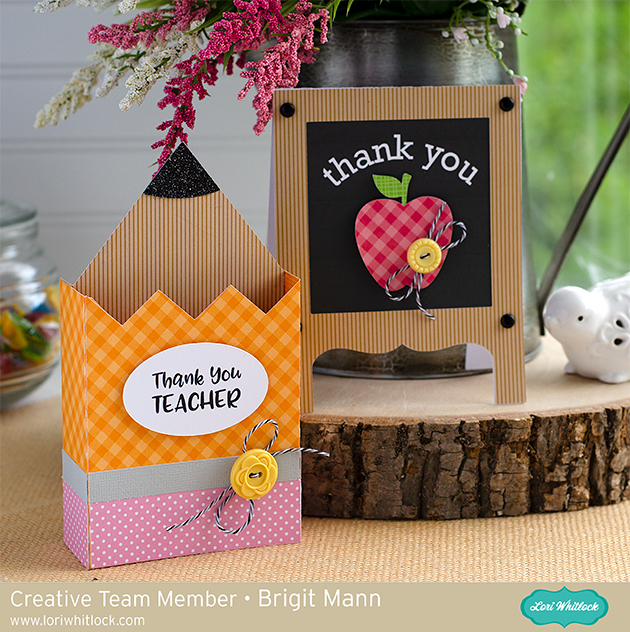
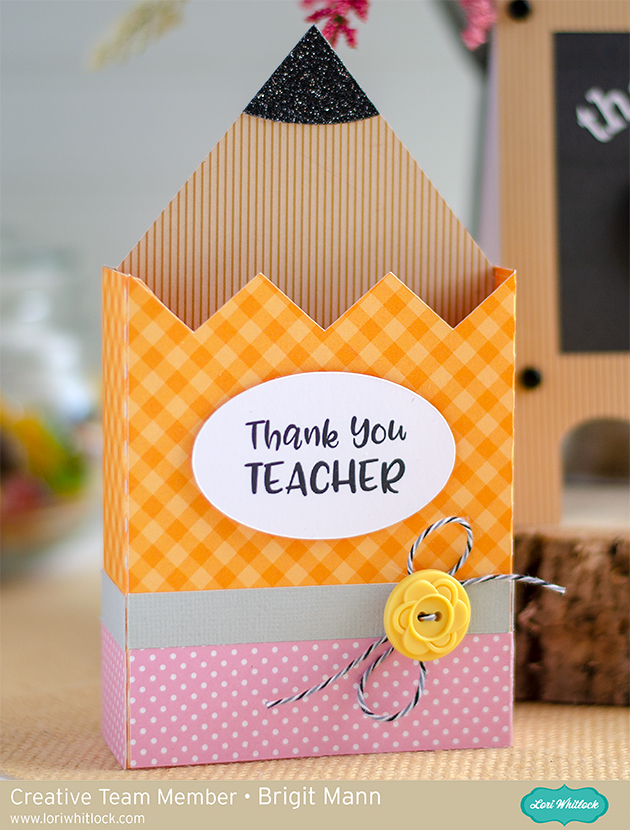
Here’s a closer look at both cards.

Get the A2 pencil shaped box card at the Silhouette Design Store.

Get the A2 teacher chalkboard easel card at the Silhouette Design Store.

Get the thank you teacher favor tags from the Silhouette Design Store.

Thanks for stopping by and have a wonderful day!