Pocket Shaped Bag by Brigit

I love anything denim so when I saw this pocket shaped bag from Lori’s shop I knew it was going to be my next project! You can get this bag also from the Silhouette Design Store here.

I wanted to add snowflakes so I used the ones from the Christmas snowflake border edge card, I just did a release compound path took the shapes and added them to the layer and did a make compound path and then I did a duplicate solid layer to cut out in white. You can get that card here in the Silhouette Design Store.

I also added the 3D poinsettia, you can get that here at the Silhouette Design Store. The stitching came out awesome, I love it!

Thanks for stopping by and have a wonderful day!

Fold and Tuck Lantern Tutorial with Michelle

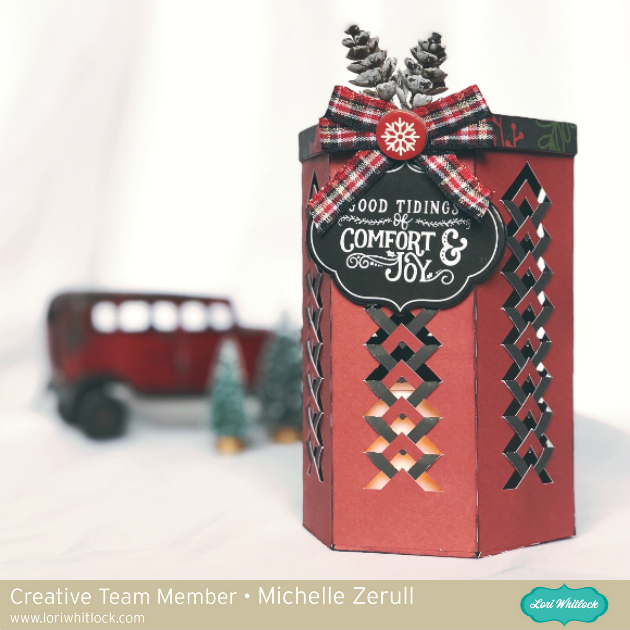
Can you believe that it’s November already? I love November! I love that I can craft Fall projects, as well as Holiday projects. Today I would like to share a tutorial for the Hexagon Fold and Tuck Lantern Found in the Lori Whitlock SVG Shop as well as the Silhouette Design Store. It’s my first Holiday project of the season!

Hexagon Fold and Tuck Paper Christmas LanternThis is such a fun project. The lantern looks difficult, but it’s not. It is an easy project. Let me show you step by step, how to put it together.


  1. Using your electronic cutting machine, cut all three paper elements. Double sided paper looks wonderful with this project since you will be seeing the underside.
  2. Using the main large piece, the body of the lantern, carefully lift the chevron elements to a vertical position, as shown. I like to do one row at a time.
  3. Take the last vertical chevron piece and tuck the arrow portion under the empty piece behind it as shown in the photo. Continue tucking the chevron arrows until you complete the row.
  4. Repeat steps 2 and 3 until all rows are completed. Doesn’t that look awesome?
  5. Fold along all score lines. There is a large glue tab at the end. Apply your adhesive along that tab and glue the ends together to form a tube. Sit the tube aside to dry completely.
  6. Now you will form your lid. Fold along all score line. Apply a small dot of glue to one of the triangle tabs and glue it to the lip of the lid as shown. Continue gluing the triangles one at a time until the hexagon lid is formed. Sit the lid aside to dry completely.
  7. Now it is time to attach the base to the bottom of the lantern. Fold along all score lines. Place the inside color up facing you. Working quickly, apply a bit of glue to all tabs.
  8. Take the hexagon body tube and place it right over the base as shown from the top view.
  9. Using a pencil or bone folder, make sure the tabs are securely attached to the inside of the base as shown.
  10. Allow your lantern to dry completely before decorating.

Now that’s finished, you can have fun decorating it! Using hot glue, I added a tiny spray of pinecones and chipboard elements from the Echo Park Paper Celebrate Christmas collection. I also put a battery-operated LED light inside. It makes a beautiful display of light and shadows! Remember to never use a real candle. The paper will burn!

Hexagon Fold and Tuck Lantern

Thanks for visiting today. Don’t forget to share your own Hexagon Fold and Tuck Lantern with us on the Lori Whitlock Facebook page or post it on Instagram and hashtag it #loriwhitlock so we can see what you’ve made.

Have a great day!

Michelle

Reindeer Petal Box Tutorial with Brigit

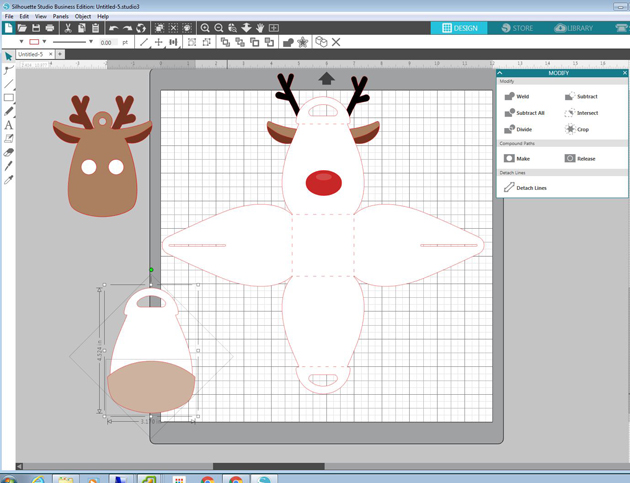
Hello everyone, I have a Silhouette Studio tutorial to share with you today on how I created this reindeer box. To make this I combined the Bunny Petal Box and Christmas Tag Reindeer svg files from Lori’s shop. You can also get both of these files here and here from the Silhouette Design Store.

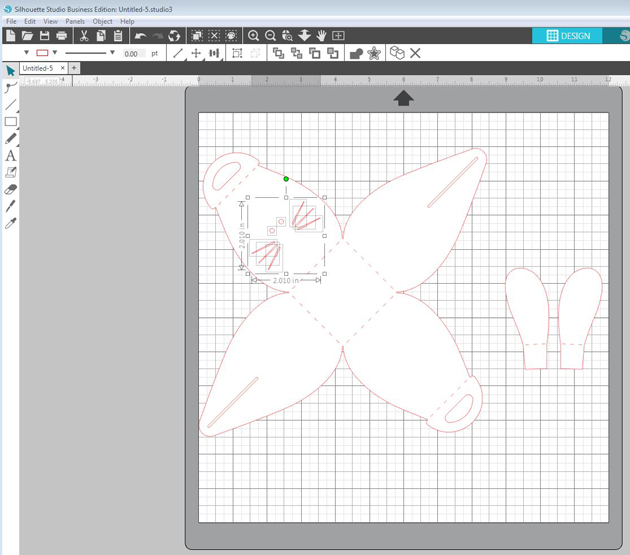
I started with the box, ungrouped and did a release compound path to get rid of the bunny face.

I grouped the box together again and rotated 45 degrees, added the tag and resized it to fit one of the box flaps.

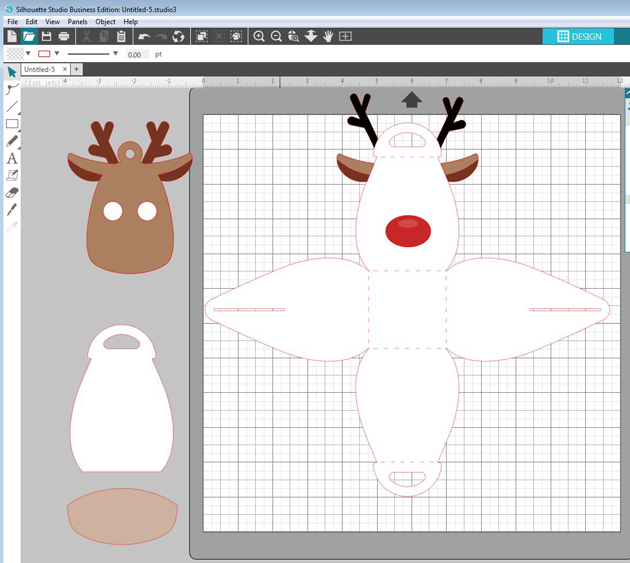
I ungrouped the tag and separated the black layer and with the knife tool I cut off the antlers. I also cut off the ears from the brown and dark brown layer. (I always duplicate my piece first before I do any slicing just in case I mess up).

I duplicated the box and cut off one of the flaps with the handle and enlarged the deer’s muzzle from the tag placing it over the box flap and selected both and cropped.

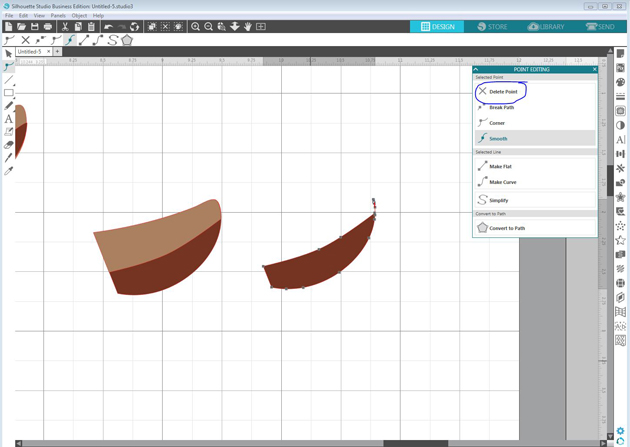
For the ear, I selected both pieces and subtracted under modify menu, I wanted the bottom part as a layer instead of the top so I could weld the top piece to the box, you will see that below.

If you have little points left you can double-click on the piece and delete points.

Last I rotated the ears and welded them to the box as shown below. Now when I put the box together I just have to fold the ears out. I did make new solid score lines, I have the Silhouette Studio Business Edition and save my files as an svg so I can import them into Cricut Design Space and cut them out on my Cricut Maker.

It seems like a lot of steps but it really went together very quickly, makes a nice Christmas treat box!

Thanks for stopping by and have a wonderful day!

Blog – Pinterest – Instagram

Christmas Thank You Cards with Anita

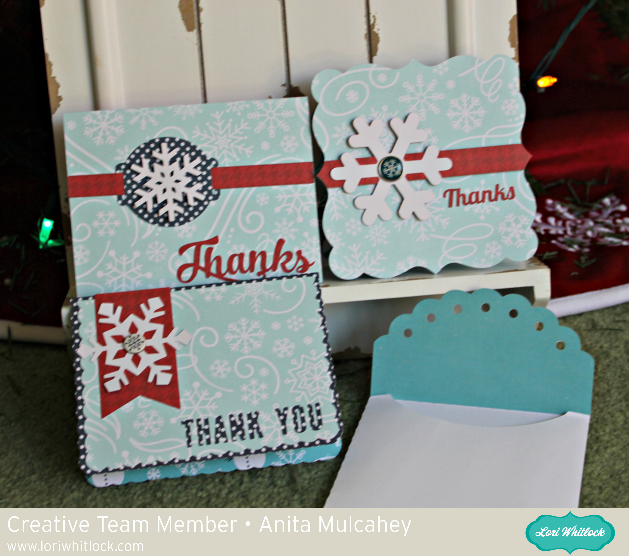
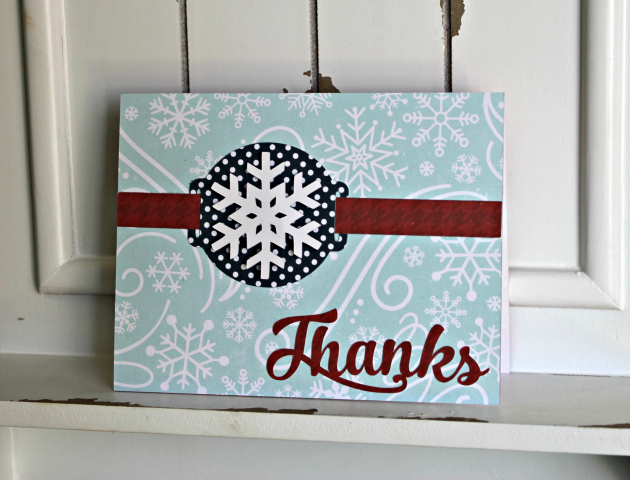
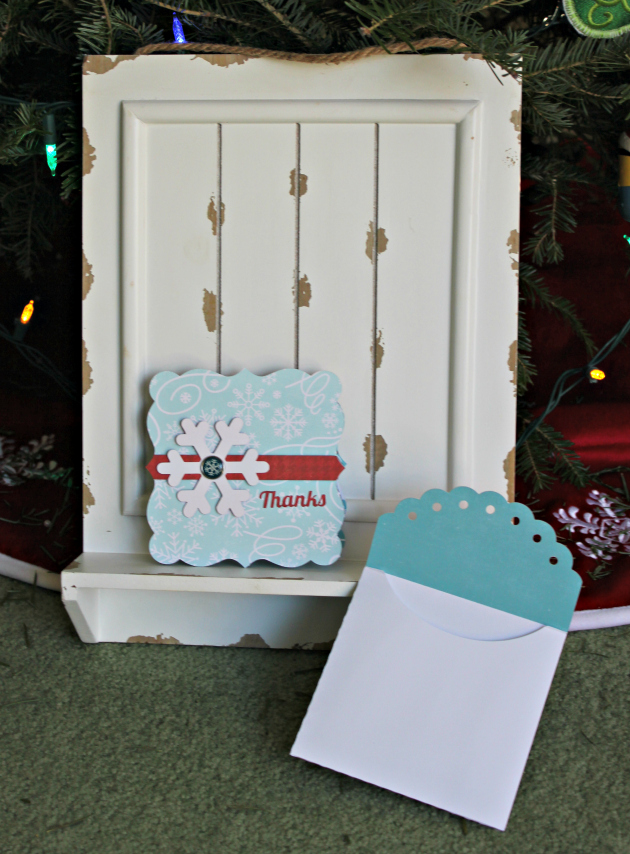
Anita here with a post holiday thank you card set.  I am always touched by the generosity of others during the holiday season and always like to take a moment to thank them for thinking of me.  Lori has some wonderful cut files to use for just this purpose.  I used one of her new Echo Park collections which is called A Perfect Winter.  I just love the patterns and colors and the embellishments are swoon worthy.  I used the following cut files to make these cards.  I am going to put the names of the files below each card as the names are very similar.

Thank you Snowflake Card in Lori’s Store   Snowflake Thank You Card in the Silhouette Design Store

Snowflake Card 3 in Lori’s Store                       Snowflake Card in the Silhouette Design Store

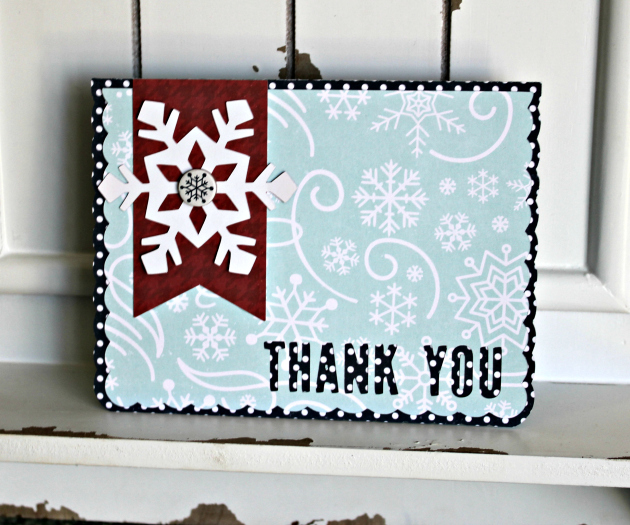
Snowflake Thank You Card in Lori’s Shop   In the Silhouette Design Store

5X5 Envelopes in Lori’s Shop  In the Silhouette Design Store

Thanks for looking and Happy New Year!

Hugs,

Anita


O Holy Night Card With Mitsyana

Hello, Friends! Design Team Member, Mitsyana Wright, here and I’m back to bring you a quick, easy, and absolutely stunning Christmas card. If you’re anything like me you are nowhere near the end of your Christmas card list. And, if you’re stunted for time and need something easy to put together and don’t want to skimp on the “WOW” factor, you are in the right place, I have just the card for you!

For this card, I used Lori Whitlock’s #10 Nativity Block Card file. (here in the Silhouette Store)

To create this card I downloaded the file and extracted it zip before uploading it into my Ecal software.

Once the file was opened into my software, I noticed that it was too big to fit onto my 12″ x 12″ mat. So I “ungrouped” the images.

I also like to change the colors of each image to match the colors I plan to use.  This way I don’t get confused on what paper goes to what piece. Sometimes shapes look very similar in size and shape. Changing the colors on screen gives me a map of what goes where later.

Another reason to do this is that it will give me an idea of what my finished project will look like. I can see what colors work well with each other before I start cutting up my precious papers.

I ultimately decided to change the card base to a deep blue, the silhouette gold foil, a white mat, and a blue one.

I inserted my paper into my Sizzix eclips and cut all my pieces at the original/default sizes.

Notice instead of cutting a white and a blue mat, I cut two instead. Well, that’s because only one mat will remain white. The other I decided I wanted to use to create a night sky with.

I used my Distress Oxide inks to create a blended night sky.

Once I the blended colors to my liking, I dipped a paintbrush in clean water and flicked drops of water onto the card. The inks reacted to the water and created the stars in my night sky.

I layered the pieces onto each other and attached them onto my card front.

And here is my finished card…

I absolutely love how this card turned out!

I hope it inspires you to create some of these gorgeous cards yourself!

Thanks for stopping by!

~Mitsyan Wright