Accordion Village Tin

Hi everyone!  I’ve been working on a few Christmas projects here and there.  Seems like I never have enough time to get everything done that I would like to create.  I have a fun quick little project to share with you today that makes for a cute gift for a coworker.  I created Lori’s  Accordion Christmas Village , but scaled it down a bit to fit inside a little Christmas tin that I had in my stash.  I cut two complete villages, I scaled them down to 4 inches tall,  added vellum to the backs and then adhered them all together. I kept the embellishments super simple as I didn’t want to distract from it’s simple charm….just some pearls, diamonds and a few hearts.  It’s the perfect little scene for my coworker’s desk to add a little bit of the holidays. You can find it here in Lori’s SVG Shop  or here in the Silhouette Design Store.

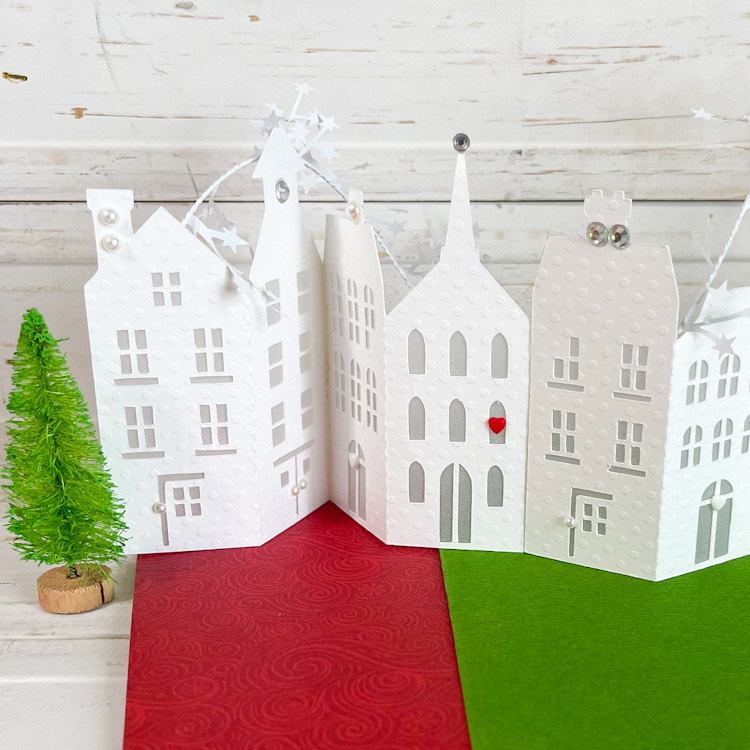
Here it is all stretched out.  So cute with the little snowflake garland and bottle brush trees.

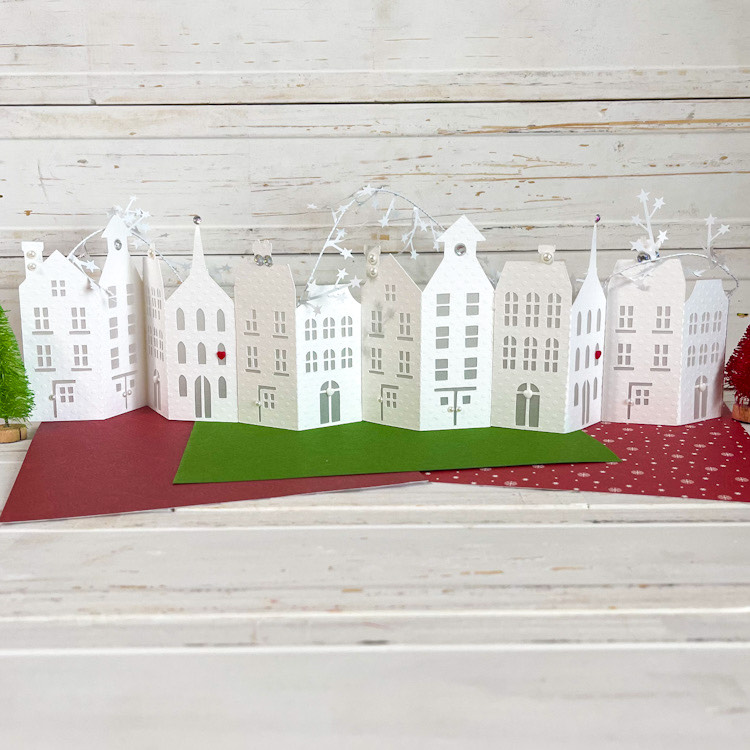
A close up with all the little details.

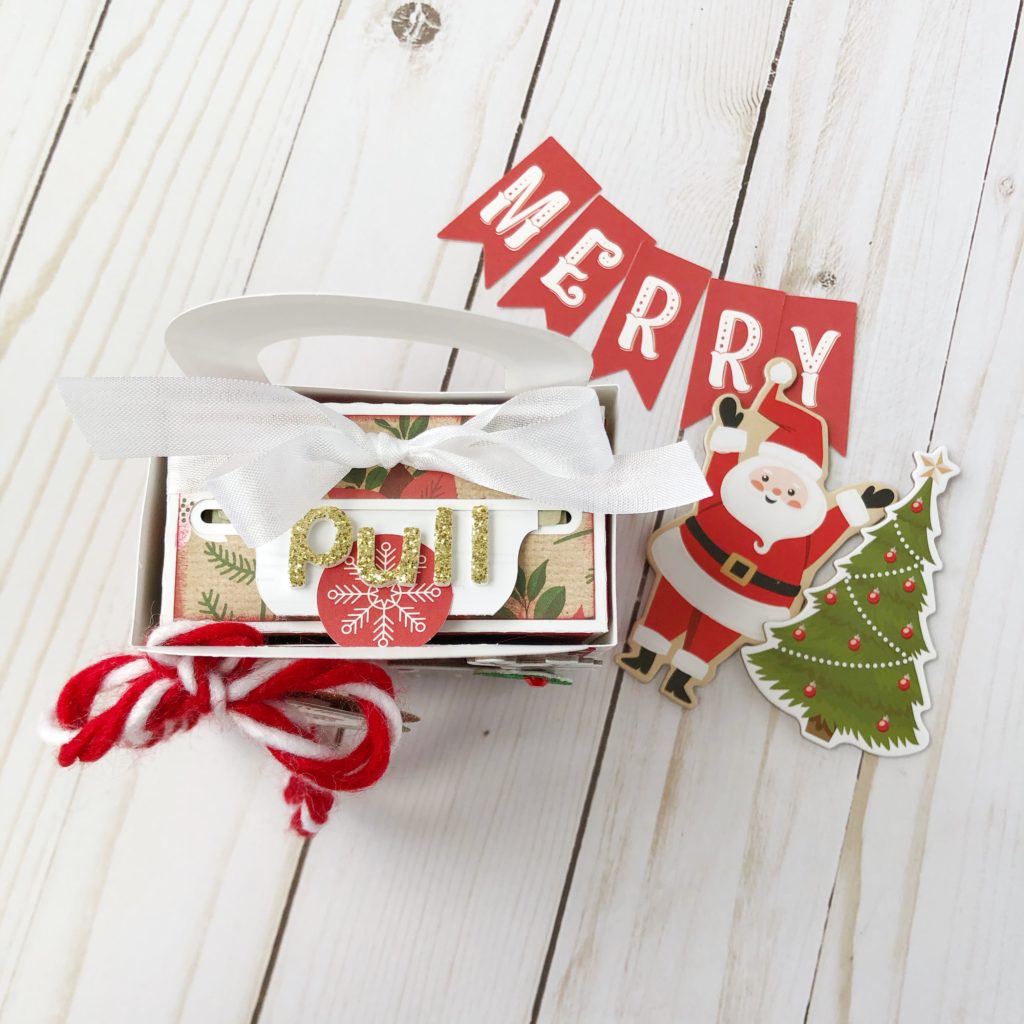
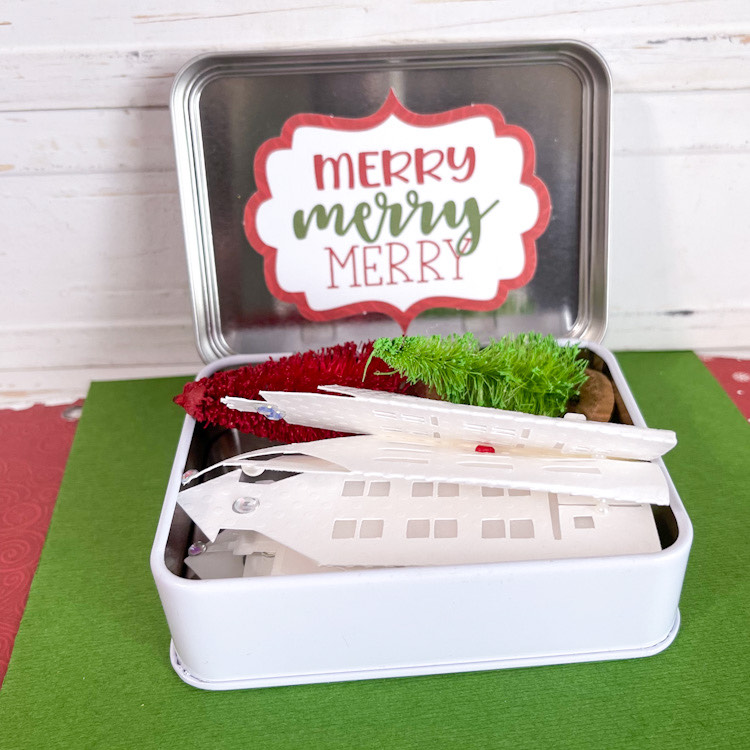
The village and the trees with perfectly in the tin.

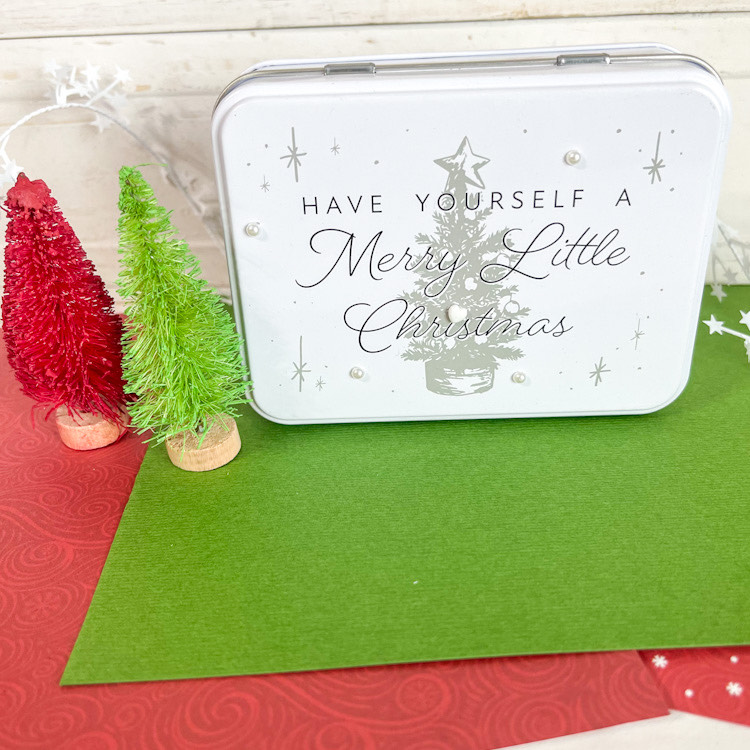
The sweetest little gift….

Thanks for joining us today. ~Cathy

Christmas Penguin Gift Set

Happy Holidays!  It’s Michelle Starcher, aka the Bookish Designer, popping in on the blog to share the Christmas Penguin gift set I made using three of Lori’s files: Gift Card Box Penguin (SVG, Silhouette), Christmas Tag Penguin 2 (SVG, Silhouette), and Christmas Card Penguin (SVG, Silhouette).  Lori debut these adorable penguins along with several other cards, tags, and gift boxes a couple of weeks ago, and I knew I had to use them for my holiday gift giving!

I used accents and patterned papers from Lori’s A Lumberjack Christmas collection from Echo Park Paper, Co to make the card and gift card box.  For the card, I used a double-sided patterned paper, which made it a little difficult to write a message inside the card.  I knew I needed a solid colored insert, so I cut an extra card base from white cardstock to serve as the inside layer of the card.  I added a Merry Christmas sticker to the front of the card as well.

For the gift card box, I used a mix of patterned papers along with a chipboard accent.  I was sure how to assemble the top pop-up to the box, but Lori’s tutorial provided all the instruction I needed to finish putting my box together.  I really like that this file contains a gift box as well to hold the entire project when it’s complete. Simply add a ribbon and you’re ready with a gift that’s SUPER CUTE!!

Finally, I created the adorable penguin tag and added a Merry Christmas sticker to the front.  I paired the tag with a buffalo plaid gift bag to complete my gift set.  I think my recipient is going to love the personalized touch!

Well, that’s it for me today!  I’m off to enjoy Christmas Eve with my family. Happy Holidays:)

Until next time,

Michelle

Christmas Apron Gift Boxes

Hello crafty friends! Aimee here today sharing a great gift idea for those Christmas bakers in your life! I used the Cook’s Apron Box (Lori’s Shop, Silhouette) to make these fun little gift boxes. The sentiment is a print and cut that came from Shadow Box Card Scene Snowman (Lori’s Shop, Silhouette).

They are full of fun sprinkles and items to decorate cookies and would make any cookie enthusiast happy. But these little boxes could hold some spices and other goodies for a grilling enthusiast as well!

These boxes end up being a little over 5″ tall and a little over 4″ wide so they will hold quite a lot!

The little cut outs that look like spatulas and a rolling pin can just be slipped into the pocket.

That’s all from me today! Hope you enjoy seeing these cute little baker’s boxes and will give it go and put a smile on someone’s face!

Aimee

Money Roll Gift Bag Tutorial

I usually gift money during the Holiday season for the teens and other hard to shop for loved ones in my life. How about you?  The thing about gifting money, is that it isn’t all that personal and it’s not all that easy to dress up!  Well, that’s until I found Lori’s super cute Money Roll Gift Bag (SVGSilhouette).  I’m making several of these this year for all the teens on my Christmas List.  I think they’ll get a kick out of it and make the gift giving a little more special.

I used Lori’s My Favorite Christmas Paper Collection when cutting out the pieces, as well as some plain white cardstock .

To begin, you can ink the edges of the designer paper to add some depth to the project. Feel free to skip this step if you’d like.

Next, glue down the designer paper panels to both boxes and gather some ephemera, stickers and ribbon to embellish both boxes.

Then, fold all score lines in, as shown.

The Gift Bag goes together pretty easy.  Add glue to the side tab and fold other side over to join the sides of the box.

Then fold the bottom of the box in and glue down.

To assemble the money roll box, glue the side tab to the opposite side panel.

Fold side tabs on one end of the box to close it. Tape your money together, end to end and add the pull tab.  I find Scotch tape works best for this part… it can be peeled off of the bills with out tearing them. Also, it’s really fun to use a bunch of $1 or $5 bills so the money just keeps coming and coming when you pull the tab.

Next, roll your money up as shown…insert it into the box with the tab coming out of the opening at the top of the box.

Decorate the money roll box as well as the gift box however you’d like.

I found several fun pieces of ephemera and chip board from Lori’s My Favorite Christmas Collection to embellish my boxes, as well as some ribbon from my stash.

And that’s it!! You can add a little shred to the bottom of the box and your gift is done!

Who’s the lucky one in your life that will get to pull that tab and find an awesome surprise inside?

Thank you for stopping by!

xo,

Michelle H.