Layout by Traci and Cake Explosion Box by Christine

Traci is on the blog today sharing this beautiful layout with us… Hi everyone! I’m back today to share a sweet layout with you.  This is my darling niece back in 1997 (I’m just a tad behind on my scrapbooking).  She was at such a cute age back then that even though each of these photos wasn’t from the same day or event, I wanted to use them together.  (How cute is that hat)??  Every time I saw Taylor back then, she made me laugh — so Lori’s title was perfect for this layout.  I’ve also been wanting to use one of Lori’s 12×12 backgrounds and I fell in love with the honeycomb pattern.  Using my cameo, I was able to cut the entire 12×12 background out of a sheet of pink pattern paper.  Then, I clipped parts of the inside away, so that the pattern was left on the bottom and up one side.
I also cut a few of the hexagons out of other pattern papers to give the layout some random pops of color.  I cut a hexagon shaped card in half to layer under some embellishments in the top right corner, and I finished up the page with twine around the edge and a few flowers.
Here are the cutting files that I used…thanks for letting me share with you today!
Lori Whitlock Geometric Lace, also available in the Silhouette store as Honeycomb Background Lace
and check out what Christine made today
It just so happens that my day to share on Lori’s blog is also my daughter’s 21st birthday so I thought that it would be fitting to share something birthday related.  This birthday explosion box is new in Lori Whitlock’s store and I had a lot of fun putting it together and adding my own personal touches.

On the top of the box, I added a bow that comes with the Birthday Box file.  Just cut a couple of strips of paper and secure with a brad.  When you lift the top off the box, the sides fall open and the cake inside is revealed.

I made the little 21 myself by typing the numbers out first and ungrouping them.  Then I drew a small rectangle the width of the numbers and welded it to the bottom of the numbers.  This created a little tab that I was able to use to attach it to the top of the box.  If I had thought about it before I cut out the box, I would have put an extra slit in the top of the box like the others have, so that I could just slide the tab in and secure it underneath.  Next time I make this, it will be easier to make it look nice.  Make sure that you can fold the number over, or the lid won’t fit on the box.
I used October Afternoon’s CakeWalk collection to cut out my box and added a few sticker embellishments here and there.
This way a really fun box to create.  I am excited to try it again in different colors.
So, if I may, a big Happy 21 Birthday Wish to my daughter.  I hope this day brings you joy and happiness!
Lori Whitlock Supplies used:

Cookie Box by Christine and Card/Bag Set by Brigit

Happy Monday! Are you ready for some beautiful projects? First we have Christine sharing the Cookie Stacker Box.

Today I have a cute little treat box to share with you.  This is a new file in Lori’s store this month, called the Cookie Stacker box, and I can see this filled with cookies, candies, or even a small toy.  I love the “see through window” in the front of the box.  I put some thin clear plastic over the opening but you could also delete that part and have a box that you can’t see into for those surprise packages!
I added a little tag onto my gift box.  I just cut a tag shape from this file, resized it, and added a few sticker embellishment from the Here & Now paper collection by Lori Whitlock for Echo Park.

The top has premade mats for the for the scalloped edges and the upper portion so everything you need to cut is included in the file.  I love the precut holes for a fancy ribbon to top your package.
I can see using this precious box for giving gifts to neighbors, birthday gifts, holiday treats and everything in between!
Lori Whitlock Supplies:
Here & Now paper and cardstock sticker collection by Lori Whitlock for Echo Park
Brigit has this adorable grouping to share with us today.
Lori has so many beautiful cards in her store and I love pairing them with one of the 3d bags or boxes to create a wonderful gift set.

The card is from the A2 Card Base Set 2 which has 4 beautiful card designs included.  Fill the cute little purse with some candies or resize it to fit some makeup or a gift card, so many possibilities.

The design of this card is so beautiful, I love that lace edge.  Definitely want to use it for a Christmas card.

All the embellishments are from Lori’s store, except for the label which is from the Silhouette Online Store.  The flower is the 3D Flower 5, the butterflies are from the Layered Shapes set and the sentiment comes in the You Make Me Laugh set.

For the flap of the purse I used one of the labels that came in the same set I used on the card, just cut it in half and added the cute little button brad.  The beautiful digital paper I used on both projects is from Echo Park’s Beautiful Life collection.

Thanks for stopping by, hope you enjoyed my project,  you can visit me at http://www.brigitsscraps.com
Card Sets by Christine and an International Giveaway

Please give Christine a warm welcome on the blog today! She has created an adorable card set sure to make anyone happy. Take it away Christine…
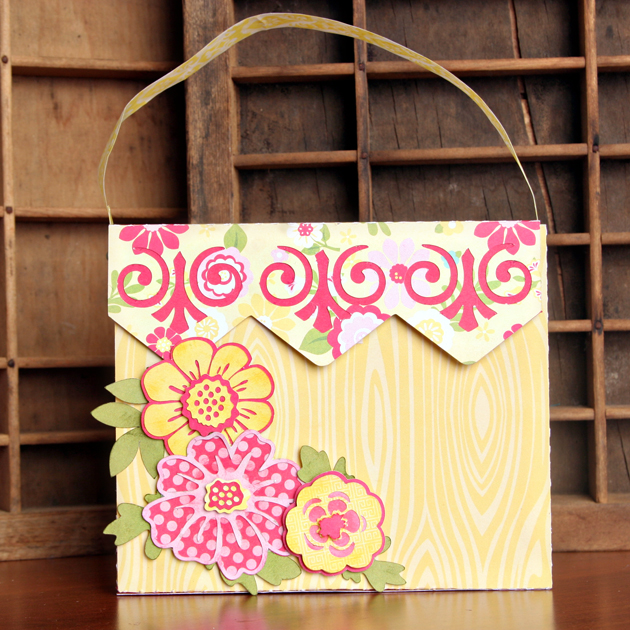
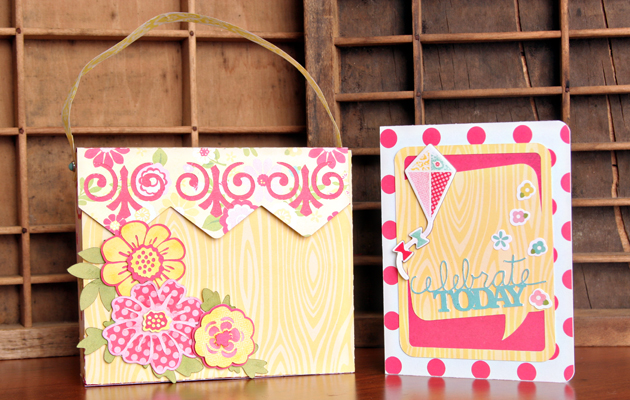
I love giving sets of cards as gifts and I like when I have a cute box to put them in.  This Stationary Box is the perfect solution.  It’s very easy to put together and you can decorate it for any occasion.  I used the Sweet Girl paper collection to cut it out, and the Layered Flowers Set 2 to decorate the front.

The box doesn’t have a handle to cut out so I decided to make my own from washi tape.  There are 3 different patterns in the Sweet Girl collection and I chose the light yellow one.  To make the handle I tore off a long piece probably about 20 inches long and did my best to keep it laying down on my desk, sticky side up.  Then I took another piece approximately the same length and stuck to the other piece so they were back to back.  The washi tape makes a really cute little handle that is strong but flexible and also matches perfectly.  After the handle was put together, I folded back the edge on both ends, punched a hole in these double layered ends with a 1/16 inch hole punch and then put a brad through the holes.  I also prepunched holes in the sides of the box so that the brads are secure inside.

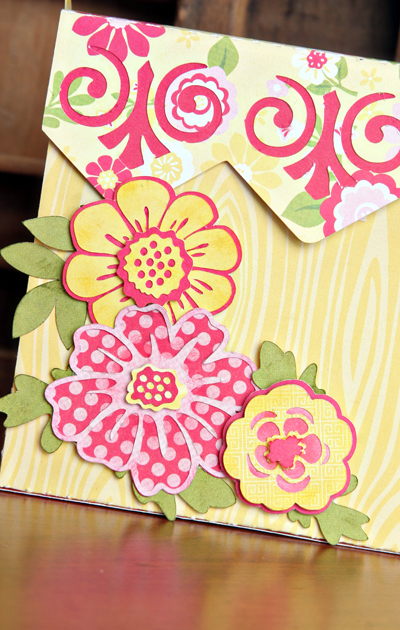
Here is a closeup of the Layered Flowers.  I used some foam adhesive under some of the layers to get them dimension.  I really love the way they turned out.  I know these are files that I will be using over and over again.
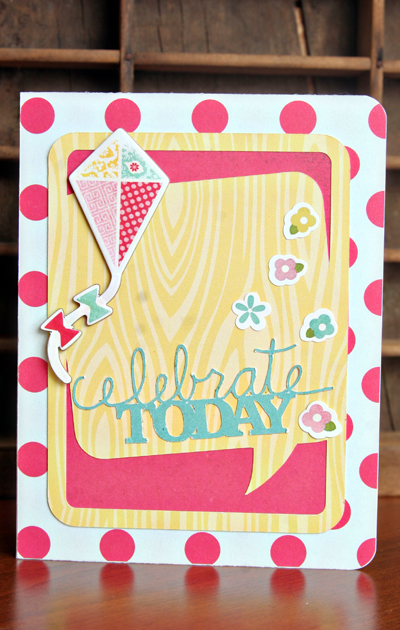
Here is a card that I made to go along with the set.  The box will hold many other cards plus envelopes.  I’ll have to get busy to fill it up.  For my card, I used the 3×4 Quote Cards as the focal point.  I use these cards in my Project Life layouts but I wanted to challenge myself to use them in a different way.  I really like that it makes a perfect background for the card’s sentiment.  (Please excuse the spots on my card.  My digital camera needs to be cleaned.)
Thanks for stopping by.  I’ll be posting more pictures of my project on my blog here.
Lori Whitlock Supplies used:
Celebrate Today phrase (Silhouette store, Design Id #9382)
Other Supplies:
Sweet Girl paper paper collection by Lori Whitlock for Echo Park
Sweet Girl Cardstock stickers by Lori Whitlock for Echo Park
Sweet Girl Chipboard Shapes by Lori Whitlock for Echo Park
Sweet Girl Brad collection by Lori Whitlock for Echo Park
Sweet Girl Washi Tape by Lori Whitlock for Echo Park
Silhouette Cameo
Before you leave, let me share with you a giveaway for our INTERNATIONAL customers only.  For National Scrapbook day there is a huge giveaway going on at Scrapbooker’s Inner Circle. She shares all the details of the contest over there so be sure and check it out if you are across the seas and good luck to you!