Valentine Gift Set SVG Files

Hello crafters! Valentine’s Day is right around the corner and this past Tuesday was National Pie Day, so … I found a little inspiration for today’s project by combining the two! I created a cute cherry-themed card and a pie-shaped gift box using a couple of Lori’s fun cutting files.Valentine's Day Cherry Card & Gift Box Tutorial

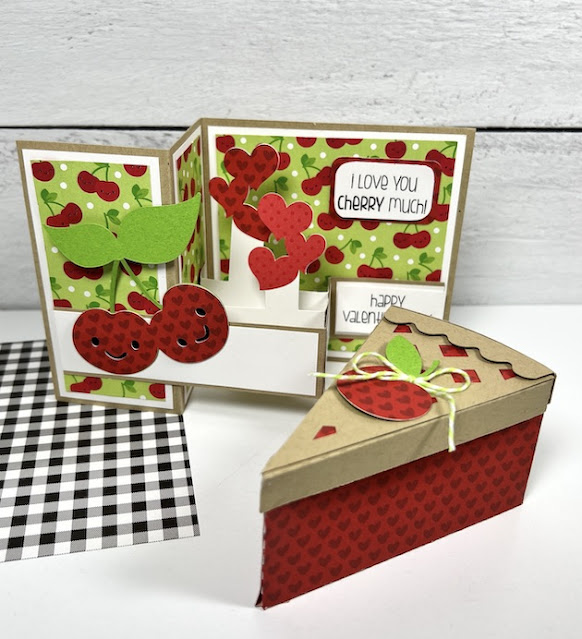
These would make the “sweetest” gift. You could fill the box with candy, a gift certificate, jewelry, a small toy, money, love notes, or clues to a treasure hunt.

First, here’s how I made the pie slice box …

Valentine's Day Cherry Pie Gift Box Tutorial

used the cutting file called 3D Cherry Pie Slice (SVGSilhouette). I cut out all of my pieces and then folded them along the score lines. The small notches on the pieces allow the shapes to bend easily to create the pie’s shape. I chose a red paper with hearts (Bella Blvd’s Bestie Hearts & Ombre in McIntosh).

Valentine's Day Cherry Pie Gift Box Tutorial

I used a liquid glue to adhere the red “cherry” portion of the pie-shaped box together. Then, I added a base inside made out of Bazzill Kraft card stock.

Valentine's Day Cherry Pie Gift Box Tutorial

For the lid, I repeated the process that I did for the base. Then, I layered the red “cherry” filling piece, the kraft lattice piece, and finally … the scalloped crust piece. I used a piece of foam tape under that for some dimension. I added the cute cherry and some lime twine and the box was complete!

Next up, is the cherry card …

Valentine's Day Cherry Themed Card and Pie Gift Box Tutorial

For this one, I used the cutting file called Pop Up Box Card Valentine Cherry (SVGSilhouette). I cut out my pieces and layered all of the pattern pieces before assembling the card. I used Bazzill Kraft card stock, white card stock, and a cherry-patterned paper from Doodlebug’s Bar-B-Cute Collection.

Valentine's Day Cherry Card Tutorial

As you can see above … the band of the card attaches to the left and right sides only, leaving the center of the band free of adhesive. This allows the card to fold and pop open easily.

Valentine's Day Cherry Card Tutorial

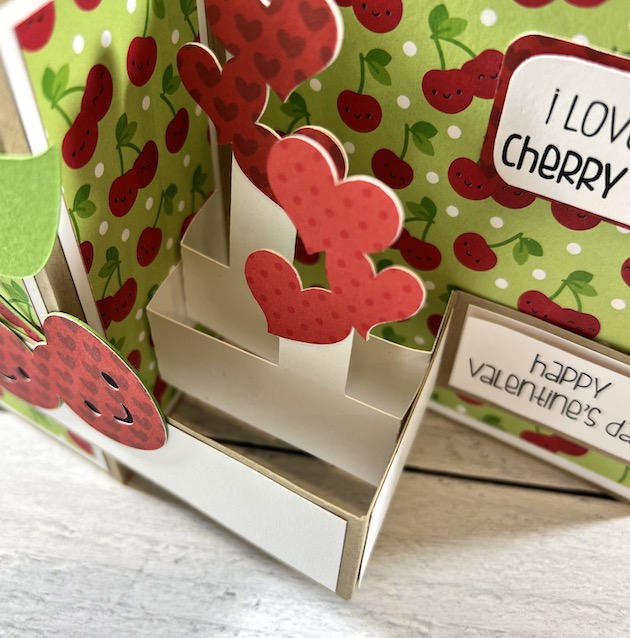
Next, I glued the two remaining pop-up elements inside the band as shown above. I used a cute red polka dot paper from Doodlebug’s petite print dot & stripe for the hearts.

Valentine's Day Cherry Card & Cherry Pie Gift Box Tutorial

And … they’re done! My cute cherry-themed Valentine’s Day card and Cherry Pie Slice Gift Box are ready for gifting. Well, that was easy! I just love Lori’s cutting files.


Thanks for stopping by. I hope these inspire your next Valentine’s Day craft project. Have a great day!

Blog * Shop * Facebook * Instagram * Pinterest

Summer Fruit Shaped Cards

Some of my favorite cards to create with Lori’s files are her shape cards, especially for my granddaughter.  She loves to receive mail and I try to send a card to her every couple of weeks with a bit of spending cash.  These are two cards that will be coming her way, bright and fun for summertime.  Both have just a couple of stickers from Lori’s Echo Park collection A Slice of Summer.  It’s one of my all-time favorite collections and I am always reaching for little bits and pieces of it to create with….it’s a must-have.

First, I have one of her new cherry cards. How cute is this?!  It is the Cherry Carton A2 Shaped Card  or you can find it here in the Silhouette Design Store.  I just love this little card, it’s so bright and cheery!  I used sketch pens to outline the basket, kind of hard to see here, and little hearts onto a couple of the cherries!

My next card continues with the fruit theme… this fun A2 Shaped Strawberry Card in Lori’s shop or here in the Silhouette Design Store.  Love the little hearts in the design of this file, so cute.  I added some stitch lines with a sketch pen to the top of the strawberry and a couple of stickers from the Slice of Summer collection. The perfect summer cards.

There are several strawberry and cherry card designs to choose from, go check them out!


Thanks for stopping by!
Cathy

Box Card Cherry Carton Tutorial

Hi there friends! Have you seen all the new cherry themed projects in Loris’s store yet? So darling! Let’s make the new Box Card Cherry Carton (SVG, Silhouette-soon to be in the store!).

I used papers from the Down on the Farm Collection by Echo Park Paper Co. Once I had everything cut out, I inked the edge of the cherries, flower, and decorative panels. I then glued the all the panels and cherries in place. The first insert has four cherries, and the second insert has three. The two tabs on the ends of the box pieces are mountain folds and then glued together creating the box.

Now to add the inserts. The tabs are valley folds, and the glue is applied to the outside of the tab (the side that is going against the inside of the box card). I lined up the front of the tabs with the front of the inside of the box and the top of the tabs with the top of the box card.

Before the glue is dry, I fold the box card flat making sure it will fold flat all the way.

I use the same process for the second insert except I line the tabs up to the back of the first insert and the top of the box card.

Lastly, I glued the sentiment and the flower to the front of the card.

Now the card is ready to send! Thanks for stopping by today, I hope you have a cherry good day!
Brandie