Camera Treat Cup Card Tutorial with Brigit

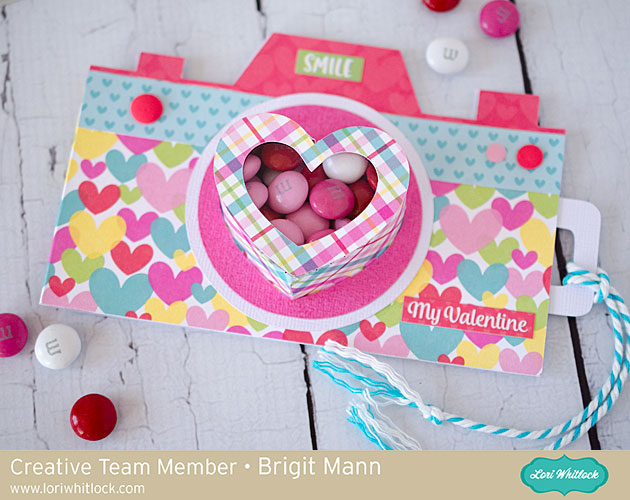
Hello, it’s Brigit here today sharing a Silhouette Studio tutorial on how I made this cute camera treat cup card. It looks like a lot of steps but it’s really super easy to make since it’s just two files put together.

This was such a fun project to make and can be used for any card to add some yummy treats.

I started with the heart shaped box with window from Lori’s shop, you can get it from the Silhouette Design Store here.

I ungrouped and deleted all except these three pieces.

Zooming in real close I aligned these two pieces along the score marks. I wanted one piece instead of two since the heart box will be sized smaller.

Selecting both I replicated and mirrored above and moved the two on the top  a couple of arrow clicks down. Depending on how wide you want the box you can move this as much as you want.

I selected all the pieces, welded and grouped them all together, I then grouped with the heart.

Next, I worked on the camera, I used the one from the travel icons set, you can get it here also from the Silhouette Design Store. I put it together on my mat and resized it to about 5.5″. Two of the pieces I didn’t use so I deleted them.

Now I took the heart box and resized both pieces together so the heart fits inside the circle. I made a duplicate of the heart and ungrouped to just use the bigger layer, this is what I used to make the heart cutout from the camera pieces.

I duplicated the whole camera and did a subtract all, I did this a couple of times deleting what pieces I had already made cutouts from.

As you can see, I ended up with all these pieces. the upper right piece is just a duplicate of the camera with the top cut off, that will go inside the card to hold the slider.

The slider is just a square and two rounded squares welded together. You just have to make sure it covers the heart opening and is smaller than the extra piece that goes inside.

I replicated and mirror left the camera bottom layer with the heart cutout, moved it one arrow click over and welded to create my card base. I did a release to get rid of the heart cutout on the left side which would be the back of the card.

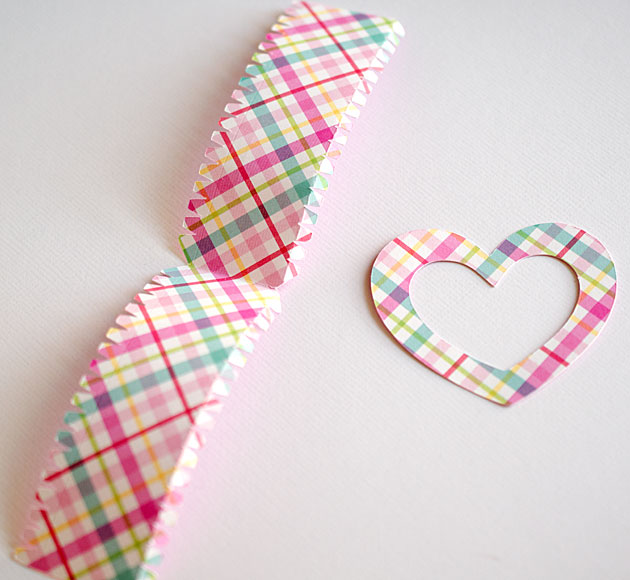
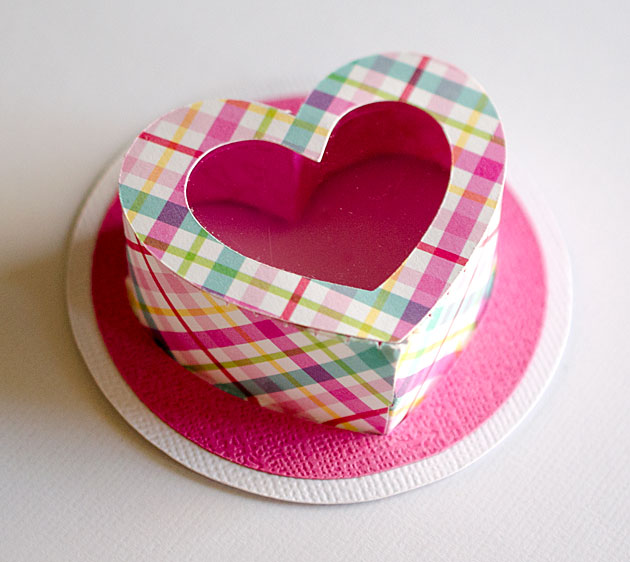
Here’s the box pieces cutout, I molded the side a little and used score tape which made it quick and easy to put together.

The pink and white layers should slide right over and glue to the bottom tabs, just make sure the tabs are going out and not in.

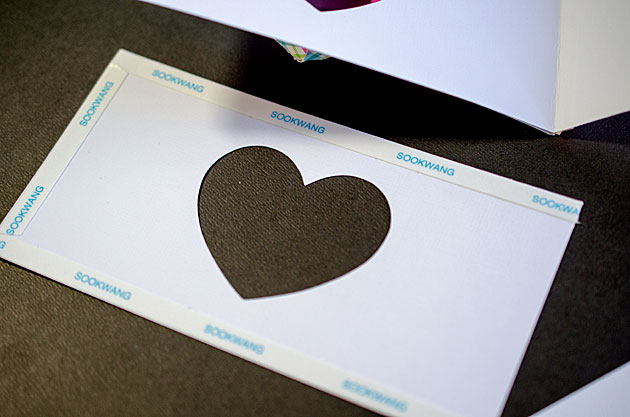
The inside piece for the slider just needs tape around three sides so the slider can move in and out.

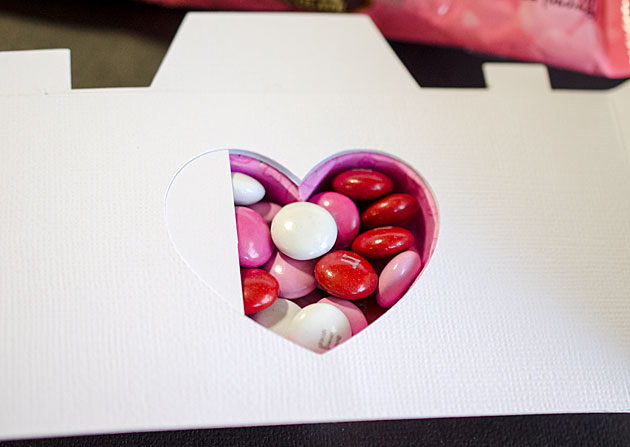
As you can see I filled the cup with m&m’s and pushed the slider in.

Here’s a closer look at the card, it’s a little front heavy so it doesn’t stand very well with the candy inside but it’s super cute. Paper used is Doodlebug’s Cream & Sugar.
Hope you enjoyed this tutorial, thanks for stopping by and have a wonderful day!!

Winter Gift Set by Brigit

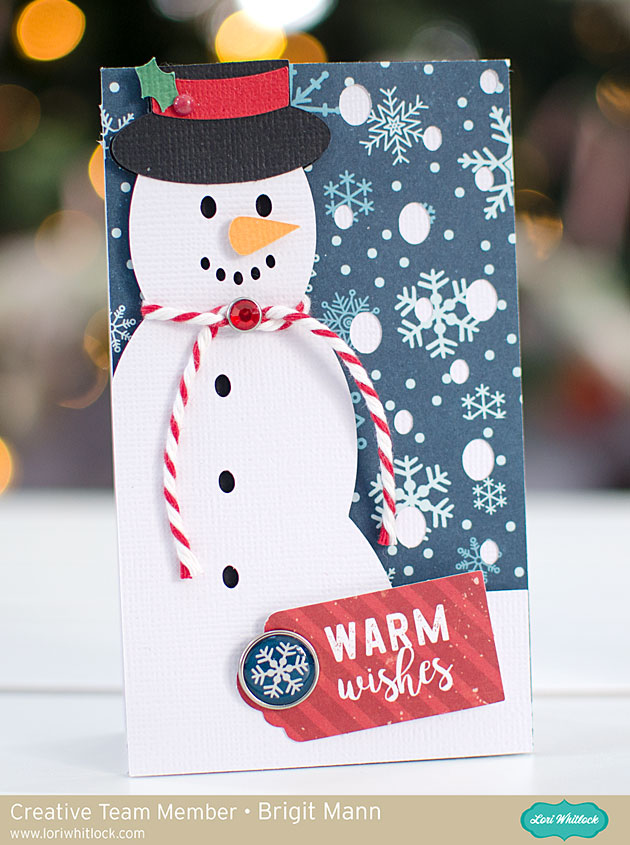
Hello, and Happy New year!  It’s Brigit here today sharing a winter gift set featuring the A2 Snowman Card and the Tall Christmas Tree Box. I’m using this set as a thank you for a friend but it would make a cute set for any winter occasion.

You can get both of these files also from the Silhouette Design Store, A2 Snowman Card and the Tall Christmas Tree Box. I used the svg from Lori’s store so I could cut them out on my cricut maker.

I made the card thinner so the snowman would better match the one on the tall box. I used paper from Echo Park’s A Perfect Winter designed by Lori along with frames and tagsdecorate brads and enamel dots from the collection.

I just did a release compound path to get rid of the Christmas tree and resized the snowman to fit on the front layer. This is such a cute box, it was perfect for the makeup items I put inside.
Thanks for stopping by and have a wonderful day!!

Christmas Border Edge Cards Adding Color Tutorial by Brigit

Hello there, it’s Brigit, I have a quick tutorial on how to add colors to these Christmas Border Edge Cards. When I have a large amount of cards to send I love simple cards and this is a quick and easy way to add a splash of color to them.

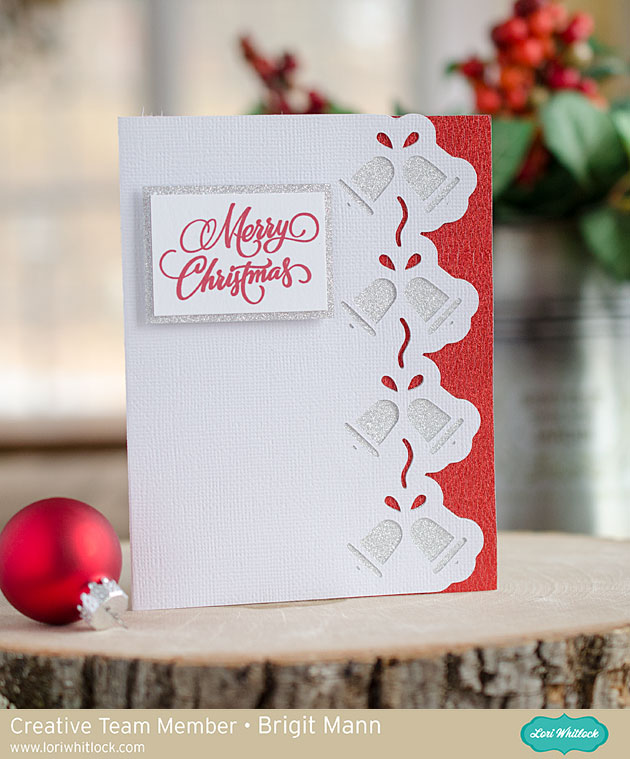
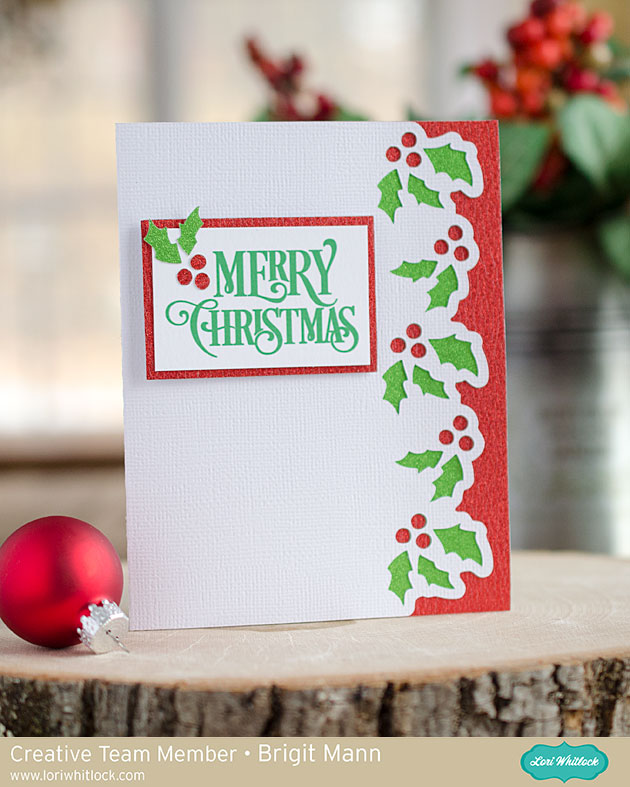
Here are three that I made from the bundle but I’ll show you the Christmas Holly Border Edge Card, (Silhouette Design Store – Christmas Holly Border Edge Card) in the tutorial.

First I ungrouped and then duplicated the card base, next I used the knife tool to slice the card in half.

On the holly border edge half I right clicked and did a release compound path and deleted just the leaves.

After deleting the holly leaves I selected the card and berries, right clicked and selected make compound path.

Here they are layered back up, super simple! You may have to shave a little off of the green so it fits nicely inside the card without hanging out further than the the back.

Here is a closeup of all the cards I made…


I really like the simplicity of the white with the colored glitter paper, I kind of wished I did the Santa one the same. For the sentiment I did a print and cut using the Merry Christmas Title 2 which you can get here in the Silhouette Design Store.


I did another print and cut using the Merry Christmas from the 3 Christmas Greetings, in the Silhouette Design Store you can get it here.

This Merry Christmas Flourish Phrase sentiment is a cut file.   Thanks for stopping by and have a wonderful day!!

Heat Transfer Vinyl Potholder by Brigit

Hello there, it’s Brigit, I have a fun heat transfer vinyl project to share today. When I saw Lori’s homemade gingerbread phase (here in the Silhouette Design Store) I knew it would look so cute on one of the potholders from the Dollar Tree.

I used white siser easyweed heat transfer vinyl, it cut out beautifully and so easy to weed. To apply I used my new Cricut Easy Press which worked like a charm, but an iron works well also. These are quick and inexpensive gifts for Christmas time, I can’t wait to make more.
Thanks for stopping by and have a wonderful day!!

Score Line Tutorial with Brigit

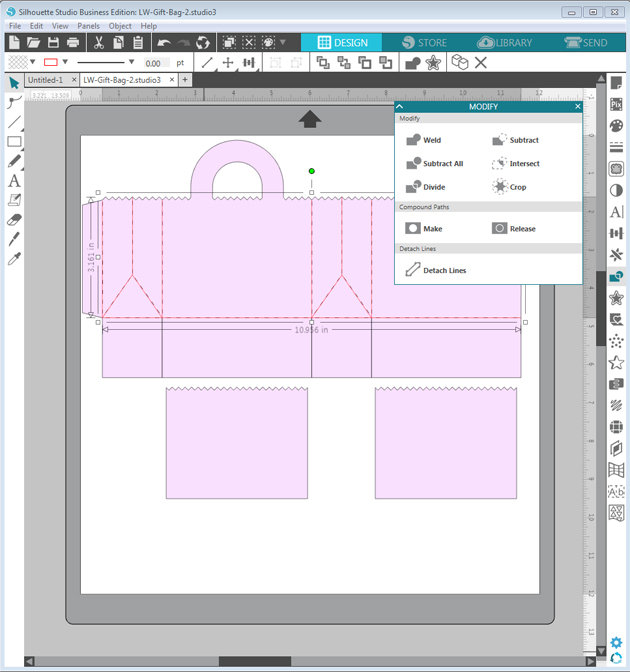
Hello, everyone, it’s Brigit here, I have a quick tutorial on how I replaced the score marks on the Gift Bag 2 file from Lori’s shop using Silhouette Studio Business Edition so I could use the scoring stylus tool on the Cricut Maker.
You can get the file here from the Silhouette Design Store, but for this purpose, I’m using the svg from Lori’s shop and I’ll explain why. I use Silhouette Studio Business Edition to design my projects even if I’m going to cut from one of my other cutting machines. I really like the Silhouette Studio software and with the Business Edition I’m able to save my projects as an svg which I can then upload into Cricut Design Space or Brother Canvas, you can’t do that with the Basic or Designer Editions and you can’t open svg files with the Basic Edition. What you can’t do with the Business Edition is use an image from the Silhouette Design Store and save it as an svg, the lines around the whole image will save as score marks so that’s why I’m not using the bag from the Silhouette Store. Cricut Design Space does have an option to add score lines but I like this way much better.
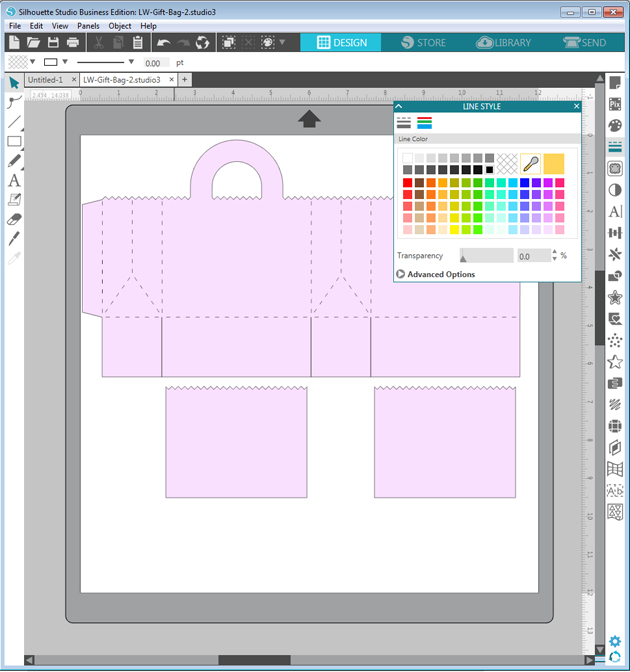
After opening the bag the first thing I do is change the fill to a lighter color and the lines to black, this way the new lines I put in will show up as red, makes it easy to line up.
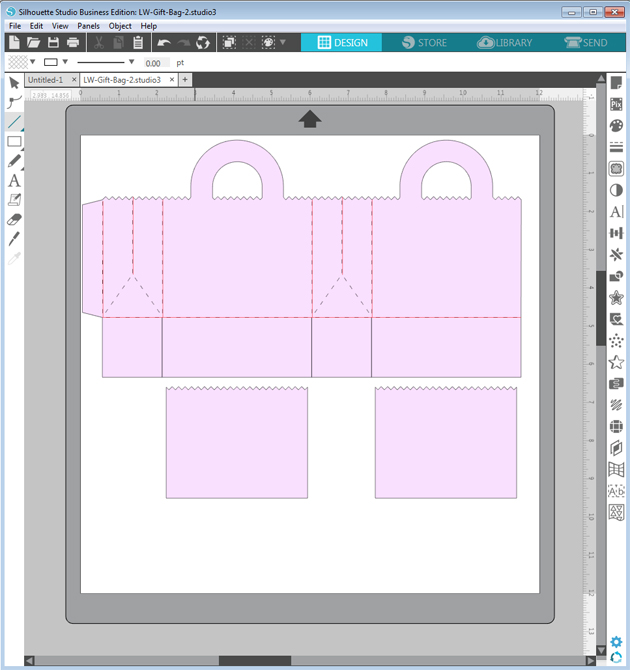
I just quickly add lines over the score marks, I’m not exact here, I fix them and add the diagonal lines when I zoom in.
Zooming in I draw the diagonal lines and align all the other ones as close as I can get.
When I’m done I select the new lines and make a compound path, if I don’t do that when I upload to Cricut Design Space the score lines are off from the project.
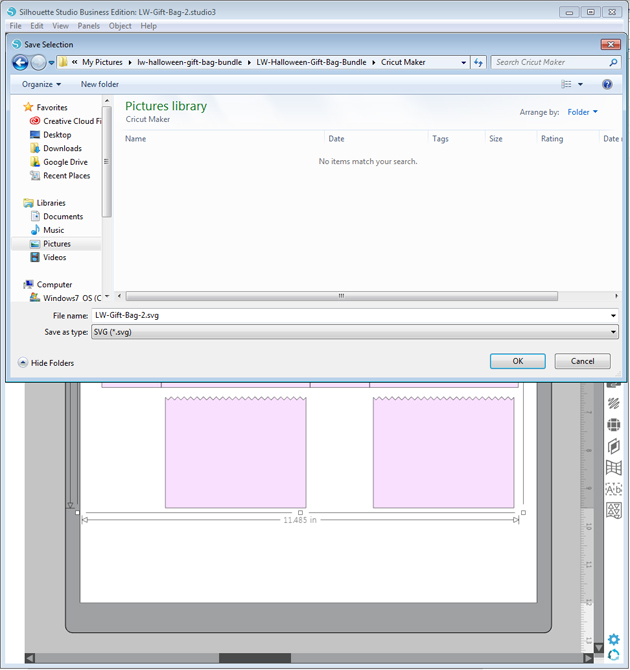
I finish by ungrouping the bag, deleting the original score marks and group with the new score lines. I select all and go to file and save selection to hard drive and in the save as type select svg.
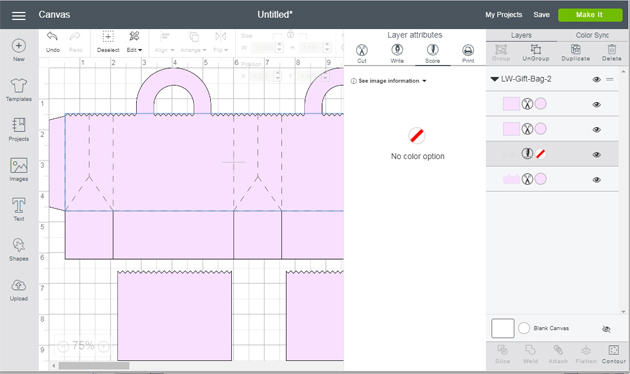
When I upload the bag into Cricut Design Space the size is much smaller, so I resize to match what it is in Silhouette Studio, then ungroup, new lines I created to score and select the bag and score lines and attach.
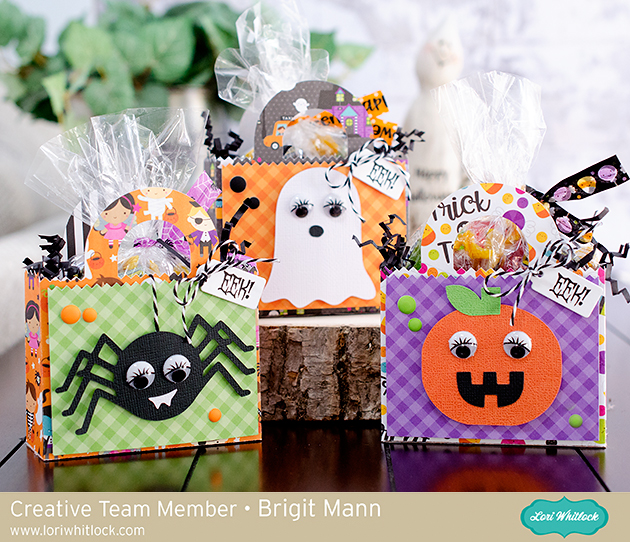
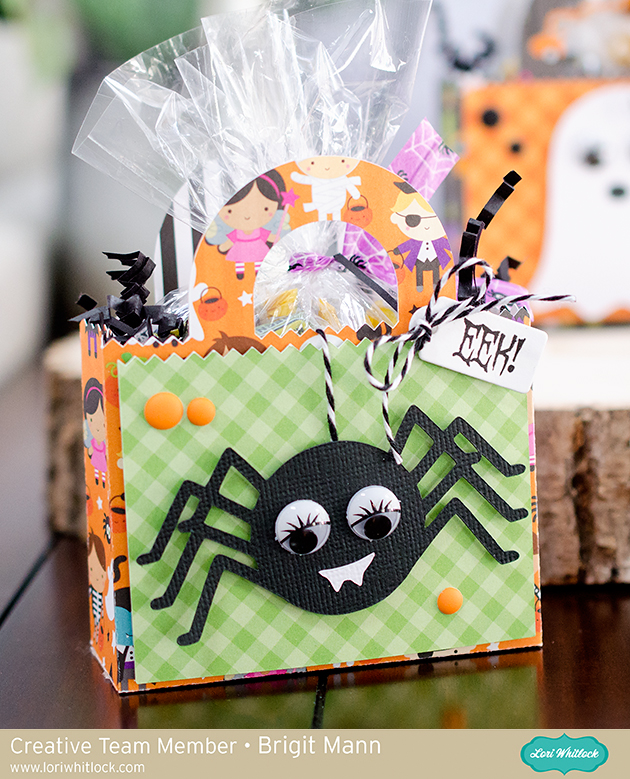
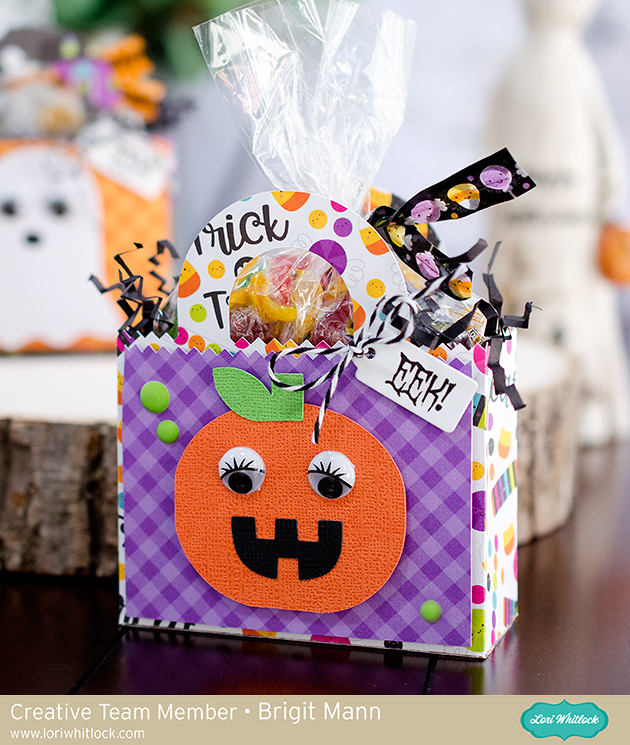
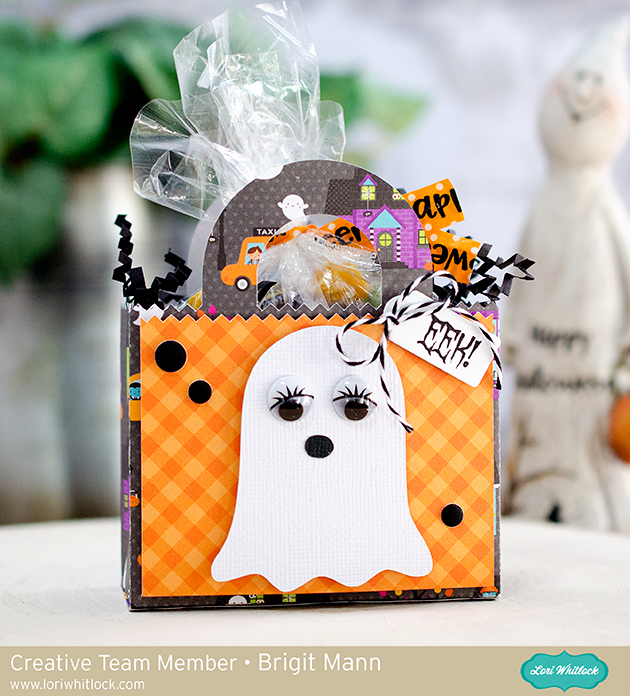
Here’s a closer look at each bag, I dressed them up with the characters from the Cute Halloween Set from Lori’s shop and here from the Silhouette Design Store.
The paper I used is from Doodlebug Design’s Booville collection and Gingham-Linen Petite Prints.
The eyes I believe I bought at Michaels and the sentiment is a stamp from My Creative Time.
Thanks for stopping by and have a wonderful day!!