Big Box Card Basket Strawberries

Hello crafty friends, Noelene here today & I want to share with you a tutorial for the berry sweet Big Box Card Basket Strawberries (SVG, Silhouette), from Lori Whitlock!
As most of you know, Strawberry projects are my favourite, so I couldn’t wait to make this card.
First step was to cut out all my pieces.
Next step is to layer & glue all your pieces, making sure to match correctly all the strawberry leaves to the green background panel before you glue. You will need to fold down the basket flaps then adhere the scalloped panels on the folded side down. The file comes with 2 flowers but as you will see, I cut some extra flowers to use as embellishments. I also inked the centres of my white flowers with some distress oxide before I glued down the circle centres or added the enamel dots. There are also some extra strawberries in the file, you can cut these if you wish for the strawberries to be seen from the back as well as the front. Note: make sure you flip the large strawberries horizontally if you wish to add these to the back of the card, remember you are doing the reverse side.
Now it’s time to put your box card together & assemble the basket. Start by folding down all the scored lines. Now glue the tabs on the inside of the box. I find the best way to do this is by folding the box flat to get the tabs nice & straight along the edge.
Next is to adhere the inside panels inside the box. These are numbered 1, 2 & 3. I started out by glueing number 2 first in the centre as I found this helped me space them evenly. Flatten your project as the glue dries each time to make sure the tabs adhere.
To finish off I adhered the strawberry onto the front using pop dots and embellished with some of the extra flowers. I also tied a bow onto the basket handle.
Hope you like my Big Box Card Basket Strawberries! This file can also be found in the Big Box Card Basket Bundle (SVG), which includes Big Box Card Basket Big Box Card Basket Flowers (SVG), Big Box Card Crafty (SVG), Big Box Card Basket Lemonade (SVG) & Big Box Card Basket Sunflowers, (SVG)
For more inspiration, check out my Instagram!
Thanks for stopping by!
Hugs
Noelene 🙂

Big Box Card Lemonade Basket

Hi. Today I’m sharing a tutorial for this adorable Big Box Card Lemonade Basket (SVG, Silhouette). Like the title says, this project is big and so fun.  No problem cutting all the flower center pieces!

1. First cut all the pieces.  If you are working in Silhouette Studio, remember to find all the white pieces that may be hiding behind a layer. Also think about any patterns you are using in your paper, and place them accordingly.  Notice the direction of scalloped flap pieces.  In this picture those pieces are a butterfly pattern.  But you’ll notice later, I used the other side of the paper.

2. Layer all the pieces, using the finished project image as reference if needed. Aren’t the ice cubes so fun!

3. Adhere the basket panels onto the basket piece.  Notice here that you will first fold down the basket flaps, and then adhere the scallop panels to the folded side.  Here I decided to use the other side of the paper!  Luckily these pieces are symmetrical so they fit perfect.

4. Time to assemble the basket.  Glue the flaps together to form the basket. I used liquid glue for the flaps.

5. Now insert the pieces into the basket and glue the flaps to the sides.  Do your best to evenly space out these flaps. They are numbered 1,2,3, so you can easily place them in the correct order.

6. Flatten the project and make sure the inside glue tabs are adhered well.  And adhere the front banner and flowers on to the basket.  Noting which panel is the front before adhering.

7. Tada!  Enjoy your finished project.  This is a fun one.  You can find some other of these Big Box cards in the Shop. I used Lori’s Have a Great Summer Collection. You can pick up your favorite Big Box card during Lori’s Sale!

Hope you are having a great summer!

Mason Jar Pop Up Box Card

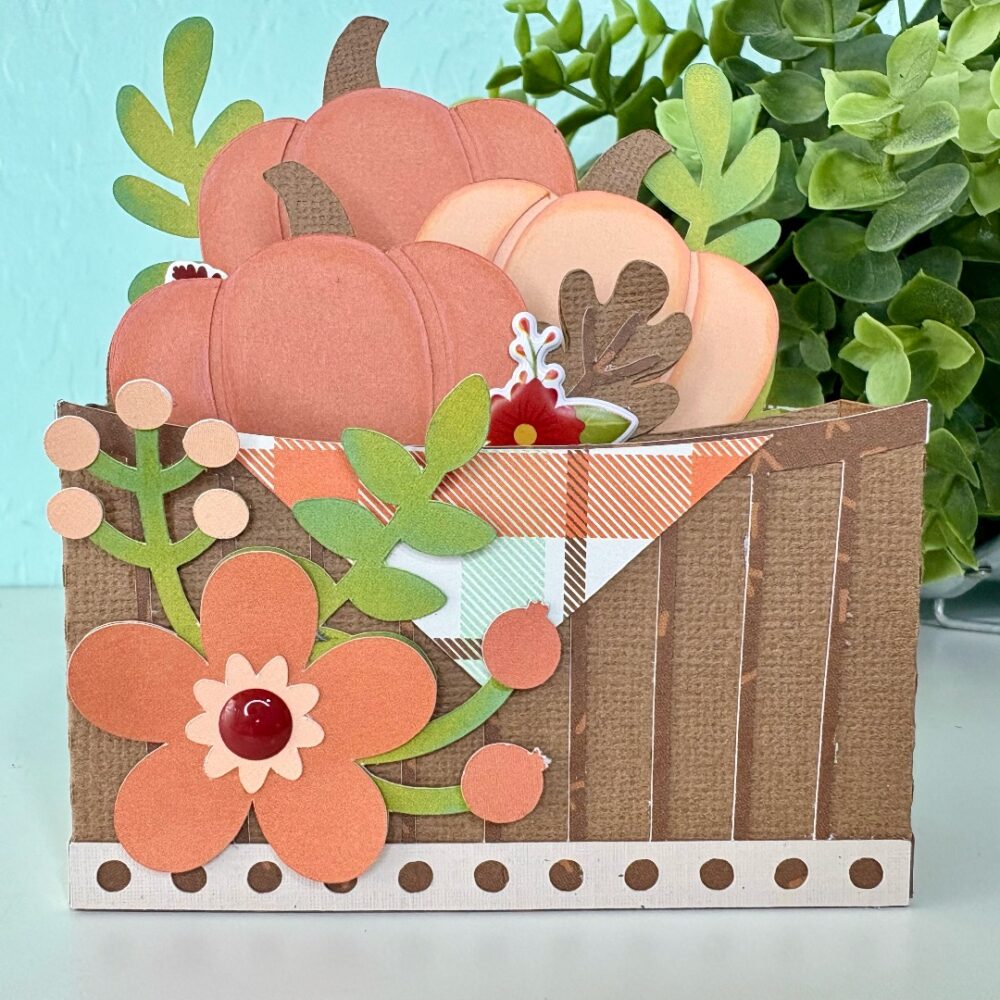
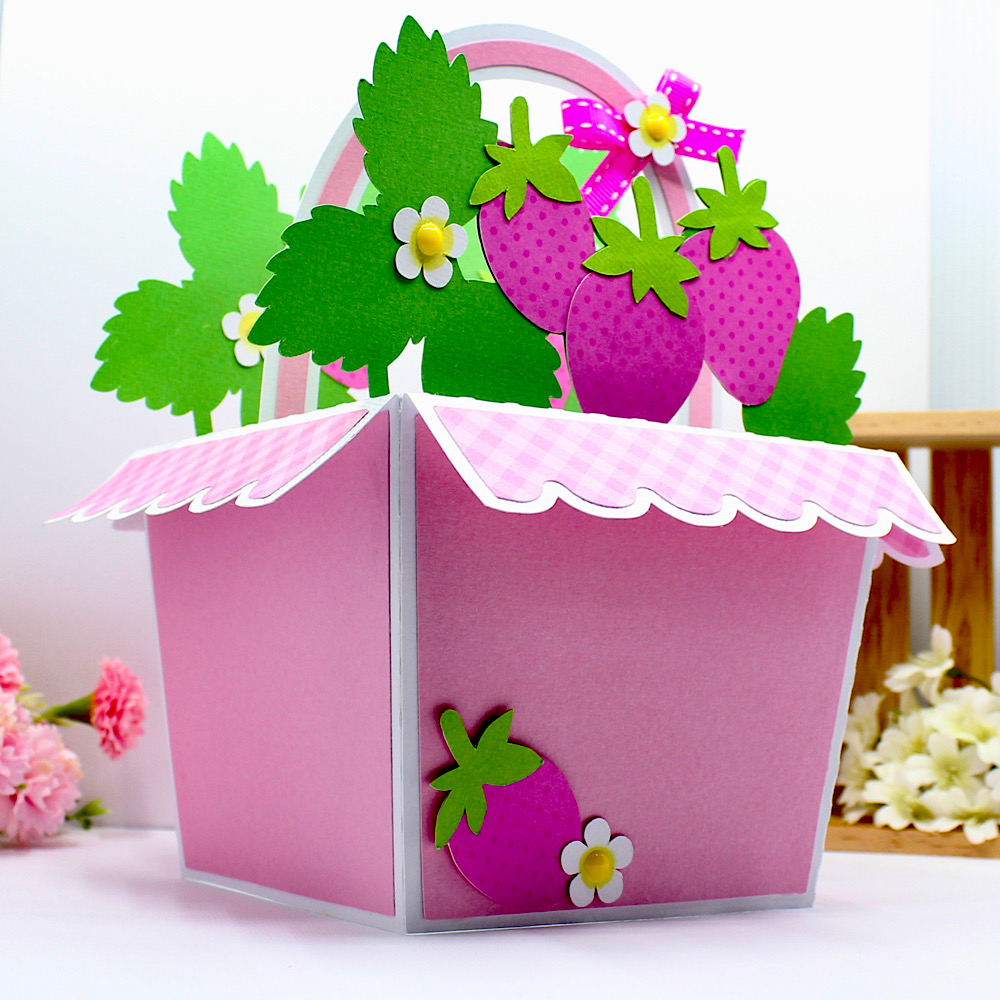
Happy Spring almost Summer Everyone!  I have a quick little card tutorial to share with you today using Lori’s new Echo Park Collection Firefly.  I simply adore everything about this collection, the patterns, the amazing details, the colors….it is all swoon worthy, you have to get it.  It is just so perfect for summer.  The card is one of her pop up box cards, that fold flat for mailing and then pop up and give a fabulous 3 d effect for your recipient.  You can find this card here in Lori’s Shop or here in The Silhouette Online Design Store.  I just love mason jars and this is just so cute.

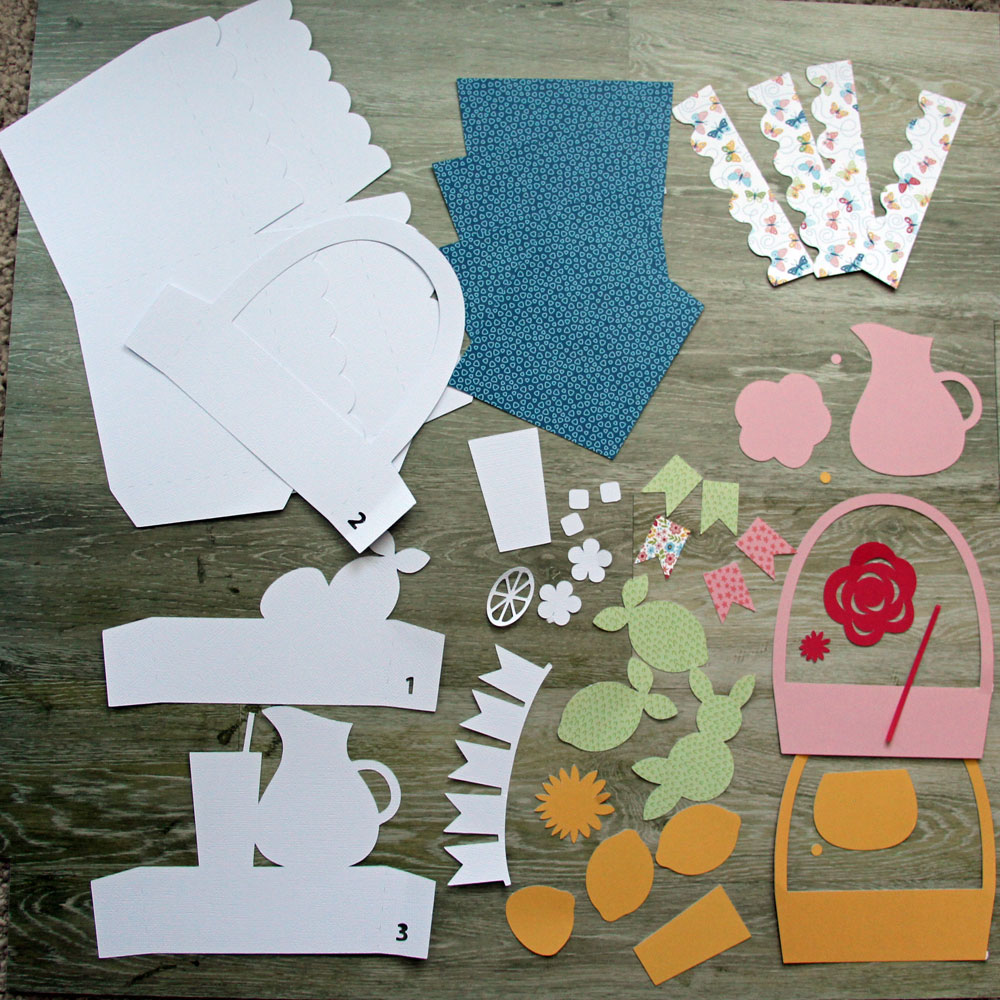
First, cut and organize all your pieces.
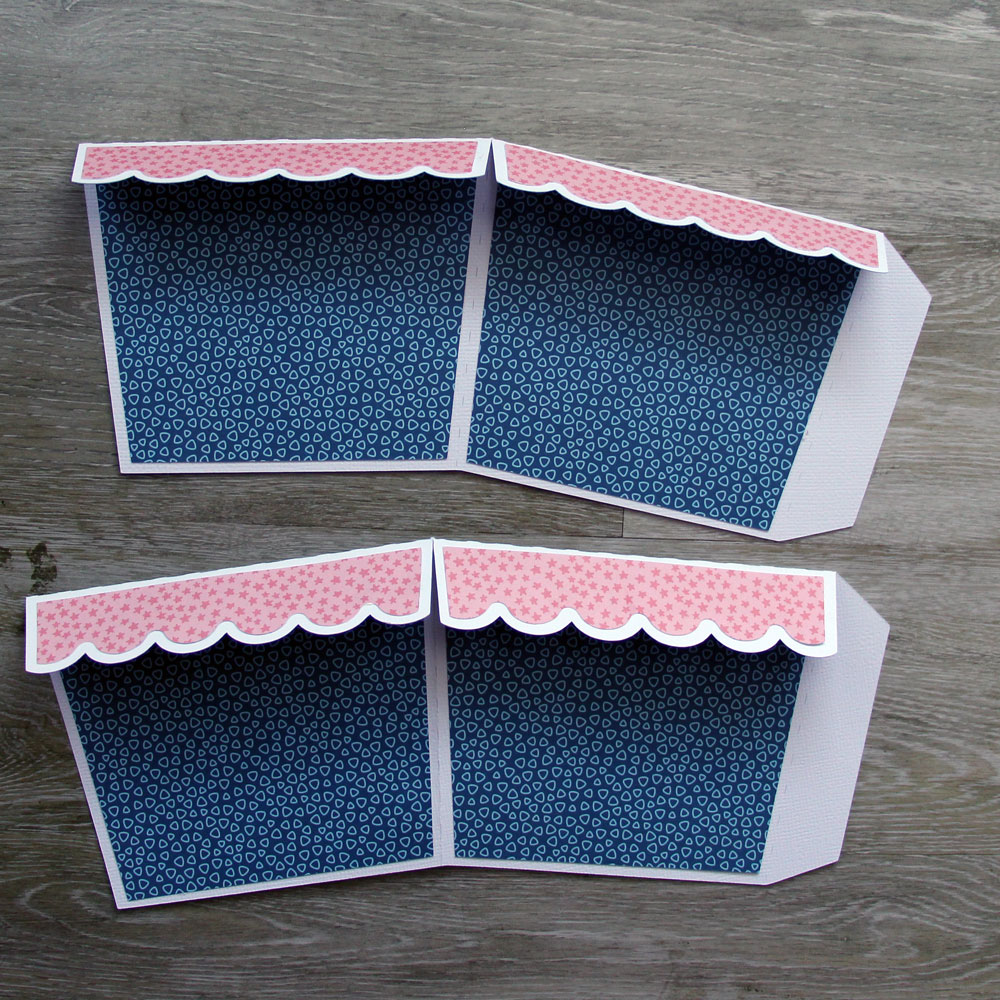
I always ink all my edges, except the white.
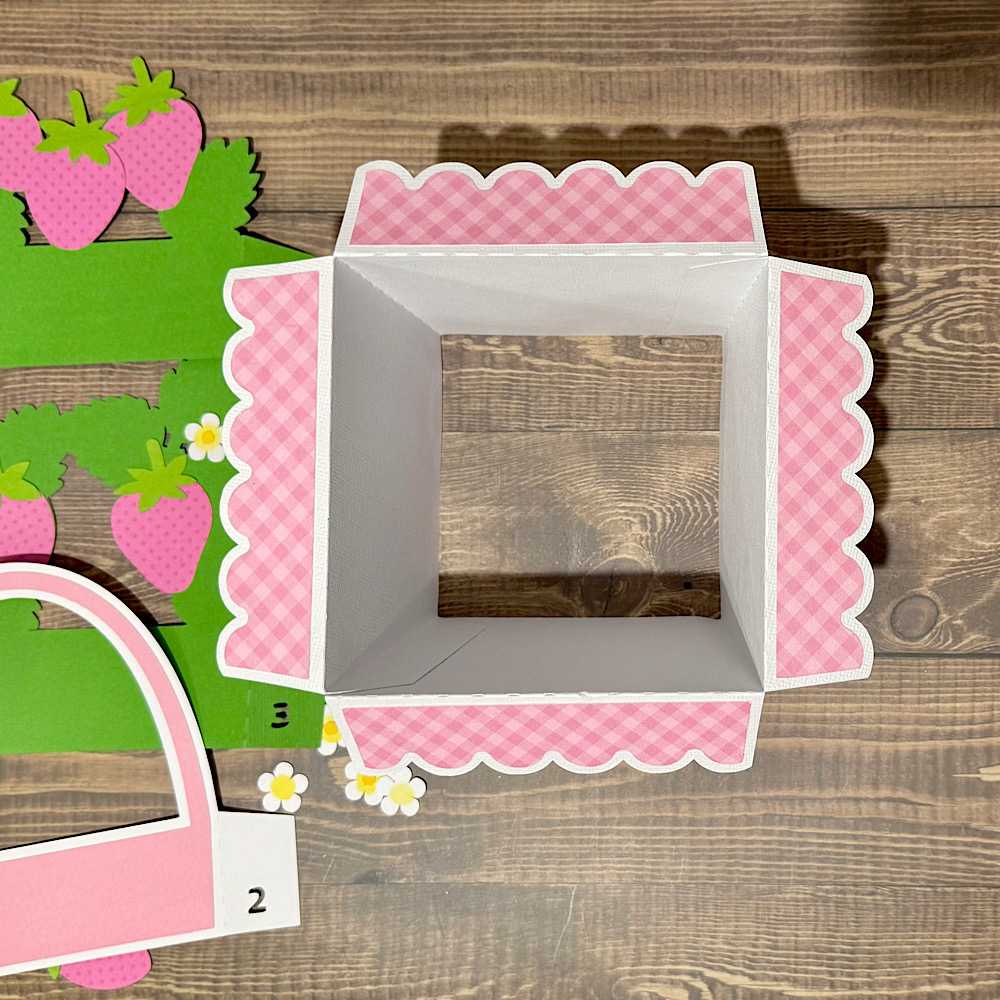
Put your card base together, here I used papers from the 6×6 Firefly paper pad and card stock.  Your score lines will be a peak and a valley.
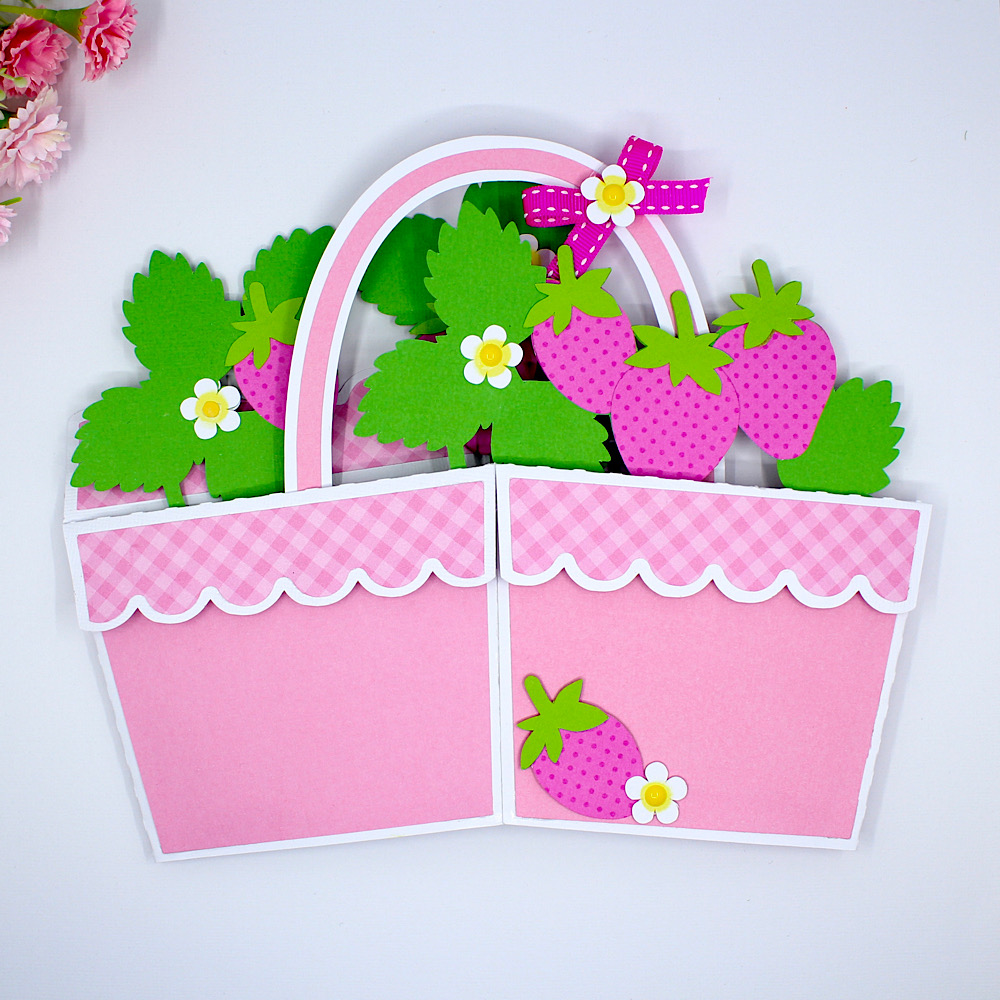
As you can see here, it fold to a 5×5 card base.
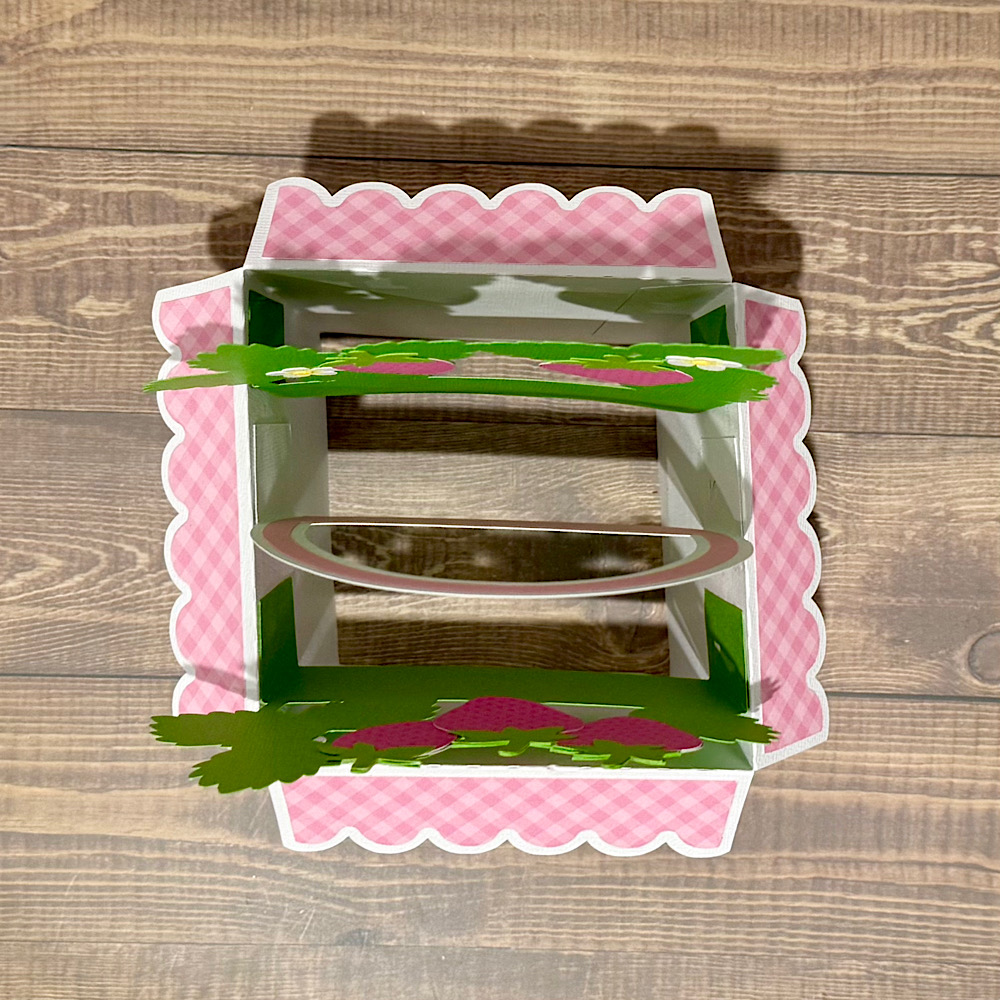
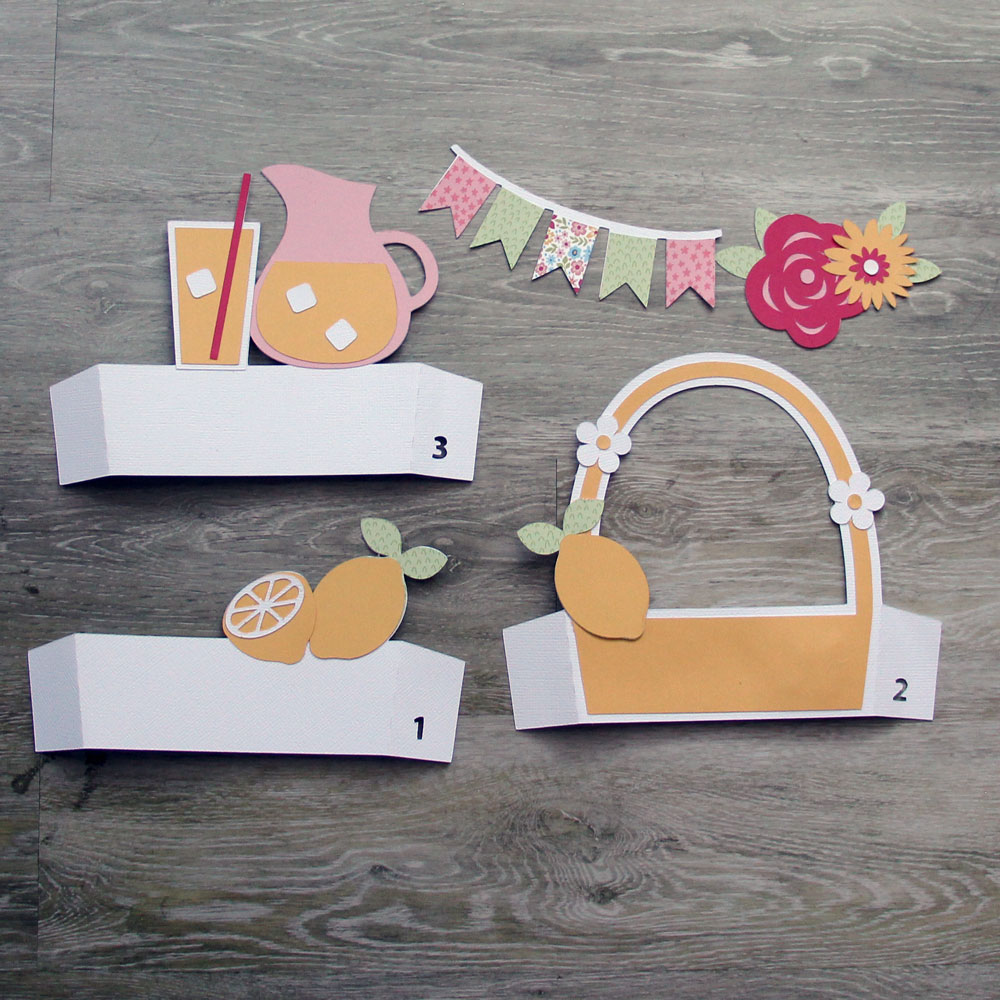
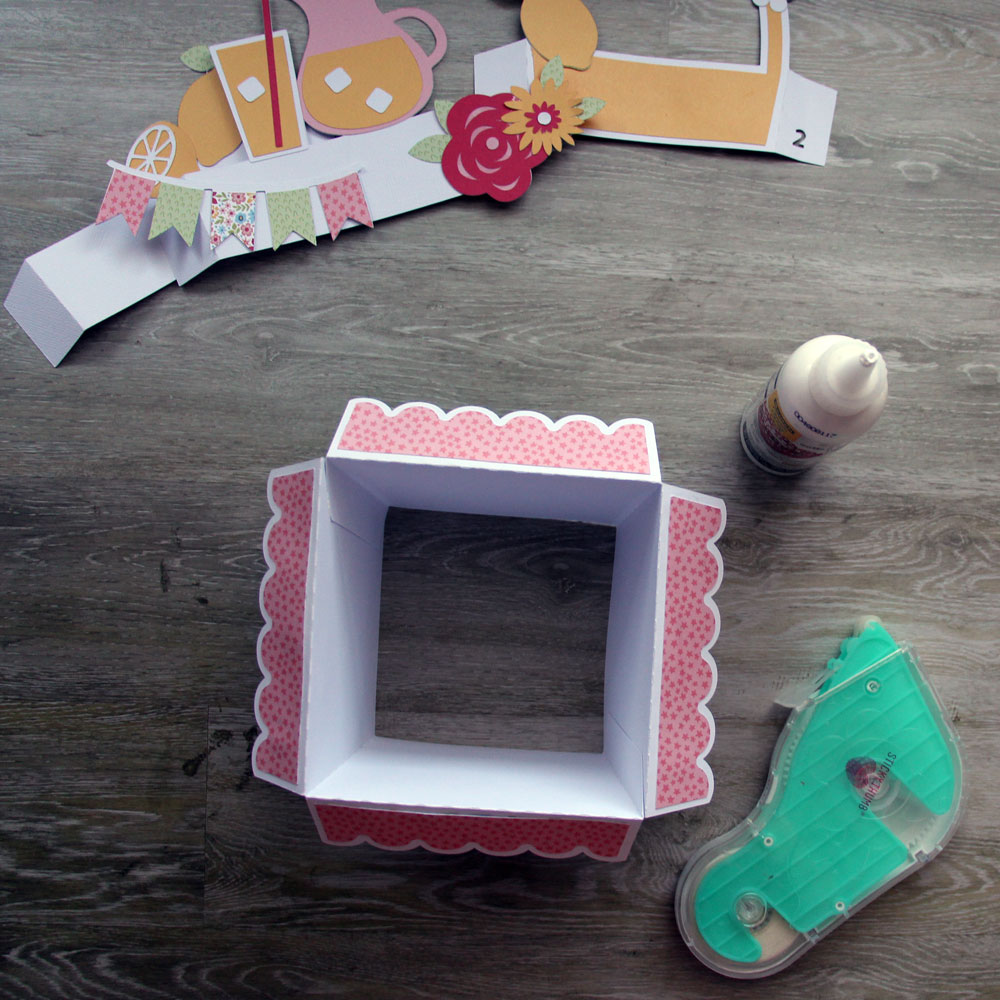
Next, make this piece.  Here I added some beautiful washi tape from the Firefly collection.  Love it!  Again you will have a peak and a valley for score lines.
You are only going to add adhesive on the two ends, and you can see where I wrote here and here.  Make sure no adhesive goes in the middle, otherwise your card won’t pop up.  My adhesive fits the first little panel and then from the second score line to the right.
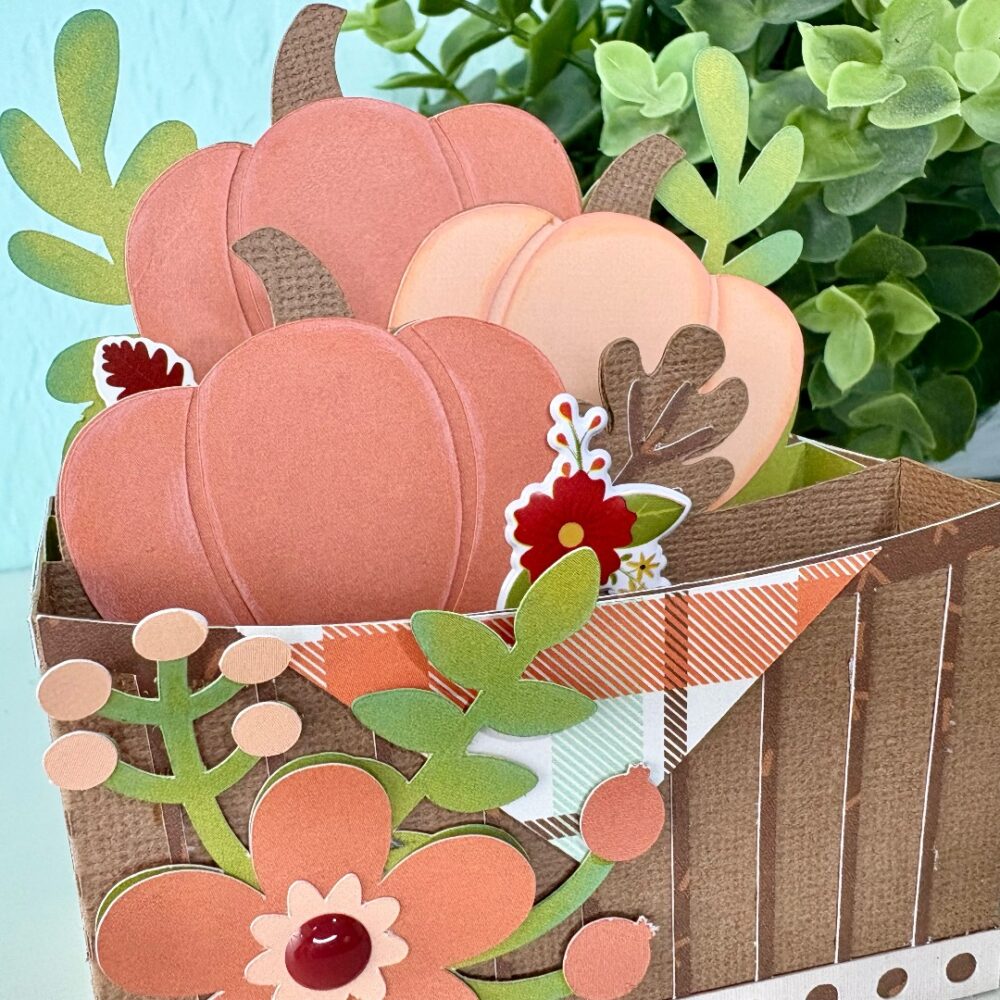
Once you add this piece, you can see how the little pop up box is formed to add your remaining dimensional pieces.
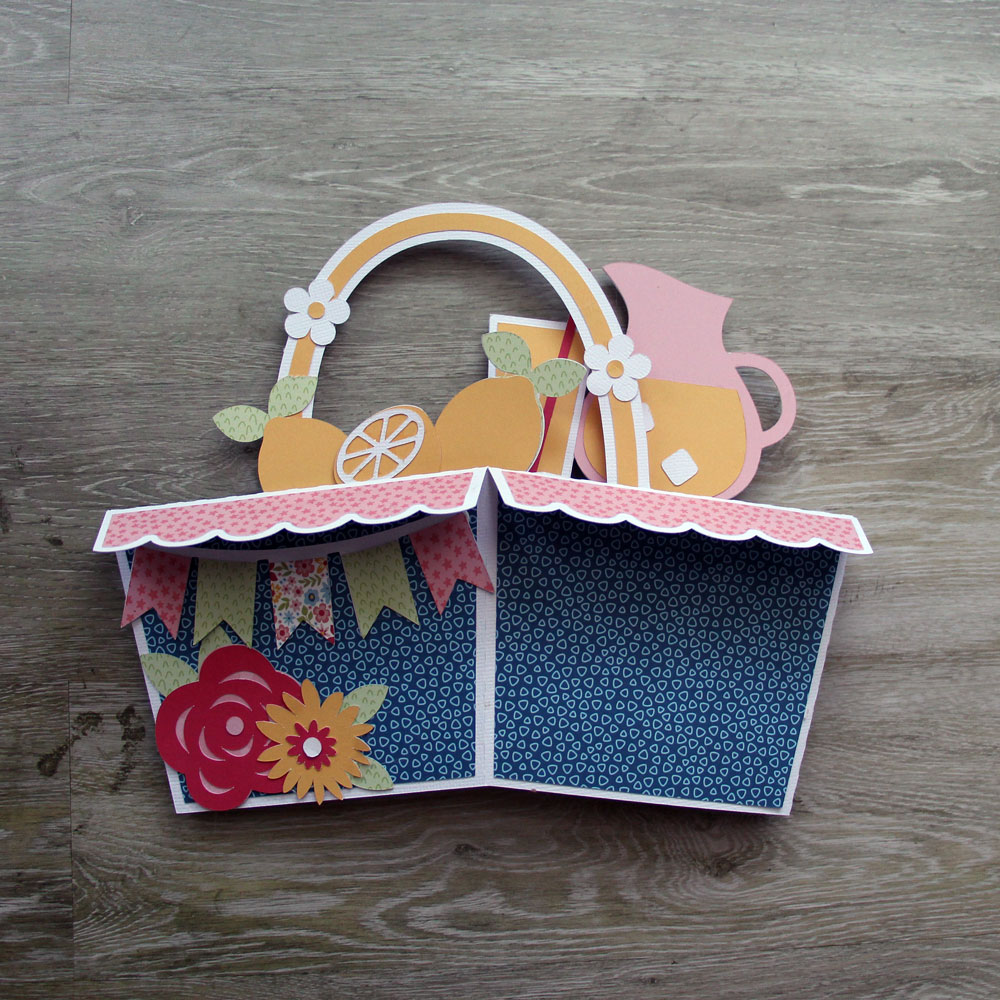
Now just finish up the layers for these two pieces and add adhesive to the sides.  Add them in order, as Lori numbers them for you…1 & 2.
Press them firmly to the sides to create the pop up effect!
And there you have it!  The cutest little card popping with joy!  I love using all the fun embellishments form her collections to really create my own take on each of her cards.


Thank you for joining us today!
Cathy


Box Card Flower Trunk Tutorial

Hello crafty friends! Today I am sharing an assembly tutorial for the Box Card Flower Trunk (SVG, Silhouette).  I used papers from the Day and Life collection by Echo Park Paper Co. I also cut a few extra flowers to add to my card to give it a fuller look.

The body of the box card is in two parts that will be glued together. The tabs are all folded in a valley fold. First, I inked the edges of all of my pieces then glued the decorative panels to the outside of my trunk. I then assembled the flowers. All of the flowers have two layers. I then glued the flowers to the two inserts. Three of the flowers are on the front insert and two flowers on the back insert.

For the trunk I added glue to both tabs and made sure to line up the holes on both pieces so that the brads would be fit. I then glued the decorative corner pieces to the trunk and added the brads to all of the holes. Enamel dots would also be cute on the holes if you can’t find brads. After I had all the brads in place I glued the back decorative panel into the trunk.

Next, I folded the tabs on the inserts in a valley fold and added glue to the back of the tabs. Securing one tab at a time I lined up the edge of the tab with the top of the trunk and held it in place while the glue set. I was also careful to not glue the tab over the back of the brad. I repeat the process for the other side of the insert. With both tabs glued I fold the card flat to check that it will fold flat then repeat the process for the second insert.

With both inserts secure I glued the last flower and stem to the front of the trunk.  I then embellished my trunk with the additional flowers and two butterflies I fussy cut from the collection.

This card is so pretty and has several sentiments for the back of the card that are included in the file.

Thanks for stopping by today!
Brandie

Box Card Easter Sheep Car

Hello everyone!

It’s my turn to share something creative on the blog, and with spring in full bloom, I couldn’t resist making something bright, cheerful, and full of seasonal charm.

This time, I’ve created a box card featuring an adorable little sheep in a glittery car, because why not add a bit of sparkle to the season? The design can be found in the Silhouette Design Store as well as in Lori’s shop.

SILHOUETTE / SVG 

Spring is all about fresh beginnings, blooming flowers, and of course, cute baby animals. I love how this card perfectly captures that joyful feeling. The box card format makes it extra fun, as it pops up beautifully but folds flat for easy mailing—perfect for sending a little springtime happiness to someone special!

I had so much fun picking out the colors and, of course, adding glitter to make the car really stand out. Because let’s be honest—glitter makes everything better!

What’s inspiring you this spring? Are you working on any seasonal projects? I’d love to hear about them!

Happy crafting!
Tamara