Donut Worry Be Happy – Food Truck Tutorial

Hello friends! Marcia here today. Toward the end of summer when all the county fairs are in full swing and the state fair is looming, I start craving mini donuts. I can’t help myself. I thought it appropriate to indulge myself and at least make a donut card. Lucky for me Lori has the cutest little Donut Truck Box Card in her store (SVG, Silhouette).

This card has lots of pieces, but it is super easy to put together. Let me show you how.

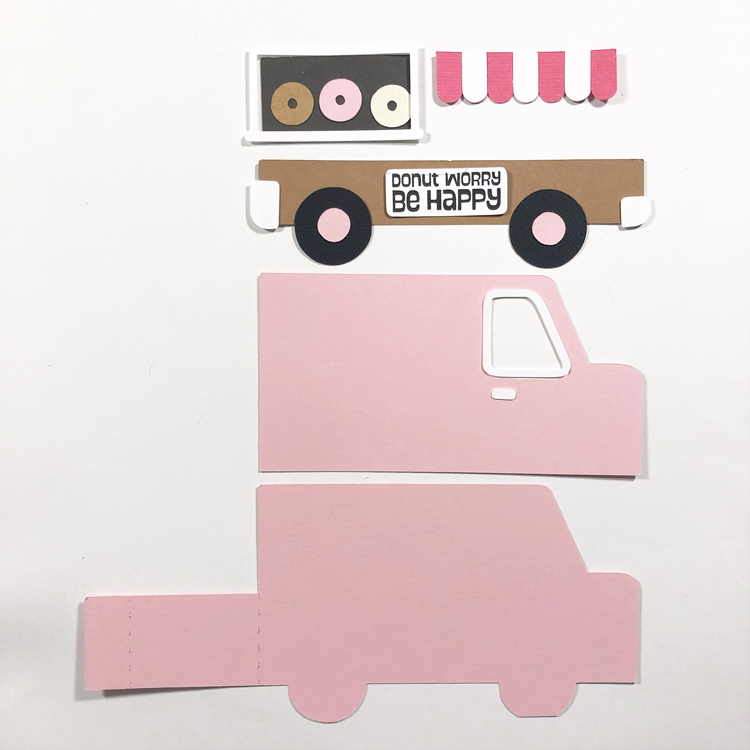
  1. Cut out all the donut truck pieces from the desired color of cardstock or pattern paper. I used the Print and Cut feature in the Silhouette Design Studio to print Donut Worry Be Happy on my computer’s printer before cutting it out.
  2. Arrange all the front cut outs with the front base cardstock truck and start to glue the pieces in place as shown.  I found it easier to work from the bottom up. Layering the truck body on first, followed by the truck’s side panel and tires. Last I added the truck window and awning. I placed foam tape under my awning only on the bottom so that it would pop up away from the truck. The top of the awning was glued to the truck.

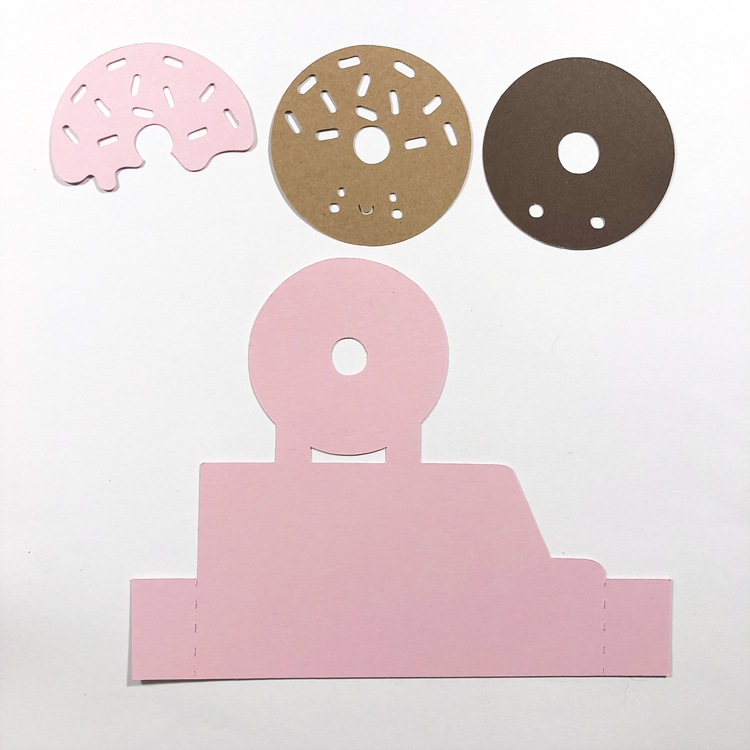
3. Arrange the middle card cut outs and glue in place lining up the sprinkles and cheeks. Pink on top of the light brown. Then that on top of the dark brown and finally adhering the donut to the center card base.

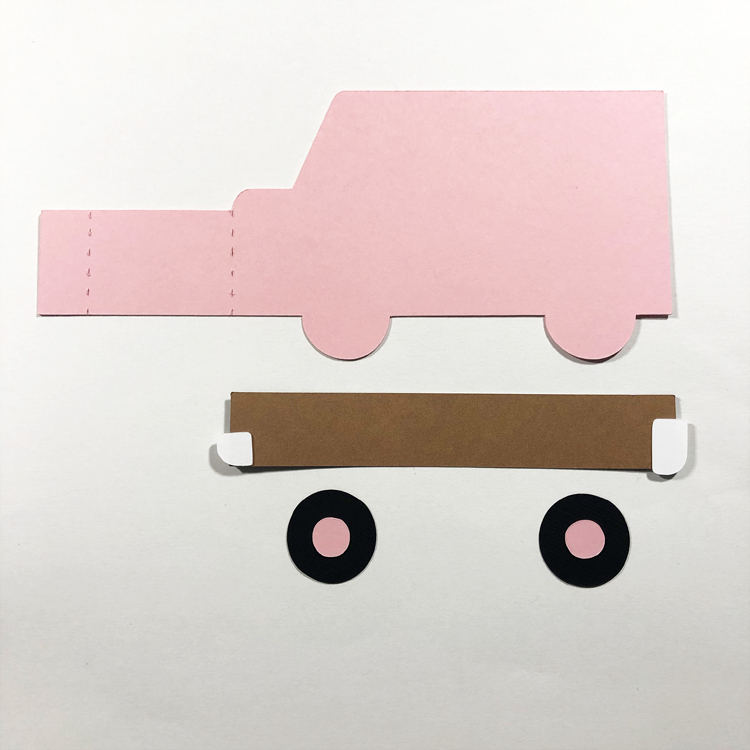
4. Then we assemble the back of the truck card, gluing down the side panel and wheels.

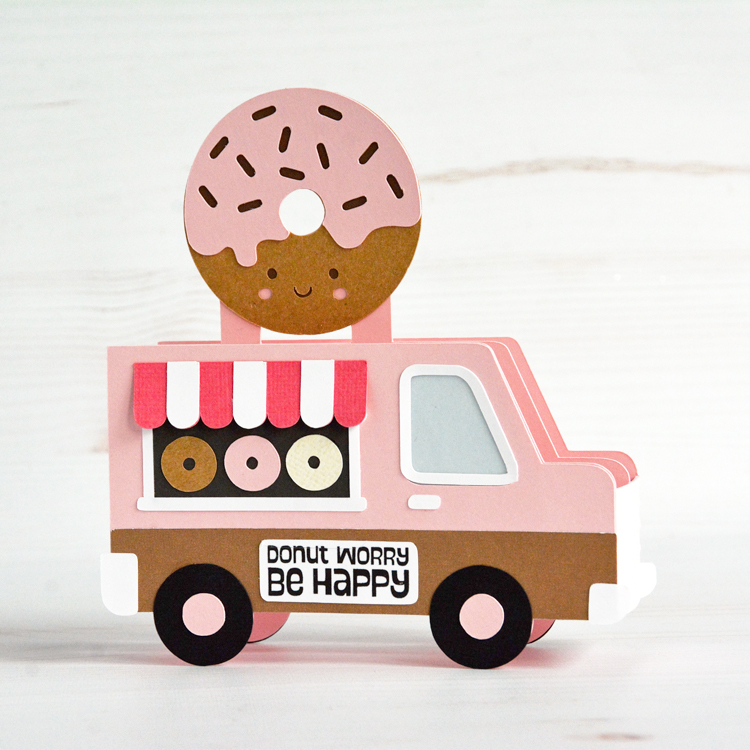
5. Now that all the pieces are assembled, it is super easy to glue the front to the back of the truck creating a box. Add some glue to the center card tabs and carefully adhere to the inside of the card, lining up the top.

This is such an adorable card and is sure to lift the spirits of any recipient, especially if gifted along with donuts 🙂  Be sure to check out all the other food truck box cards in Lori’s shop as well. Note: This box card does fold flat for mailing in a 5×7 envelope.

Have a great week!
~Marcia

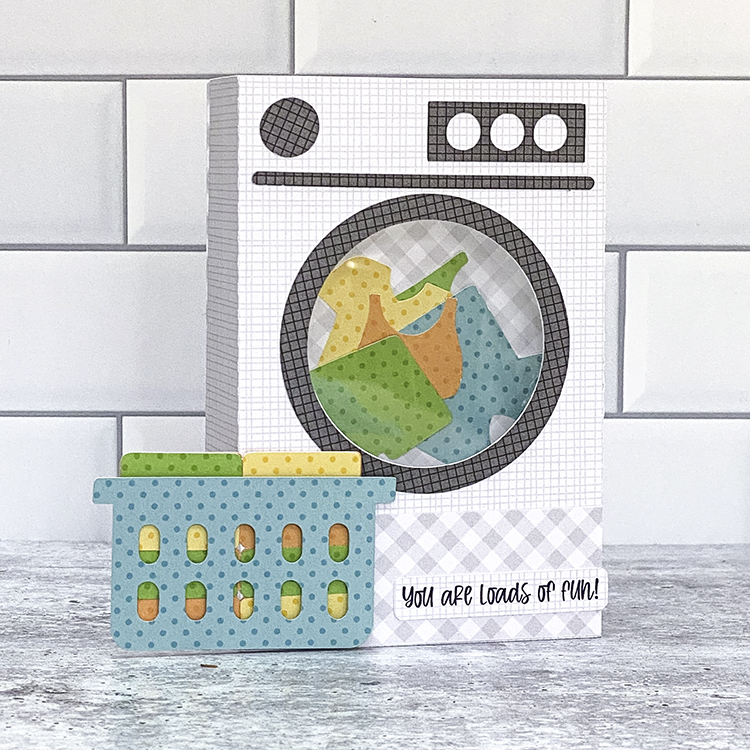
Washing Machine Box Card

I don’t know about you, but laundry seems to be a never ending process around here.  I swear, I throw 3 items in the hamper and they multiply to be at least 12!  When I saw this adorable Box Card Washing Machine (SVG, Silhouette) I couldn’t resist making it!  I love the acetate washer door, it adds the perfect touch!  This card would be perfect for just about anyone! Even better, I don’t have to dry, fold and put it away!

This card is a shaped box card.  For assembly help with Lori’s shaped box cards see this post.  Have you made any cards from Lori’s Shop?  Make sure to tag @loriwhitlock on Facebook and Instagram.  We love to see what you create.  That’s it for me today, thanks for stopping by to peek!

BLOG | INSTAGRAM

Farmhouse Lemon Scale Card

Hello friends! Marcia here today. Lori has a new Farmhouse Card bundle in the shop and this cute Lemon Scale Box Card caught my eye (SVG, Silhouette).  I used the beautiful new Echo Park Farmer’s Market collection to create this and it is so perfect for these farmhouse cards.

A metallic foil cardstock gives the look of stainless steel, making the card look so realistic.

Go check out all the new farmhouse cards. They are perfect for summer and fall cardmaking. Thanks so much for stopping by.

~Marcia

Yellow Punch Buggy!

Hi Everyone,  Lori has some fabulous summer themed files in the shop, including this absolutely adorable Summer Vintage Bug Box Card (SVG, Silhouette).  It made me think of all those long car rides as a kid, where you scanned the roads for a “yellow punch buggy” (no punches back!)  So of course I had to make a yellow version.  Take a peek…

It’s so cute, I love the little surfboard and starfish… they add such a summer beach feeling!  This card folds flat and will fit into a 5×7 envelope.  For help with assembly, this shaped box card post will get you pointed in the right direction!  Check out all of the other fun cards in the “Cutest 3D Card Bundle”  they are perfect for all of your summer card making!  That’s it for me today, thanks for stopping by to peek!

BLOG | INSTAGRAM

You’re The Best Pop – Tutorial

Hello everybody! Marcia here today. I thought I would do a tutorial on this adorable popcorn box card. I made this Father’s Day Popcorn box card (SVG, Silhouette) for my Dad. I have fond memories as a child of him taking my siblings and I to the movie theater. Now that he is older, I am the one who is taking him out to the movies.

This tutorial is based on Silhouette Studio, but there are parts applicable to all different cutting machines.

After opening the file in Silhouette, you will want to ungroup all the pieces. If there is a printable sentiment, set your print registration marks in the Page Setup Menu. This lets the software detect where your cut lines should be in reference to the printed text. Ungroup the text from the shape surrounding it and move the shape to cut outside of the print registration marks. Select the printer icon to send the text to your printer. After printing, mount the paper in the upper left corner of your mat and load the mat into your Silhouette. Move the shape to cut back around the text. Now select the text and move it away from the shape to cut. Send to Silhouette to cut. Cut the rest of the pieces from whatever desired cardstock or pattern paper you like.

Before assembling the pieces together, I like to ink the edges of some pieces to make them look more dimensional. I selected a yellow and light brown here for inking my popcorn edges.

After inking, assemble the popcorn box and the card inserts. I used pop dots behind some popcorn pieces for added dimension.

Adhere the card inserts to the inside of the popcorn box, placing the popcorn insert in front of the sentiment insert. Use more pop dots to adhere the filmstrip slightly behind the sentiment.

Lori has lots more Father’s Day cards in her shop. Go take a look. Thanks so much for stopping by.

~Marcia