3D Lantern Bats Tutorial

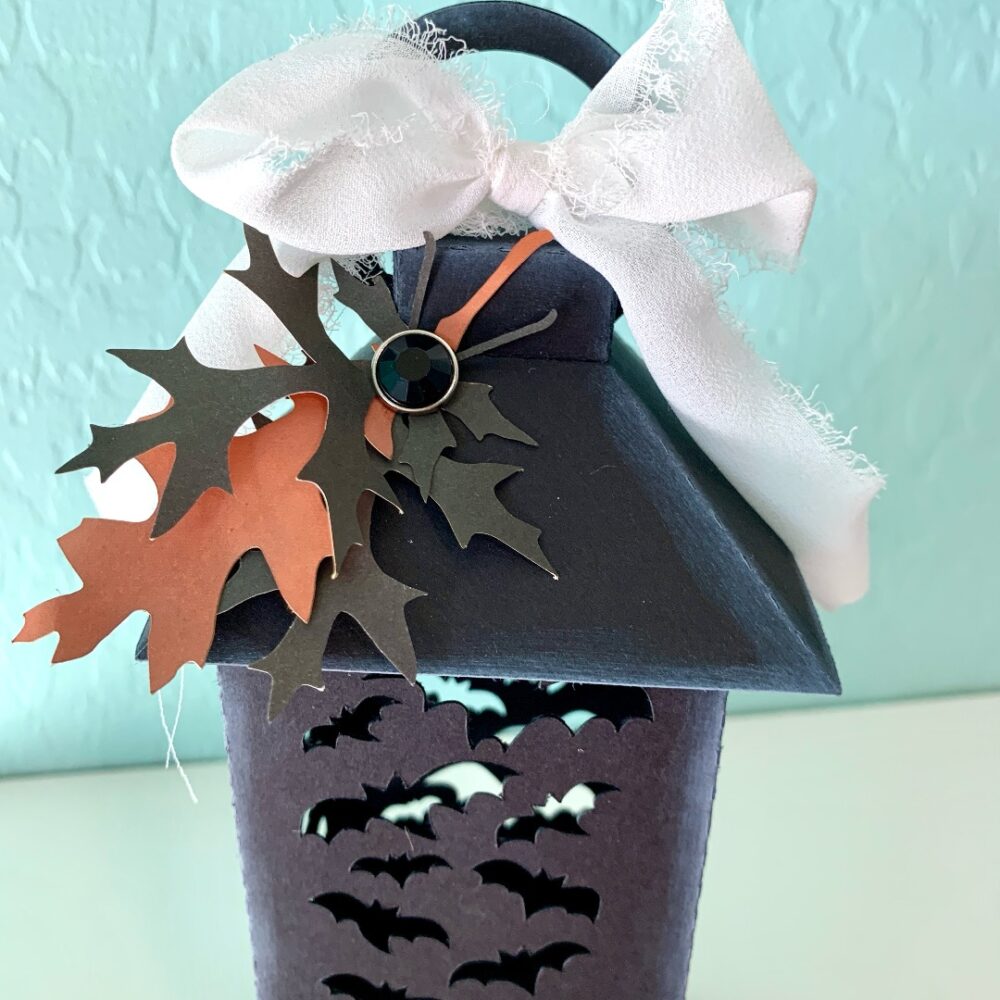
Hi there! Thanks for stopping by today. I am sharing an assembly tutorial for the 3D Lantern Bats (SVGSilhouette) file. This cute lantern has several versions and makes a cute decoration for Halloween. For one lantern you will need two sheets of cardstock. I also used a few scrap pieces of cardstock to make some fall leaves for embellishment.
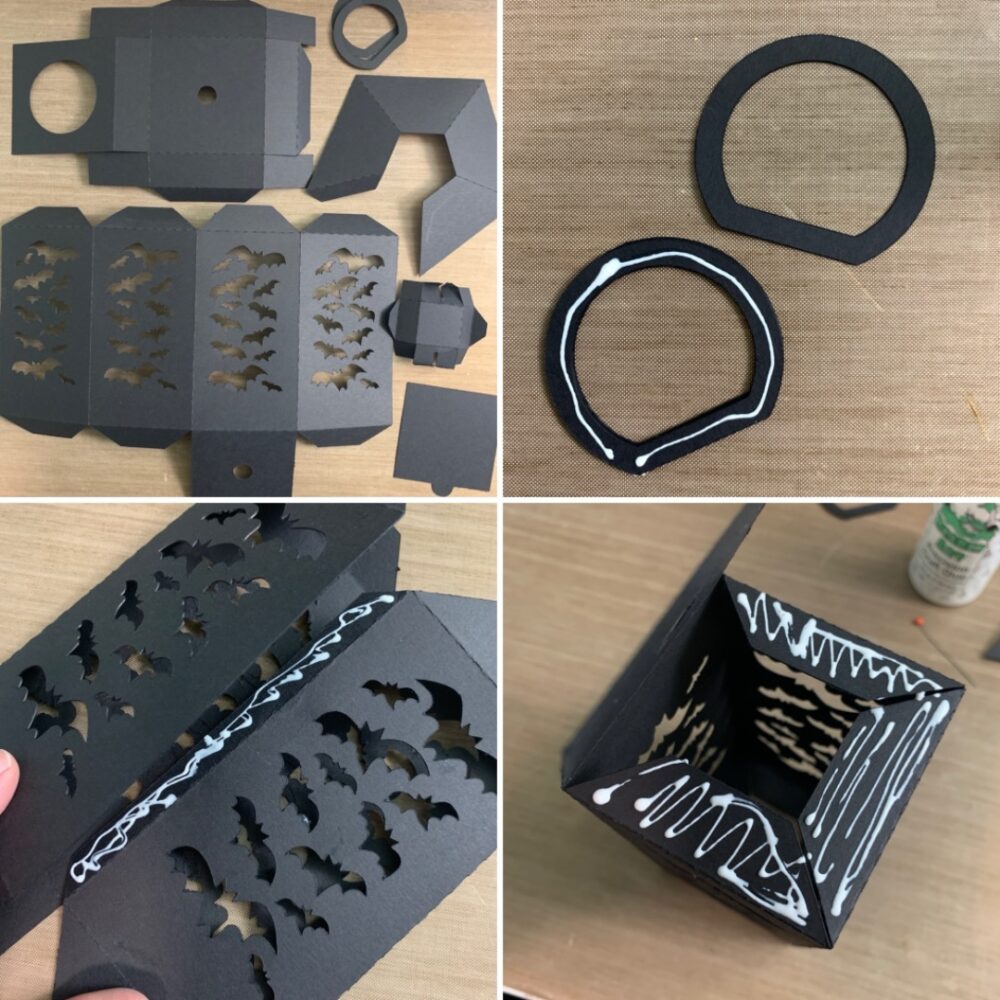
Once all my pieces were cut, I folded all of the score lines as mountain folds. I then glued all of the D ring shapes together. The lantern body is one piece with one long tab, I added glue to the tab and lined up the opposite edge of the lantern body to the tab. After the glue was set, I flipped the lantern over and added a generous amount of glue to all the bottom tab and folded over the base and applied even pressure while the glue set.

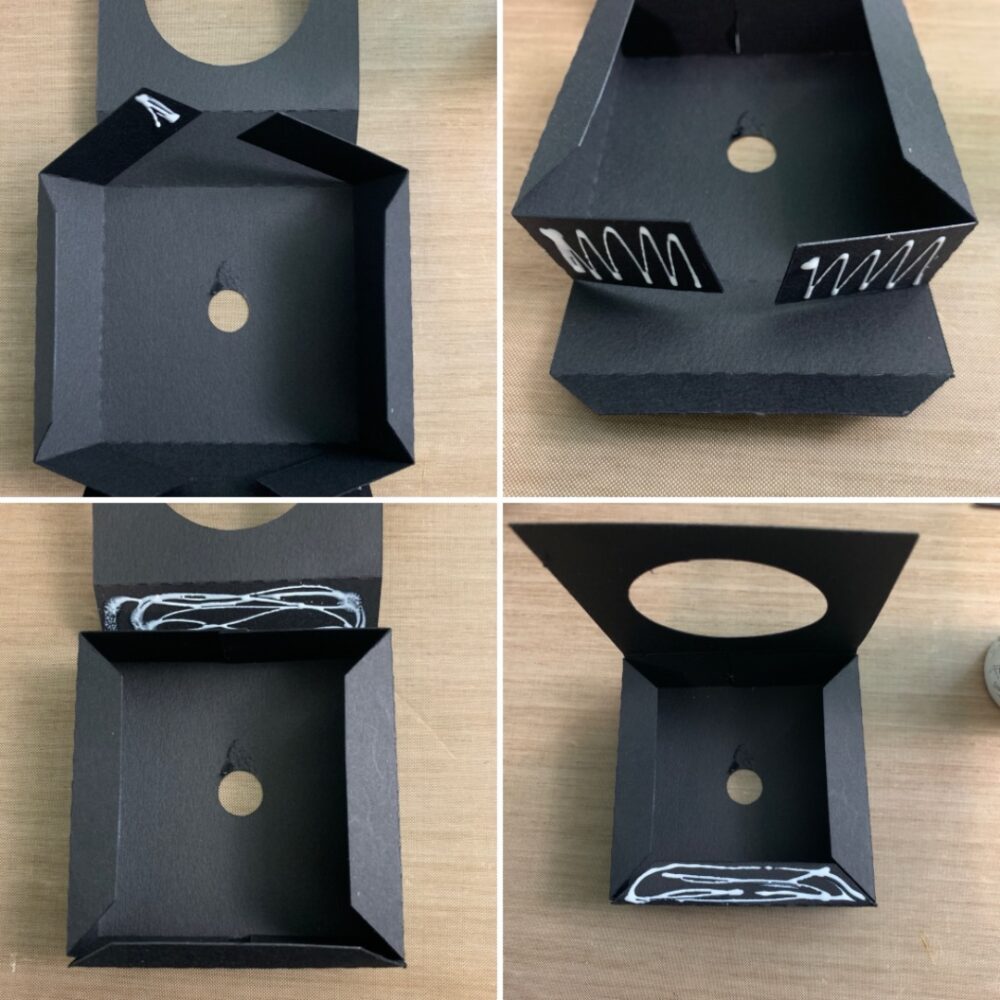
For the base I flipped the base piece over so that the top is on the bottom. I then glued the two longest tabs together. I then added glue to the other long rectangular tabs and folded up the side to secure. Back to the first side I glued I applied glue to the side of the base and held in place. For the flap with the large hole, I only applied glue to the opposite tab. This is to create a sleeve for a battery tea light.
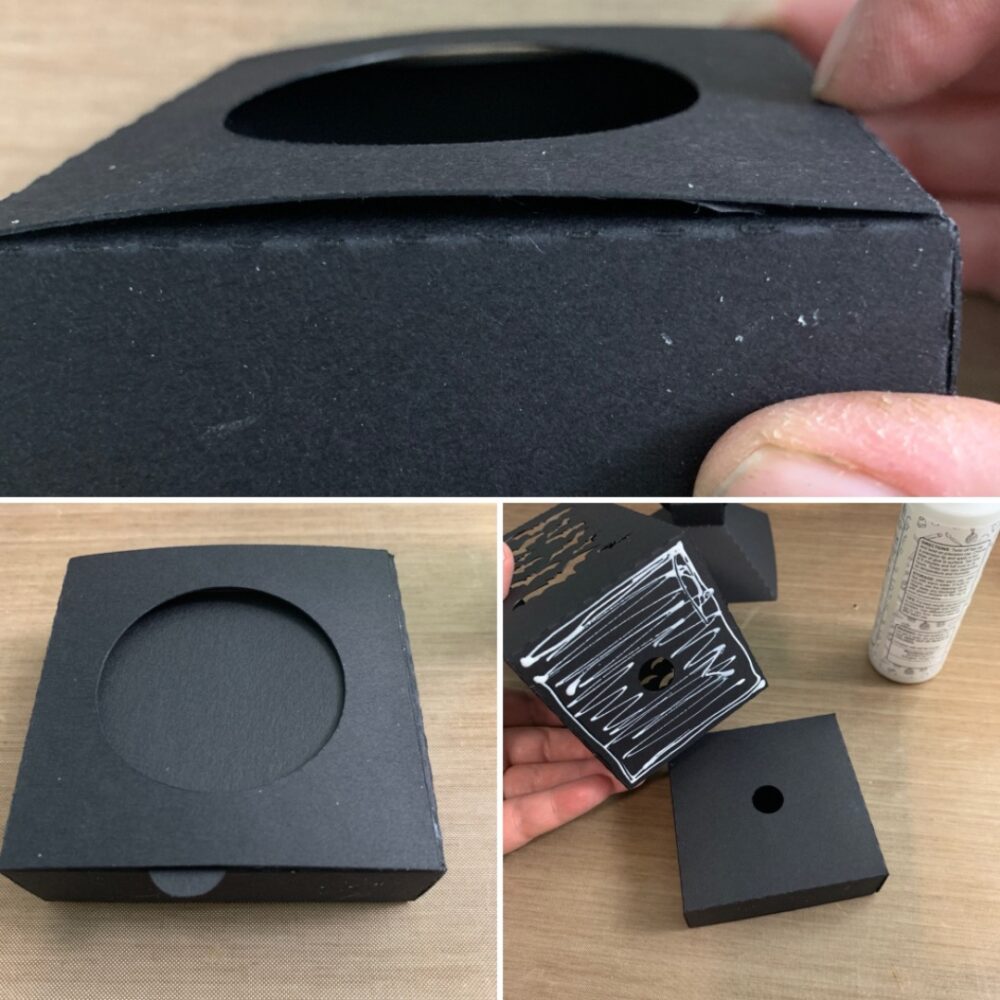
I then slid the square with the small tab through the sleeve to cover the large hole in the bottom. I then flipped the base over and add a generous amount of glue to the bottom of the lantern body and secured the base. I used the two small holes to line up the body to the base.
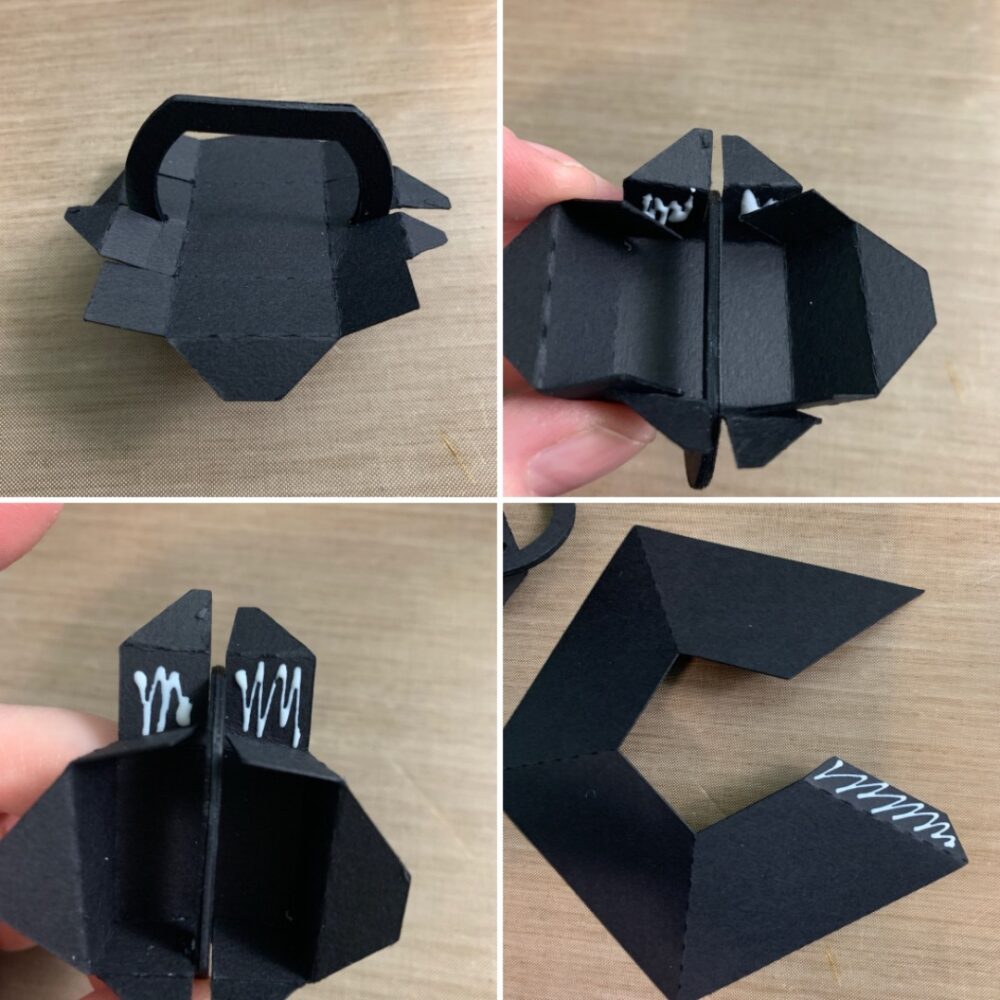
 
For the top small box for the lid the of the lantern I flipped it over and pushed all of the rectangle shaped tabs back into mountain folds (this helps keep them out of the way while I glue the box together). I added the D ring between the notches. I added glue to the square tabs and held in place while the glue set. I also glued the c shaped piece together by adding glue to just the tab.
Once the small box was dry and set, I pushed all the small tabs through the square in the roof of the lantern and added glue to the small tabs on the inside of the lantern roof. I then added glue to the tabs on the top of the lantern body and held the roof on with even pressure while the glue set.
After the lantern was dry, I cut some oak leaves (SVG, Silhouette) and inked the edges of the lantern. I used some chiffon ribbon for a bow and glued on the oak leaves.

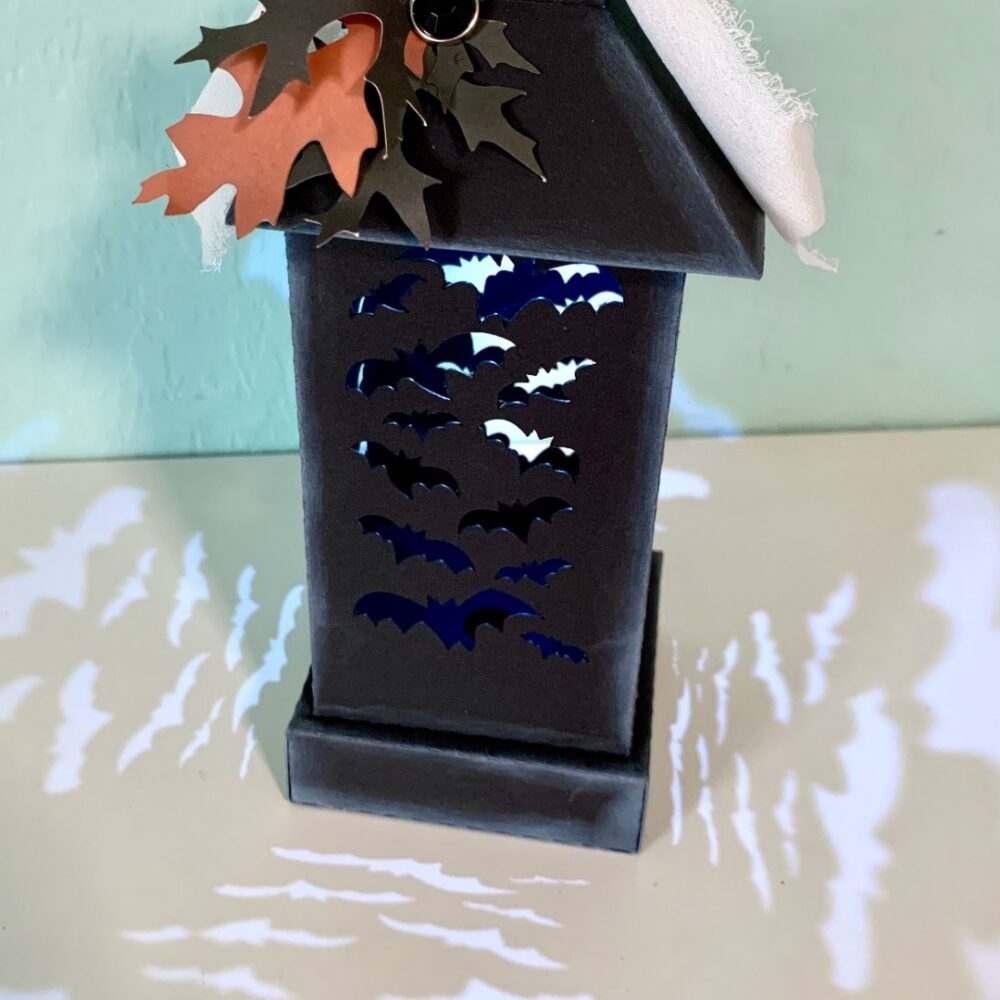
I had a little ballon light to my lantern to get the bats to cast on the walls and shelf.
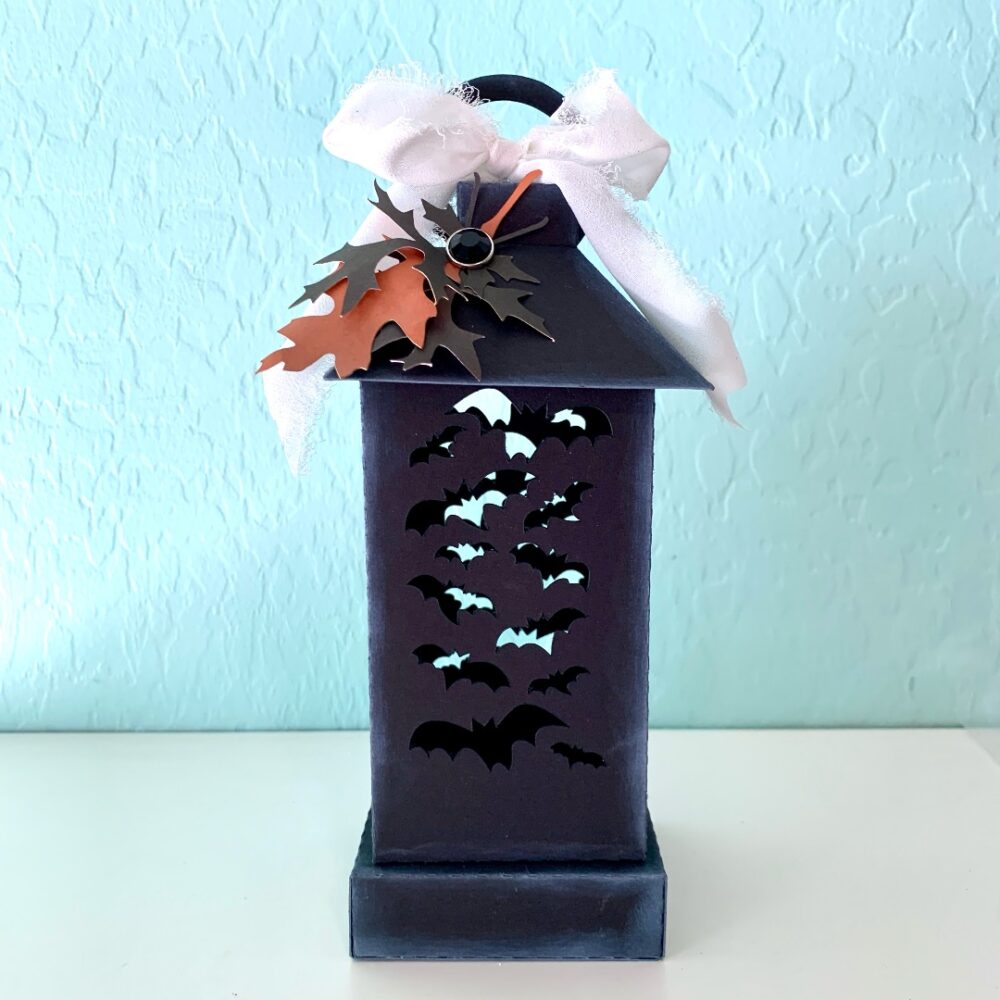
This would be a fun addition to a Halloween table or tiered tray display. Thats all for me today. Thanks again for being here.

Brandie

Shadowbox Box Card with Traci

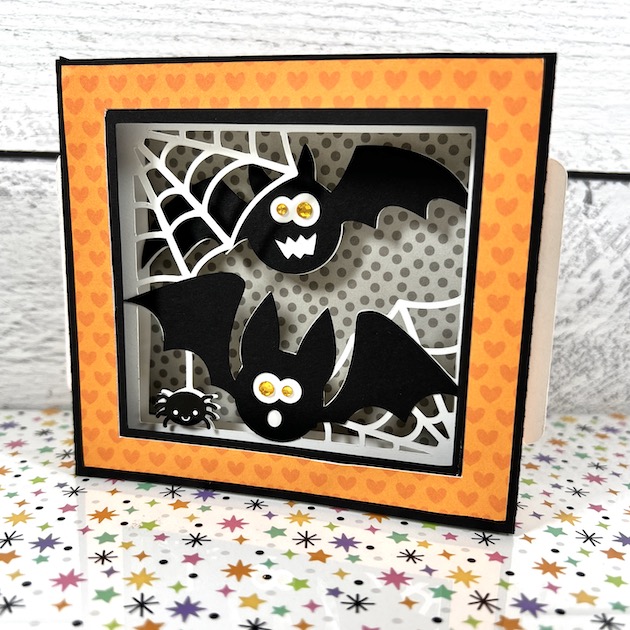
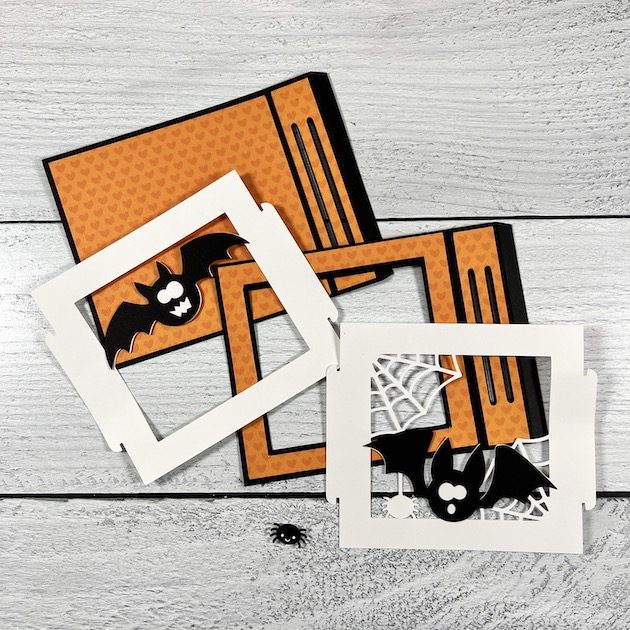
Hello everyone! Traci here and today I’m sharing a tutorial on how to make this spooky little Shadowbox Bat Card (SVG, Silhouette). I created this with one of Lori’s fantastic cutting files and it makes the cutest card for Halloween! What a great way to let someone know you’re thinking of them around the holiday.

Halloween Shadowbox Bat Card Tutorial

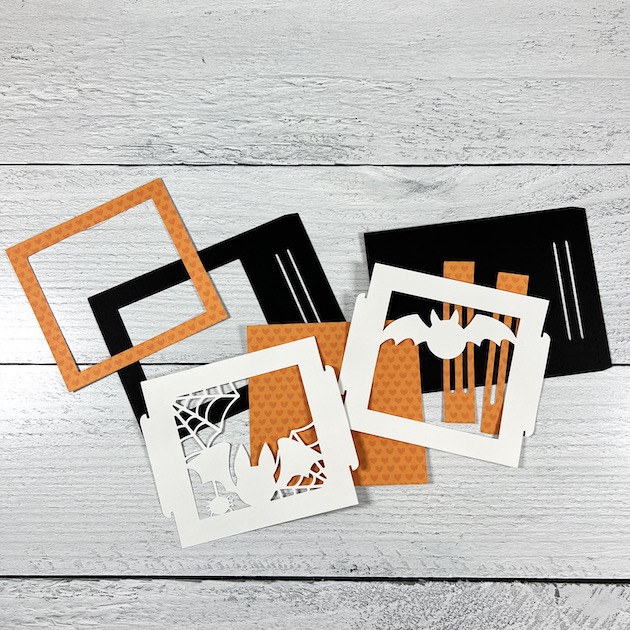
To get started, I cut out all of the base pieces first and laid them out on my craft table.

Halloween Shadowbox Bat Card Tutorial made with a Lori Whitlock cutting file

Then I adhered the pattern paper to the base card, making sure to keep the design going the right direction. I learned this the hard way when I glued my hearts upside down. 😊

Halloween Shadowbox Bat Card Tutorial

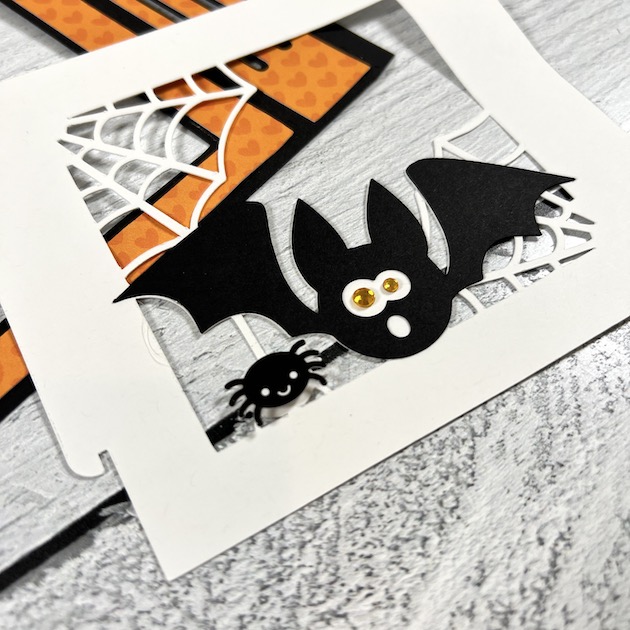
Next, I added the black bat pieces to the white card stock …

Halloween Shadowbox Bat Card Tutorial with spiderwebs, a spider, and hearts

I embellished the bat’s eyes with some sparkly gold gems. Then, I added a cute spider icon sticker (from Doodlebug’s Sweet & Spooky Collection) to the white spider space just below the bat’s wing.

Halloween Shadowbox Card Tutorial with bats, gems, and a spider

Once all of the pieces were adhered, I slipped the white page tabs into the base card slots and glued the black base on to create a box.

Halloween Shadowbox Card Tutorial with bats, spider, spider webs, and gems for eyes

I love how Lori’s box cards can stand alone to be displayed on a shelf, desk, or a counter AND … also fold flat for tucking into envelopes and mailing. So fun! 

Here’s the file I used called A2 Shadowbox Card Halloween Bats …


A2 Shadowbox Card Halloween Bats cutting file by Lori Whitlock


I hope you’ll give this fun cutting file a try. It’s simple to create and makes such a festive Halloween card. Thanks for stopping by and happy crafting!


Blog * Shop * Facebook * Instagram * Pinterest