Easter Banner Tutorial

Hello crafty friends. Today I want to share with you how I made this cute Easter banner using 6 Lori Whitlocks Files:
Layered Bunting 2 (SilhouetteSVG)
Easter Purse Topper (SilhouetteSVG)
Easter Sheep Car Box Card (SilhouetteSVG)
Easter Bunny Car Box Card (SilhouetteSVG)
5×7 Easter Bunny Card (SilhouetteSVG)
Easter Basket Chick Box Card (SilhouetteSVG)
I wanted my banner to have a pastel rustic feel. I chose some Doodlebug kraft gingham cardstock for my bunting base. Then some coordinating coloured papers to match.
To start my project I opened all the files in Silhouette that I wanted to use.  I deleted the parts I didn’t need then I copied them onto one page with the bunting.  You will see I have used the similar bunnies from the 5×7 Easter Bunny Card & Easter Bunny Car box card. I did this because the carrots in the box card are whole carrots once you ungroup everything. Also she has more of a body. I omitted her bow & used the floral head piece from the 5×7 card. You can just use the Bunny from the Easter Bunny Car box Card if you wish. I also took the extra step of using the egg from the topper to give the bunny a belly like the one in the 5×7 card. To do this I used the same step below by sizing it onto the bunny.
When you open the Bunting file it will have 3 bunting shapes across the page. I right clicked over all 3 & enlarged by dragging the corner just enough so that all 3 bunting pieces fit across my page. I then coppied all 3 & pasted another row. You can make yours bigger or smaller however you please. I did mine this way as it will give me the most bunting pieces, (6 in total per page), without too much scrap. I cut 9 bunting panels in total. Next I sized my images one by one. To do this I copied a bunting panel to the side of my page. I then placed my image piece inside & enlarged or reduced the size making sure it fit inside. Make sure you place the little panel across the top of the bunting as well as I did in my image below.  Do this step for all your pieces.
Now once you have all the sizes correctly cut out all your pieces & glue together all your image pieces.
Then just place everything onto the panels to see what order you want everything to sit. Once you are happy with it, it helps to take a photo so that you remember where to glue everything.
Now glue the panels onto the bunting base. You will notice that the body on the bunny is a little long. Before I stuck down the bunny I placed her onto the bunting with washi tape, then I turned the bunting over & traced the edge with pencil along the back of the bunny. I then cut along the pencil trace & proceeded to stick the bunny onto the front of the bunting.
 
I used foam squares to stick down my image pieces. This gives them a raised look.
Once you have all the bunting pieces ready the last step is to thread some twine & pastel pom poms through to finish the banner.
You can use as little or as many files as you wish. The possibilities are endless. I just love Lori’s files & couldn’t resist the temptation.
I hope I have given you some inspiration today to create an easter bunting banner!
For more inspiration, check out my Instagram!
Thanks for stopping by!
Hugs
Noelene 🙂

Bunny Banner Home Décor

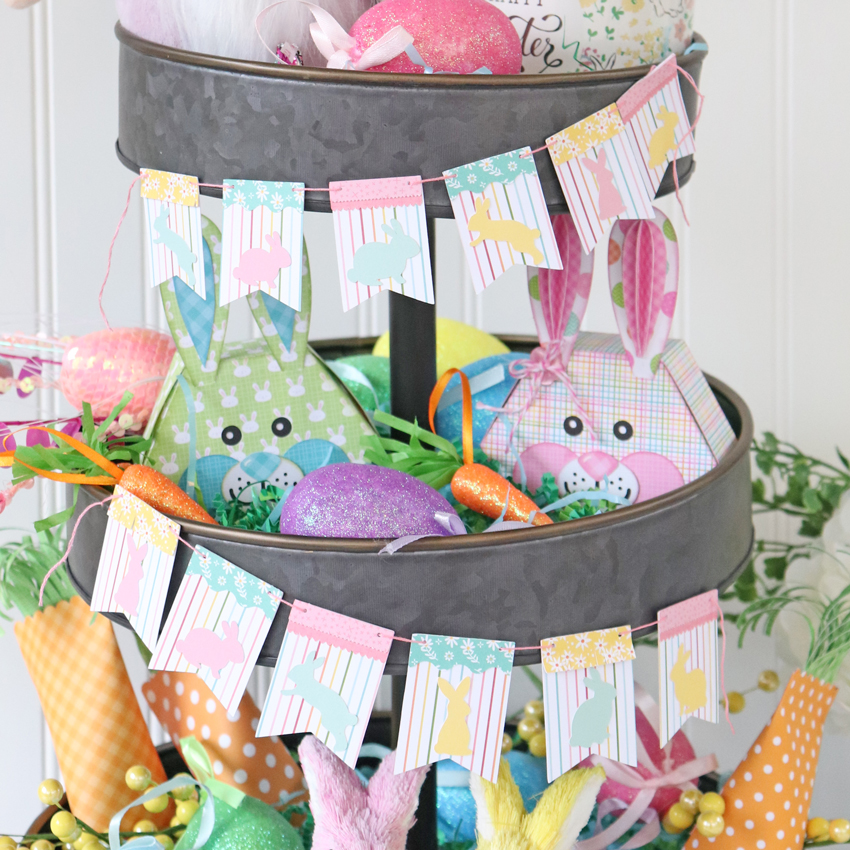
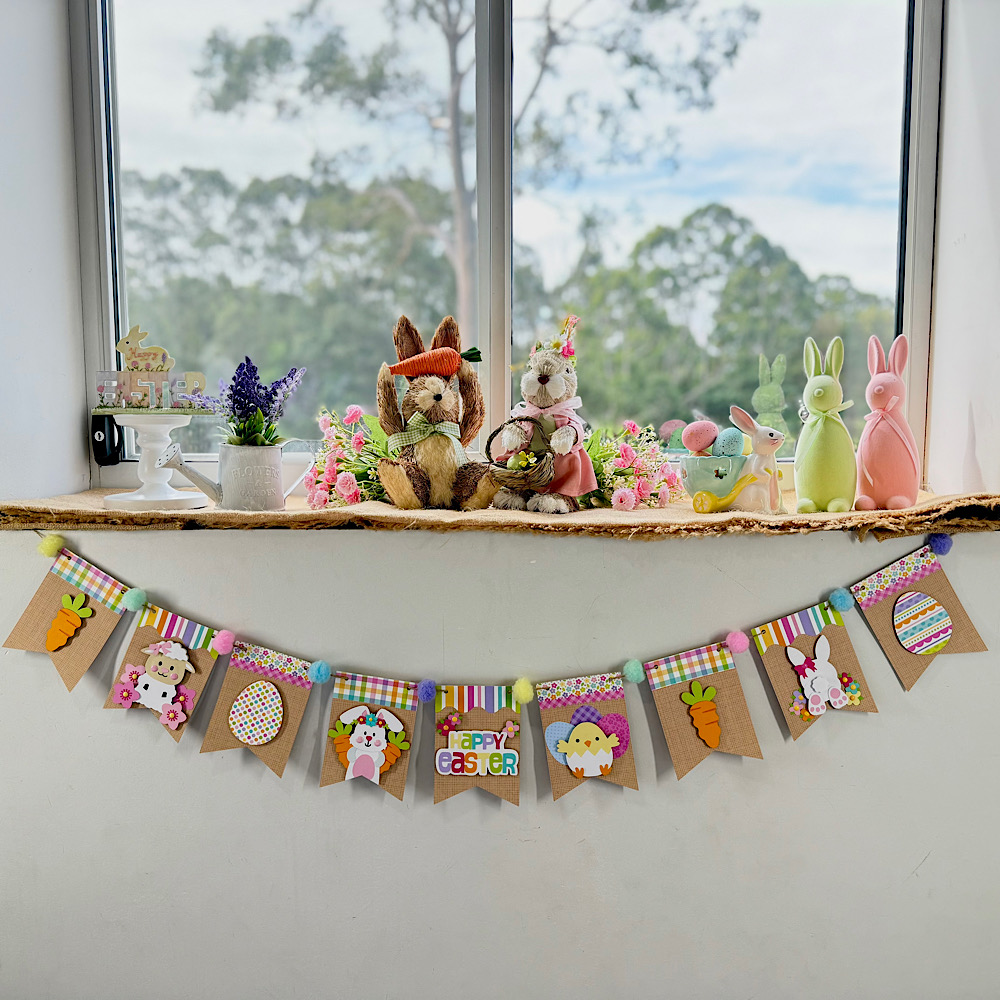
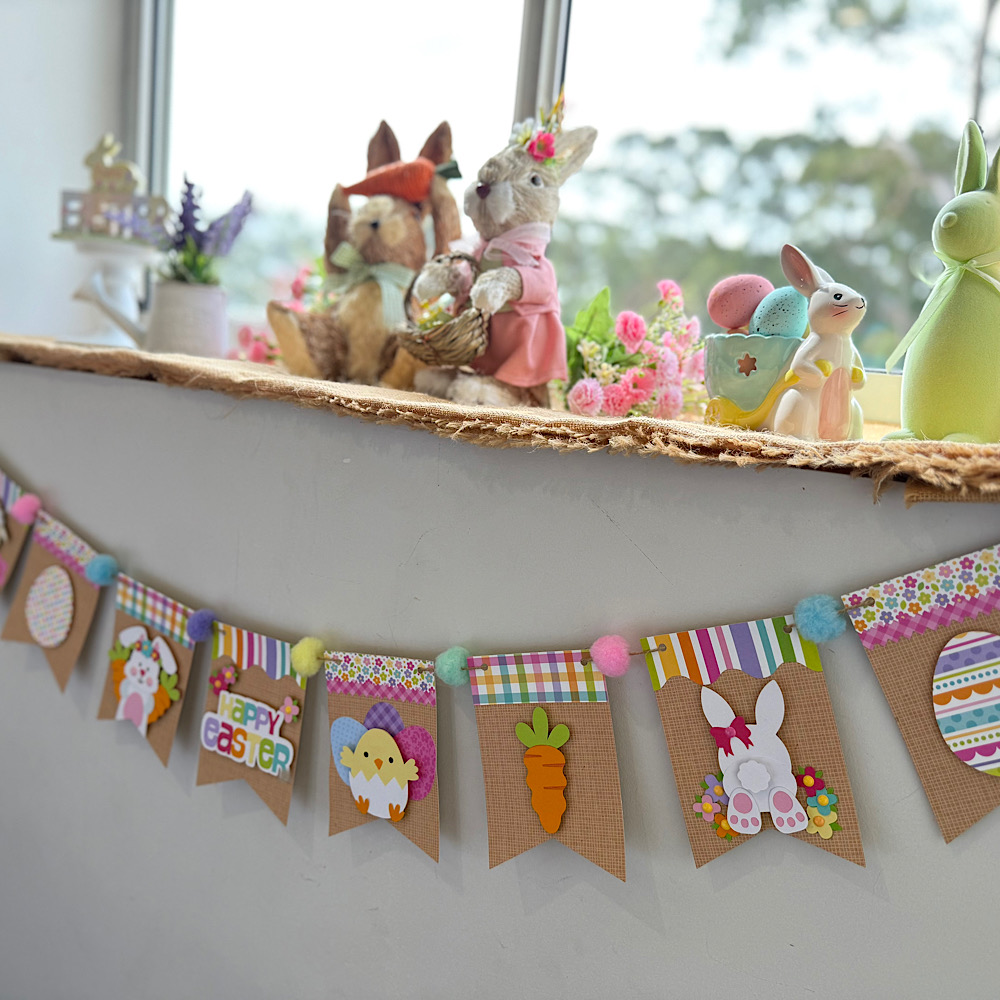
Hello crafty friends! Aimee here today. Easter is a little over a week away and I have been a busy little bee decorating my house with bunnies, Easter eggs, and springy flowers. After a long cold and dark Winter, I am ready for some light and refreshing pastel colors and happy little bunnies!

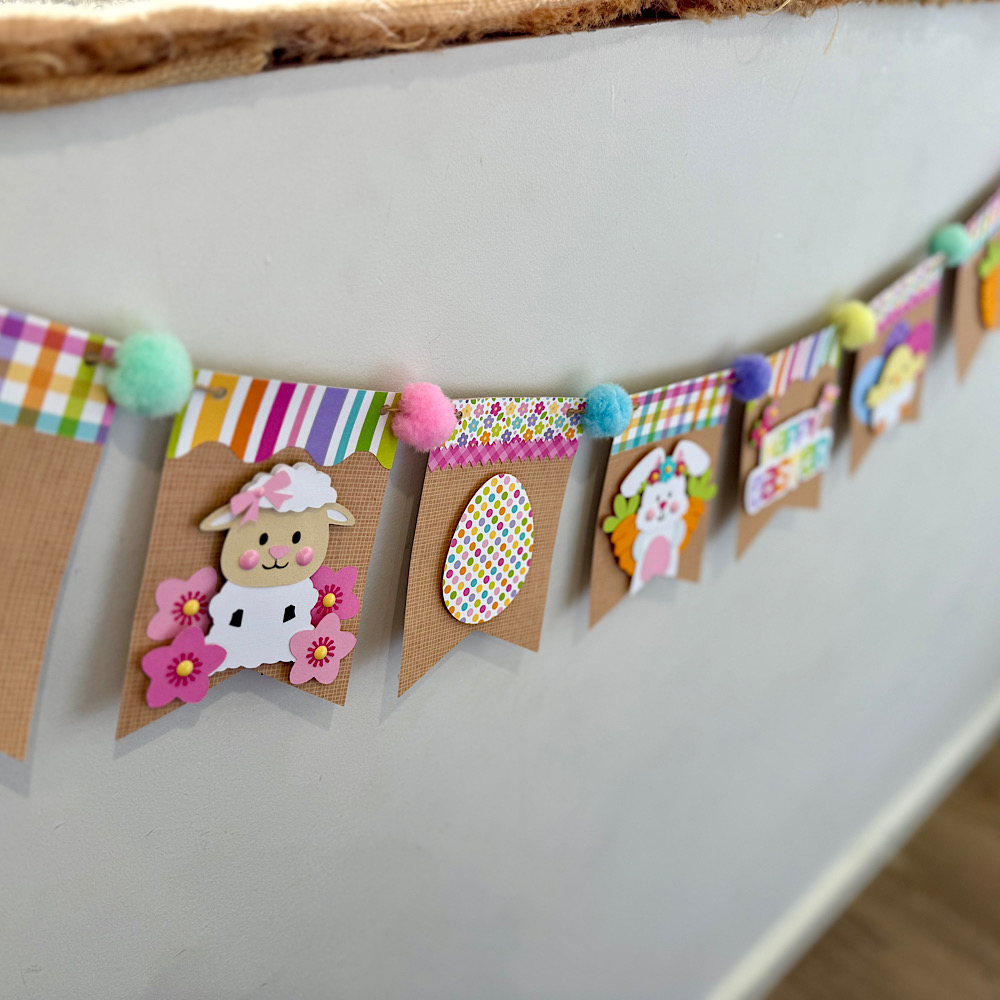
Today I wanted to share an idea of using some of Lori’s svg files to help you along with your Spring/Easter decorating. On my beautiful tiered tray set I have 4 different files. There are the adorable boy and girl Hexagon Easter Bunny Boxes (Lori’s Shop, Silhouette) and the Carrot Favor Boxes (Lori’s Shop, Silhouette) which I made a couple of years ago and held onto because they are just too stinking cute and I couldn’t give them away. But today I want to show you how I made the sweet little bunny banner that is draped on my tiered tray set. I made a quick little tutorial on how to create this banner using the Layered Bunting 2 (Lori’s Shop, Silhouette) and the Easter Bunny Set (Lori’s Shop, Silhouette). In this picture below you can see just how much paper projects can add to home decorations. And I am LOVING how adorable the banner turned out! If anyone is interested, I used Lori’s Echo Park Easter Wishes and All Girl collections for this project.

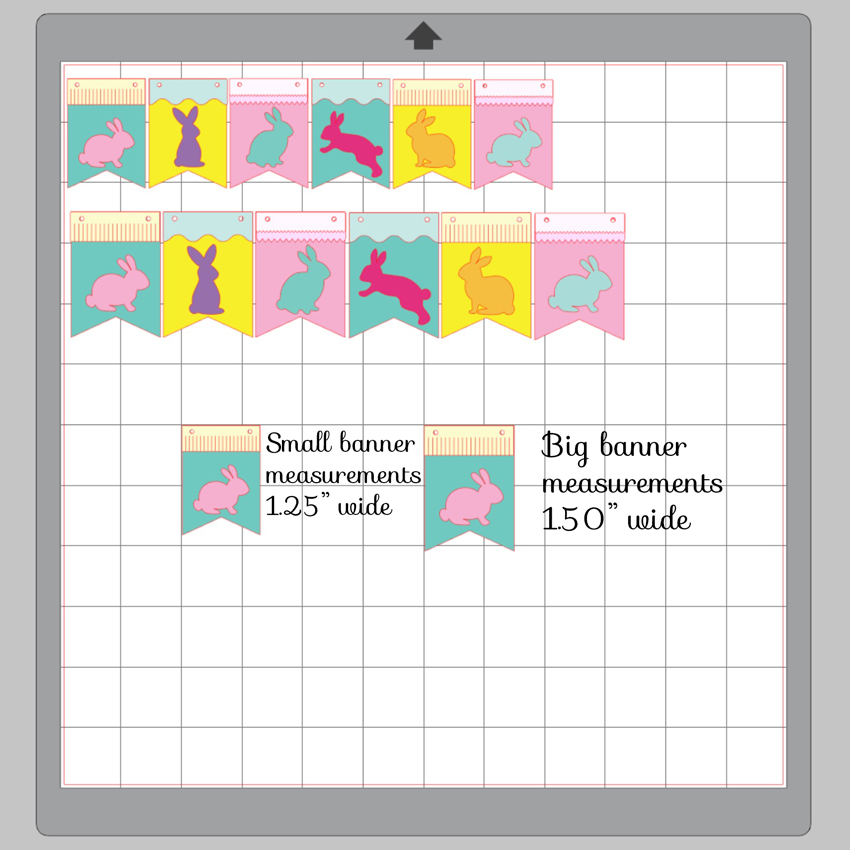
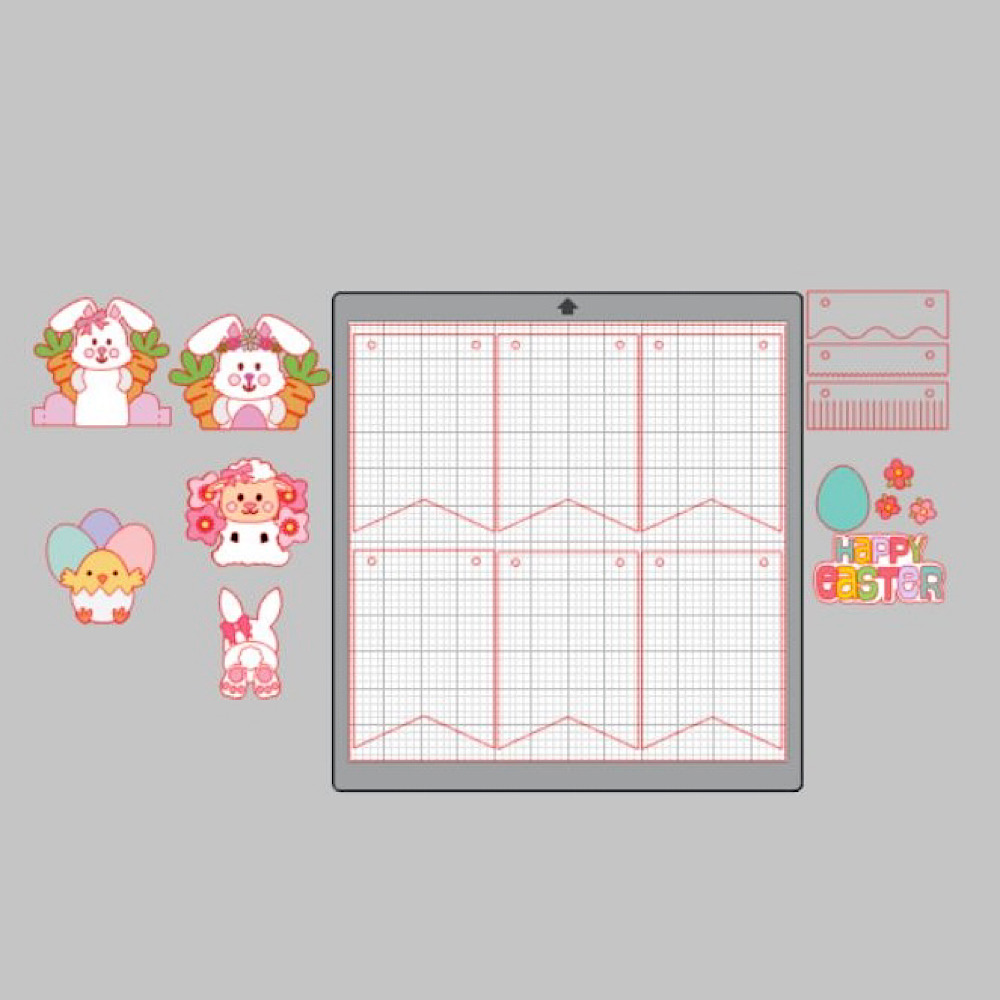
To get started, I pulled up both of the files to get an idea of how they would fit together. When you pull the banner pieces up you will see just an outline. I colored them in for my tutorial.

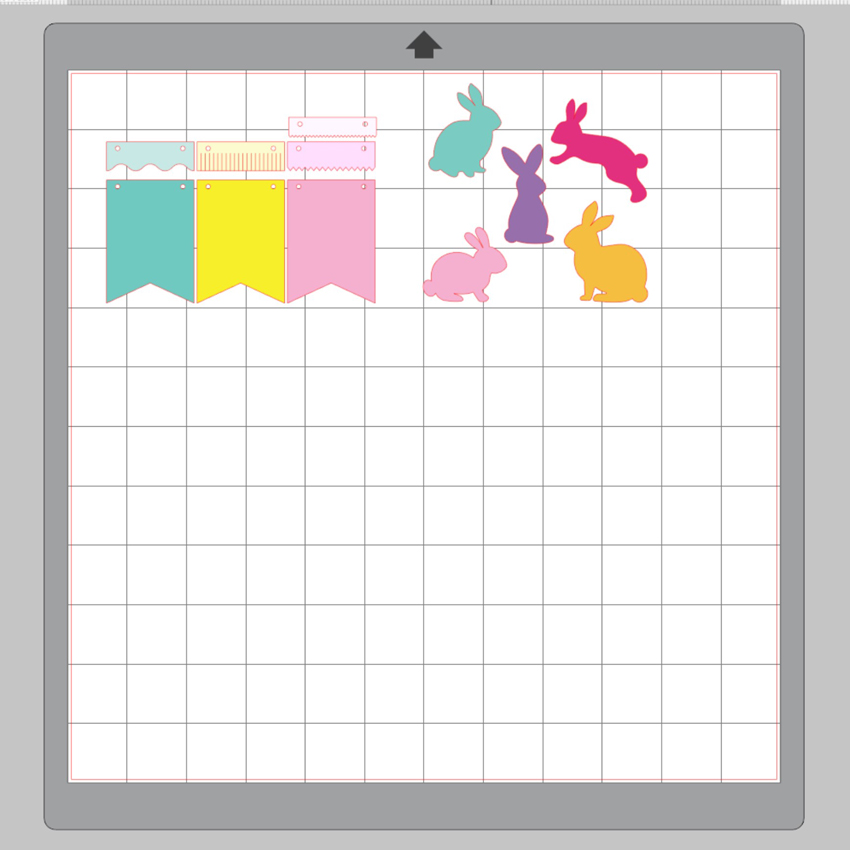
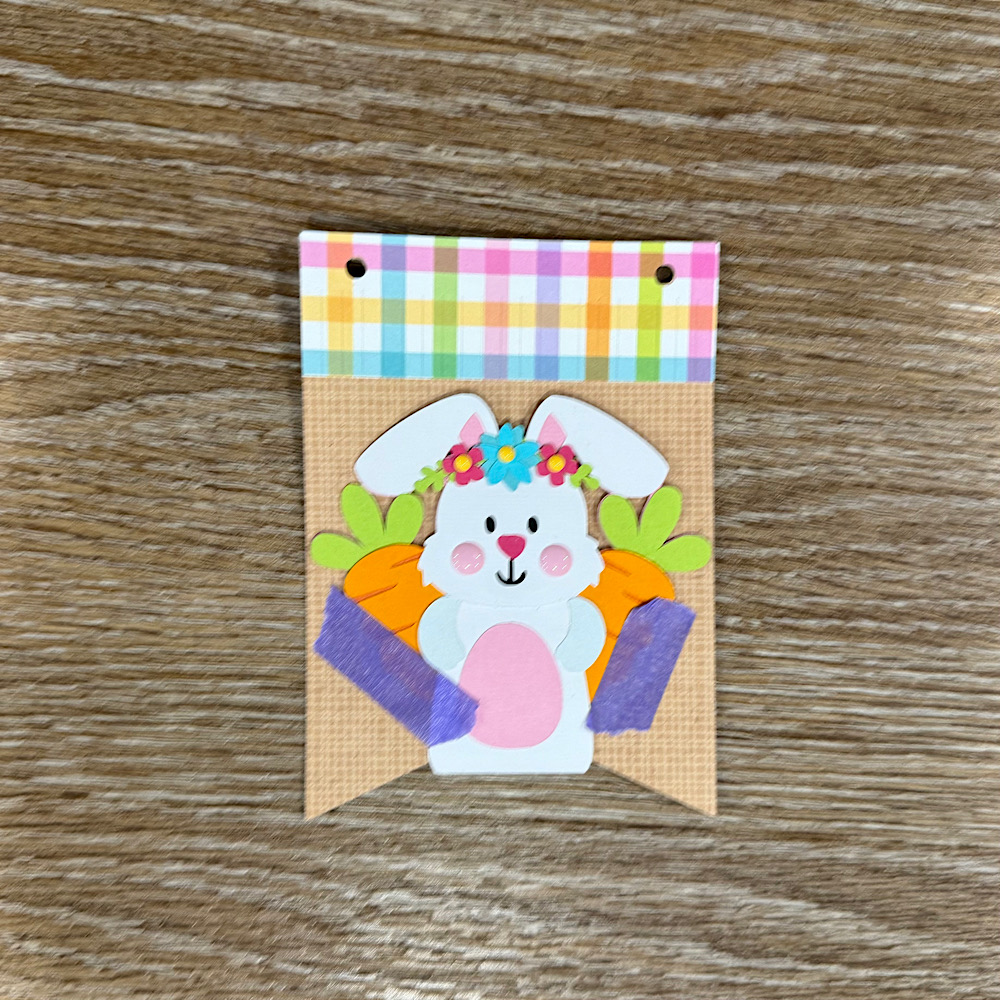
I knew I would need at least 6 banner pieces so I duplicated the banner pieces and added the bunnies to each to get an idea of what it would look like and what colors I wanted to use.

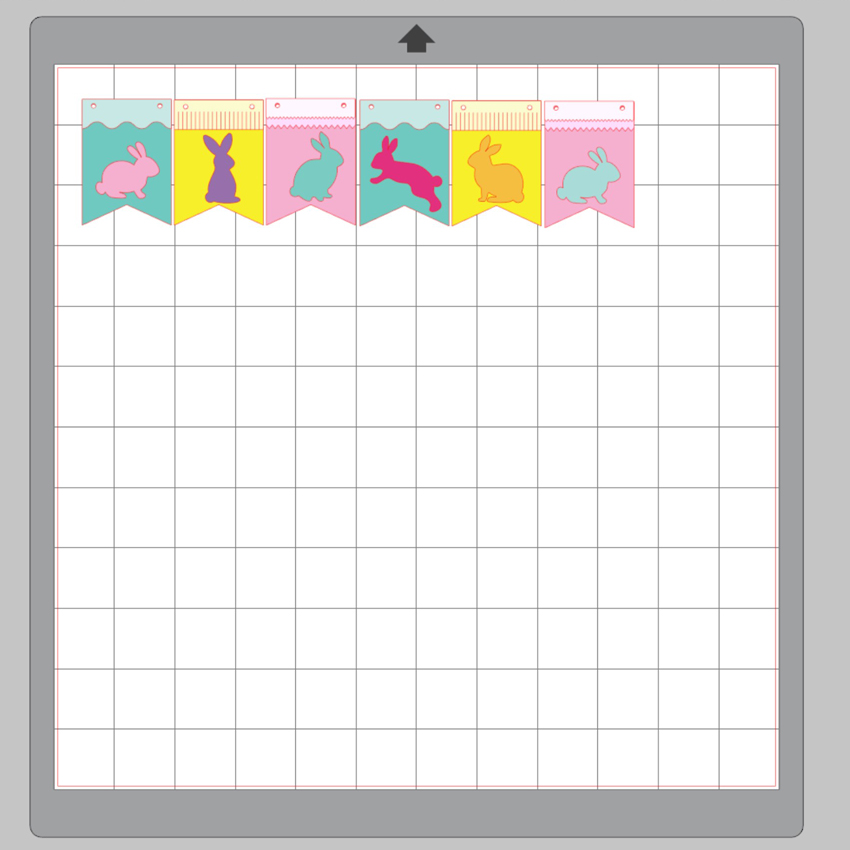
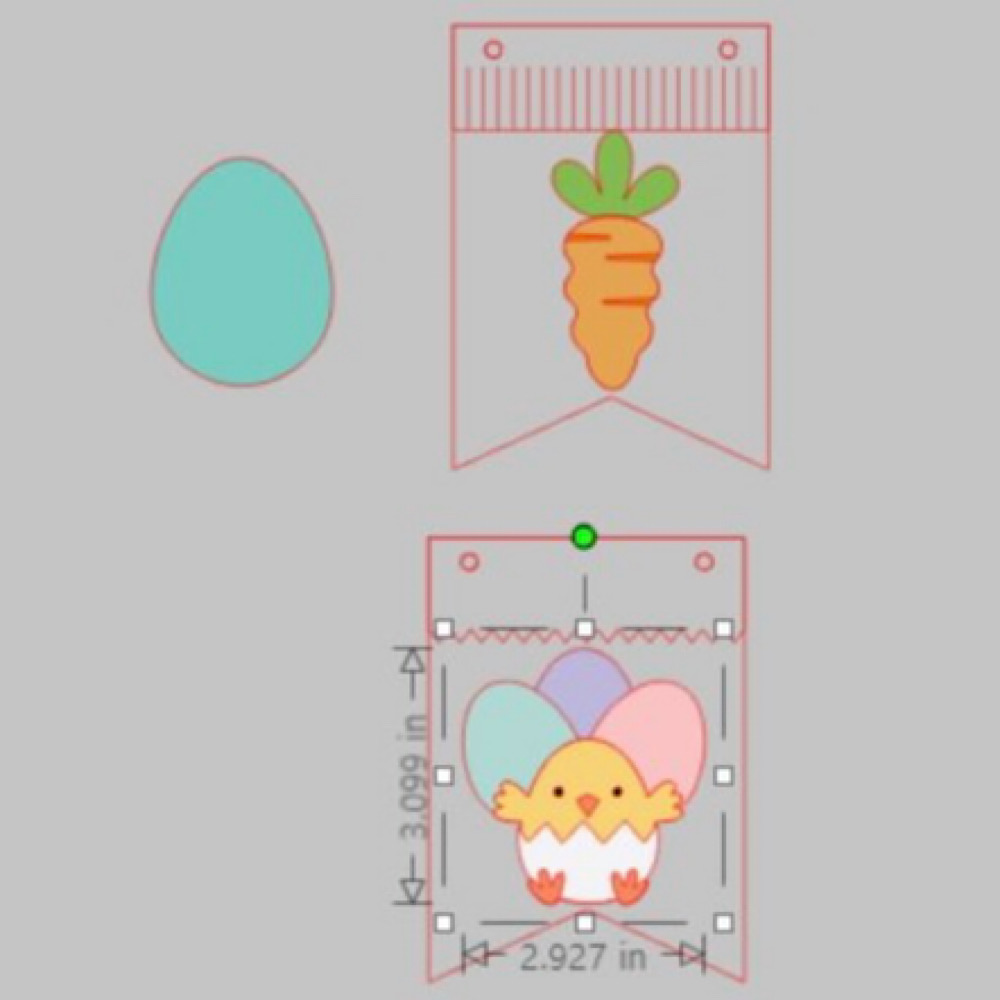
And also I needed 2 banners for the layers  of my tiered tray set but I wanted one of them to be bigger for the middle layer. So I duplicated the entire banner set and then resized it to make it bigger. As you can see in the picture, the small banner pieces measure 1.25″ wide and the big banner pieces measure 1.50″ wide. These can be resized to fit any project you may have.

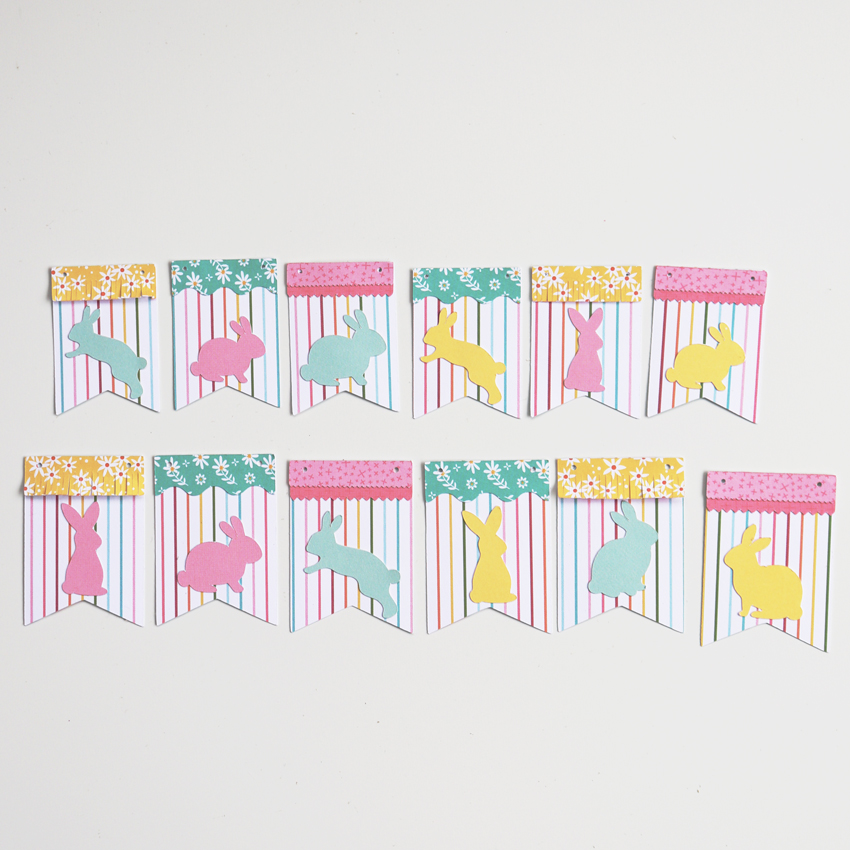
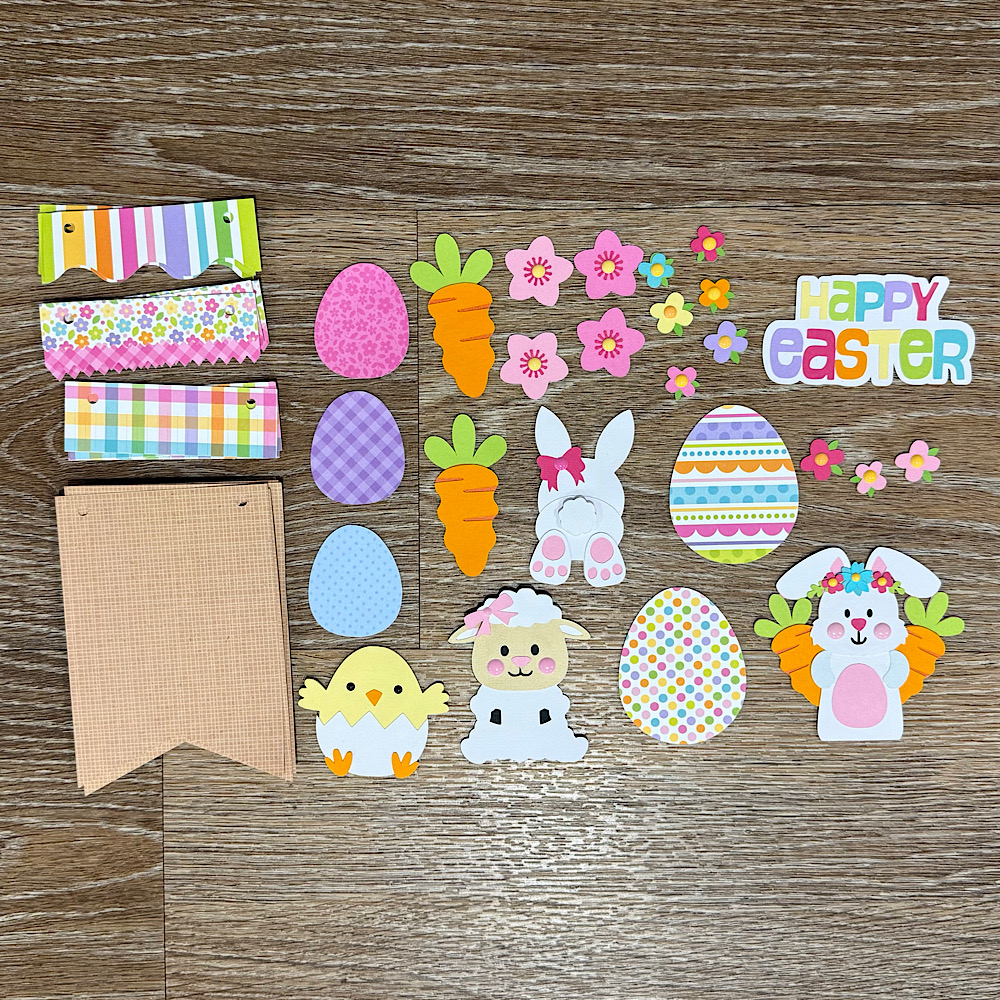
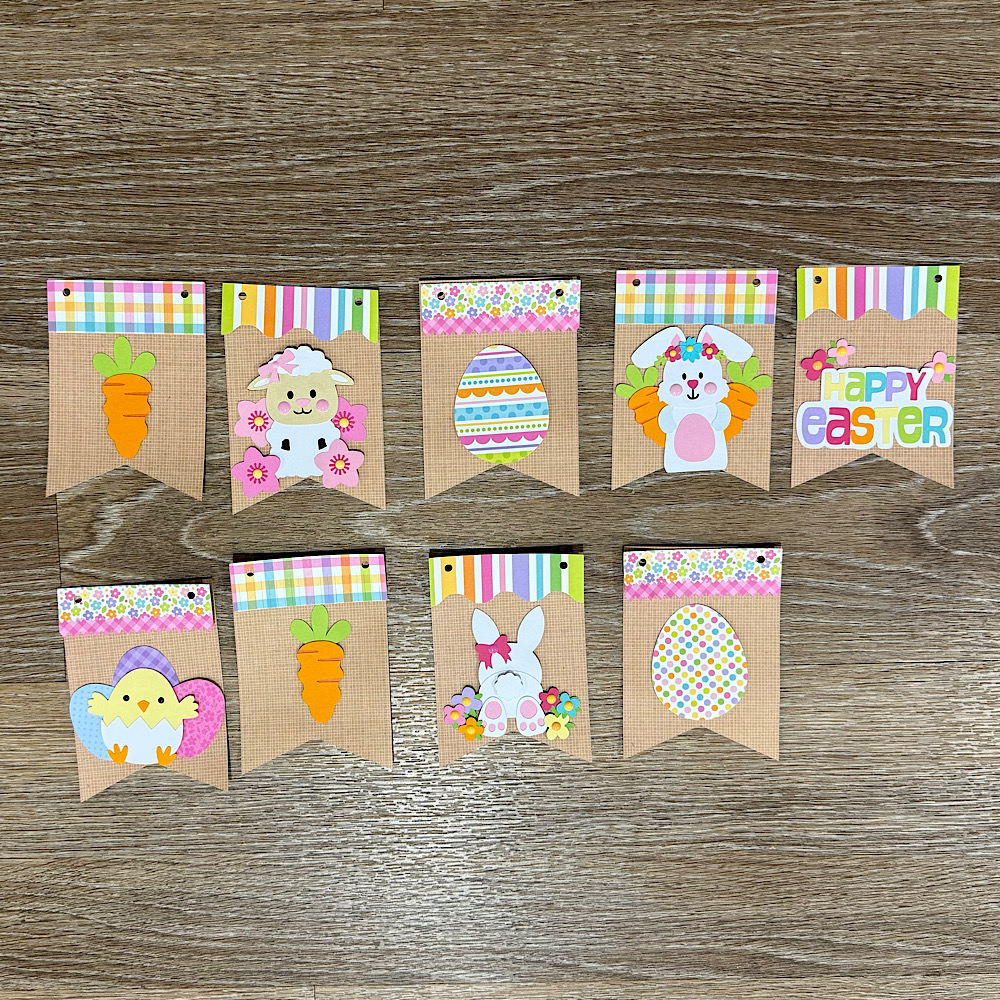
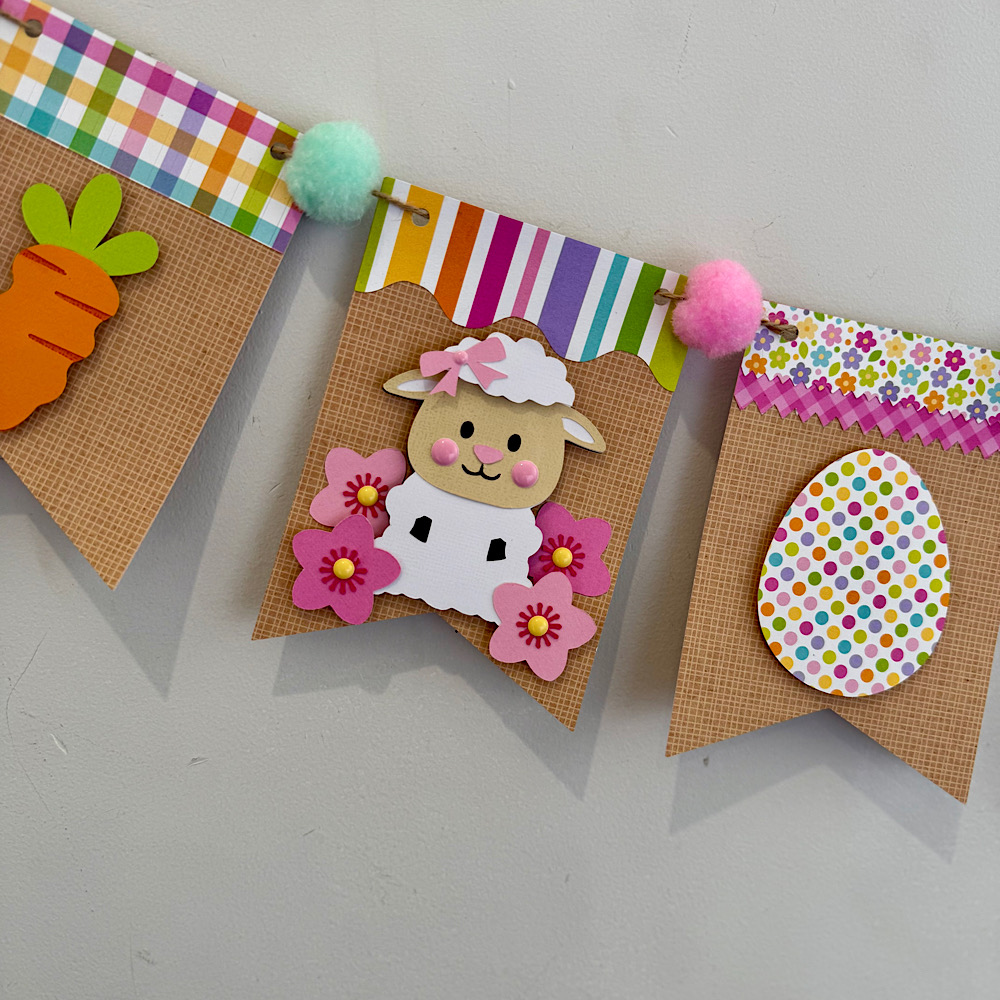
Here you can see all of the pieces cut out using different patterned papers. Now to start adhering all of these pieces together. A quick tip…glue the top of the banner pieces before the bunny rabbits! That way you’ll know where to place the bunny without over lapping the pieces.

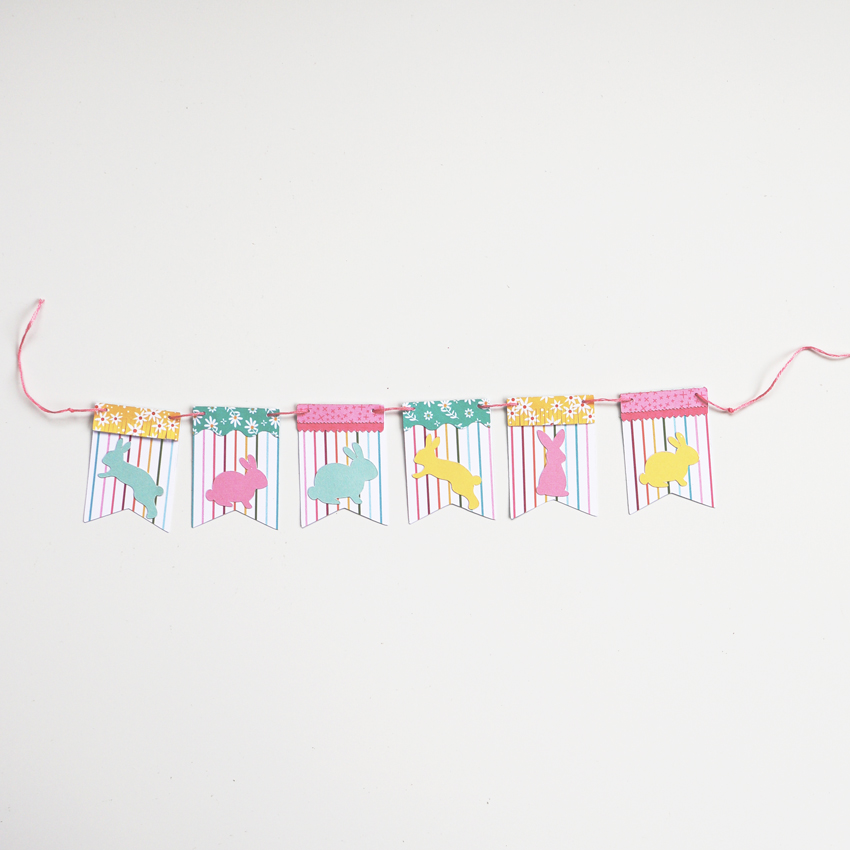
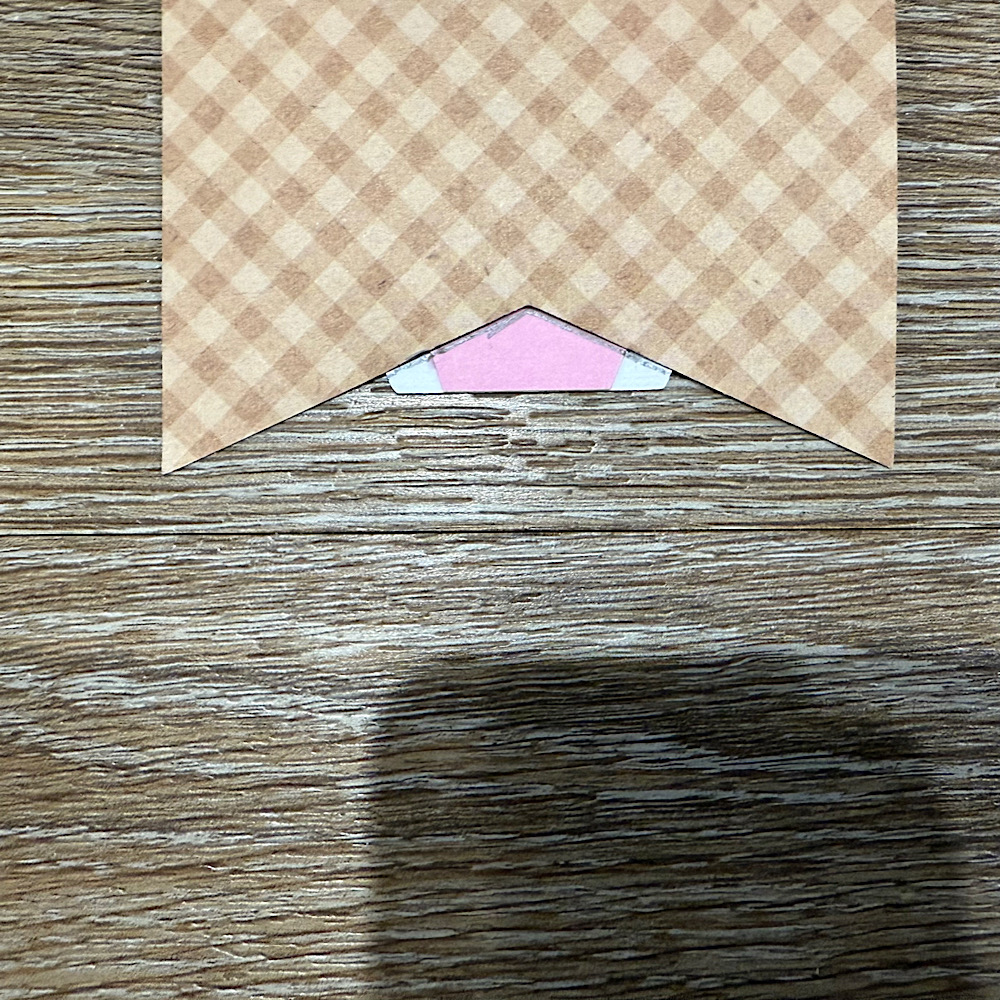
Now that all of the pieces are adhered together we can start stringing them together.

For this step, I used some pink floss and a needle. I wanted to use some twine but the holes in the banner pieces are so small it would not work. But I’m liking the pink floss and think it actually looks better and the needle made it quick and easy to assemble the banner.

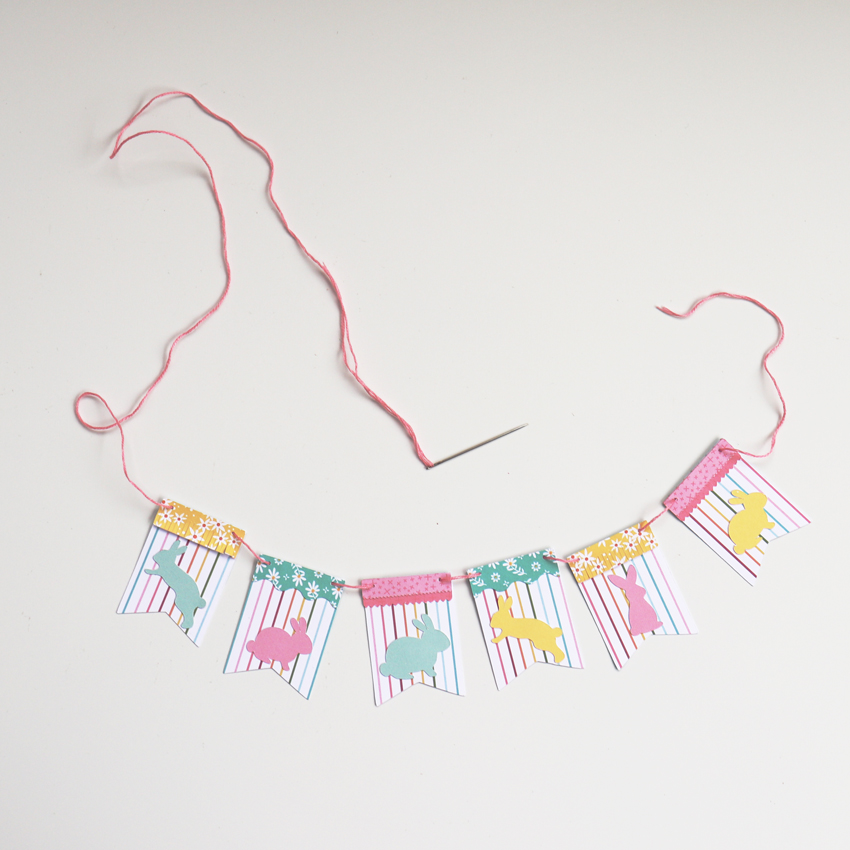
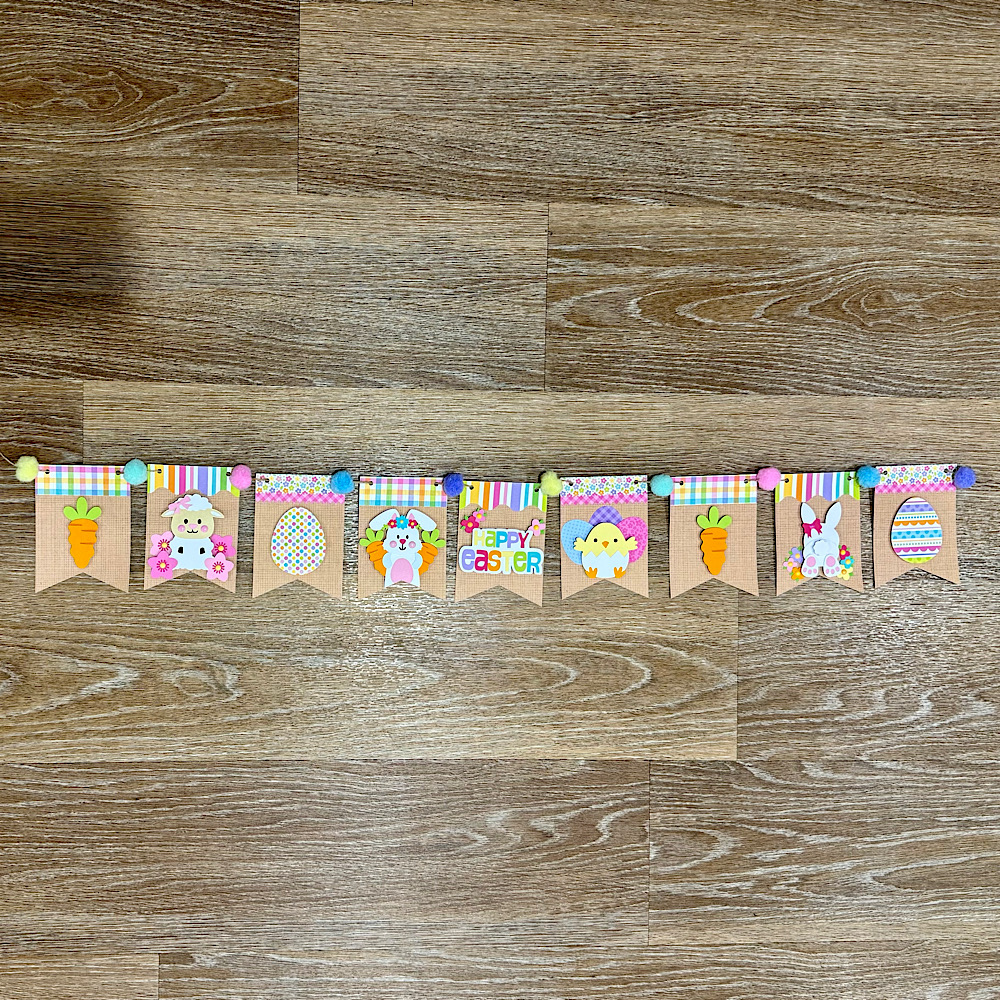
Once you have all of the banner pieces assembled, tie a small knot on each end to keep the pieces from sliding off.

To attach the banners to my tiered tray I used some very sticky tape runner to the tops of the banner pieces.  And now it’s ready to be set out for all to admire! I sent pictures to my sister and she gushed over it!

So that’s all from me today! I really hope everyone is happy and healthy and ready to brightened up their space with a beautiful and cheery bunny banner!

Happy Easter to all!

Aimee


Leprechaun Banner with Brandie

Hi there friends! Brandie here with a fun holiday banner. I enjoy making banners and my little guy gets a kick out of the cute characters and images of the season. This banner came together really quickly.
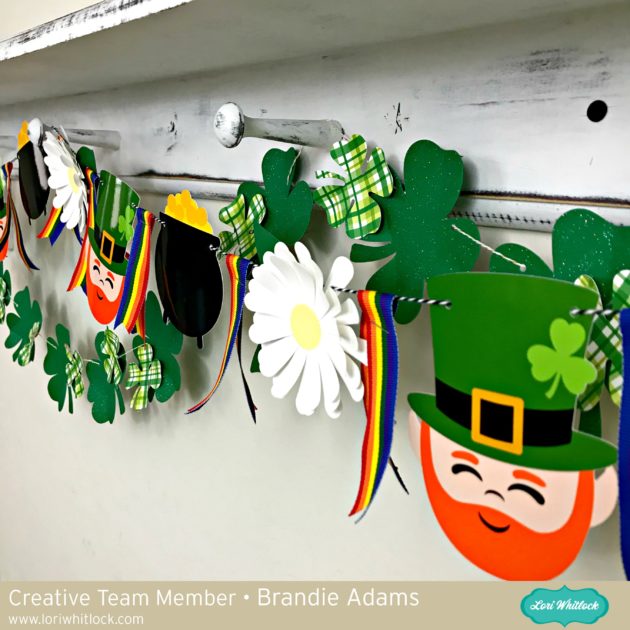
I used the Leprechaun Face (SVG, Silhouette), Pot of Gold (SVG, Silhouette), Shamrock cluster (SVG, Silhouette), and the 3D Flower 29 (SVG, Silhouette). For the leprechaun and pot of gold I converted the cut files to a print and cut on glossy photo paper. The shamrocks and flowers are cut from cardstock.

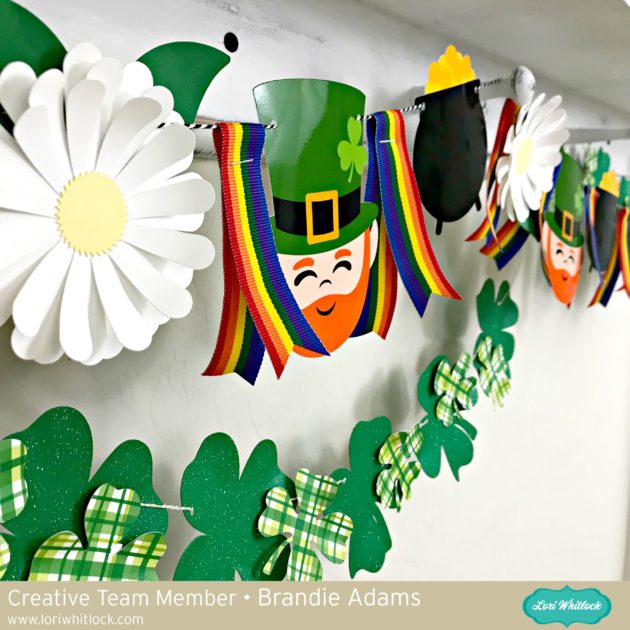
That’s it for me today. Thanks for stopping by.

Brandie

Reindeer Banner by Brandie

Hi there friends! Brandie here with a cute reindeer banner for Christmas. I used the Reindeer Shaped Card 2 (SVG, Silhouette) and the snowflakes can be found here.

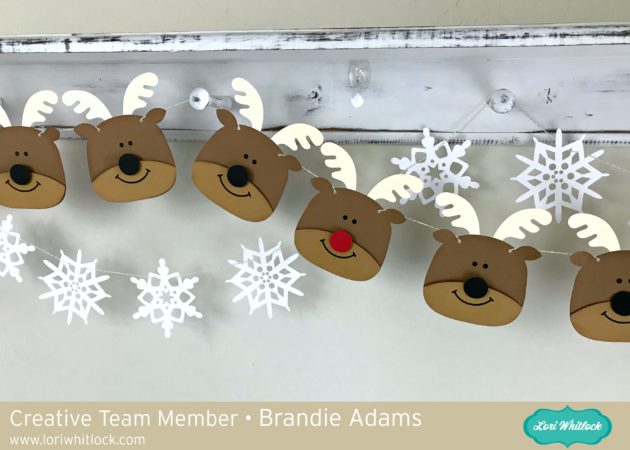
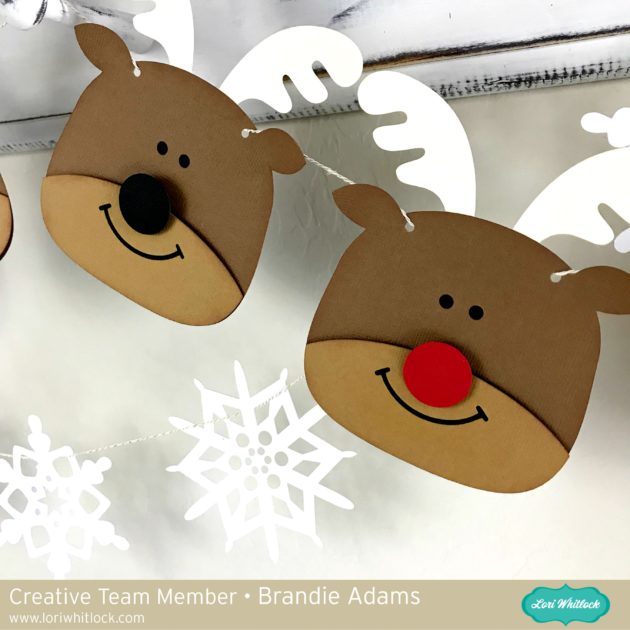
My little guy was so excited when I hung the banner he kept asking me to tell him the reindeer names.

So do you decorate for Christmas before or after Thanksgiving? I have slowly been adding the Christmas décor this week. I love this time of year!  Thanks for stopping by today and enjoy the holidays!

Brandie

Instax Photo Banner Using Build A Banner Dingbats Font with Kathy

Hi Everyone!  Today I have a tutorial showing you how to create a fun banner using the Build a Banner Dingbats Font (Lori Whitlock SVG Shop, Silhouette)  My daughter is headed off to study in Scotland for her Junior year and I wanted to make her a little something to decorate her room, that wouldn’t take up too much suitcase space!  I thought a banner with some of her favorite photos would be fun.  She loves her Instax camera so I made the banner to hold some of these cute instant photos!

If you’re not familiar with Dingbat Fonts, they are fonts that have pictures and shapes in place of the letters.  Lori has a lot of them in her shop, and they really can be used for almost anything including vinyl, HTV and cutting projects like mine.  If you look at the picture below, I’ve typed out A through Z using the Build a Banner Dingbats Font and the Text tool.

To create my banner I started by choosing 3 of the banner pieces (A, X and U)  I resized each piece to be 5″H x 3.25″W so that each piece would be large enough to hold a picture.

I wanted to make the banner so that my daughter could swap out the pictures if she wanted, so I set out to add small cut lines on the banner pieces to hold just the corners of the picture.  To do this I needed first to know the size of the pictures being used.  Instax pictures are approximately 3.39″H x 2.13″W so I created a rectangle that size using the shape tool.

I placed the rectangle on one of the banner pieces and centered it using the Transform tool.

I drew a line 0.5″ long and then moved it to one corner of the picture.  Using the green dot, I slanted the line so that it covered one of the corners.

Next, I copied the small line, clicked on the copy, right mouse clicked and selected flip horizontally.  This gave me a line to add to the opposite corner.   I made sure the two lines were properly aligned by using the transform tool.  Once I was happy with the placement, I selected both lines and grouped them.

To create the bottom lines, I made a copy of the grouped top lines, right mouse clicked on the copy and selected flip vertically.  I positioned those lines along the bottom of the rectangle.

Again I made sure that all the lines were aligned correctly within the banner piece using the transform tool.

Once they were all in place, I removed the rectangle, and grouped the slot lines along with the banner piece to make them one.

I copied the lines before grouping and added them to the other banner pieces, centering them using the transform tool.

Once they were all ready, I sent them to cut!  I added the pictures to the cut pieces, and decorated them using some Rosettes from the Build a Rosette Set 1.5″ (SVG, Silhouette) and Build a Rosette Set 2″(SVG, Silhouette).  I strung all of the banner pieces together on a piece of twine, holding them in place with small clothespins.  Some quick hints: 1)  Hot Glue is your friend when making rosettes, and 2) before threading the pieces on the twine, add a little glue to the ends of the twine and let them dry.  This will prevent fraying.

That’s it for me today, thanks for stopping by to peek!


*BLOG * INSTAGRAM *