Christmas Recipe Card Box

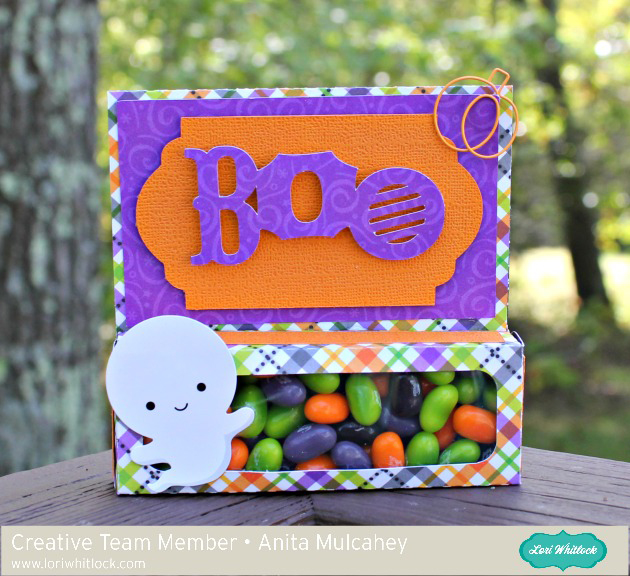
Anita here with a fun Christmas recipe card box which I made using several different files from Lori’s store. It is called 4X6 recipe box and you can find it here in Lori’s store and here in the Silhouette store. I hosted a cookie swap last weekend a made one of these boxes for each of the lovely ladies who participated in the swap. The box is so easy to assemble and you can decorate it any way you want.

These are the pieces that you are going to need for the box top. Lori labels her pieces to let you know which piece is for the inner lid and box to cover up your paper seams. I left the note on my piece when I loaded it onto to my cutting mat and then after it was cut I marked  the back side with a pencil which piece was the inner piece. It makes things so much easier.

To start, glue together the sides of the lid so they form a box shape.

Fold down the top tabs inside and glue.  Next,  glue the side and top flaps down.

Glue lid liner into cover.

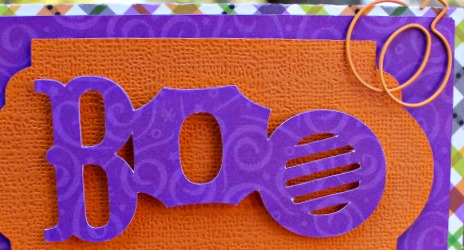
Glue top on the lid.  You are now ready to put the decorative pieces on your box.

These are the pieces for the box.

Glue the sides of the Main box together.

Glue bottom piece onto box.  (You can see my note that I wrote on the piece before I took it off my mat.)

Add bottom liner to main box and you are ready to decorate your box.


The cut file for the box comes with the divider set as well. I also used a print and cut label called Merry Christmas Print and Cut Phrase which you can find here in Lori’s store and here in the Silhouette store. I also used a print and cut recipe card for my cookie swap. I used my Xyron to run the pieces through to decorate the box. You can see my label above that is still on the Xyron backing paper.

Here is the box open with the dividers in it. Such a sweet and fun holiday gift. My ladies were so excited by their boxes and you can make one up quickly too. Happy Holidays to everyone. I made Mocha Dot cookies which everyone seemed to love. If you want the recipe, let me know.
Hugs,

Anita
//

Christmas Tags Gift Set with Anita

Hi!  Anita here with a fun holiday gift idea.  I am hosting a cookie swap and like to have some door prizes for attendees so decided to make this gift box and fill it with lots of fun tags designed by Lori Whitlock.  I used Lori’s new line from Echo Park called I love Christmas.  I love everything about this adorable line.

These tags are print and cut files I’ve listed the filenames below.

Season’s Greetings Print and Cut  (they are sold as a set) in Lori’s Store and in Silhouette Store

Christmas Tags Print and Cut In Lori’s Store, and individually in Silhouette:   Merry Christmas Happy New Year Wreath , Ho Ho Ho Merry Christmas , Merry Christmas

Tree Tag in Lori’s Shop and in Silhouette Store

Folded Christmas Tree Tag in Lori’s Shop and in Silhouette Store

Snowflake Tag in Lori’s Shop and in Silhouette Store

Winter Tree Robin Tag in Lori’s Shop and in Silhouette Store

Christmas Gift Tags in Lori’s Shop and in Silhouette Store

Christmas Gift Tags Folded in Silhouette Store

Five Christmas Tags in Silhouette Store  I used some of the cut outs from other tags to decorate some of these tags.

Christmas Tags in Silhouette Store

Box full of the lovely tags.  It is called A2 Stationery Organizer with Drawer and you can find it here in Lori’s Store and here in the Silhouette Store.

That’s it for me today.  Hope that you will have a great Thanksgiving if you celebrate it and a festive holiday season.

Hugs,

Anita

Car Monogram Tutorial with Anita

Hi!  Anita here with a tutorial to make your own car window monogram. This is for my daughter’s car and she loves anything that is monogrammed.  I previously purchased one and it came off in the car wash.    I used Lori’s Monogram Set A-Z which is a lovely file set with so many different options for your personalization needs.  You can find this file here in Lori’s store and they are sold as individual letters in the Silhouette store.  Here is the M, here is the C and the L.

There are a few supplies that you will need for your project.  You will need some kind of vinyl and transfer tape.   I chose some glitter vinyl from Cricut.  You will also need a brayer, a craft stick or scraper and a weeding tool, or pick.

Open all three files on your mat, they will likely overlap but you can move them around.

Ungroup your monogram files one set at a time.  Move the three initial groups that you want to use onto your mat.

Ungroup the desired monogram files from the remaining files and leave them on your mat.  I am using  CLM.

I  decided that I wanted to use a round monogram so I kept that file on my mat.  The other files were off to the left and messy so you can highlight them all and delete them.

I made the circle and monogram large so that I could get the placement that I wanted within the circle.  I  measured the space on her rear window which would allow for the monogram to be positioned so that the rear wiper would not touch it when in use.

I resized it to fit her window.

When you put the vinyl on your mat,  you want to use a brayer or a pizza roller to make sure that the vinyl is stuck to the mat well and will not move.

Next, select the vinyl setting for cutting on your machine and adjust your blade.  This is very important because you want it to make what is called a kiss cut which is essentially to cut through the vinyl but not the backing.  This will make more sense as we move forward.

Once your design is cut, you need to weed out the pieces of vinyl that you do not want to have in your final design.

After weeding,  cut the backing with your design on it so that you have at least 1/2″ clearance on all sides.  Cut a piece of the transfer tape to the same size or slightly bigger dimension than your design piece.  Remove the liner from the transfer tape piece and gently place it over your cut image.   Use a scraper to burnish the transfer tape onto the vinyl.

Now you might be wondering why my sample above is pink and my actual monogram that I put on the window is silver. Well, things don’t always work out and you might have to start again.  I worked hard at trying to burnish the pink monogram and just believe that the vinyl was old and the design was a bit intricate so it just did not work.  I moved on to plan B and it worked like a charm.

Peel the backing paper from the design,  leaving the transfer tape, with your design, sticky and exposed.  Be sure to clean the window first and then put the transfer tape with the vinyl images onto the window.  Use your scraper to make sure that it is burnished to the window.

Pull back a tiny piece of the transfer tape to make sure that the letters are sticking.  When you know they set, pull the whole piece of tape off at a 45 degree angle, slowly and carefully.  I’m so happy with this design!  I’m sure my daughter will love it!

Happy monograming.  You can monogram so many things, from clothing, to home goods, to a car window.  Lori has so many adorable files that would look so awesome in vinyl on a surface of your choice.

Hugs,

Anita


Boo Jelly Bean Box with Anita

Happy Monday fellow Lori Whitlock fans.  Anita here and I made Lori’s Halloween Candy Card which you can find here in her store silhouette and here in the Silhouette store.  I cut a piece of acetate to cover the center hole to keep my festive jelly beans in.  You could put so many different treats in here including fun sized candy bars.

Thanks for looking and have a great day.


Lip Balm Pumpkin Tutorial with Anita

Anita here with a fun tutorial to combine two cut files to make a lip balm pumpkin.  I came across this orange EOS lip balm when shopping recently and wanted to make a fall holder for it.  I used Lori Whitlock’s Flourish Pumpkin cut file which you can find here in the Silhouette Store and here in the Lori Whitlock store.  I also used the Lip Balm Monsters Cut file which you can buy in the Silhouette Store  and in Lori’s store and adapted it to make it work with my orange EOS.  How did I do this?  Well let me tell you just how easy it is.  I also used one of Lori’s new Echo Park collections called I Love Family.

You are going to want to open the Flourish Pumpkin cut file and put it on your mat.

You then want to ungroup the pumpkin so that you can move the parts around.  Move the stem off your mat for now.

Add the monster cut file to the same mat.

Now you are going to want to make sure the monster cut files are selected and then you want to ungroup them.

Once you have ungrouped the files you should move all but the orange or green body piece off of the mat.  I chose to use the orange, but you can use either for our purposes.  Next you will select the body from the monster and release compound path.  This will allow you to have the center circle be a separate piece from the body of the monster so that you can move it over onto the pumpkin.

Before you move the circle you want to remove color from the circle.  Click on fill color and select the cross hatch design I have highlighted as that will remove the color.  Move the circle from the center of the monster body to the center of the pumpkin.  Cut your file and you will have a beautifully sized circle ready for any EOS lip balm.

I took some twine and curled it around a round tool after wetting it with some Stiffy, fabric stiffener and added that as an accent.

Lastly, open your EOS lip balm and carefully place the pumpkin center over the lip balm.  I find that if you line up the indentation on the lip balm in the front of your design and hold it in place then it will come out perfectly lined up when you screw the cap on.  This is a great little gift and you can make these out of any of your favorite cut files following these simple instructions.

Hugs, Anita