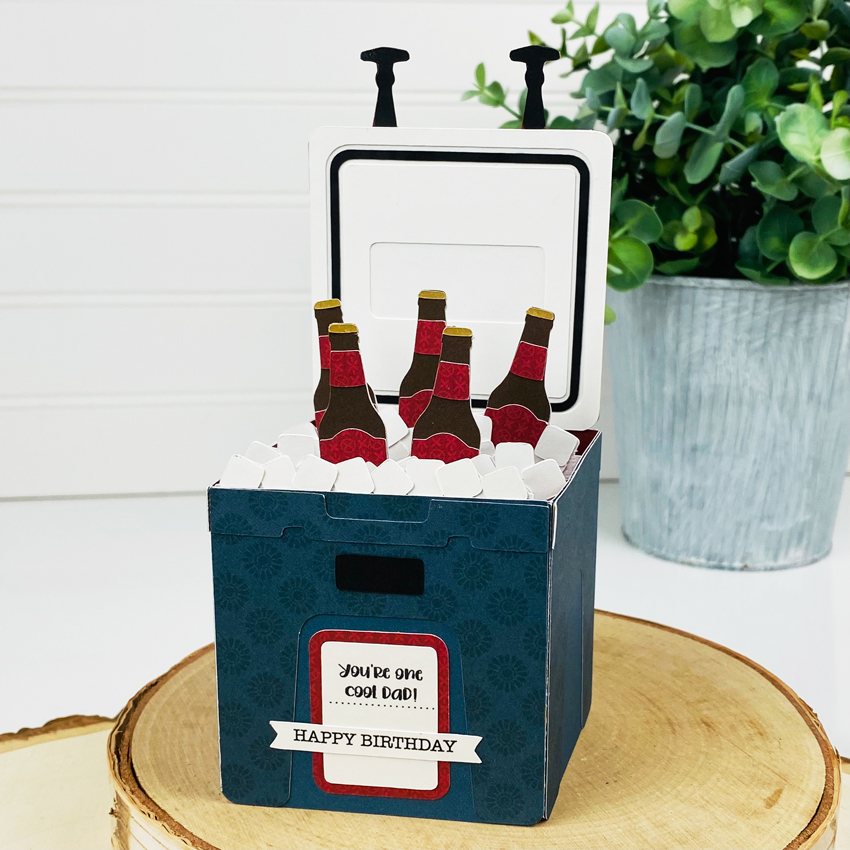
You’re One Cool Dad Happy Birthday

Hello crafty friends! Today I have a very cool card card to share with you! This is the Cooler With Drinks (Lori’s SVG Shop, Silhouette) card that folds flat for easy mailing. It was part of the Father’s Day card set but Dad may just deserve a beer on his birthday too!

I love the sentiment on this one but wanted to make this a birthday card for my hubby. I highlighted and deleted the “Happy Father’s Day” part of it and left it blank. Then I made a print and cut of the sentiment along with a Happy Birthday banner from one of the Box Card Envelope files.

Then I adhered the happy birthday banner over the blank space of the cooler sentiment piece. It turned out amazing and he loved it! Always think outside the box to see how you can manipulate a file or add to a file to turn it into what you need.

Thanks for stopping by today!

Aimee

July 4th Block Flag

Hello crafty friends! Looking for a quick and fun way to decorate your home with some July 4th décor? I am so excited to share this project because it looks so stinking cute on my foyer table with some other Independence Day items!

This is the 4th Of July Block Flag (Lori’s SVG shop, Silhouette). Measuring at 4 1/2″ x 4 1/2″, it is the perfect size to decorate with. Although this file could be resized to be larger or smaller to fit your need.

I used the America collection from Echo Park Paper for the papers which turned out perfect. For the star, I used the size provided in the file and then added another smaller sized which is layered using pop dots. Then I added a twine bow to the star, a button, some ribbon, one of the banners that I found in the 6×6 paper pad and voila!! Cuteness! I love this piece!!

That’s all from me today! Hope you all enjoy this look at the 4th of July Block Flag!

Aimee

Father’s Day Gift Set

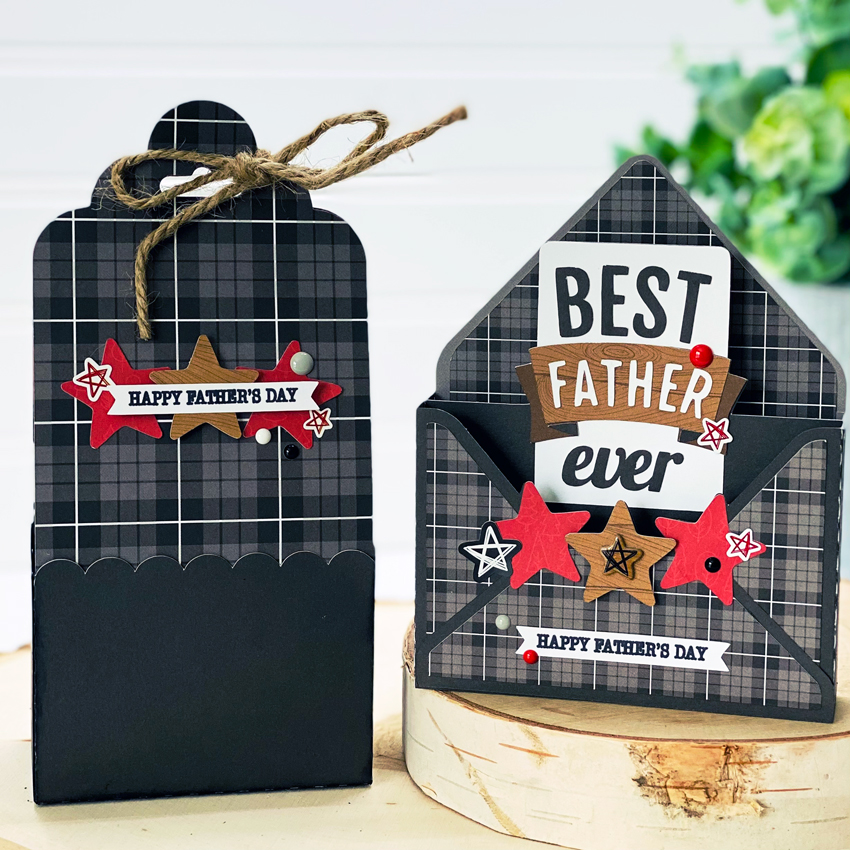
Hello crafty friends! We’ve already celebrated Mother’s Day and now it’s almost time to celebrate Dad! Aimee here with you and my tip for the day is take a minute to look at the svg files you have and see which ones can be matched up. And I also have a small tutorial on putting this adorable new box together for you.

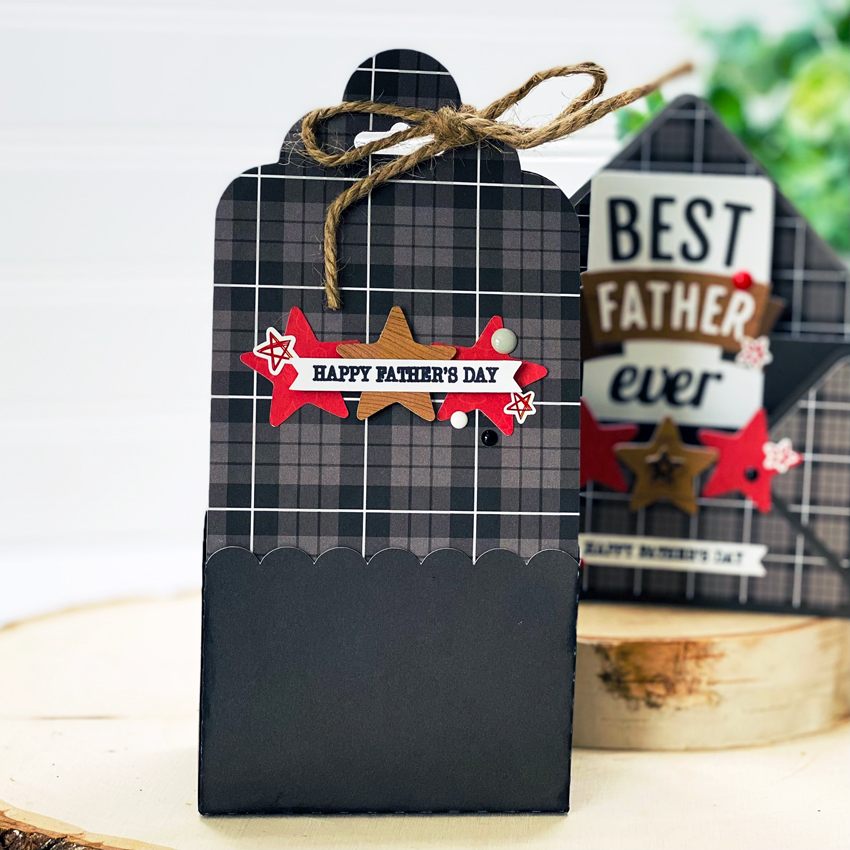
For my Father’s Day Gift set, I’ve used the Box Card Envelope Father’s Day (Lori’s SVG Shop, Silhouette) and Tag Wrap Gift Box (Lori’s SVG Shop, Silhouette). Instead of using the flower that came with the box file I decided I wanted to cut out some additional stars that came with the Father’s Day card file and make a small collage on the box so the two would match. I also used some fabulous papers and stickers from the Little Lumber Jack collection.

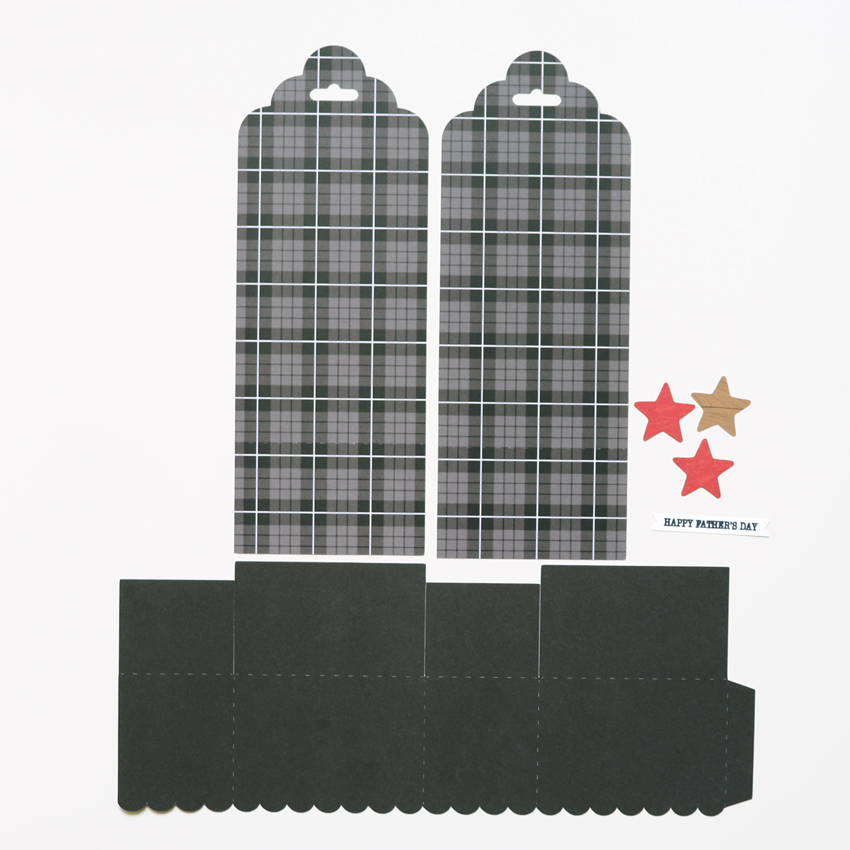
The assembly for the Tag Wrap Gift Box is very simple! I started off by cutting my papers and getting my adhesive ready. I wanted to point out that my box piece is upside down in the picture. So make sure when you are adhering the front and back piece to the box panel that the scallops are right side up.

Next thing to do is fold all of your cuts on the dotted lines. Then adhere the tag pieces to the box…scallop side up! Lol!

And then adhere the side tab and the bottom tabs as you would any normal box bottom. Now your box is ready for decorations.

When looking through my stash I found some rope twine that matches perfectly with the wood in the papers! And I added some enamel dots and star stickers to both pieces.

Now all I need to do is buy a gift for my hubby and I’m all set for Father’s Day! Hope this cute set gives you some ideas and inspiration for your Father’s Day gifts! Thanks for stopping by!

Aimee

3D Pickup Truck with Flowers

Hello crafty friends! Have you all seen the adorable 3D Pickup Truck with Flowers (Lori’s SVG Shop, Silhouette)? Maybe you’ve seen it but passed it by so I’m here today to give you another look. IMO this is so stinking adorable! How cute would this be sitting on a mantle with some Summer décor? Now that I’ve just typed this I realized I can add this to my Summer décor in my tiered trays!!

It doesn’t take much time at all to put this little guy together. Maybe it’s because I pulled out my A Slice Of Summer collection and it all kinda fell into place. I used the Solids papers for the truck and the flowers and some of the enamel dots for a little pizzazz on the wheels and headlights.  For an assembly tutorial see Lori’s YouTube Channel here.

And all of these adorable rolled flowers that complete this summery truck of goodness are all included in the file! I can almost envision my grandfather driving this around but without the flowers LOL!!


Hope everyone is having a lovely day and thank for stopping by!

Aimee

Bunny Banner Home Décor

Hello crafty friends! Aimee here today. Easter is a little over a week away and I have been a busy little bee decorating my house with bunnies, Easter eggs, and springy flowers. After a long cold and dark Winter, I am ready for some light and refreshing pastel colors and happy little bunnies!

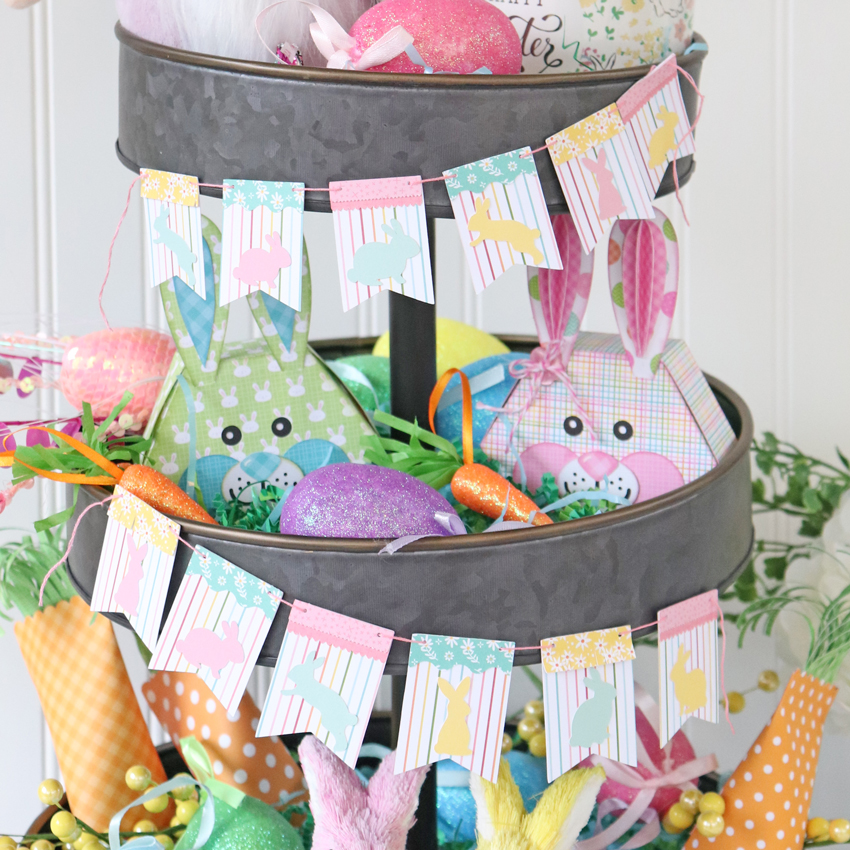
Today I wanted to share an idea of using some of Lori’s svg files to help you along with your Spring/Easter decorating. On my beautiful tiered tray set I have 4 different files. There are the adorable boy and girl Hexagon Easter Bunny Boxes (Lori’s Shop, Silhouette) and the Carrot Favor Boxes (Lori’s Shop, Silhouette) which I made a couple of years ago and held onto because they are just too stinking cute and I couldn’t give them away. But today I want to show you how I made the sweet little bunny banner that is draped on my tiered tray set. I made a quick little tutorial on how to create this banner using the Layered Bunting 2 (Lori’s Shop, Silhouette) and the Easter Bunny Set (Lori’s Shop, Silhouette). In this picture below you can see just how much paper projects can add to home decorations. And I am LOVING how adorable the banner turned out! If anyone is interested, I used Lori’s Echo Park Easter Wishes and All Girl collections for this project.
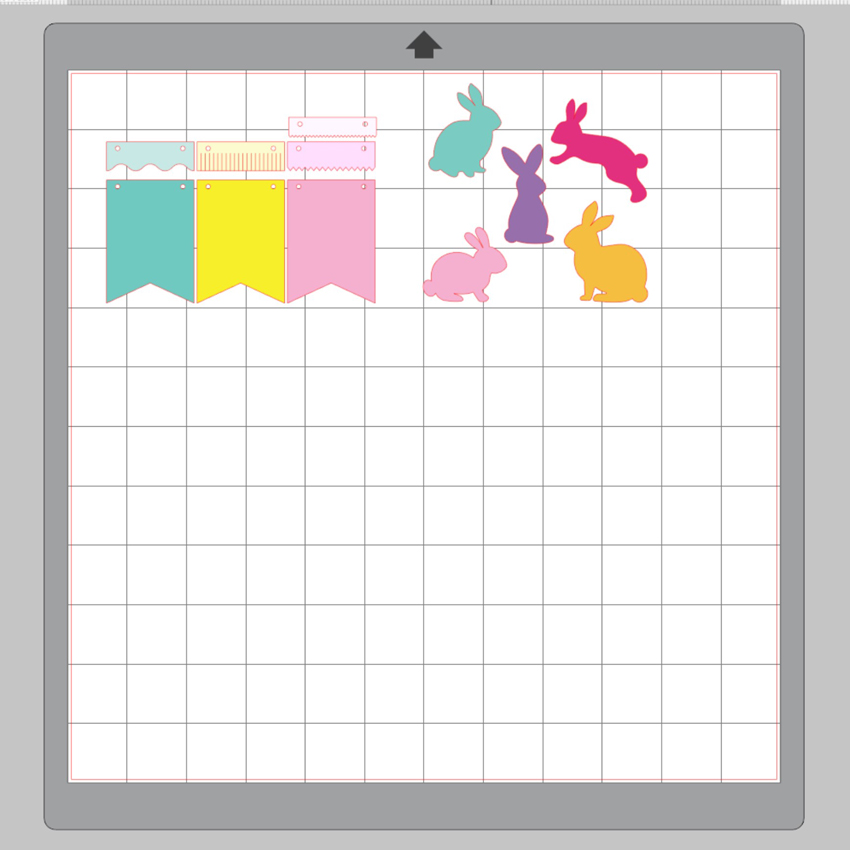
To get started, I pulled up both of the files to get an idea of how they would fit together. When you pull the banner pieces up you will see just an outline. I colored them in for my tutorial.
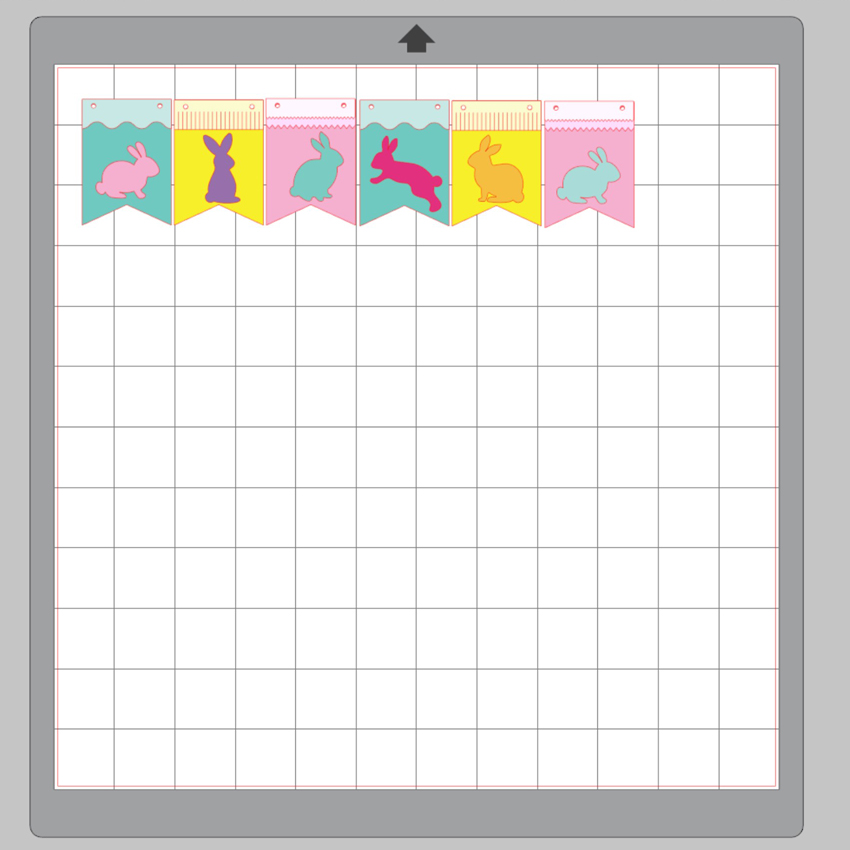
I knew I would need at least 6 banner pieces so I duplicated the banner pieces and added the bunnies to each to get an idea of what it would look like and what colors I wanted to use.
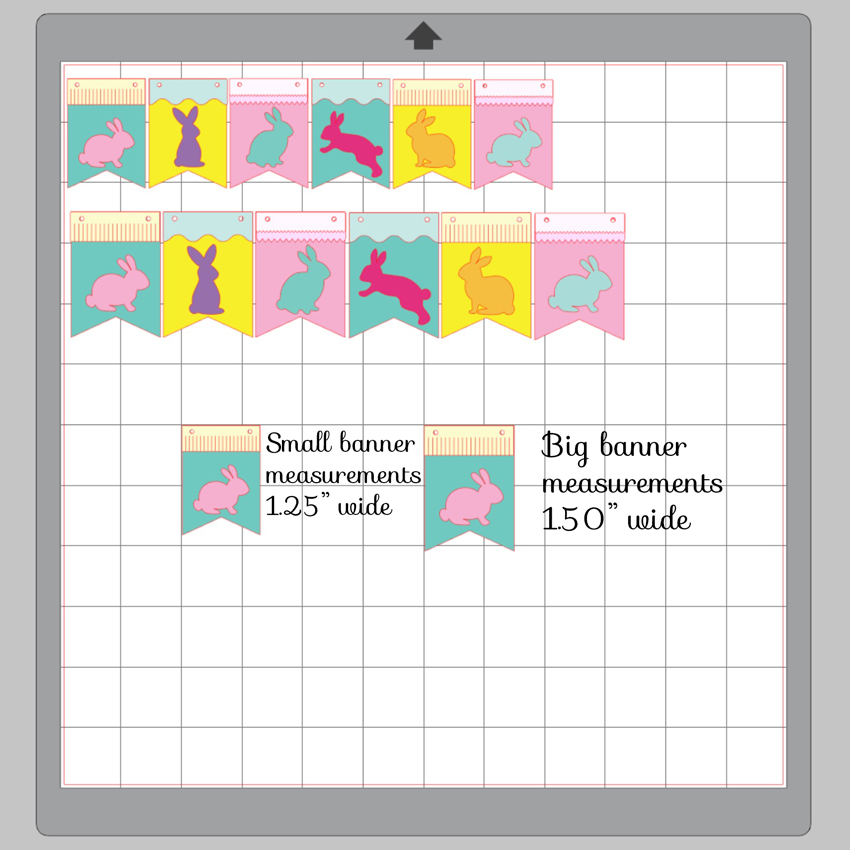
And also I needed 2 banners for the layers  of my tiered tray set but I wanted one of them to be bigger for the middle layer. So I duplicated the entire banner set and then resized it to make it bigger. As you can see in the picture, the small banner pieces measure 1.25″ wide and the big banner pieces measure 1.50″ wide. These can be resized to fit any project you may have.
Here you can see all of the pieces cut out using different patterned papers. Now to start adhering all of these pieces together. A quick tip…glue the top of the banner pieces before the bunny rabbits! That way you’ll know where to place the bunny without over lapping the pieces.
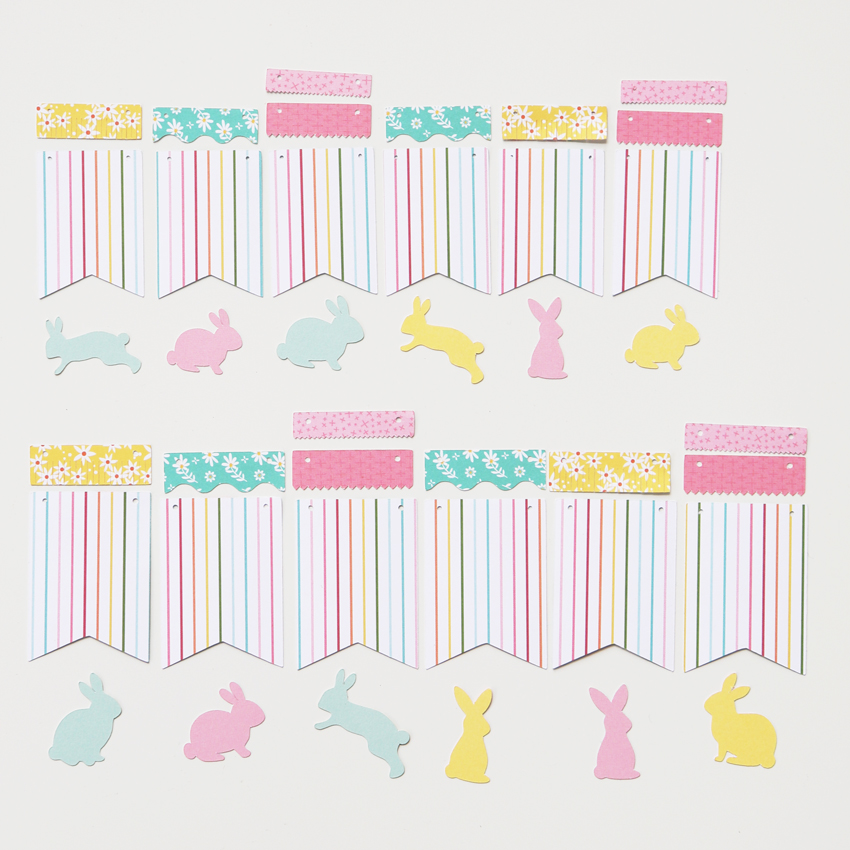
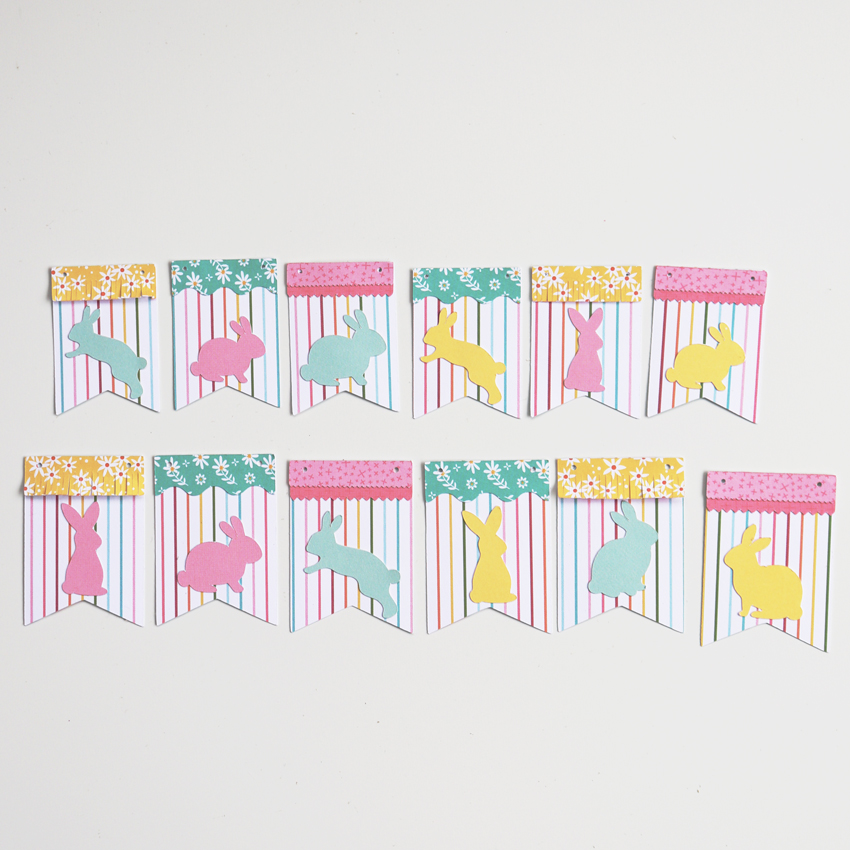
Now that all of the pieces are adhered together we can start stringing them together.
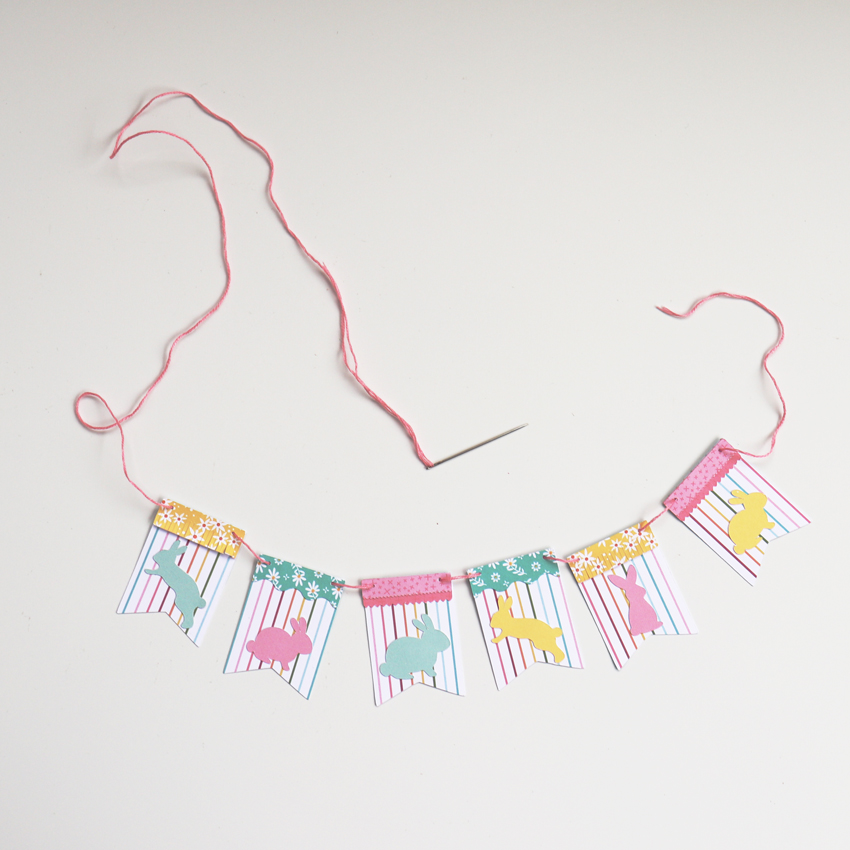
For this step, I used some pink floss and a needle. I wanted to use some twine but the holes in the banner pieces are so small it would not work. But I’m liking the pink floss and think it actually looks better and the needle made it quick and easy to assemble the banner.
Once you have all of the banner pieces assembled, tie a small knot on each end to keep the pieces from sliding off.
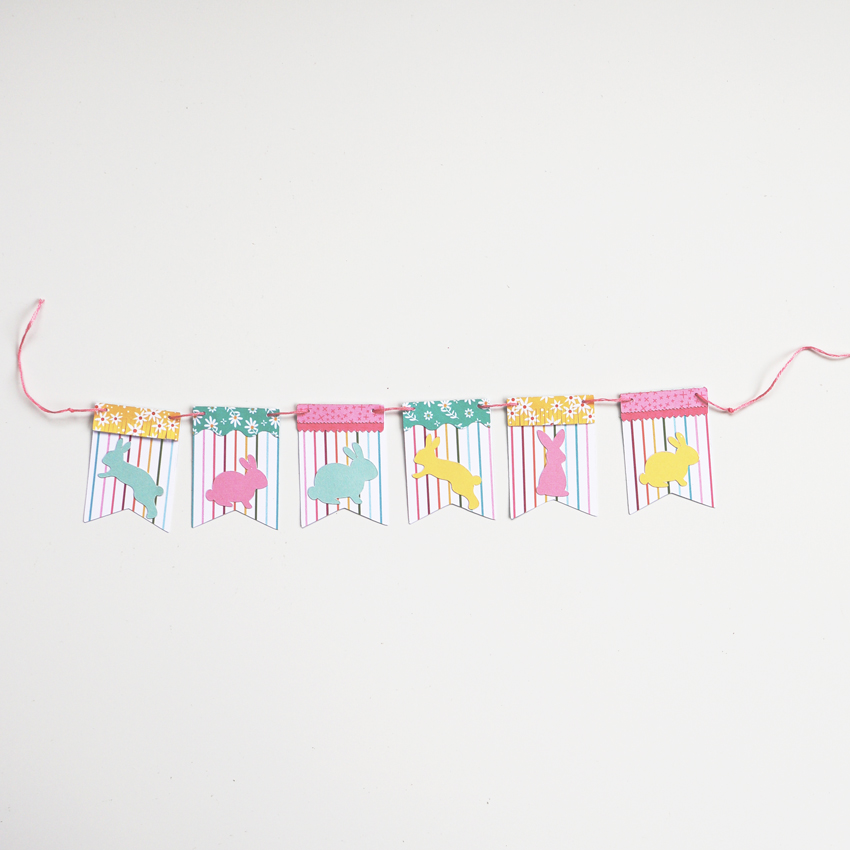
To attach the banners to my tiered tray I used some very sticky tape runner to the tops of the banner pieces.  And now it’s ready to be set out for all to admire! I sent pictures to my sister and she gushed over it!

So that’s all from me today! I really hope everyone is happy and healthy and ready to brightened up their space with a beautiful and cheery bunny banner!

Happy Easter to all!

Aimee