Matching Mandala Card and Box Set by Aimee

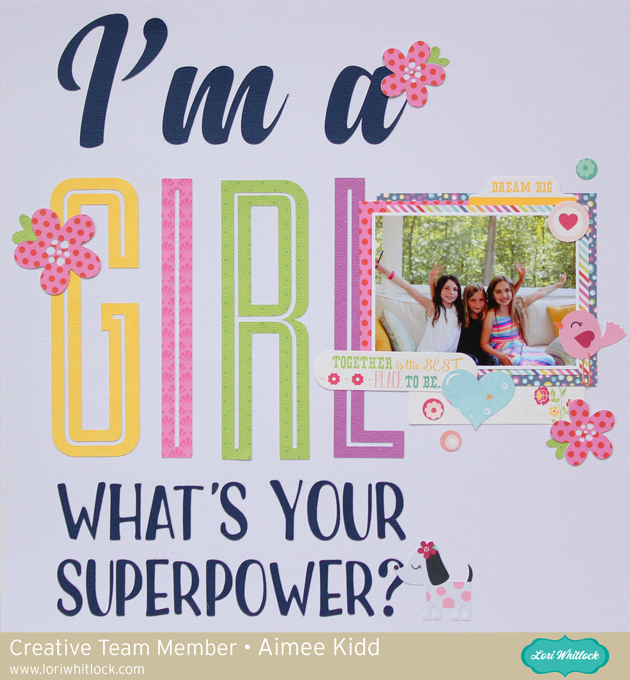
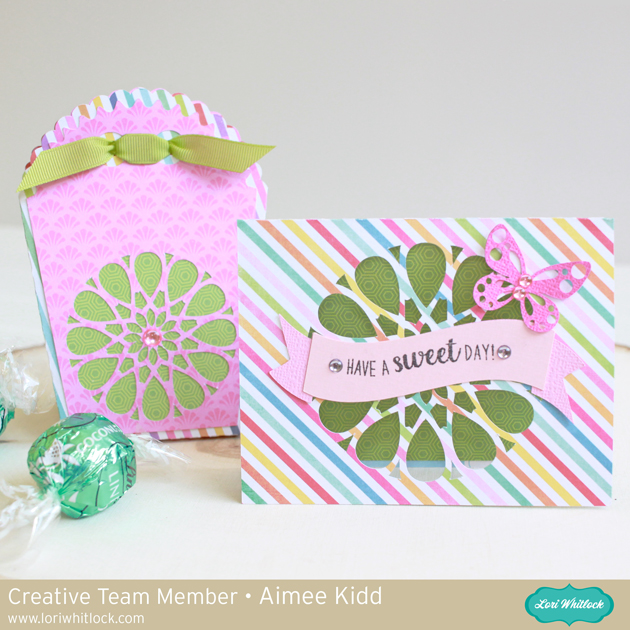
Hello everyone! Aimee here with you today with a tutorial on creating a matching Mandala card and box set. I absolutely love the beautiful mandalas and wanted to create a box that has that same beautiful design. I feel this would be a perfect combo to give a friend on her birthday.

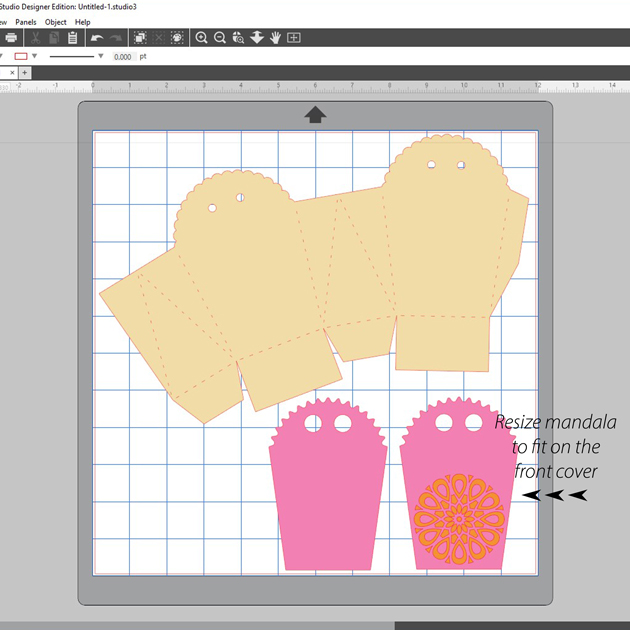
I started off making the Mandala Card 3 (Lori Whitlock store or Silhouette store) as my inspiration and then started the process of making the matching box. I opened up the Favor Box Ribbon Tie Scalloped SVG (found in the Lori Whitlock store or at Silhouette) along with a mandala SVG (Lori Whitlock store or at Silhouette). I resized the mandala to fit the front cover of the favor box.


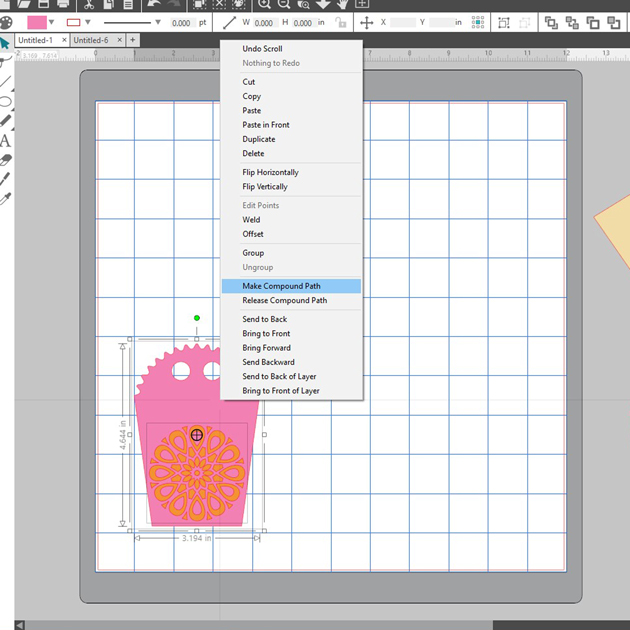
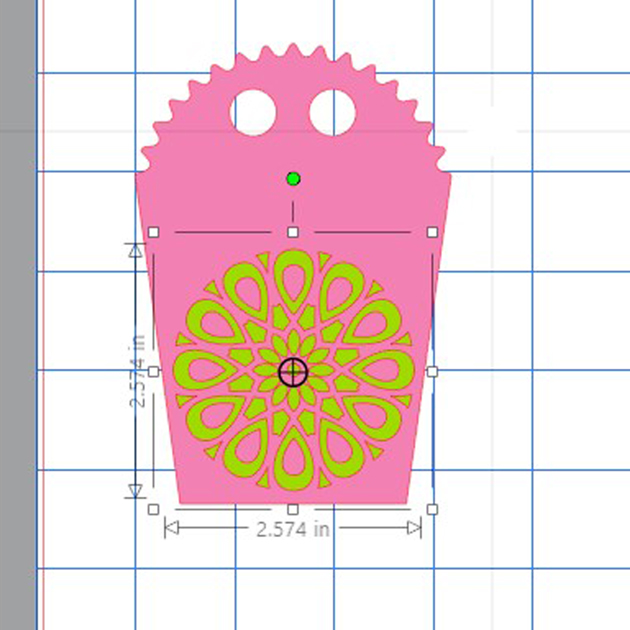
Then I highlighted both pieces…right click, scroll down until “make compound path” was selected and left click.

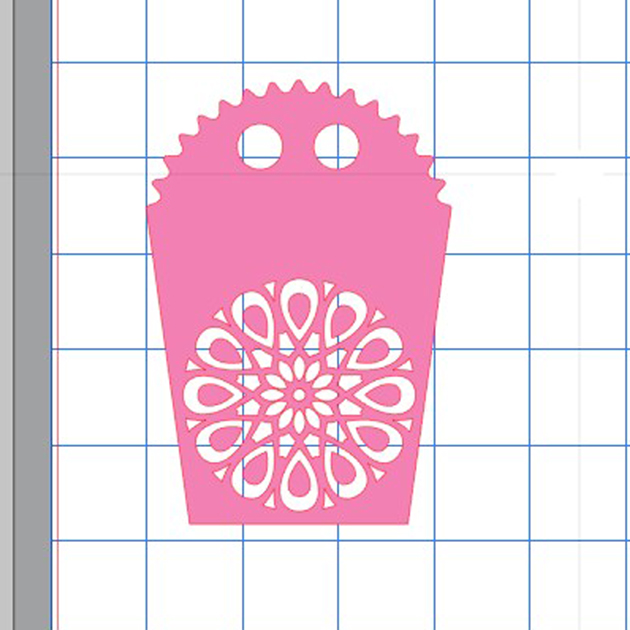
Now the cut should look like this and ready to cut. The center pieces of the circles will cut but I chose not to use them on my project.

Next comes creating a circle that will fit behind the mandala to mask the pattern paper.

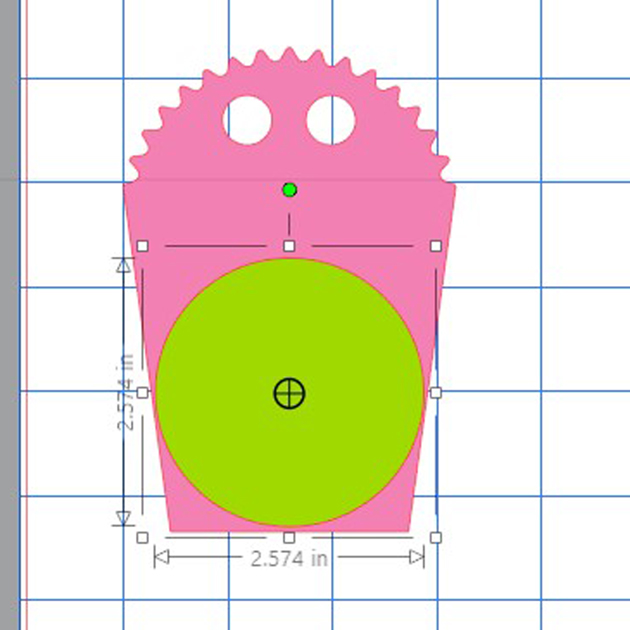
Make sure that the circle is big enough to cover the backside of the mandala but small enough not to peek out from behind the layered box piece.

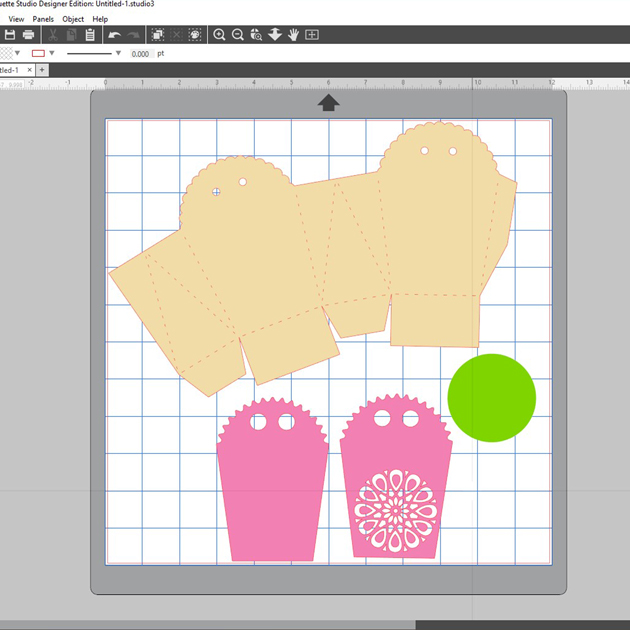
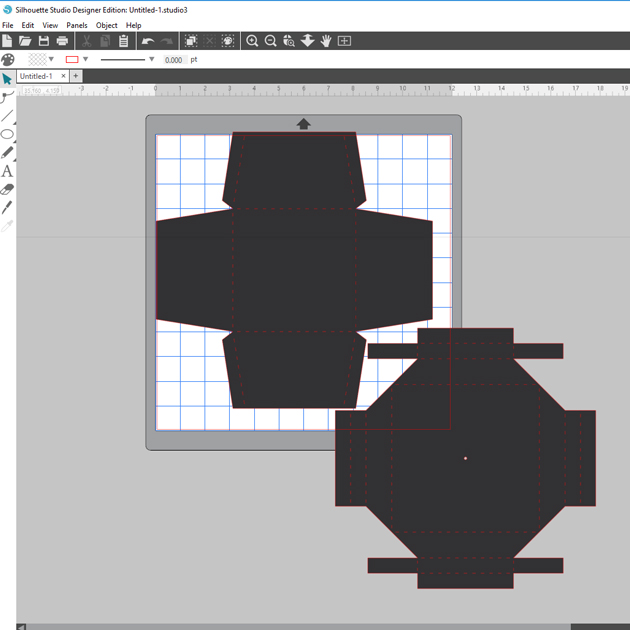
Now everything is ready to cut!

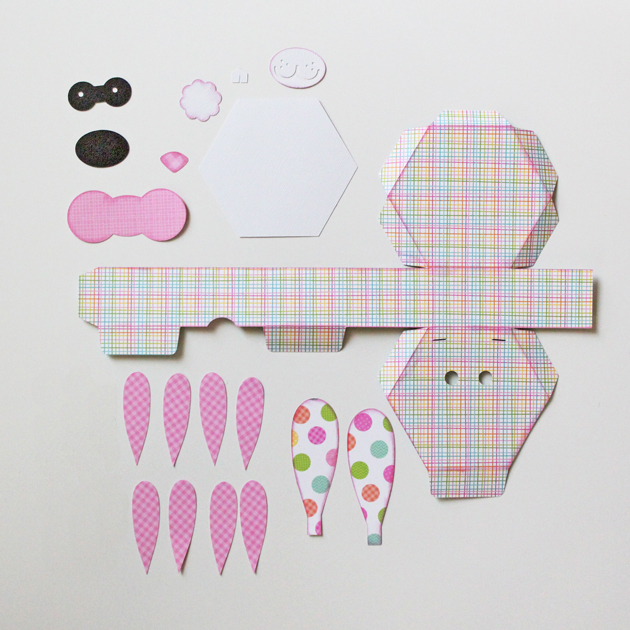
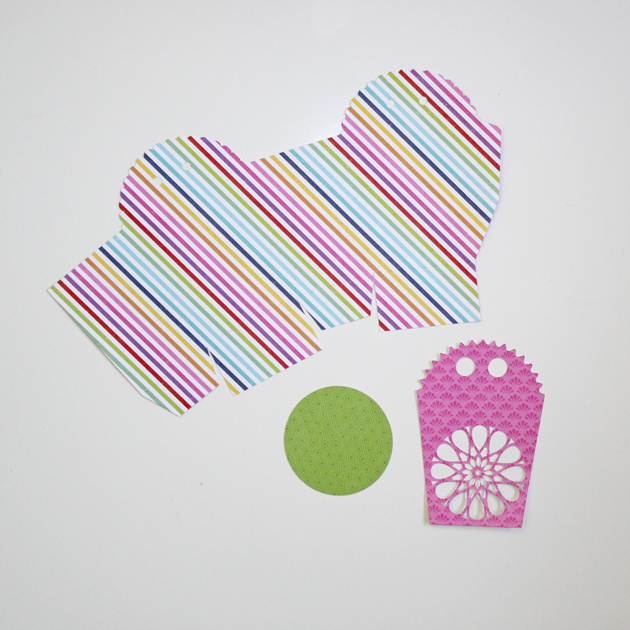
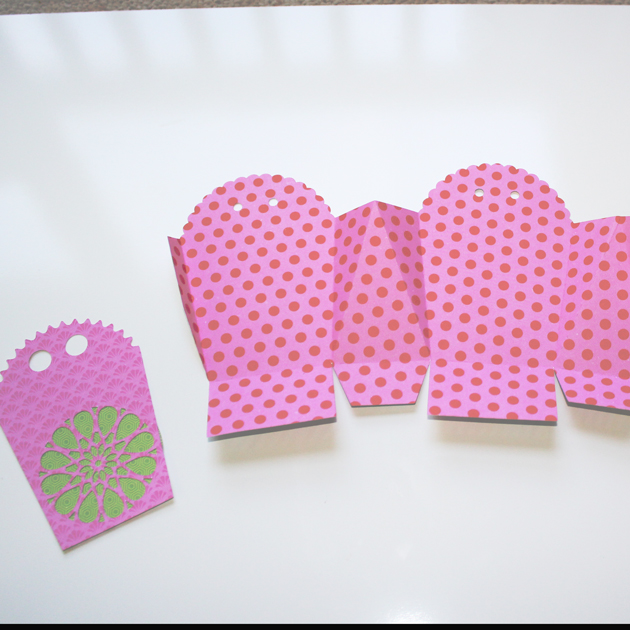
And here are all of my pieces cut out from pattern papers (with the exception of the back cover panel).

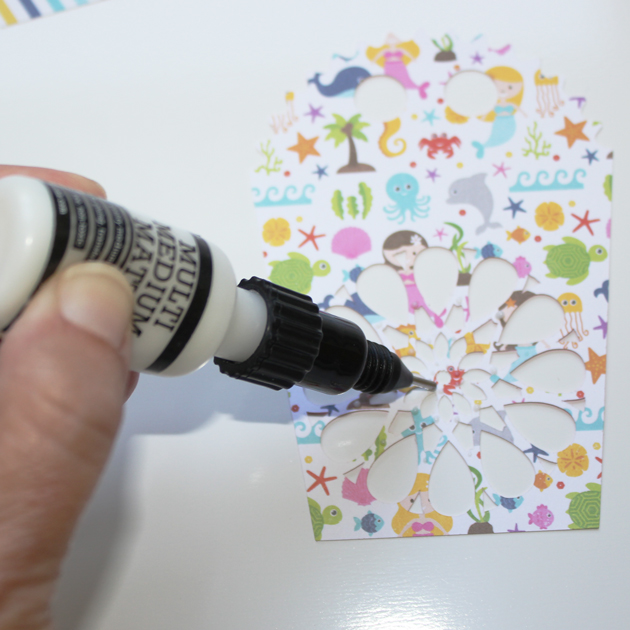
Because the mandala svg is so intricate I used a small tip glue bottle to apply adhesive.

Now that I have the green circle adhered to the panel cover I am ready to pre-fold my box and then adhere it together.

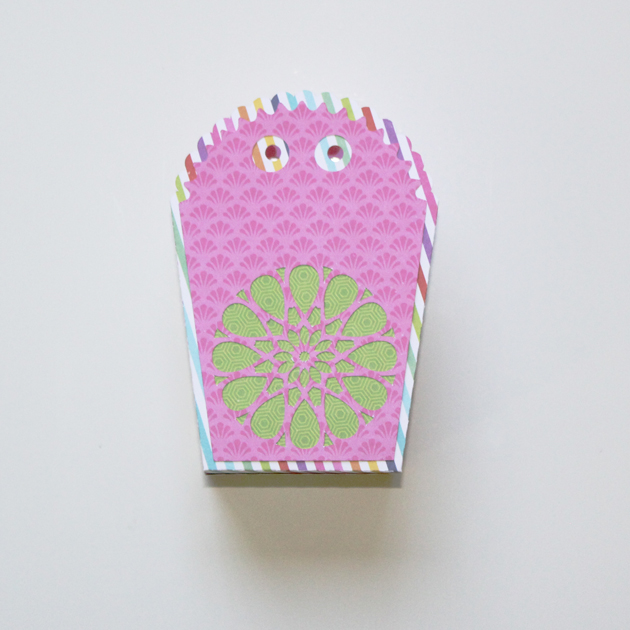
Here is my box assembled and the front panel cover adhered to the front of the box.

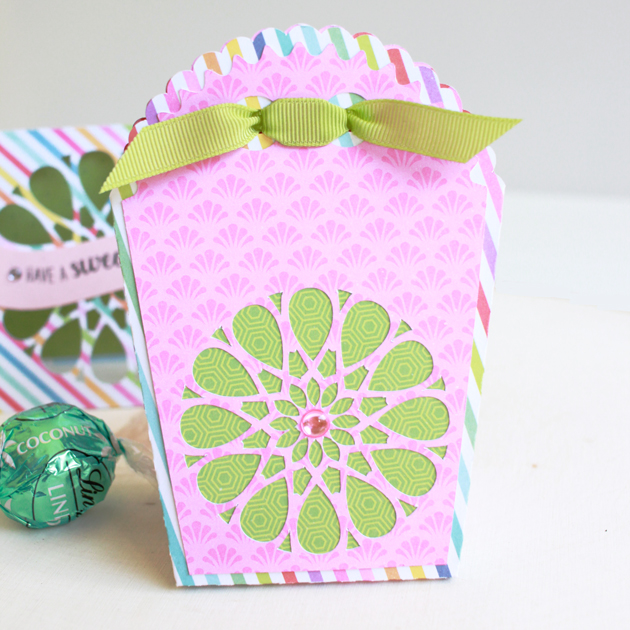
Decorating is the fun part and there are so many options such as sequins, gems, ribbon, etc for decorating.


Thanks for joining us today for this tutorial! I hope this gets the creative juices flowing on how you can mix and match different svg cuts to create a whole slew of projects.


Aimee

Apple Cards for Teacher by Aimee

Hello crafty friends! Aimee here with you today and I have a couple of year end apple shaped cards to let your child’s teacher know how special they are!

I combined a couple of Lori’s cuts to create these cards. For the card base I used the Gift Card Holder Apple (SVG or Silhouette) and sentiment is the new Big Heart Teach Little Minds (SVG or Silhouette).

A little tip for you…I centered the sentiment on the apple and then highlighted the two cuts and clicked on “make compound path” to get this cut below. Then I cut it out and laid it on top of my card to know exactly where to glue my letters down.

Thanks for stopping by today!

Aimee

3D Graduation Cap Favor Box by Aimee

Hi crafty peeps!! Aimee here with you today with a tutorial on how to assemble and create the new Graduation Cap Favor Box. I made this box for my niece Katie who will soon be receiving her Masters in Early Education and I couldn’t be more proud of her!

This fun and adorable box svg is available at the Lori Whitlock store *here* and at the Silhouette Store *here*. I also added some of the beautiful Lori Whitlock flowers after seeing a lot of graduates are now decorating the top of their caps which is a fabulous idea!! Wished that was a thing when I graduated!! (Rolled Flower 11 – Lori Whitlock or Silhouette, Rolled Flower 20 – Lori Whitlock or Silhouette)

Alrighty, let’s get started! I resized the original file to create a bigger sized box.

Since each piece was so big I used 2 sheets of cardstock…1 for the top piece and 1 for the bottom piece.

After I had each piece cut out, I folded each cut line.

The bottom piece is easily assembled by adhering the gluetabs to the inside of the box.


For the top piece, start with the 2 sides with the extra gluetabs and adhere them down to the base of the hat. Follow along as I step you through it in the following pictures.

And this is what the underside of the top piece should look like after you’ve adhered all pieces down.

Now comes the fun part of decorating the top of the Graduate Cap!

That’s it for me today! I hope you enjoyed this tutorial and Congrats to all those graduates!!

Aimee

I’m a GIRL layout by Aimee Kidd

Hi scrappy friends and happy Monday! Aimee here with you today with a layout that I had to create as soon as I saw this phrase cut from Lori. I think it is adorable and it was perfect for this picture of my daughter and her friends. I also brought in a couple more cuts like the sweet little bird, cute dog, and flowers. I also used the bright and beautiful papers from Let’s Be Mermaids.

Cuts used:

I’m a girl What’s your superpower? – Lori’s site       Silhouette store

Dog/flower – Lori’s site       Silhouette store

Bird – Lori’s site        Silhouette store

Thanks for stopping by today and happy crafting!!

Aimee


Hexagon Easter Bunny Box tutorial by Aimee

Hi friends! Aimee here with you today to share a tutorial on how I made these adorable Hexagon Easter Bunny Boxes! This is one of the new cut files for Easter.  You can find it on the Lori Whitlock site here or on the Silhouette Design Store here.

When you open this file up in the Silhouette program it is already color coded and shows you where most of the pieces go to get you started.

I separated all of my pieces and added 3 more sets of the inner ear piece cut so that I could fold them in half long ways (which I will show in a few minutes) and adhere them together to create a look of extra “fluff”.

So here is what it looks like after I cut out all of my pieces. I went ahead inked up the edges and let that dry before going to my next step.

I started assembling my box by adding glue to side piece first and then the bottom flaps. Do not put glue on the top tabs because your box opens and closes from the top flap.

Next comes the face. Start with the black piece for the eyes and adhere it to the underside of the flap with the eye holes lined up with the eye holes that are cut into the box.


Next I worked on the ears where I folded each inner ear piece in half long ways (4 pieces for each ear). Then glued them together and then to the outside ear piece.

Time to add the ears to the box…slip the bottom of each ear piece into the slots provided and glue to the underside of the top flap of the box. Then glue the white hexagon piece to the underside. This gives the ears more stability and the whites of the eyes.

Your box should look like this now. The rest is simply adhering all of the mouth pieces together and then adhering to the box.

Here is Mrs. Bunny…

and her sweet little cotton tail!

and here is Mr. Bunny.

And here is the sweet little couple together. 

Thanks for stopping by today to take a look and I hope that everyone has a blessed Easter holiday!

Aimee