Vinyl Application Tutorial on a Travel Mug

Happy Thursday Everyone:

Anita here with a tutorial on the application of vinyl to a travel mug.  I wanted to make this for one of my friends for Valentine’s Day as one of her true loves is coffee.  I used Lori’s SVG called I Only Need Coffee on Days with “Y” (SVGSilhouette).  I used some Cricut silver matte vinyl for my project.  I selected matte vinyl for my cutting surface.  You do not need to mirror the design when using regular vinyl on a project.

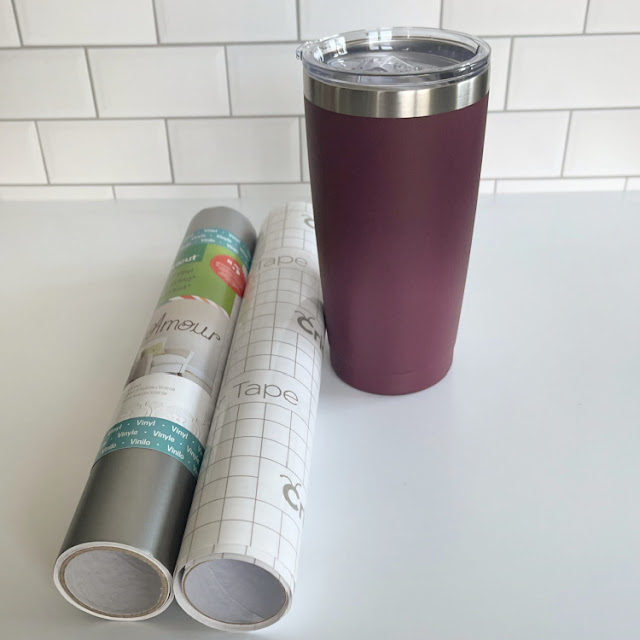
Here are the materials that I used for my project.  You will want to pick up some transfer tape if you don’t have any as it makes these vinyl projects so much easier.

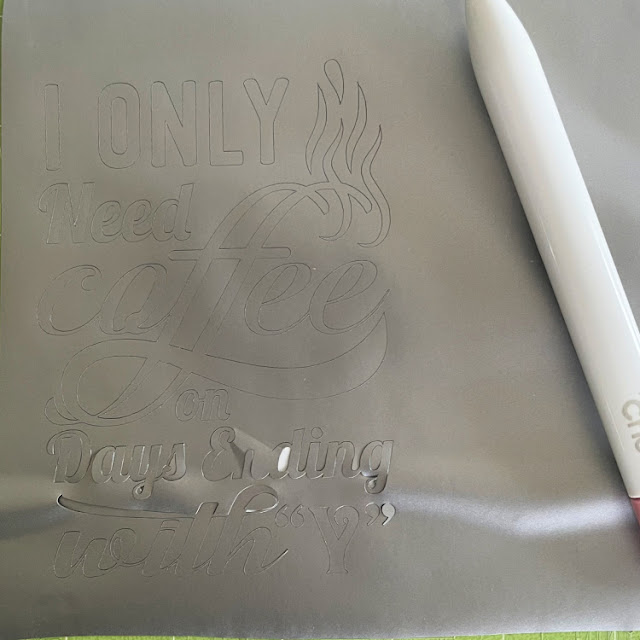
Here is the design cut out and that is my weeding tool from Cricut which is next to the design.  It has a hook on the end which makes fishing out those tiny little pieces so easy.  You can use a pin and I have used a seam ripper in the past too.  You are going to want to remove all of the pieces of design that you don’t need to be there.  I started in one corner and slowly peeled the excess away from my design.  If there are fine elements to your design you might need to hold onto the design with one hand as you pull the excess away so that your design doesn’t tear.

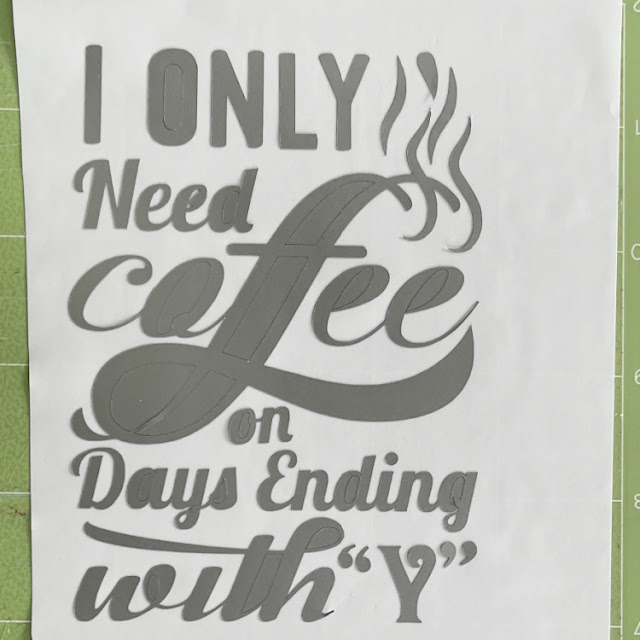
Here is what my design looked like after I peeled away all of the excess piece which came off in one piece,  Next, I needed to go in and grab those extra little bits to help define my design more.  I used my weeding tool for this.  You can use a pin as well.

.

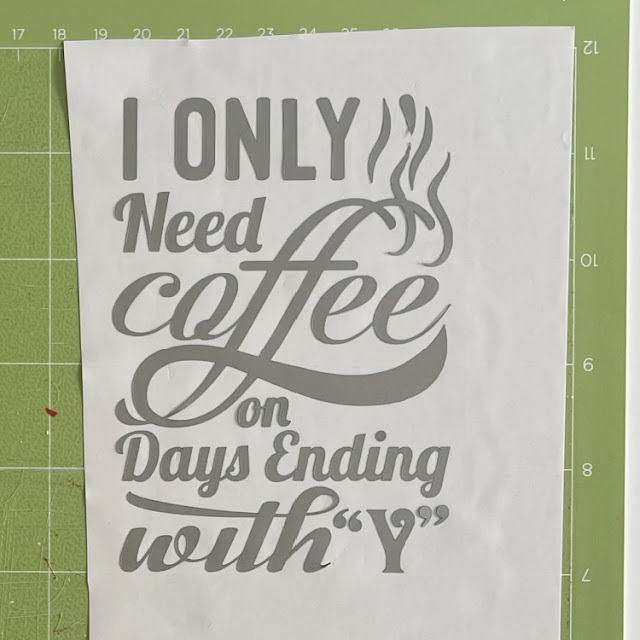
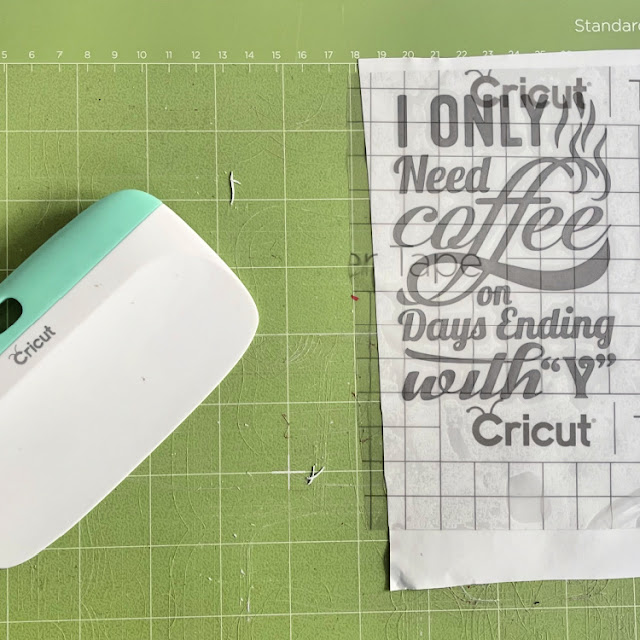
My design is now all weeded and ready for the transfer tape to be applied directly on top of the design.  I cut a piece of transfer tape a little larger by 1/2″ or so around your design.  Then I peeled off the white piece on the transfer paper leaving the sticky side exposed and then stuck that down on top of my design.  I leave my design on my mat through these steps as it is easier to work with.  At this point, you need to burnish the transfer tape onto your design.  Essentially you want the tape to pick up just the vinyl from the backing paper so that you can adhere it directly to your mug and see exactly where it will go.  I used my Cricut scraper that I bought but you can certainly use a popsicle stick for this step.  Check to see if you successfully got the vinyl to adhere to the transfer tape.  If not, continue to burnish until it all comes off the backing paper.

This photo shows the transfer tape on and the tool that I used to burnish the vinyl onto the transfer tape. And my well-loved mat, lol.

Lastly, I placed my transfer tape onto the mug.  I started carefully at one edge laying it on and let it gently fall where it wanted to given that the cup is rounded.  I then used my fingers to smooth out the transfer tape.  Once I was happy with the placement, it was time to again burnish the design to get it to adhere to the cup.  It came out great and I’m sure that she will love it.

Thanks for looking and have a great day.

Hugs,

Anita


Sleepy Hollow Dead And Breakfast

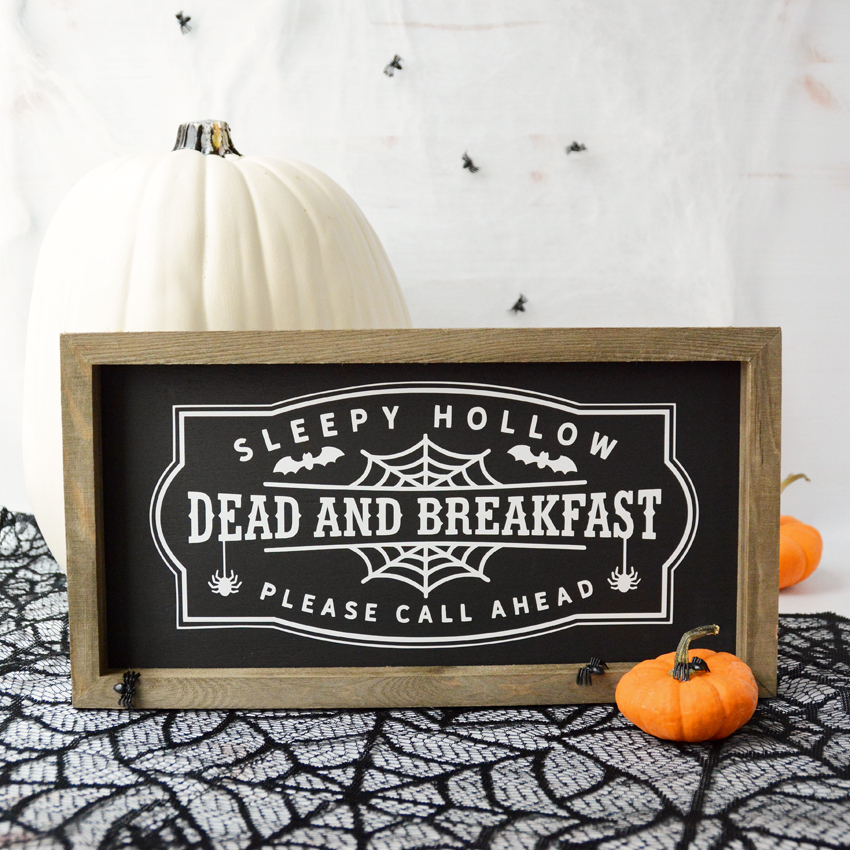
Hello everyone! Marcia here today. There is still time to add some Halloween decor pieces to your home. I thought I would share a Halloween sign I created from a Jillibean Soup Mixed The Media Sign and white vinyl. This Sleepy Hollow Dead And Breakfast cut file can be found here (SVG / Silhouette ).

I love decorating for Halloween! There are lots of Halloween themed cut files available in Lori’s shop. Go check them out. Thanks so much for stopping by.
~Marcia

Welcome Sign featuring Vintage Sign Font with Ashley

Happy First Day of School for some of you out there today!  Two of my kids are headed to the first day–both in high school.  I also have a Freshman in college who will be starting in a couple of weeks.  I am featuring a sign today using the Vintage Sign Font found here in the Shop or in the Silhouette Store.  This font has great letters for signs as well as some special characters.

To find those special characters, you can see them in Silhouette Studio.  Or if you are using another program.  The special shapes are found on these keys: []|<>? (look next to P on the keyboard and next to M).

I used Oramask 813 purchased at Expressions Vinyl to make the stencil for the board. I also decided to get the Silhouette Roll Feeder since my sign is 5 feet tall.  I would highly recommend the roll feeder.  It kept the vinyl moving nice and straight.  One caution is that as you get to the end of the roll of vinyl, be careful that it doesn’t get stuck as it is moving in/out of the machine.

I used the alphabet and the leaf which can be found with keys [ ].   The board is common board–5′ tall and 9″ wide.  The tall board makes a great front porch statement!

Customizing a Shape Using the Knife Tool with Kathy

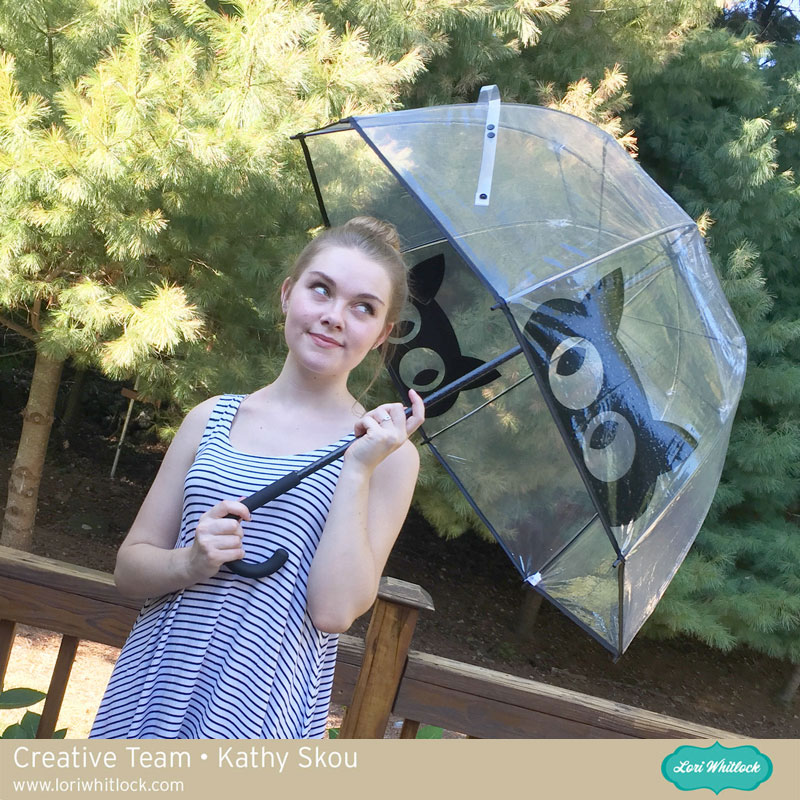
Hi Everyone, it’s Kathy today with a tutorial to show you how to use the knife tool to customize a shape for your project.  I have to start this tutorial with a confession.  I am a crazy cat lady.  I saw a similar item to my project on Pinterest, wanted to purchase it only to find that it was only sold in the UK and it was sold out.  I was determined to have it so I came up with a way to make it myself… take a peek…

How cute is this??  Luckily my daughter was happy to be my model!  This was really pretty easy to do… I started by loading Lori’s Black Cat Design into Silhouette Studio.

 I clicked on the knife tool on the left side tool bar. Using the tool I drew a line across the design where I wanted to cut it.

You can see that the line I created divided the cat, leaving the top half of the face as a stand alone design.

I deleted the portions of the design I didn’t want, then resized the top of the cat’s head to fit my umbrella panel.  I changed my cut settings to vinyl and cut my design.

You can cut vinyl without using a mat, but I usually use my mat so that I can use smaller pieces of the vinyl.  I cut out the cat face, then weeded out the pieces I didn’t want.

Next, I applied the transfer paper to my design and made sure it was down well, eliminating air bubbles using my scraper tool.

I peeled the transfer paper off, bringing the design with it.  The transfer paper makes it easy to apply the vinyl design all at once, exactly where you want it.  I applied it to my umbrella, using my scraper again to eliminate air bubbles, then peeled off the transfer paper, leaving just the design.

And voila!  A crazy cat lady umbrella!

That’s it for me today, thanks for stopping by to peek!

Permanent Vinyl Tutorial with Kathy

Hi Everyone!  It’s Kathy today with a fun tutorial using Permanent Adhesive Vinyl to customize some wine glasses!  We have some good friends with a pool who gave us an open invitation to swim this summer!   I wanted to give them a little something as a thank you for their generosity.  I found these acrylic wine glasses at HomeGoods and thought they’d be the perfect gift!

It was so simple to add the little fish from Lori’s Island Paradise Set (here in the Silhouette Store).

1.  I started with some Acrylic Wine Glasses (good for the pool area, they don’t shatter!) and some colorful permanent (outdoor) vinyl sheets.

2.  Load your design onto the virtual mat and size it for your object.  I added a rectangle around them to make it easier to remove the unwanted pieces of vinyl from around the design without wasting vinyl.  Change the cut settings to Vinyl. (blade depth of 2)

3.  Place the  vinyl onto the mat and feed it into the Cameo.  You can omit the mat if you’re using a 12″ sheet (choose load media), but I’m used to using my mat when I use smaller pieces of vinyl.

4.  Once the design is out, peel  away the unwanted pieces of the vinyl.

5.  I cut the eyes from white and black vinyl and peeled the back off the vinyl and added them to my fish.  It was easy to do this with simple, little pieces.  I thought it would be easier to add the eye layer before placing the fish on the glass.  For more complex or intricate designs you would want to use transfer tape to add any layers.

6.  Transfer tape makes it easy to place a design on your object.  First cut a piece about the same size as your design.  Peel one edge of the tape from the backing and place the tape on the edge of the vinyl backing.  Peel it off, while pressing it over the design.

7.  Once the back is completely off, rub your scraper over the design to make sure it all sticks to the tape.

8.  Peel the tape off, the design should come with it.  If it doesn’t, press it back down and go over it again with your scraper.

9.  Place the tape with your design over the glass.  Starting from the center of the design, start pressing onto your glass.  Move outward, pressing out any air bubbles.  Once the design is down rub over it with your fingers again to make sure it’s on securely.

10.   Slowly peel the transfer tape off the glass.

I’m really happy with the way they turned out!  It’s such a nice way to personalize a gift!  You could also do monograms!

That’s it for me today!  Thanks so much for stopping by!