30% Off Sale on SVGs & 3D Witch Lantern Tutorial

Hello everyone! Marcia here today. Since Halloween is just around the corner, I thought I would get a jump on making some fun décor items.  I found this spooktacular 3D Witch Lantern (SVGSilhouette) in the shop and had to make it!  There are similar lanterns with pumpkins, bats, haunted house, etc… so you could make a variety to set up all over your home. They are designed with an opening in the bottom so that you can place a tealight there to light the lantern up!
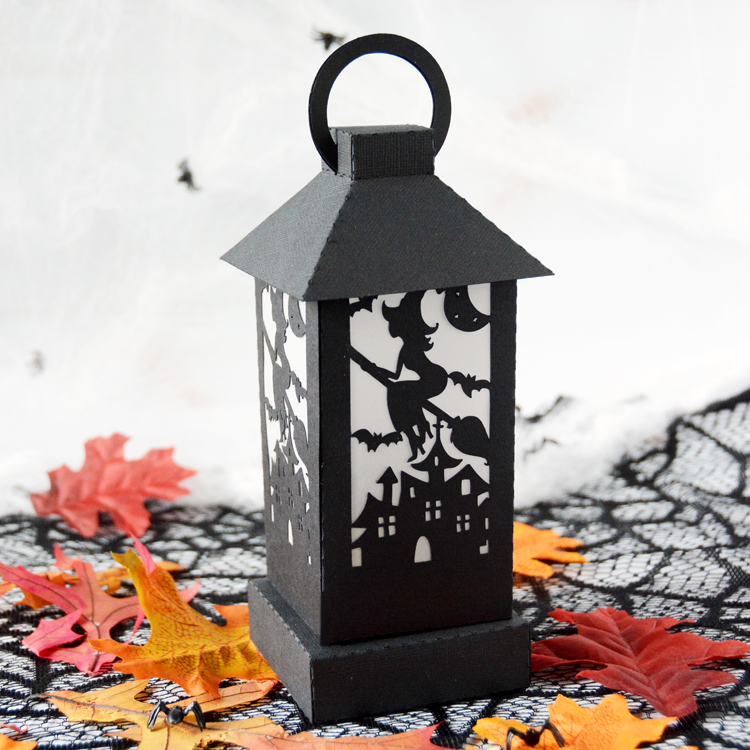
Let me show you how easy they are to make.

  1. Select a cardstock color and cut out all the lantern pieces. You will need 2 pieces of 12×12 cardstock.
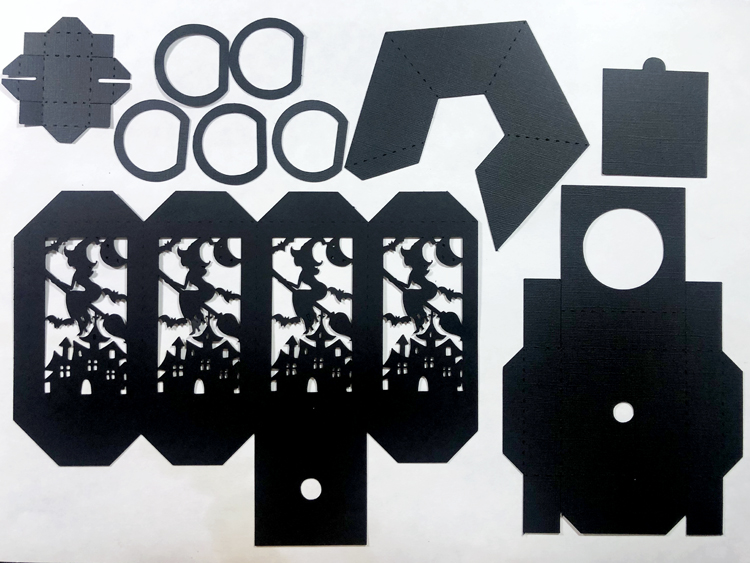
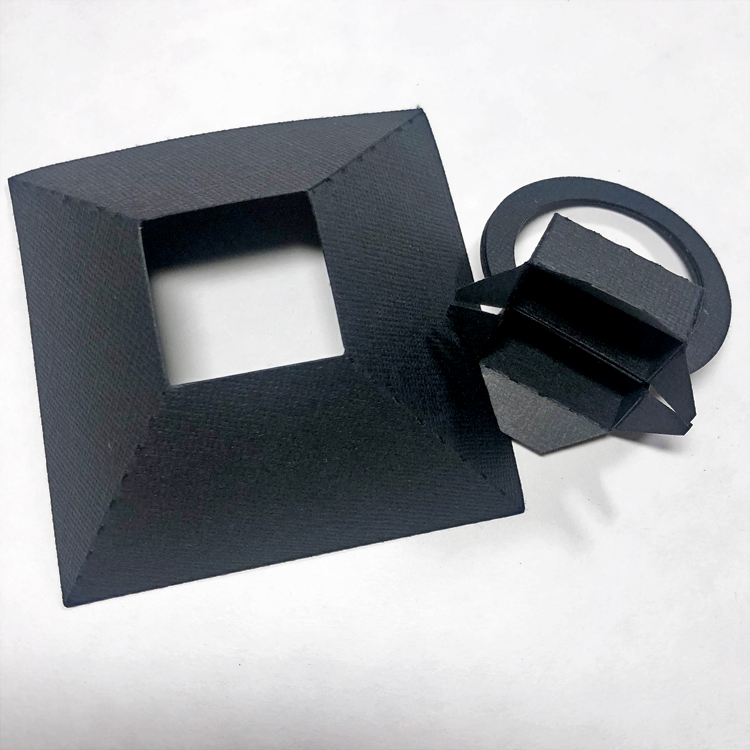
2.  I like to assemble this from the top down. Glue the 5 D-Rings together. Then create a box with the square top piece to the left of the D-Rings in the above photo. The flat side of the D-Ring fits in the slot in the box. Bend the tabs out. Glue the side of the angled lantern top. Fit the tabs from the box top into the square opening. Flip the top over and glue the tabs one at a time to the inside of the slanted lantern top.
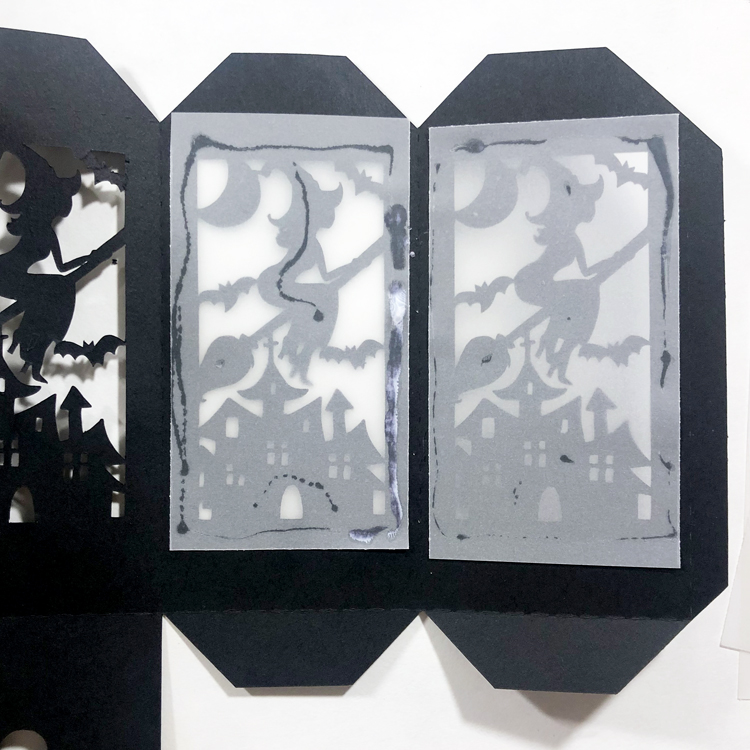
3.  I cut 4 pieces of vellum to place on the back side of the lantern design. Just be sure to apply the glue where it will not be seen. Glue the side of the lantern.
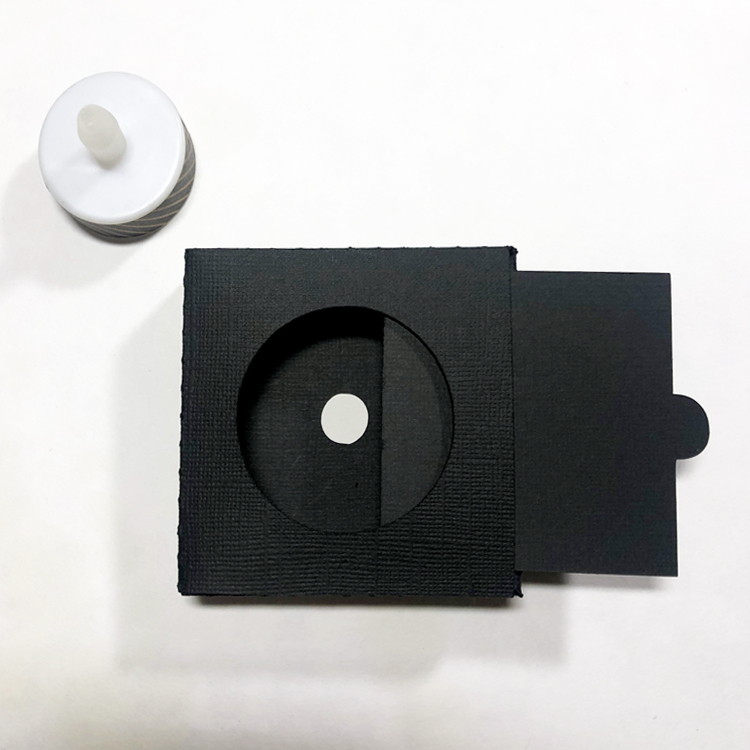
4.  Assemble the base. The small hole is for the tealight to poke through. Glue the sides of the base only, leaving a slot for the bottom panel to slide in and out allowing access to the tealight.
5.  Adhere the slanted lantern top to the tabs at the top of the middle design piece. I did this by applying glue to all 4 tabs at once and then setting the lantern top on over the glue. You can reach inside from the bottom of the middle section to make sure the two pieces adhere nicely. If your hand does not fit, use a bone folder or pencil to reach inside. Glue the bottom of the middle design piece shut. When it is dry, apply glue to the bottom of the middle design piece and fit the hole over the top of the hole in the lantern base. I found this easy to do with a tealight in place so I could be sure I wasn’t covering up too much of the tealight opening. Apply a small bit of pressure to get a good seal. I use a quick dry adhesive when creating 3D projects to reduce the time needed to hold things together until the glue dries.
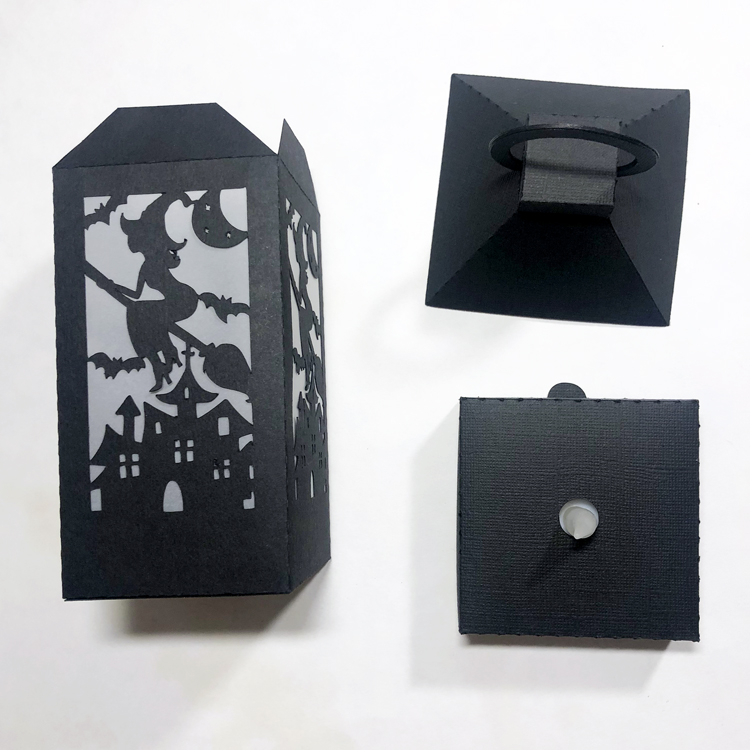
Allow the adhesive to dry completely before you attempt to pick up the lantern by the D-Rings. I love how this turned out! My photo does not do it justice. I placed a color changing tealight inside … so cool in the dark! I think I will have to make more now. Go check out all the designs in the Lori Whitlock store.

And don’t forget, all SVG files are on sale in the Lori Whitlock SVG shop through Saturday, September 17th when you use code SEP2022 at checkout!
 

Thanks so much for stopping by.
~Marcia

Father’s Day 3D Camper Tutorial

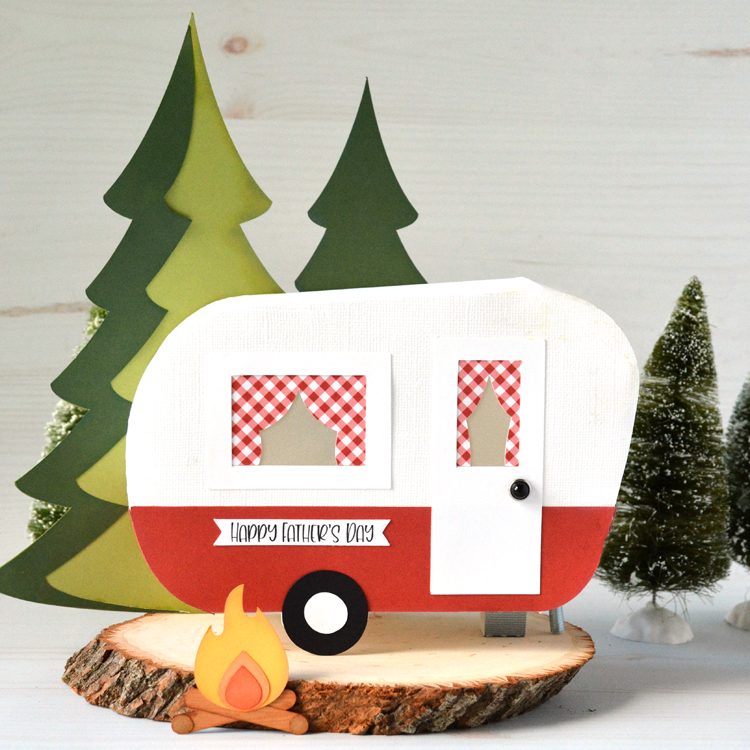
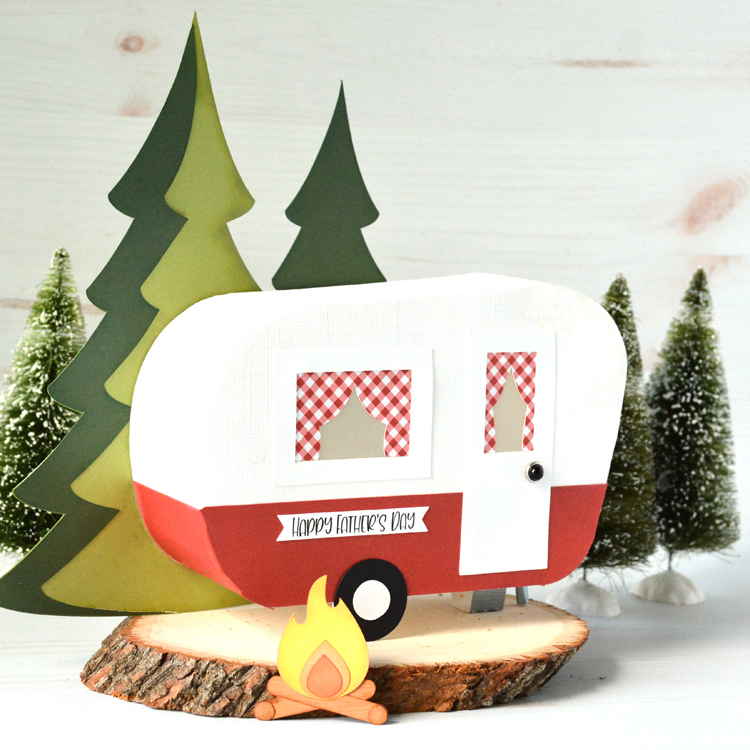
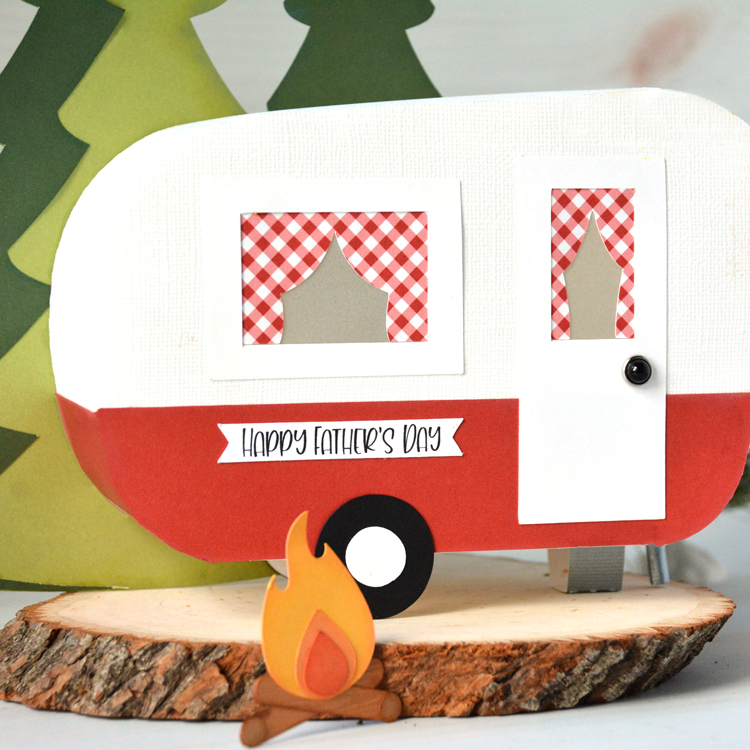
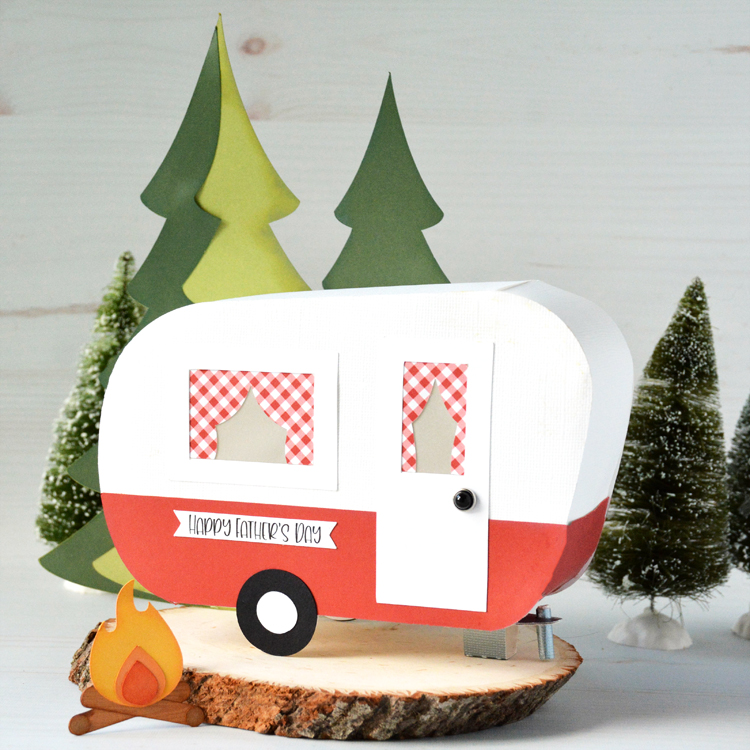
Hello everyone! Marcia here today.  With Father’s Day approaching, I wanted to make something special for my husband. He loves to camp, in fact we just returned from a camping trip in Northern Minnesota. He also loves all things vintage. We have talked about fixing up an old camper one day. When I saw Lori’s Father’s Day 3D Camper (SVG, Silhouette) I had to make it for him.

Let me show you how you can make one too.

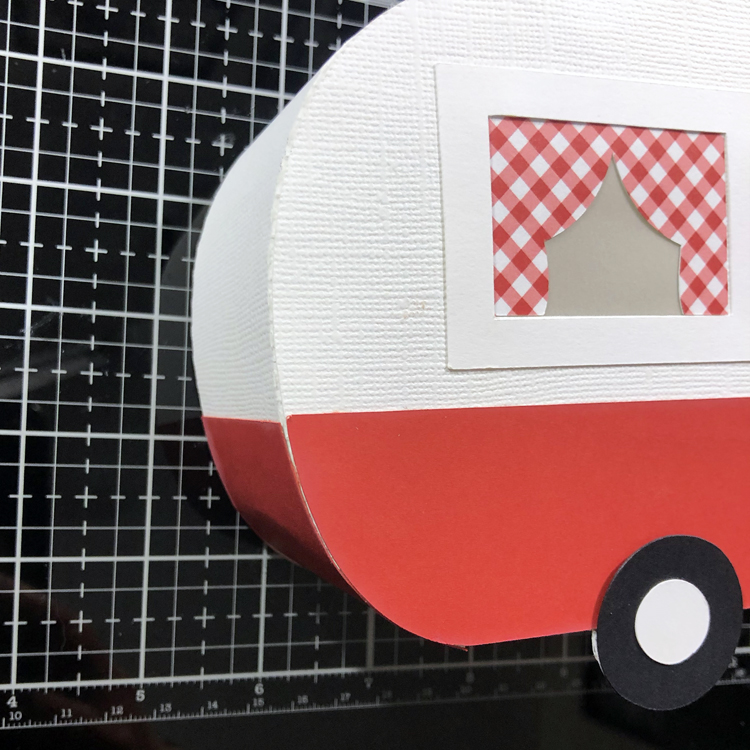
5.  Starting on one side, slowly adhere the tabs around the curved edges of the camper. Using a quick drying glue helps. When one side is done, flip the camper over and do the other side.

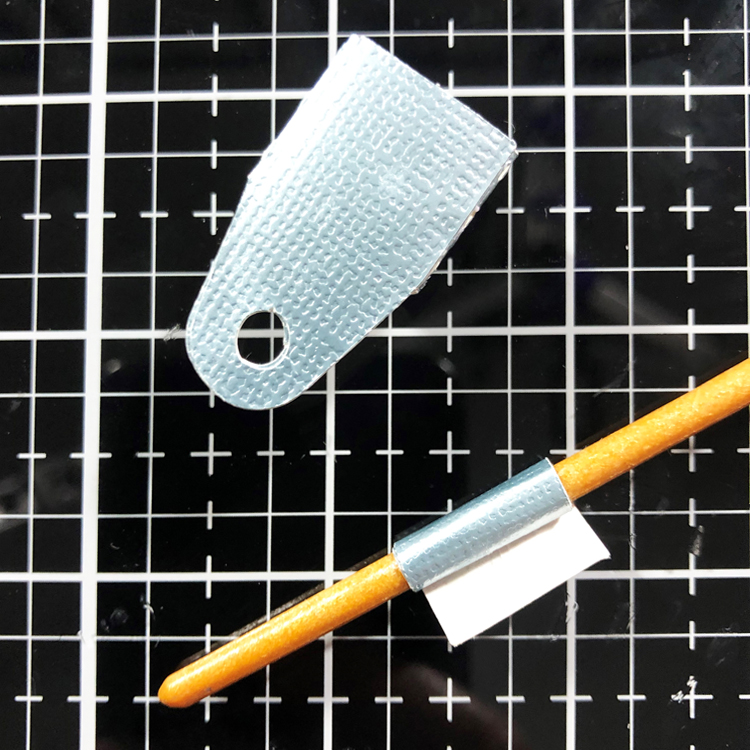
6.  Assemble the hitch. The post must be rolled up small enough to fit through the hole. Adhere hitch to the bottom of camper extending the hitch post out in front.

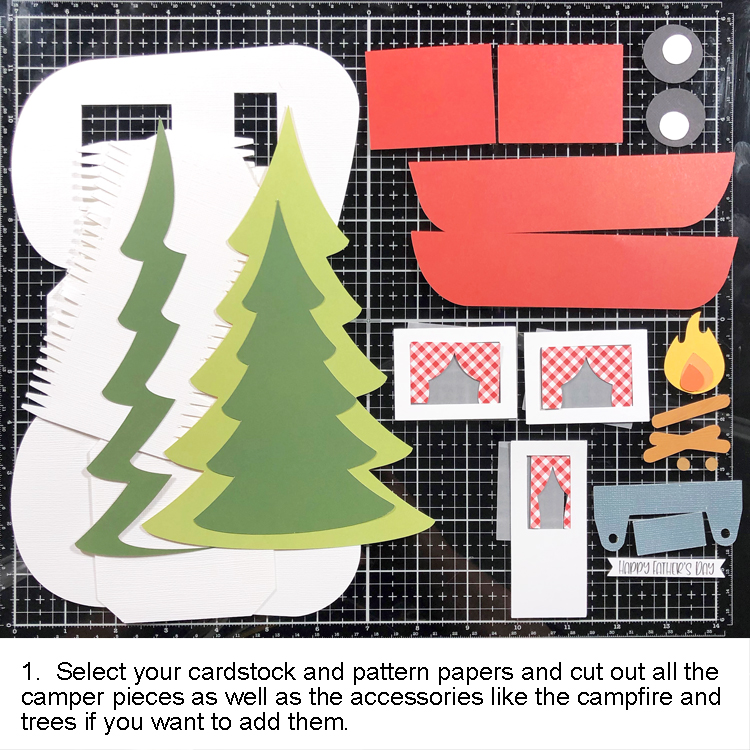
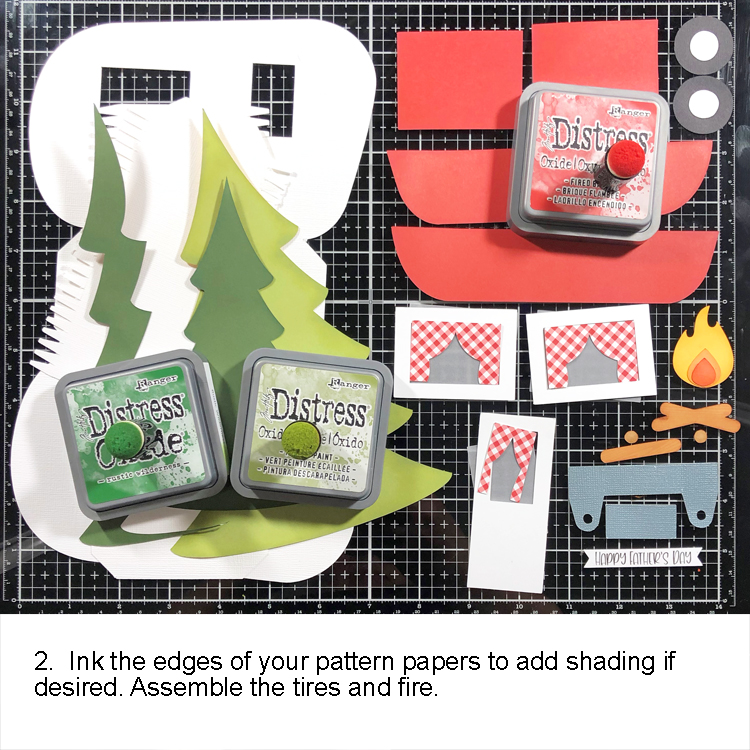
7.  Adhere tires. Add a self stick brad for a doorknob. Add trees in back and the fire in front of the camper. Use the Father’s Day sentiment if you want, or change it up to suit your needs.

Lori has lots of Father’s Day ideas in her shop. Go check them all out and have some fun making your own 3D Camper!

Thanks so much for stopping by.
~Marcia

3D Camper Tutorial

Hello crafty friends! Aimee here and I’m ready to share a tutorial on how to assemble the ever so adorable 3D Camper Father’s Day file (Lori’s SVG Shop, Silhouette).  As you can see this is clearly not a Father’s Day camper but a Summer camper. It really could be made for any season or occasion. So kick your flip flops off at the door and come on in my sweet camper and let me tell you how I made this!

To get started I picked out some beautiful papers from Echo Park Paper’s  A Slice of Summer collection and cut out all of the pieces.

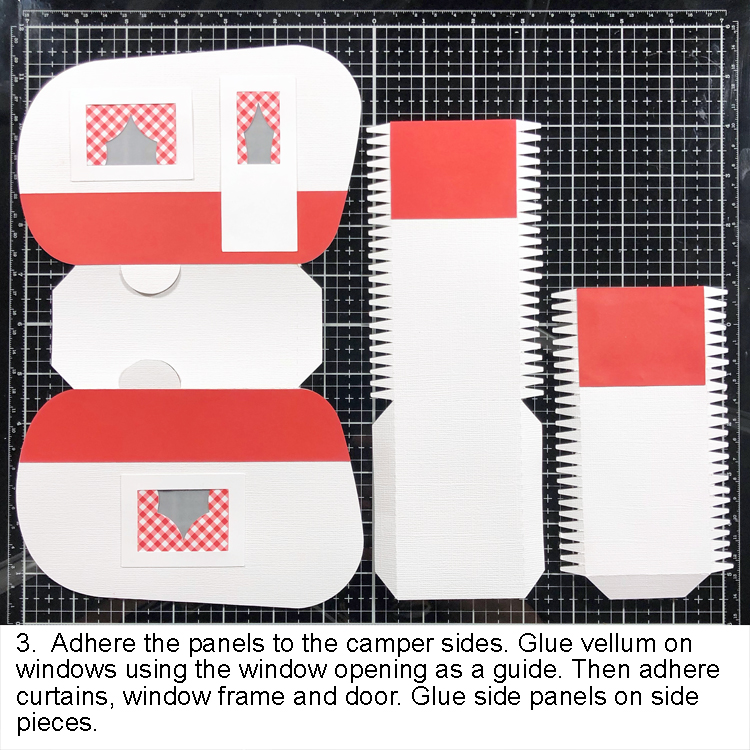
Before I started assembly of the camper I adhered some of the pattern paper pieces to it. Start by folding on the score lines as it helps guide where to adhere the bottom camper pieces. For the windows, adhere the light blue pieces on the inside of the camper and then the curtains will fit just inside the boxes on the camper shell.

Then adhere the outside frames to the windows and door.

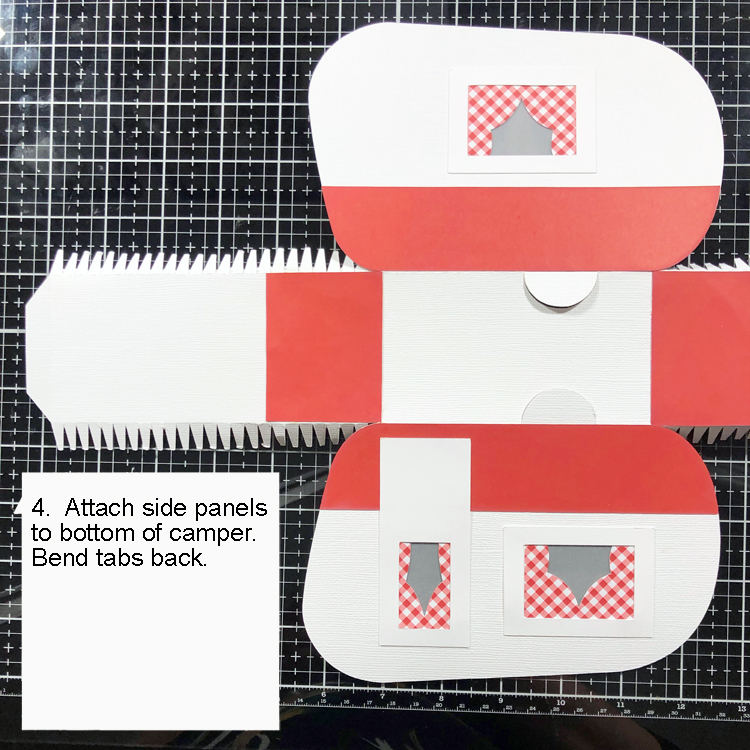
Next you will want to adhere the tabbed pieces to the main body of the camper piece. Lay pieces out and adhere them just as shown in the picture below.

Lift these pieces up until they meet and adhere them together. Next use your hands to shape these pieces to the contour of the camper shape and then add your adhesive to the solid tab on one side and every small tab piece on one side and adhere it to the main body piece of the camper. When that side is dry adhere the other side down.

The last piece is the hitch. The main piece is simply folding it and adhering the two pieces that are similar with one over lapping the other. Take the other piece (rectangle) and roll it up on the handle of a small paint brush. Adhere the end and roll it over to keep the entire piece adhered together. Then adhere the two pieces together.

Then adhere the completed piece to the bottom of the camper.

And now your camper is complete and ready for some embellishments. I found some butterfly stickers in my collection and sprinkled them around because that’s how it is in my perfect camping world! LOL!!

Use this as a happy decoration in your camper or as a centerpiece at a Summer BBQ…how cute would that be? This is fairly good size of decoration that measures 8.50″ tall and about 8″ wide and I promise you it will stand out no matter what you use it for.

That’s all from me today…how you all enjoy!

Aimee

Paper Teapot with Michelle

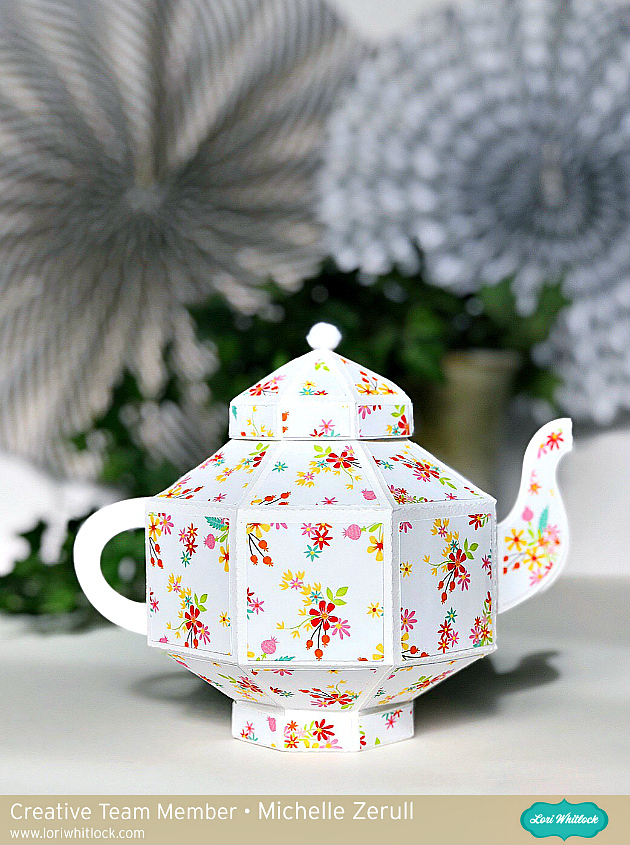
It’s cold outside! It seems as if everyone I know is coughing, sneezing, or has some other Winter ailment. Michelle Zerull here today to share a sweet paper teapot. It won’t cure a cold, but it will make your day a more cheerful one.

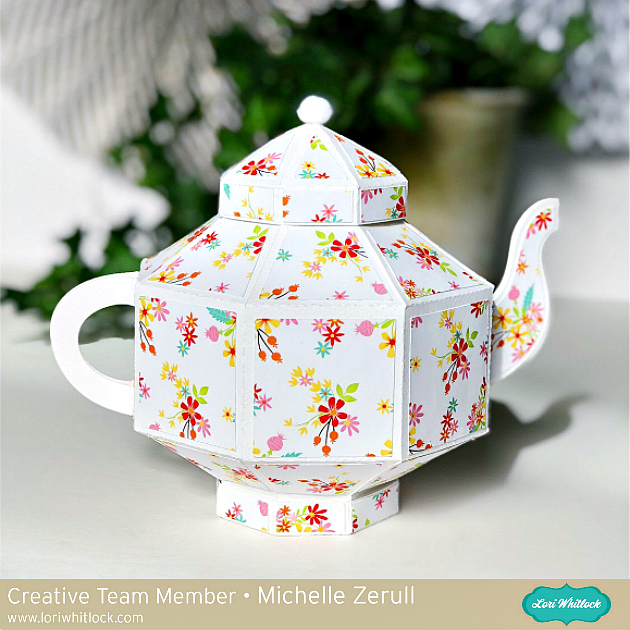
Paper Teapot with Lori Whitlock SVG Files and Echo Park Paper Easter Wishes

You can find this 3D Teapot 2 in the Lori Whitlock SVG Shop, or at the Silhouette Design Store. It’s one of Lori’s classic designs.

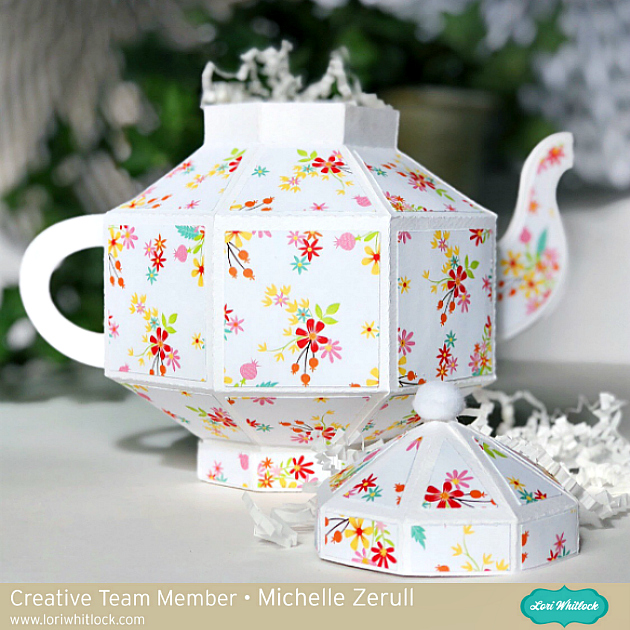
Paper Teapot with Lori Whitlock SVG Files and Echo Park Paper Easter Wishes

The lid comes off so that you can insert a small gift. It would be a great place to to tuck a small package of tea or soup packets to give to a sick friend.

I made panels for my teapot from Lori’s newest paper collection, Easter Wishes by Echo Park Paper. All of the papers in this collection have such lovely prints!

Paper Teapot with Lori Whitlock SVG Files and Echo Park Paper Easter Wishes

Thank you for visiting today. Happy Crafting!

Michelle

<3

3D Witch Hat Tutorial with Brigit

Hello there, today I’m sharing a tutorial on this 3D witch hat project. This hat can also be purchased from the Silhouette Design Store here and also as a set in the 3D Halloween Bundle from Lori’s shop.

This is such a cute home decor piece to add to your Halloween collection, I really love how it came out.

The first thing I did was add all the pieces onto my mat in Silhouette Studio, this included the 3D Chrysanthemum Flower, (Silhouette Studio chrysanthemum). You will need 6 duplicates of the triangle layer and 2 duplicates of the hat top. I used patterned paper from Doodlebug Design’s Pumpkin Party  I did a release compound path on the triangle layer and removed the circles.  Tthis way I’d have solid pieces to show off the pretty star paper.

I resized the hat so I could fit one piece of the hat top with the hexagon bottom on one sheet, this saved me a black piece of cardstock, I also sized the flower so the orange color pieces would fit all on one sheet of cardstock.

I cut all my pieces out and inked the edges of the patterned paper, flowers and leaves.

I assembled the top of the hat first, this thing went together perfectly, I love Lori’s files!!

I then added the triangle layers onto the sides and glued down the circle patterned paper to the black circle rim.

For the leaves I bent them by hand and used ink to create some vein lines, I then sprayed them with some water and crinkled them by hand a little.

I used my McGill tool and mat and a paint brush to curve the flower petals up.

I Glued all the petals together and added a black jewel in the center.

To complete the look, I added some black tulle around the hat, glued the flower and leaves to the side and added the ghost clip and ghouls sticker from Doodlebug’s pumpkin party,

Thanks for stopping by and have a wonderful day!