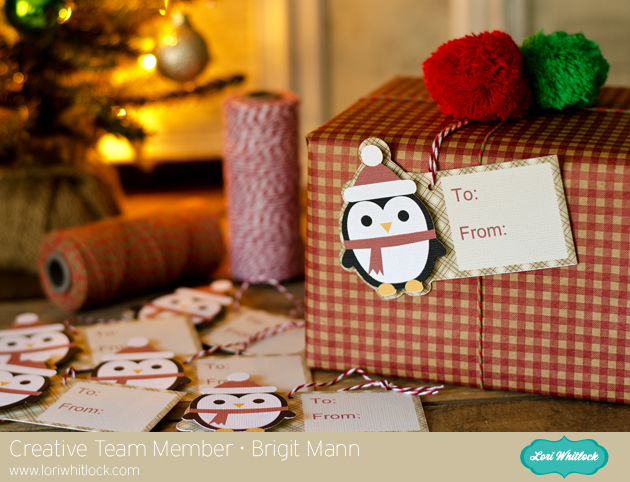
Hi everyone! Brigit here with a fun print n cut tutorial for you today.
These cute penguin Christmas tags are so easy to make and really helps save some time.

Start by getting the penguin from the Christmas Icon Set, I love this set by the way, so many cute svg files in there.
Ungroup and fill each piece with colors, zoom in and layer the penguin together like I’ve done below, select all and group together.
You want to create an outline for your penguin, select him and go to the Offset Window, choose offset and change offset distance to .1 and apply.
Draw a 2″ x 3″ box and place it over the offset of the penguin you just created, like I have in the photo below, with both selected right click and weld or you can go to the Modify Window and weld.
Place a circle about .125″ on your tag, (this is for your twine or ribbon) and select both the tag and circle, right click and choose make compound path, this helps later when you choose to only cut around the edge of the tag.
Fill your tag with digital paper, I’m using Echo Park’s Reflections Christmas designed by Lori.
I added a 1.75″ x 2″ box and filled with beige then added the text so you could see it better.
Fill your text with color or if you just want it outlined make sure under the Line Style Window you check the Print Lines of Selected Shapes.
It’s important that you only cutout the outline of your shapes. I chose to cut my penguin out separately so I could pop dot him up. Go to the Cut Style Window select tag and choose the Cut Edge, do the same for the penguin, it should look like the photo below.
In the Registration Window select Show Reg Marks
Under Page select your printer page.
I have a wide format printer so mine is setup to print on a 12″ x 12″ size paper.
I was able to fit 6 tags but you can re-size to fit more if you’d like.
I hope you find this tutorial helpful. Christmastime can get very busy so these pnc tags come in handy when you need some quickly.
Thanks for stopping by, you can visit me at http://www.brigitsscraps.com

Oh my goodness! What an adorable and clever idea!!! Pinning it right now.
I love this idea! I thought I could live without print and cut (don’t have my laptop networked with my printer) but now I don’t think I can live without doing it!
Thanks so much for the tutorial and the wake-up call!!!
Loved this tutorial! I was able to make a few myself. Thank you for sharing.
Thanks so much and I’m so happy you were able to make some!!
Yay! I did it! They are just so cute! I really love them, and thanks so much for the tutorial so I could make them myself.