Hi friends – It’s Tya and today I am sharing with you a tutorial on how to custom make your very own Valentines Day Stickers! Recently Lori came out with a few darling sets of Print and Cut Valentines with the cutest icons on them. So I thought it would be fun to make some matching stickers with the same icons on them and add a little personal touch to them by saying who they were from as well!
Let me show you the steps on how I did this!
First off gather your supplies – I used some Double Dot papers from Bo Bunny for my enevelopes, some Silhouette White Sticker paper and some buttons for decor.
First step-
Pull up the files in the the Silhouette Software – I used the Butterfly and Heart Valentine file for my project.
Using the Print and Cut feature – I printed out my cards.
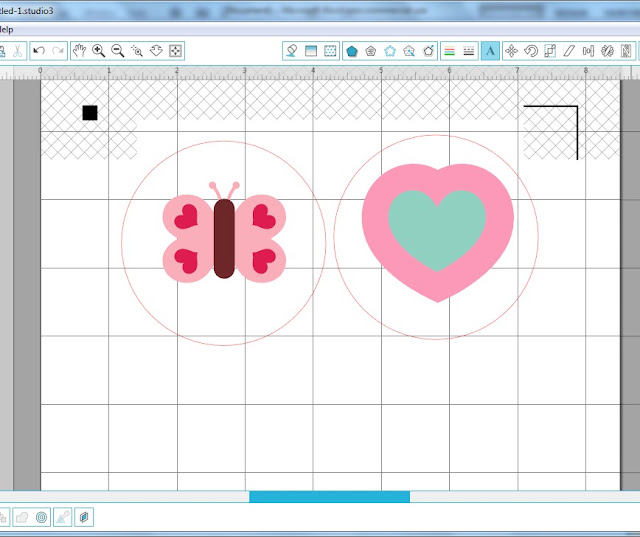
Next I ungrouped the images until I got the Butterfly and Heart Image all by themselves.
Now I want to draw a circle around the shapes to make the outside of the sticker, so I took the Ellipse tool and made a 3 inch circle around both shapes.
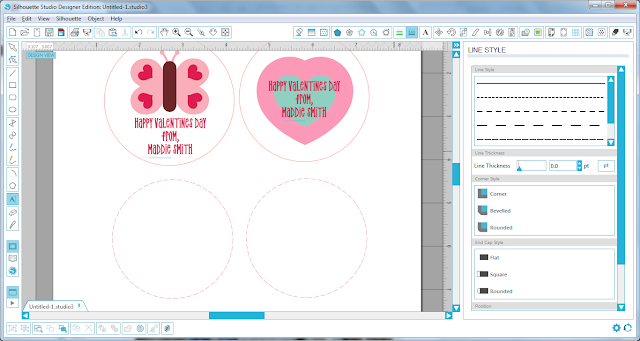
Next, I typed out my sentiment using the Type Tool – I used the LW Simple Dot Font. I added the sentiment onto the shapes.
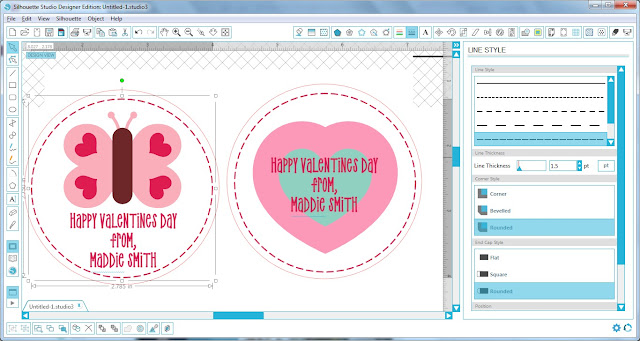
Next , using the Ellipse Tool again, I drew a 2 .75 inch circle.Drag that circle into the larger circle and center. Using the Line Style Tool, changed the line from solid to dashed to make it look like it was a sewn edge. You don’t necessarily have to do this step but I thought it was fun. 🙂 Now go ahead and duplicate the shapes to fill your sticker sheet.
Next we need to make sure that the only lines that the Silhouette is going to cut is the outer line as shown, so go to the Cut Settings tab and make sure you click on every part of the sticker and make sure that the inside shape, sentiment and dotted line circle do not get cut by clicking No Cut. Then select the outer line and select cut edge. This way the only line that will get cut is the very outer edge.
Now we are ready to print the sticker sheet out. Load the sticker paper into the printer. Add registration marks and select the “White Sticker Paper” setting on the Silhouette and then print it out. The settings that are preset for this type of paper are perfect. Here is the paper all printed and ready to cut.
And here are the stickers when then have been cut out.
Next , using pattern paper cut out the envelopes.
Now you are ready to decorate your envelopes with the stickers. I added some fun buttons and twine to fancy them up a bit.
That’s all there is to it! If you are tired of boring, store bought Valentines cards, give these cute cards and stickers a try. This would be so fun to let your kids help with the decorating of the envelopes. Thanks for stopping by! Happy crafting!


Such a darling idea! Your daughter’s friends are going to love these. 🙂
Your child’s friends are going to love these cute Valentine’s. I’ve never seen a beautiful Valentine like this come home with my child! Button’s and twine… oh, my!
Thanks for sharing!
Cute idea! Thank you for sharing!!
Would it have worked to use the inside offset function to create the dotted lines?