Adorable 4×6 Vertical Mini Album with Pockets and Tags

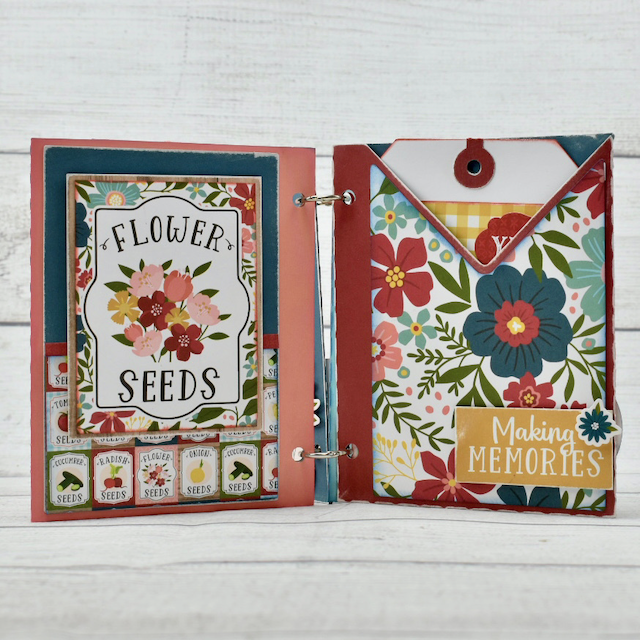
Hi there paper crafting friends!  It’s Michelle Starcher, aka the Bookish Designer, hopping onto the Lori Whitlock blog to share a mini-album I made using the Farmer’s Market collection that Lori designed for Echo Park Paper Co. I used the 4×6 Vertical Mini Album with Pockets & Tags (SVGSilhouette) to make the mini-album. The album was easy to put together and can be decorated with your favorite stickers and embellishments to make the project pop.


The project includes four pockets and tags as well as four rectangular pieces that can be used to frame your photos on the back of each pocket. You can easily include a picture on the front and back of each tag. I added an extra piece of cardstock to my tags for more color along with a few embellishments.
 

Until next time,

Michelle, aka the Bookish Designer


18 Hours Left! ALL Friday $5 Bundles are Back!

You have 18 hours left grab any Friday $5 Bundles that you want! This weekend we brought them all BACK!!! This is something we rarely do. So, if you’ve missed some Friday $5 Bundles, now is your chance to pick them up!! They will be available until midnight so be sure to take advantage of this fabulous special! When they’re gone, they’re gone!

These SVG files can be used with Cricut Explore, Silhouette Studio (with the Designer Edition upgrade), Scan N Cut, and any other cutter that will work with SVG files.SHOP ALL $5 BUNDLES HERE

Here are some of our customer favorites this week…

Friday $5 Bundle #65

Friday $5 Bundle #122

Friday $5 Bundle #75

Have a great day!

Don’t Miss This! ALL $5 Bundles are BACK!

This weekend we have brought back every single one of our Friday $5 Bundles!!! So, if you’ve missed some bundles, now is your chance to pick them up!! They will be available until Sunday at midnight so be sure to take advantage of this fabulous special! When they’re gone, they’re gone!

These SVG files can be used with Cricut Explore, Silhouette Studio (with the Designer Edition upgrade), Scan N Cut, and any other cutter that will work with SVG files.SHOP ALL $5 BUNDLES HERE

Here are some of our customer favorites this week…

Friday $5 Bundle #65

Friday $5 Bundle #122

Friday $5 Bundle #75

Have a great day!

All Friday $5 SVG Bundles are Back!

Hi Everyone! Happy Friday! I have some great news for you — this weekend we are bringing back every single one of our Friday $5 Bundles!!! So, if you’ve missed a bundle, now is your chance to pick them up!! They will be available until Sunday at midnight so be sure to take advantage of this fabulous special!  These SVG files can be used with Cricut Explore, Silhouette Studio (with the Designer Edition upgrade), Scan N Cut, and any other cutter that will work with SVG files.SHOP $5 BUNDLES HERE

Have a great day!

Grid Pop Up Card Tutorial

Hi Everyone!  I’m back with another fun 5×7 Grid Pop Up Card today!  In addition to the seasonal versions of this card type, Lori has a fun 5×7 Grid Pop Up Birthday Bundle.  I have a few January birthdays coming up so I decided to make the 5×7 Grid Pop Up Card Birthday Balloons version (SVGSilhouette).  I pieced it together with papers from Lori’s Pets Collection for Echo Park Paper.  Take a peek…

I put together a quick tutorial showing just how easy these cards are to assemble.
Start by cutting the pieces of your card.  You will have three plain bases (bottom) and three decorated inserts.  Next, add the different elements to the inserts.  I cut and added the stars, balloons, and banner to the front-facing pieces (the clouds are part of my patterned paper).  I also print and cut the sentiment piece using the print and cut feature of my Silhouette.  This piece goes on the back of the largest insert.


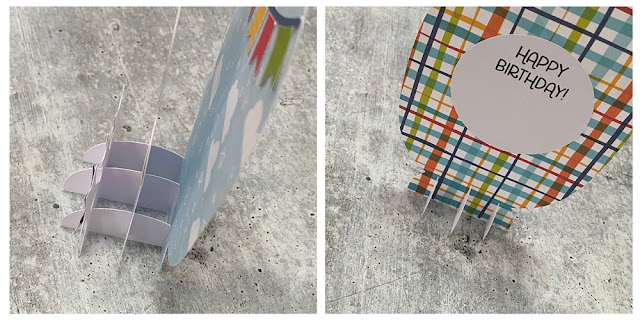
Next, you want to start assembling your “grid”.  Start with the three plain bases.  The two smaller bases go on the outer sides with the larger one in the middle.  Slide the front star insert into the front-most slits in each of the base pieces as shown.  The bottoms should be flush.  You may need to wiggle them a little to get them there.
Next, add the second insert with the balloons.  You want to slide it into the second set of slits in the base pieces.


Lastly, repeat the process with the largest background insert.  Slide it into the last row of slits until the bottoms are all flush.
Once assembled this card folds flat to fit into a standard A7 (5.25″ x 7.25″) envelope.


That’s it for me today, thanks for stopping by to peek!
Kathy