Chalkboard Card for a Teacher Using Cricut Design Space with Karin
I made this adorable chalkboard card that you can use to give a special teacher a gift card.
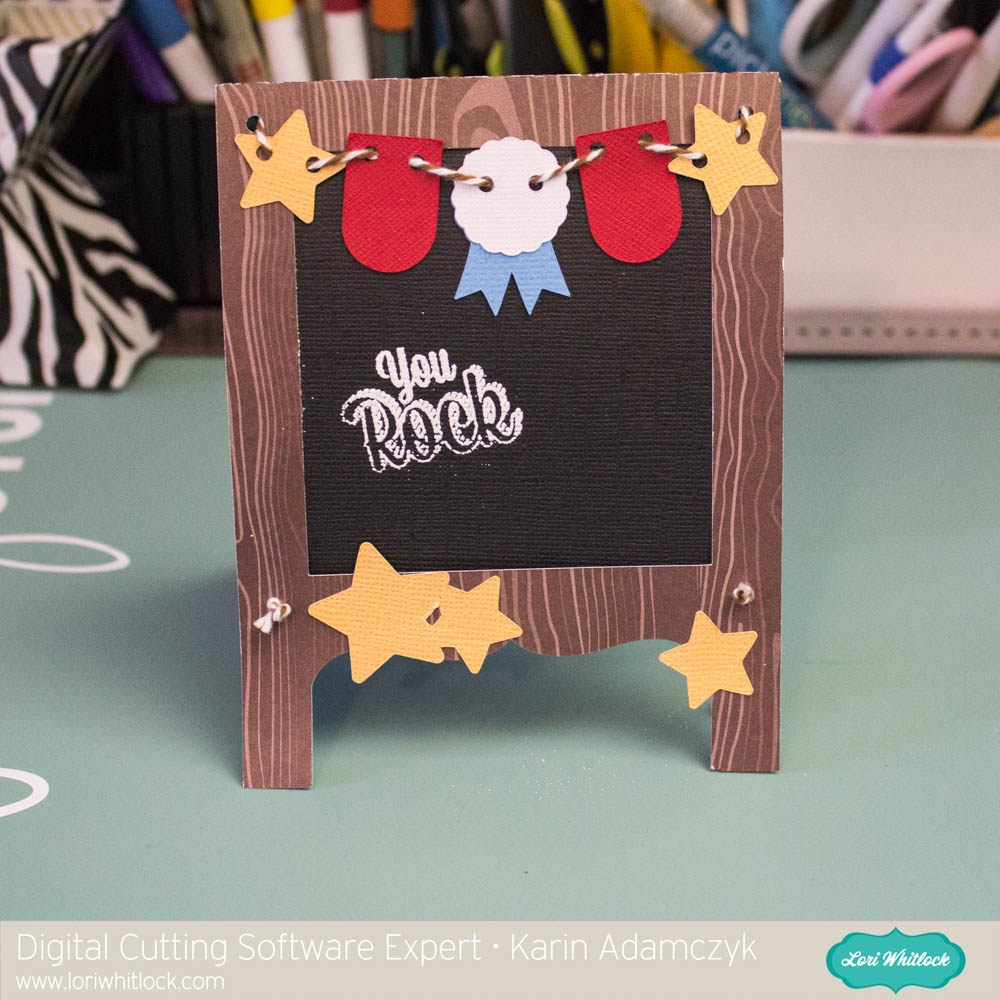
To make the card, I brought the files into Design Space by choosing Upload Image.I opened the image of the cutting file (JPG) in Preview on my Mac and just moved that window onto the screen next to the cutting file pieces so I could see the colours used in the original project. In this case, I loved the colours because they are nice and bright so I used all the same colours for my card. I even had a great piece of wood grain patterned paper.To change the colours of the components in Design Space, all I did was click the piece, that piece is highlighted in the Layers panel, then I clicked the scissors icon and then the colour I wanted for that piece.Here you can see that I changed the colour of these tabs to red.Before clicking Go, I selected the individual pieces by drawing a rectangle around them and then I right clicked and chose Attach. This is so that the little circular cuts and scoring lines stay in the right place on that particular piece.After I cut and assembled the pieces, I used some baker’s twine to string the banner pieces along.I put knots in the baker’s twine to attach the legs at the front and back.I just used my ATG gun to put adhesive on the back of the iTunes card and attached it to the back of the card.I stamped a sentiment on the front of the card. The You Rock stamp is from the Avery Elle Celebrate Stamp set. I used American Crafts Zing Embossing Powder in White Opaque Finish, my VersaMark watermark stamp pad and my Ranger Black Heat Tool for the sentiment.


This is a really great tutorial! Thanks!