It’s Beginning To Look A Lot Like Christmas


Anita here with a fun tutorial to make this gift set.  I love to quilt and embroider as much as I love to paper craft and I was thrilled to recently discover that Lori Whitlock has embroidery files that she has designed, many of which mirror her paper craft SVG files.  You can find her gorgeous embroidery files at Embroidery Online.  I will give you all the links in the post .
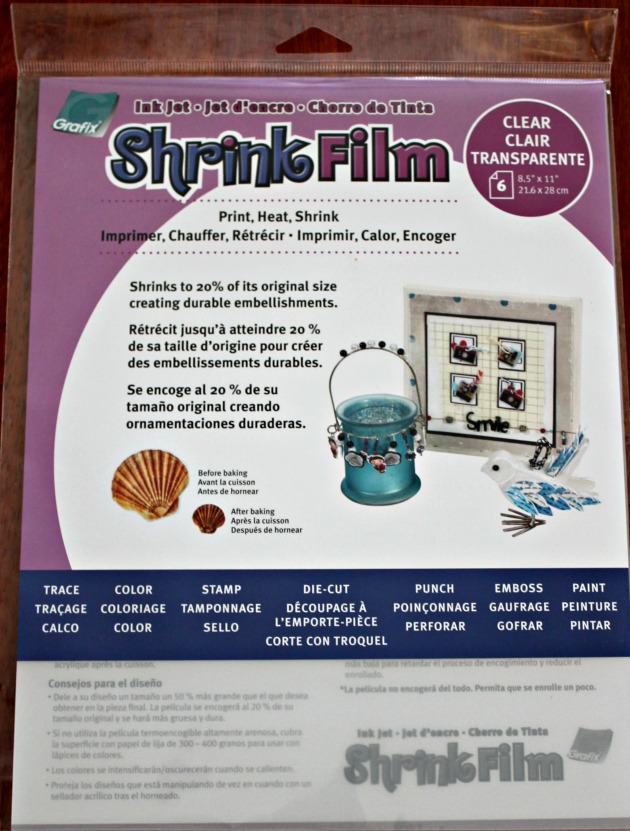
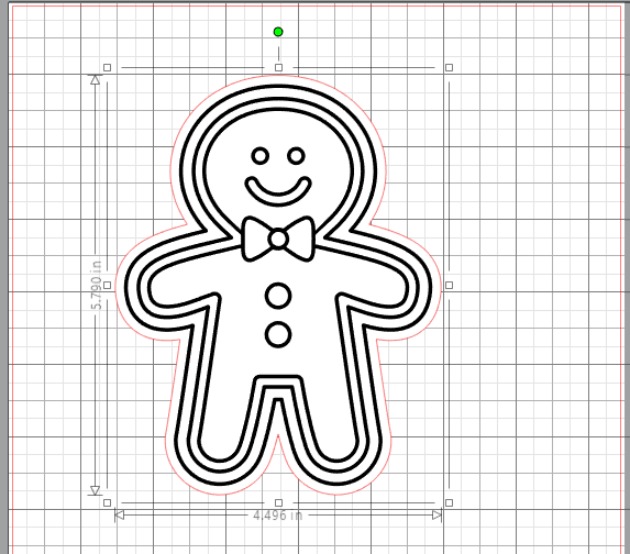
I bought shrink film from Amazon and used Lori’s Print & Cut Stamps Christmas Cookies which you can find here in her store .  I resized the image of the gingerbread man so that it would come out the size that I wanted.  I then printed the image onto the shrink film through my laser printer.  Just let it dry for a few minutes before coloring it.
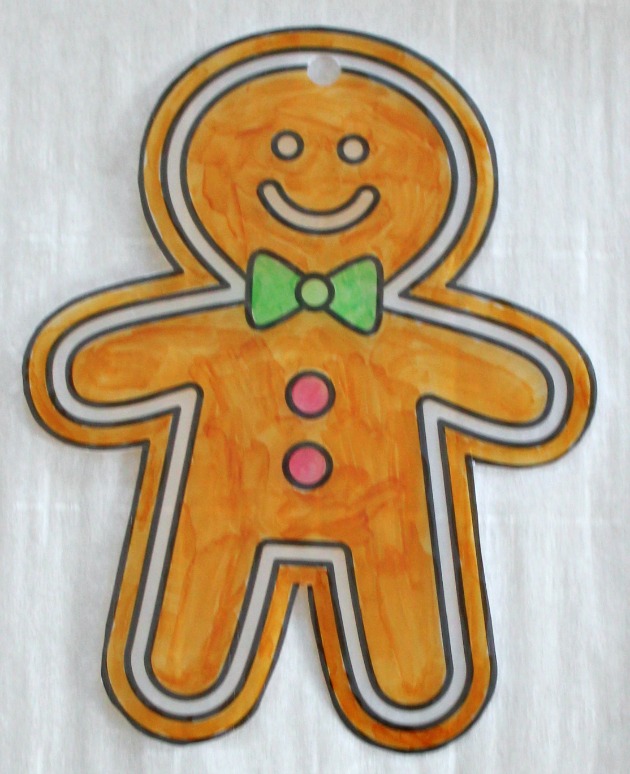
I then used my Copic markers to color the shrink film.  I knew that the colors would deepen once I shrunk the image so chose my colors with that in mind.  I used R37, E11, G14, G07, E99 for the gingerbread man and Y08, E99, R37, G07 for the Gingerbread house.  Be sure to punch a hole in your shrink film before you put it in the oven and remember that the hole shrinks also.  The directions say to bake the film on parchment at 300 degrees for 2-3 minutes but I found that my heat gun worked much better as I could control the plastic as it shrank.  Below is the before picture.
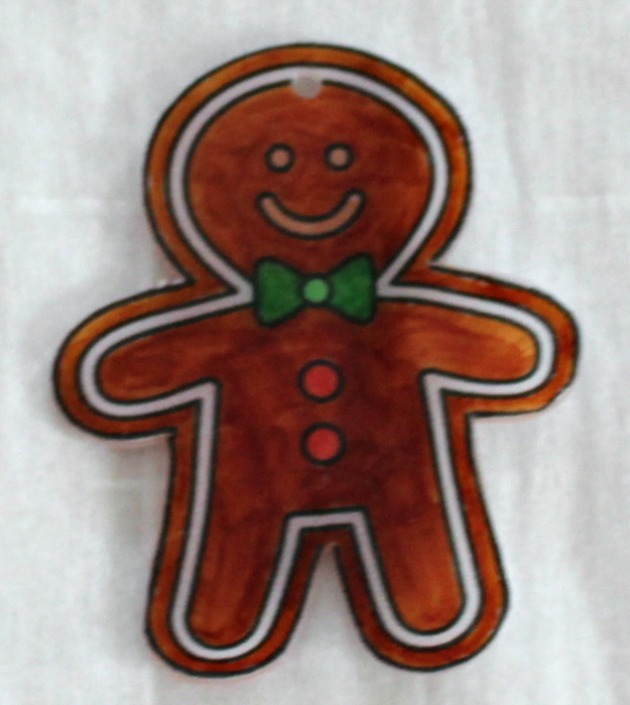
Here is the photo of the shrink plastic after it was  done.
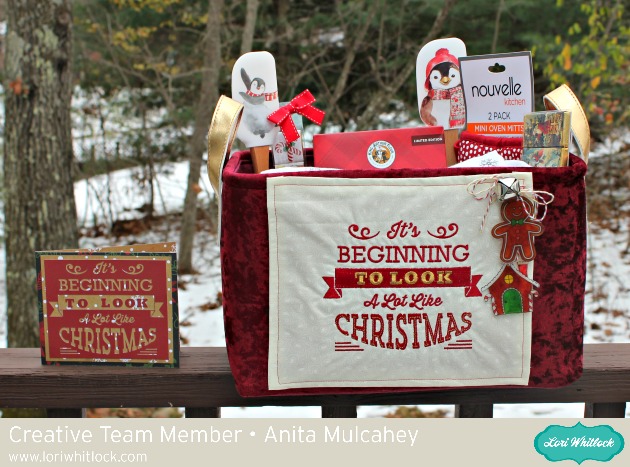
I went to Embroidery online and bought the bundle which had all the Christmas embroidery files that I wanted to use for this project.  It is called Christmas Time by Lori Whitlock.  You can buy the collection or the individual embroidery files.  I embroidered the phrase It’s Beginning to Look a Lot Like Christmas on a piece cotton.  I then finished the edges and glued it to the front of my tote.  I also embroidered my daughter-in-law’s name on the top of the apron as this set is for her.  She is an amazing baker.
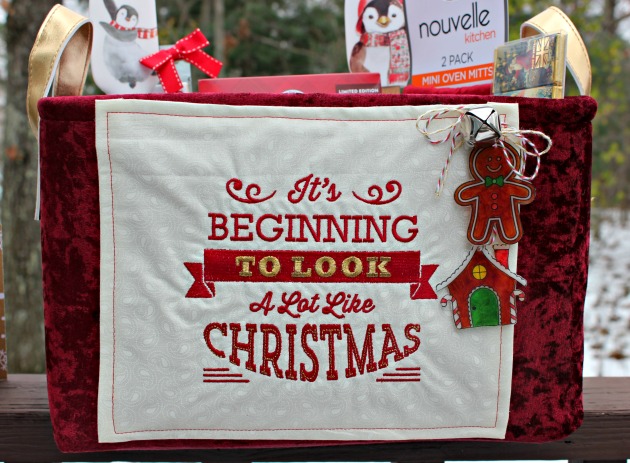
I then strung my two adorable gingerbread embellishments on some yummy twine, added a bell and glued that down as well.

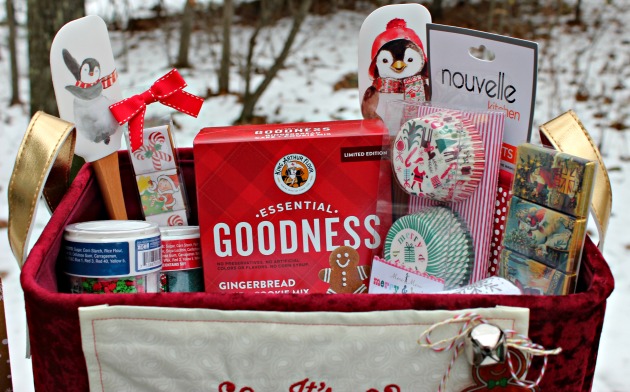
I really love to match things and  have been so excited to make this project.  Here is a close up of all the goodies that I put inside the basket.
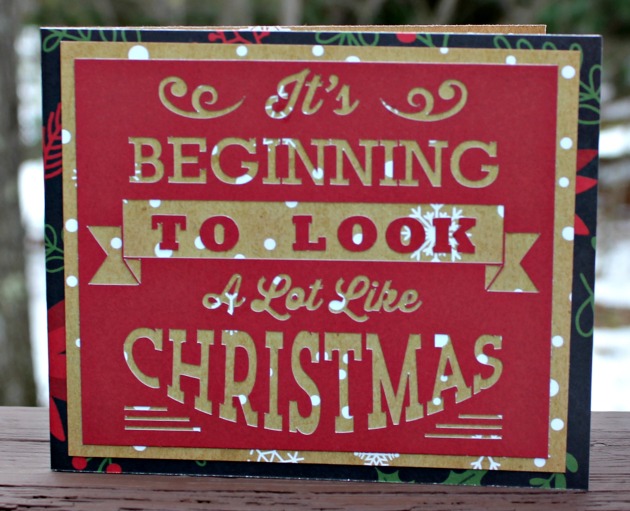
The last thing that I did was made a card that used the SVG cut file which matched the embroidery.  I used Lori’s new Christmas collection called Celebrate Christmas.  The cut file can be found here in Lori’s store and here in the Silhouette store and is called Look a lot Like Christmas Phrase.
That’s it for me.  Hope that you have a wonderful holiday season.

Hugs,

Anita
 

Make a Silhouette Advent Calendar!

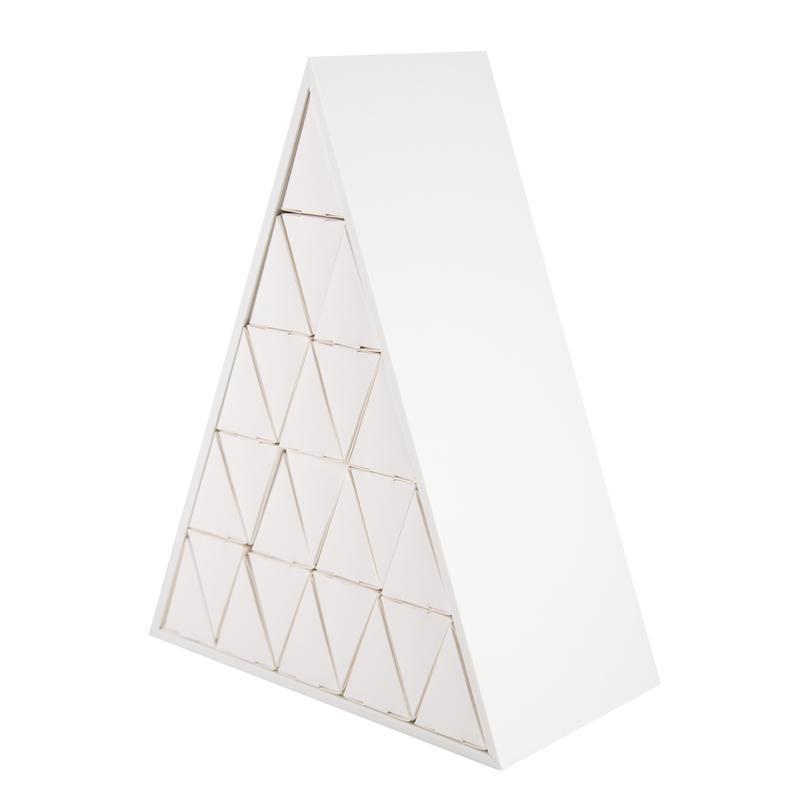
Have you seen the Advent Calendar that is available in the Silhouette Store this year?  Last year it was only available as part of one of the Black Friday bundles but it was so popular, that Silhouette has made it available as a stand alone project this year!  It features a pyramid-shaped shadow box and 25 pre-cut  triangular boxes, which fill the shadow box. Its so simple and fun, and now is the perfect time to make one!  Normally, it is  $39.99 – but between now & October 31, 2018, you can purchase it for just $24.99, using my exclusive code LORI and by clicking HERE.

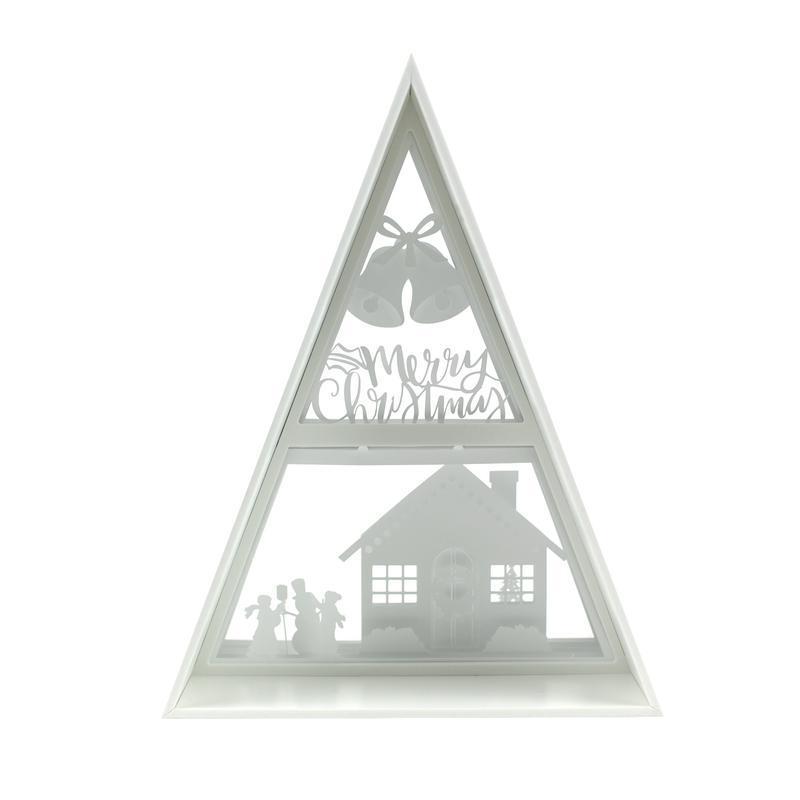
The Advent Calendar arrives completely blank. Silhouette gives you a download card with a code that you can redeem for a set of cut files to customize your calendar. Also, included in those cut files, are 4 Christmas scenes that you can cut and install in layers behind the boxes. After all your boxes are removed, you then reveal a fun layered holiday scene!

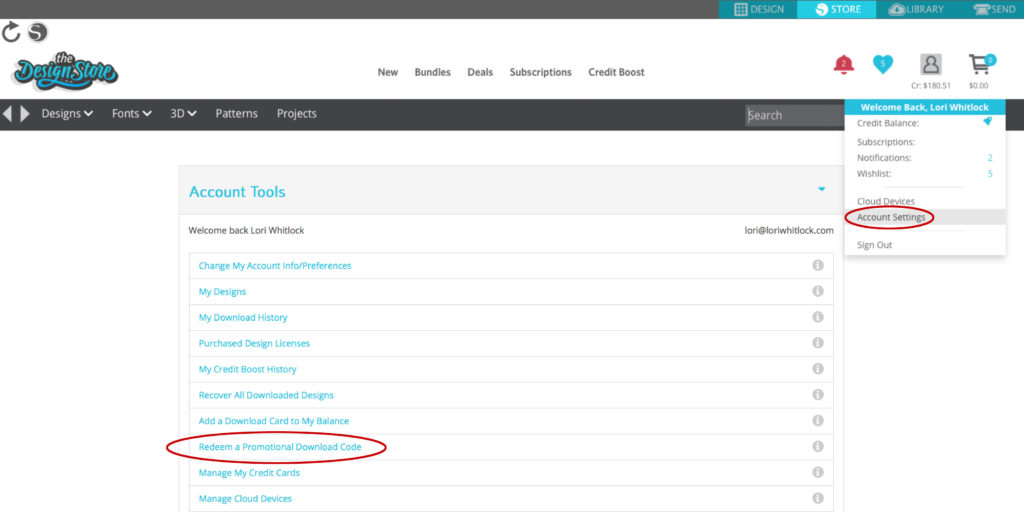
To redeem this download card, simply open the Silhouette Design store, click on your name & this screen will appear.   Then click on Redeem a Promotional Download Card — and a screen appears where you can enter the 16 digit code that is hiding underneath the silver scratch off area on the card.  Once you have entered this code, click on “Apply Card”, and the designs will download to your library.   

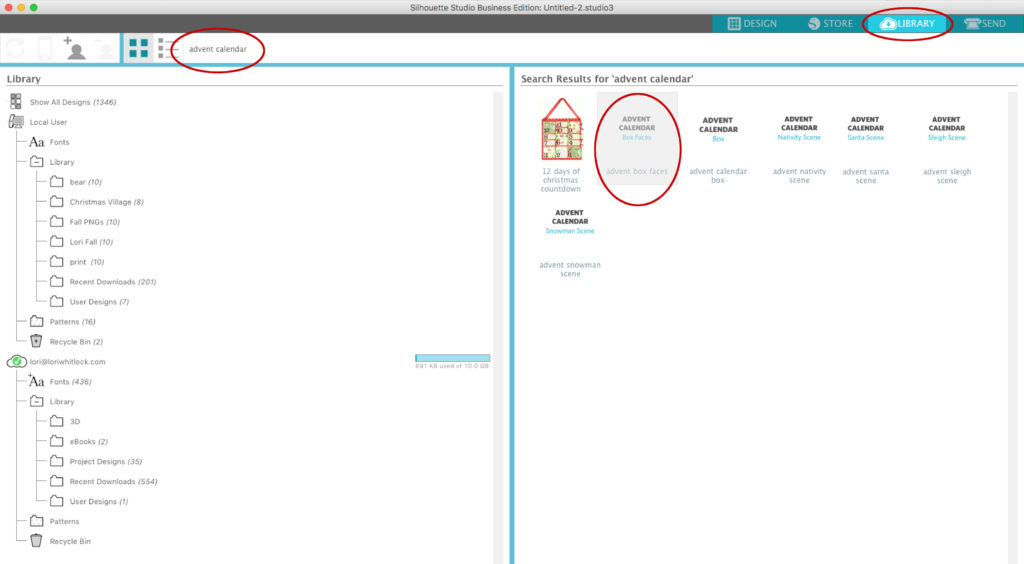
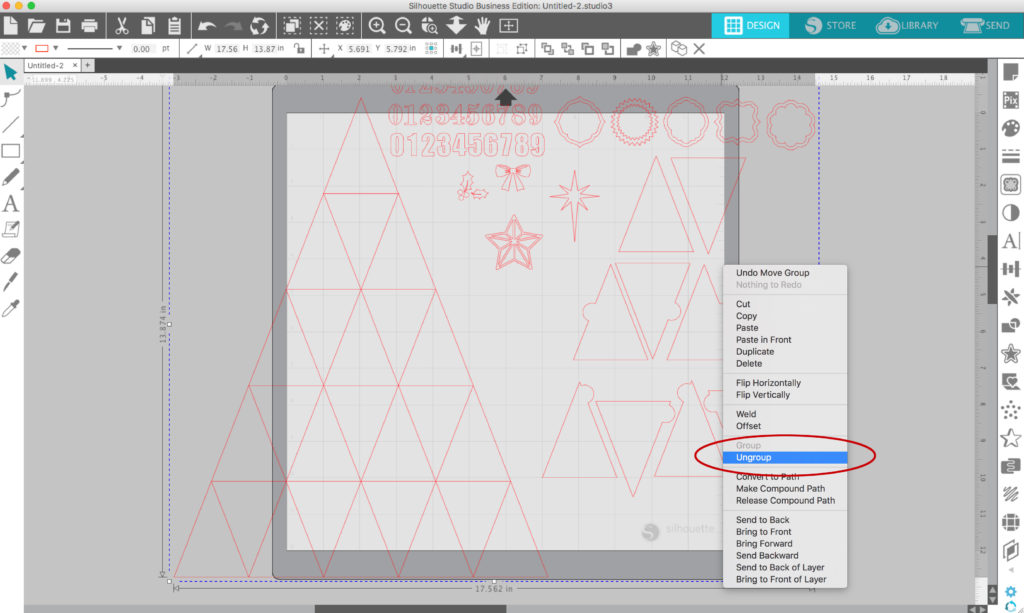
Once you’ve downloaded the files, it’s time to get started customizing your calendar!  Here’s how I embellished my calendar…To start, I opened Advent Calendar Box Faces file.

Next, I un-grouped and removed pieces all except the triangles.

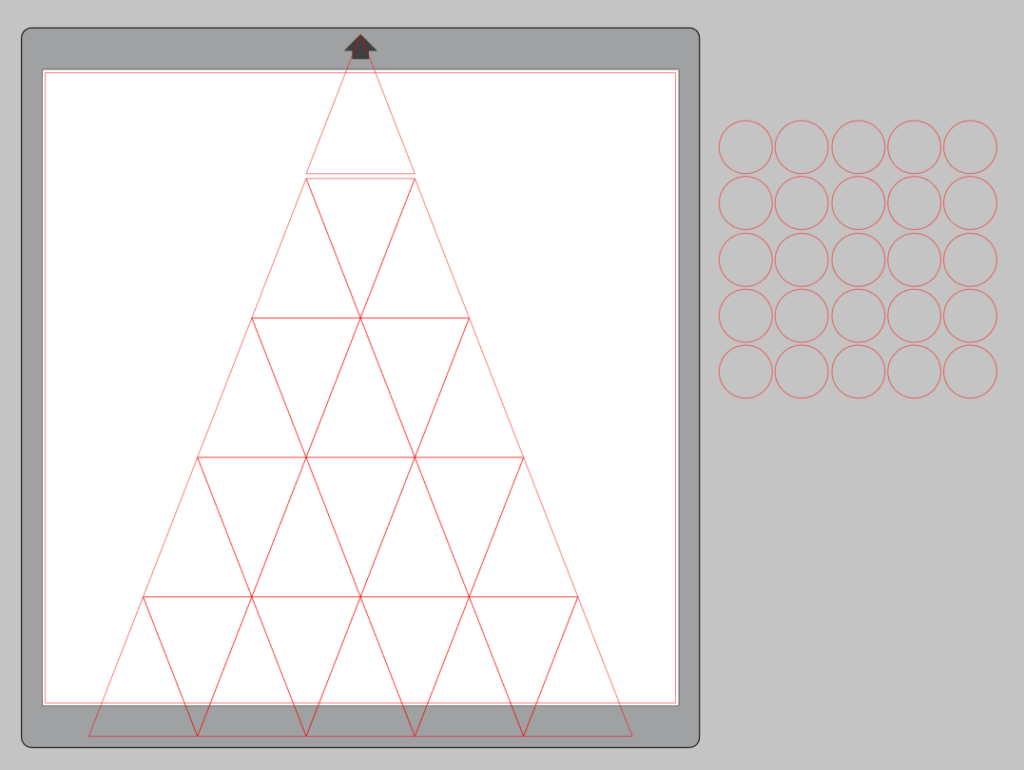
I created 1 inch circles using the left tool bar, To do this, select the oval/circle shape. Then hold down the shift key and drag your mouse while holding the left mouse button. When you’ve drawn the circle, release the mouse button first and then release the shift key. You can resize the circle as needed.

I then used replicate tool to create 25 circles

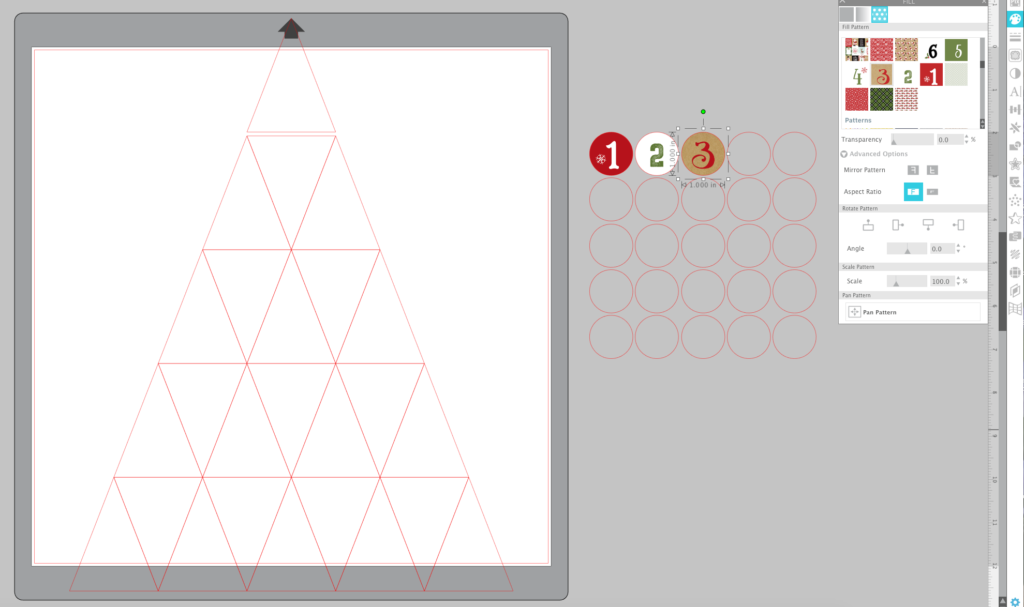
I then added the numbers to my Pattern Fills library and began filling circles with numbers. I’d like to give you the number set for FREE just for reading along this far in the post : ) CLICK HERE to download the number set.  (click on the link then the three dots in the corner and click “download”)

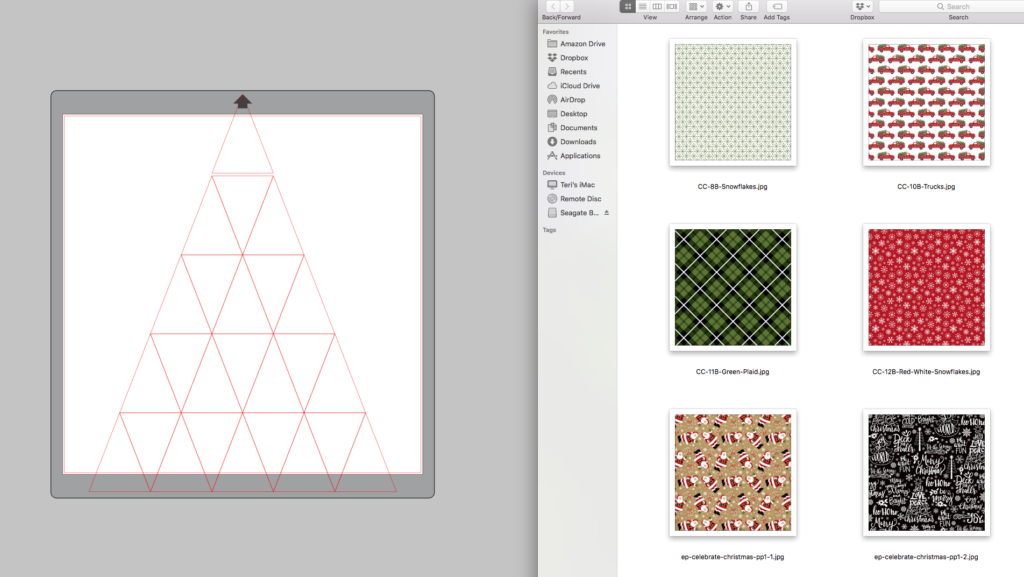
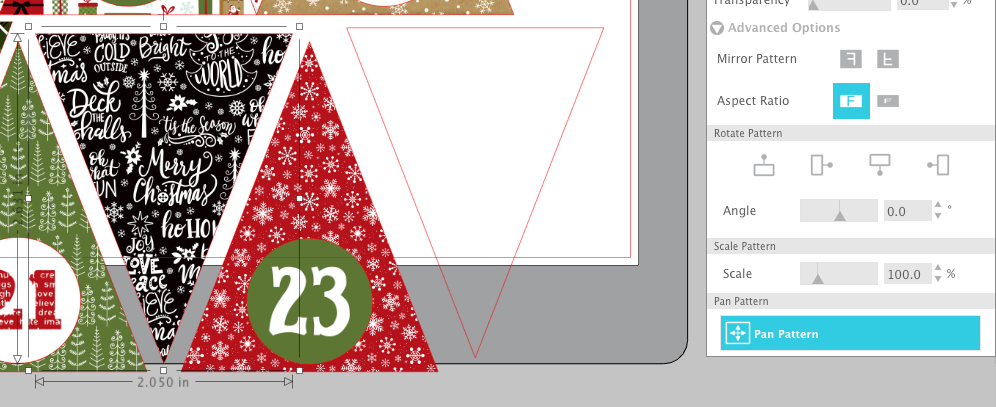
After I was finished with the numbers, I added fills to the triangles to coordinate with the number fills. Did you know you can simply drag and drop pattern into the triangles directly from your computer window? No need to upload them into your pattern library. Of course adding them to your library is great, but dragging them in from your computer window is sure handy and quick! I used the digital version of my Celebrate Christmas Collection.

You may choose to use a portion of a pattern fill by using the pan pattern tool in the fill portion of the side panel tool bar. To move the pattern to your desired placement, hold down the black circle with the crossbars and pan the pattern to your desired placement.

After you have filled in the patterns, place your numbers in desired triangles. You can use the align tool to help you center them in each triangle.

Repeat this process until you’ve filled all 25 triangles.  When complete, you will want to group each number and triangle. Then, carefully set up your triangles to print and cut. Depending on your printer, this can be done on 8½”x11″ or 12″x12″ sheets.

Basic Print and Cut Instructions:
1.Open the Page Setup Panel and change page size to 8.5×11 (or whatever size paper you’re using with your printer)
2. On the Page Setup Panel, click on the third Tab over. Set registration Marks Style: Type 1 CAMEO (or Portrait if that’s what you’re using)
3. Send the file to your printer and print on white cardstock.
4. Load the sheet of printed cardstock on your CAMEO Mat in the top left corner just as shown on your screen.
5.Click on the Send Tab.
6. Choose your material, Action = Cut, choose your tool.
7. Be sure to select the image on your cutting mat and then choose CUT EDGE.
8. Send. (your machine will read the 3 registration marks with it’s optical eye and then cut the triangles out precisely).

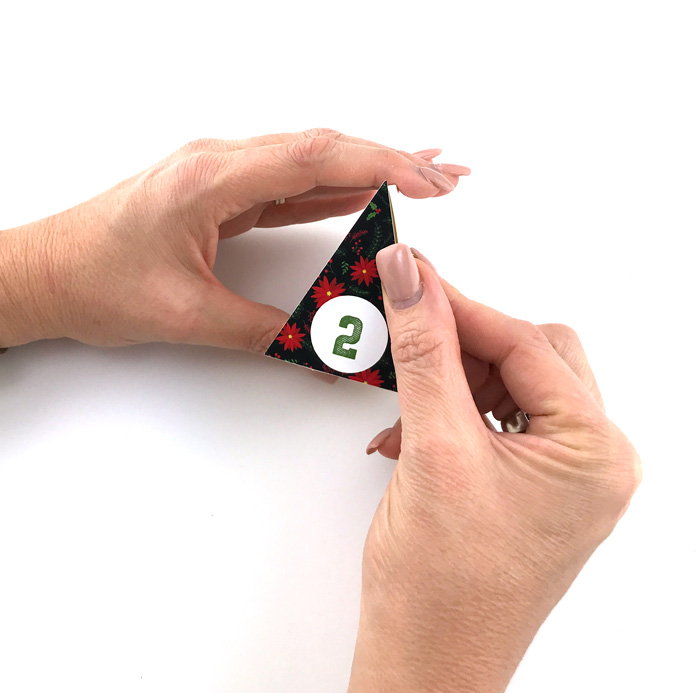
Once you have everything cut out it’s time to assemble. Simply glue the triangles to the front of the boxes. The scene in the back is numbered and has little tabs that insert into the advent calendar base making it easy to put those in place. 

Here’s a finished view of my Advent Calendar! I’m super excited to use it this holiday season!

And, as you remove the boxes each day, it reveals a darling layered shadow box scene.

This advent calendar is such a fun way to celebrate the season! And, it was fun to customize it with print and cut and my Silhouette CAMEO.  This calendar is available for just $24.99 through October 31st when you use my exclusive code LORI and by clicking HERE!

Halloween Lantern Set by Aimee

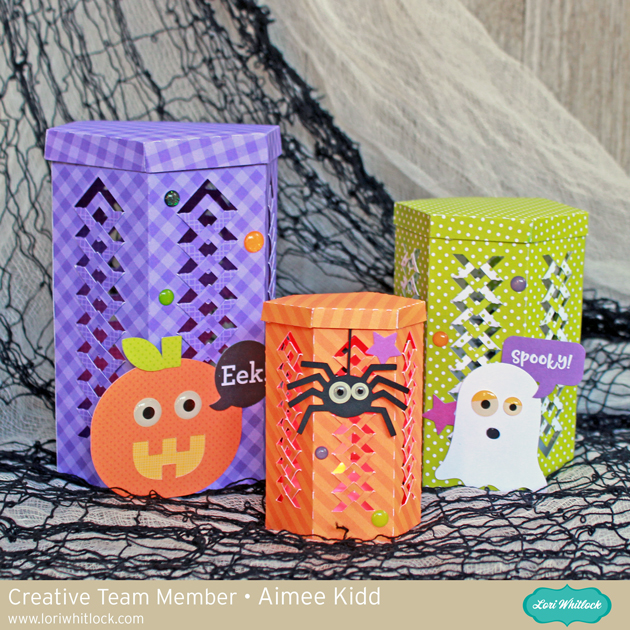
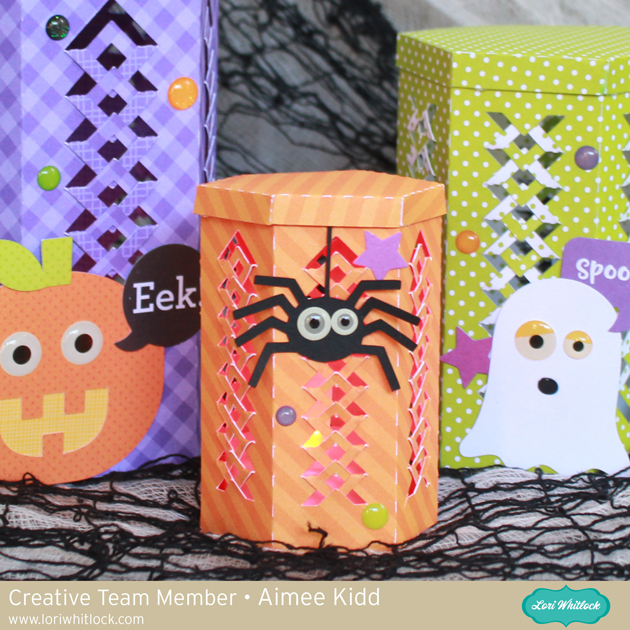
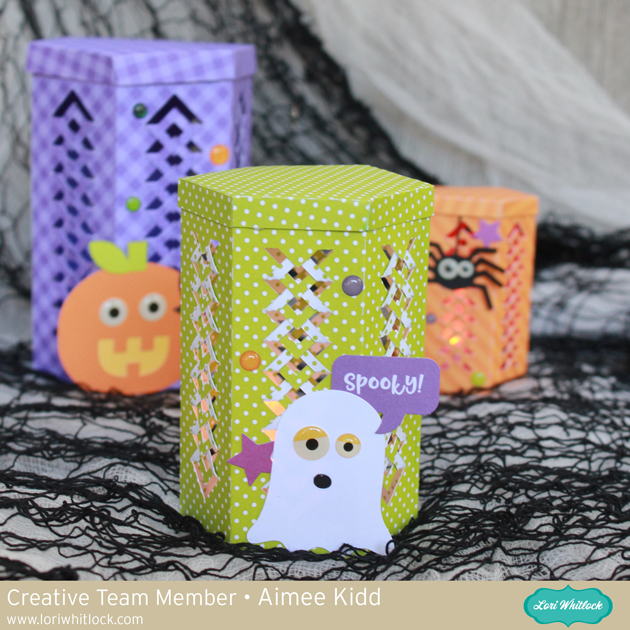
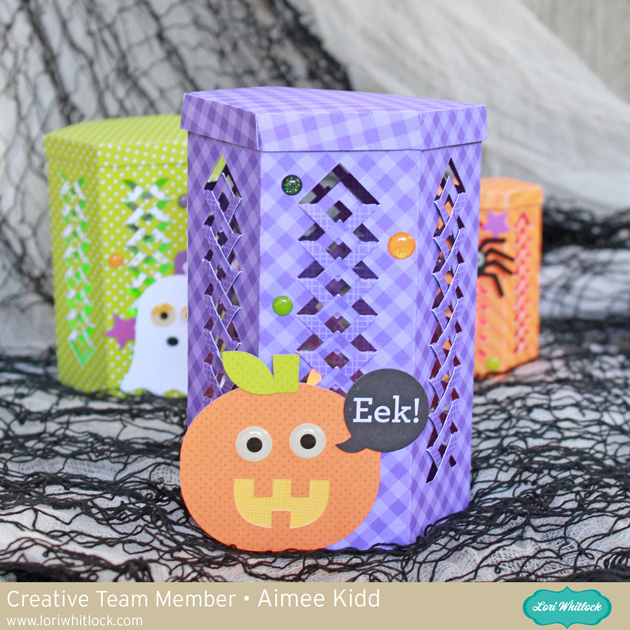
Hello friends! Aimee here with you today with a quick and easy Halloween project that is fun to create. And with Halloween quickly approaching you could create these in no time and they are sure to catch the eyes of your party guests or little trick or treaters!I used the Hexagon Fold Tuck Lantern (Lori Whitlock Shop, Silhouette Design Studio) to create this fun little set of Halloween lanterns. This file is so versatile it can be used for a number of celebrations!Since I was making a set,  I wanted a different height for each one. The smallest spider lantern was resized to 3″. This sweet little hanging spider svg file is part of the Halloween Icon set and can be found at the Lori Whitlock Shop or in the Silhouette Design Store.Up next is the spooky little ghost lantern which was resized to 4″ and can be found in the Cute Halloween Set found at the Lori Whitlock Shop or at the Silhouette Design Studio.And our last lantern in the set is the plump little pumpkin lantern which is cut at the normal file size at 5″. That adorable little pumpkin is also found in the Cute Halloween Set. I hope you all enjoyed these fun and adorable Halloween Lanterns!  The lanterns are so much fun to put together and decorate and are perfect for any occasion!
Hope everyone has a fun and safe Halloween!

Aimee

Doodlebug Design Cut File Feature: Hello

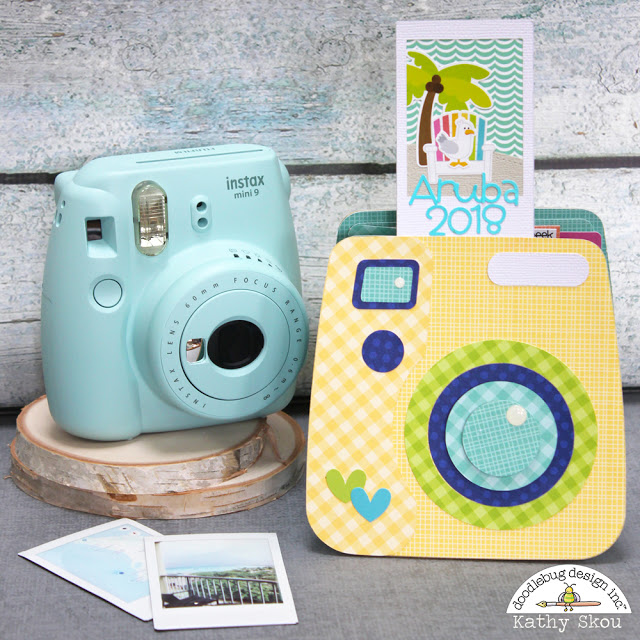
Hi Everyone!  Today I’m showcasing another fabulous project using Doodlebug Design’s cut files!  This fun Instax Mini Album was created by Kathy Skou for Doodlebug Design.

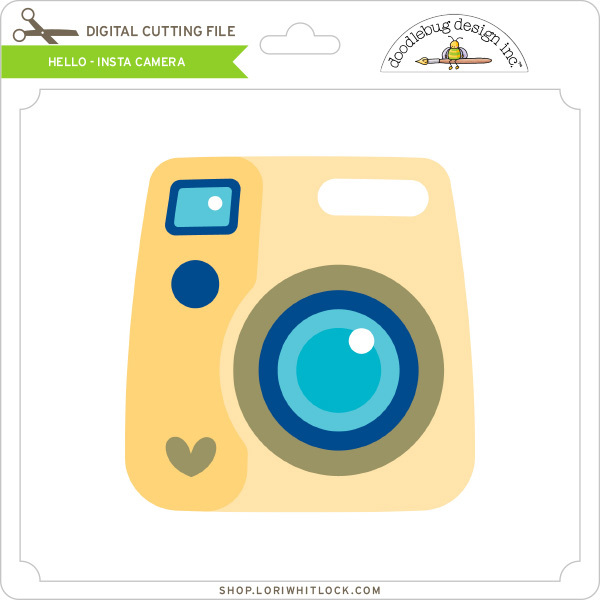
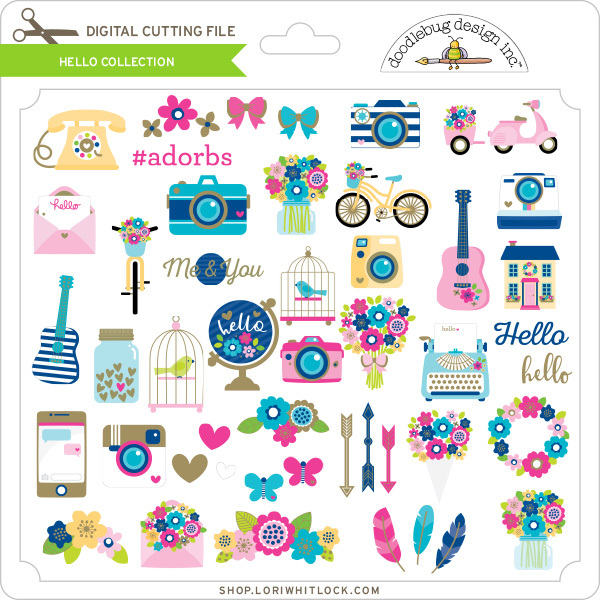
Kathy used the Insta-Camera File from the Hello cut file collection as the base for her album cover.

For more views of the album, see the original post here.   New Doodlebug Design SVG files are being added to the Lori Whitlock SVG Shop on a regular basis, so stop by to see all of the fun SVG files HERE!

Have a great day!