Nugget Box Tutorial

My cute little neighbor kids always get a little holiday treat from me and so when I saw these nugget boxes (found HERE) I knew thats what they were getting. I did alter my box some so you can see my wrapped nuggets. I cut the wrap/outside of the nugget box in acetate.

First, cut your pieces and get your nuggets.
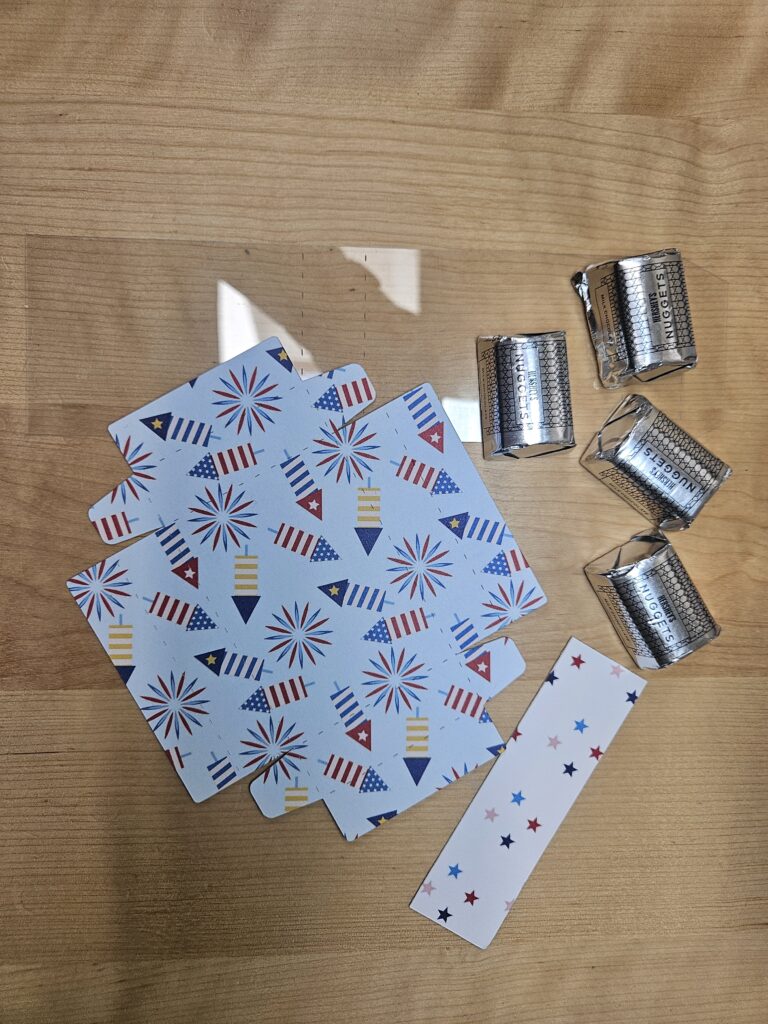
Fold on the score lines. Below will show you where to add your adhesive. I like Scor-tape for a secure hold. When assembling the box make sure you adhere the tabs inside before folding the edges over or else your tabs will show.
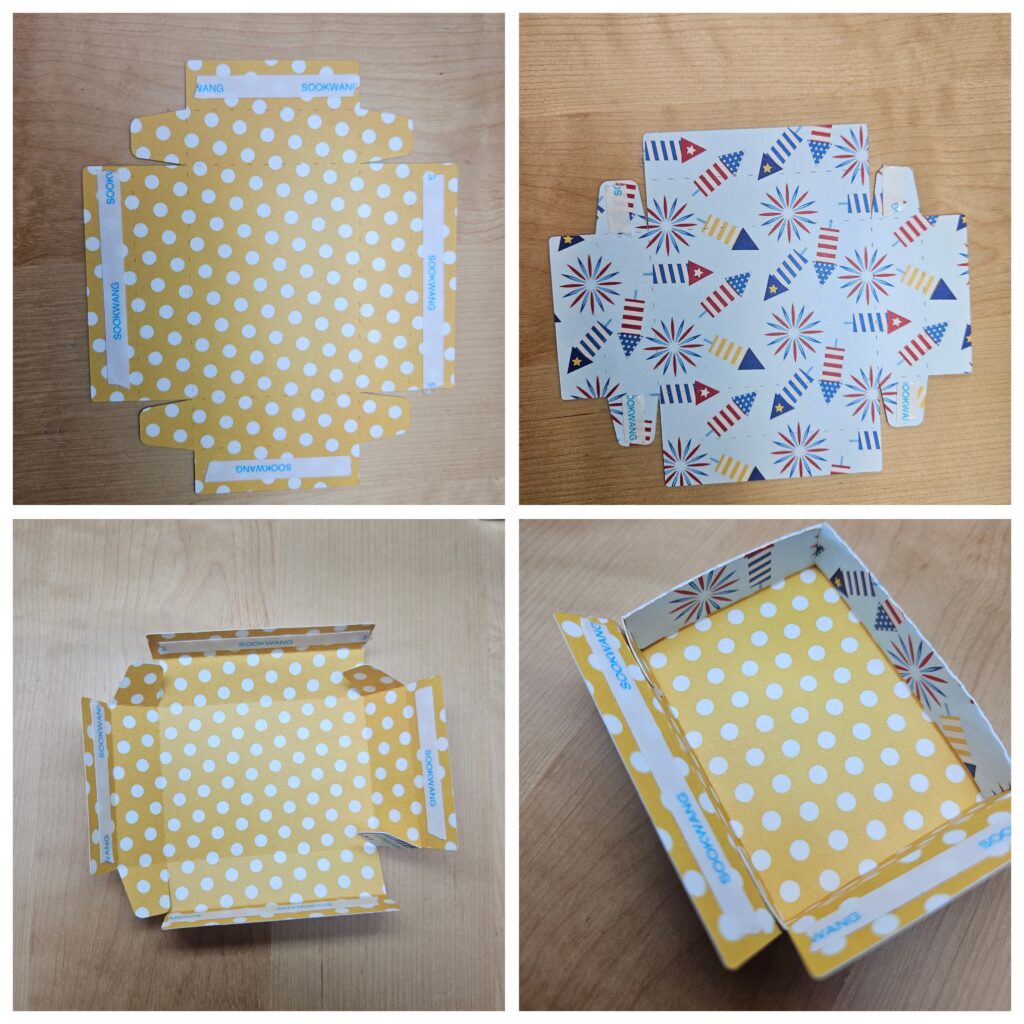
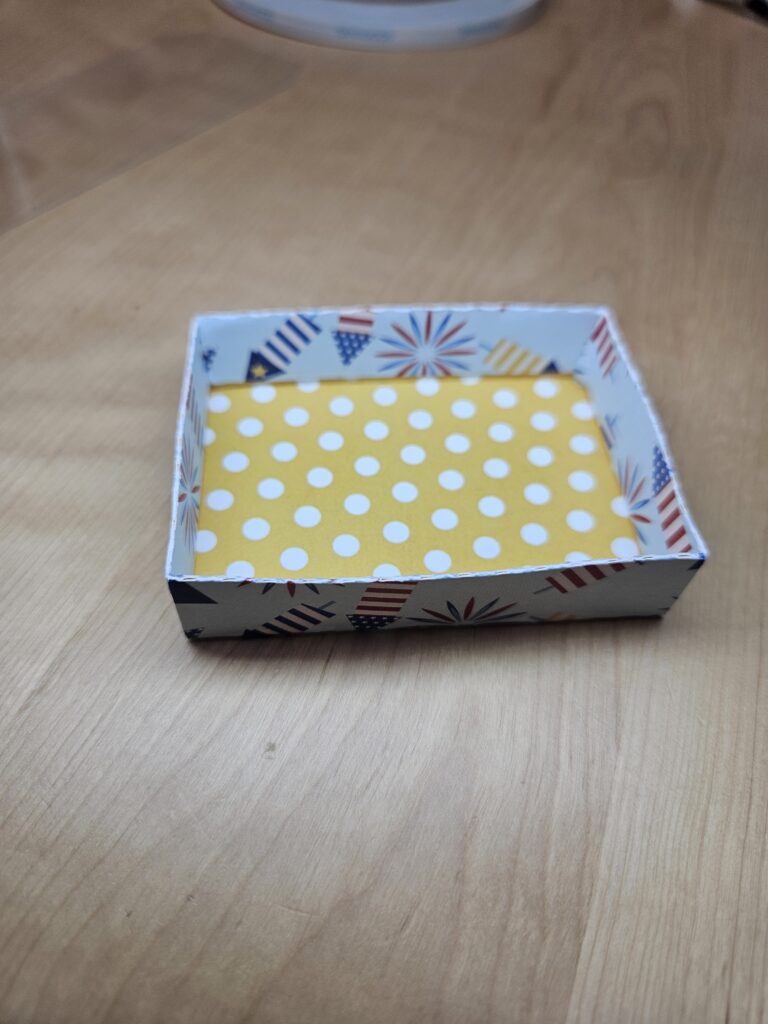
After gluing your tabs, fold the edges over and glue them in place. Below is what your completed nuggest box will look like.
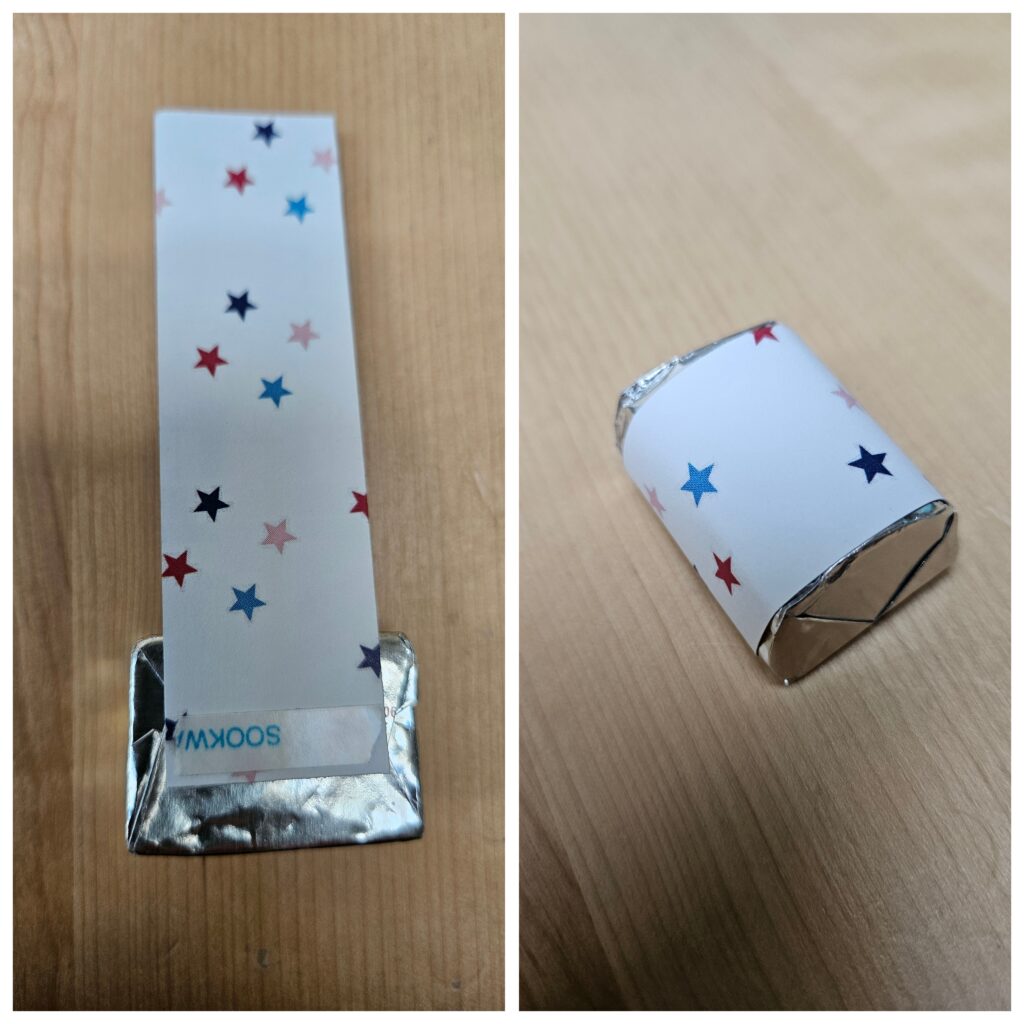
The wrap for the nuggets isn’t on the file but those just need to be cut 1 inch x 3 inches. Add tape to both sides on the same end of the paper and attach it to the nuggest.
The acetate in the following photos is hard to see but essentially just cut the slide part of the file and fold on the score lines. Adhere with strong adhesive on the tab to complete the box.
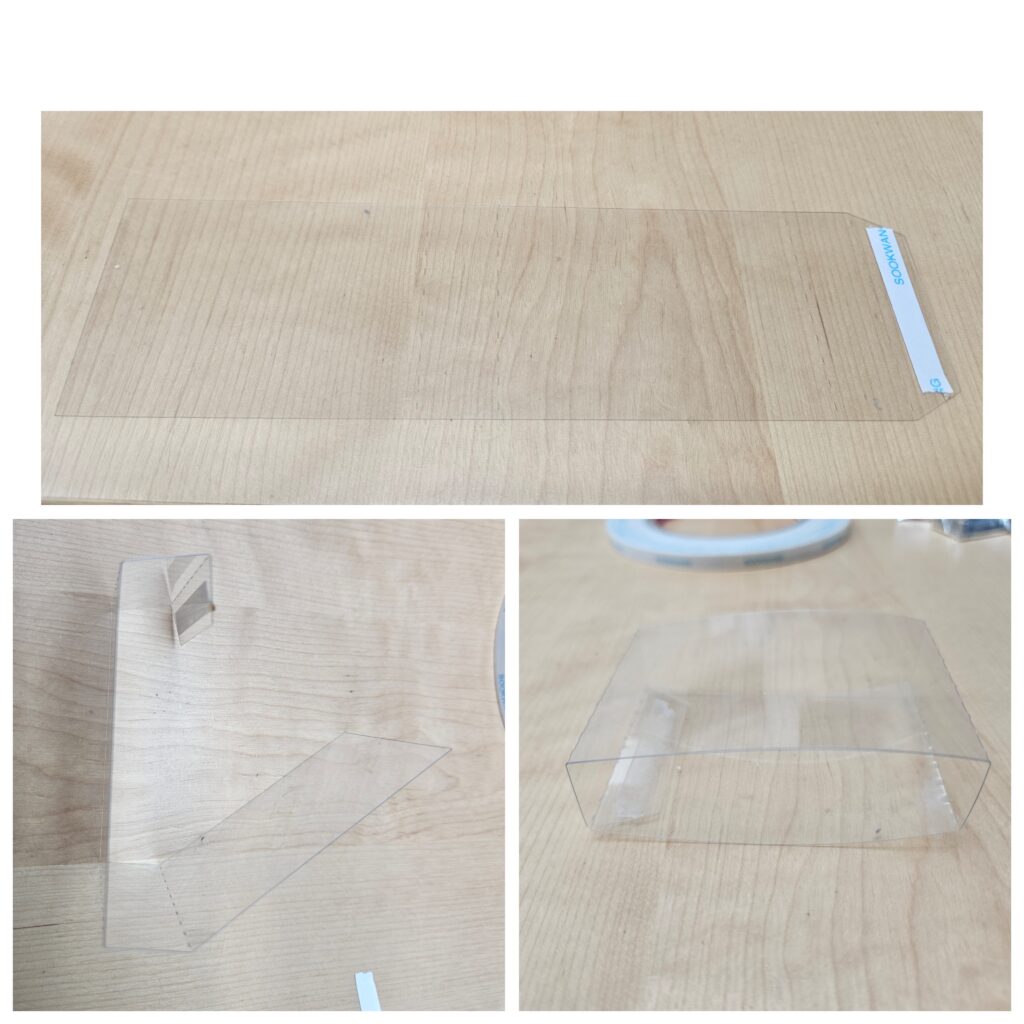
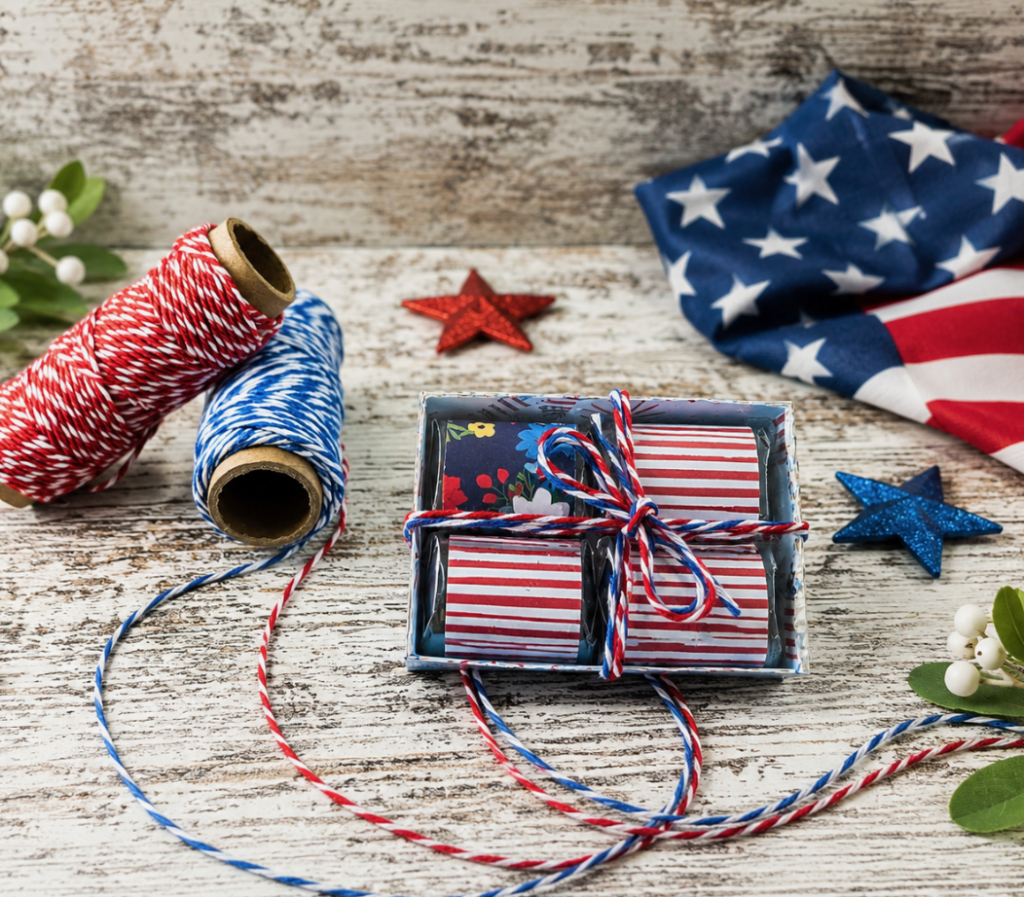
Slide your nugget box into the acetate sleeve. I added some twine around the box for a little extra love.
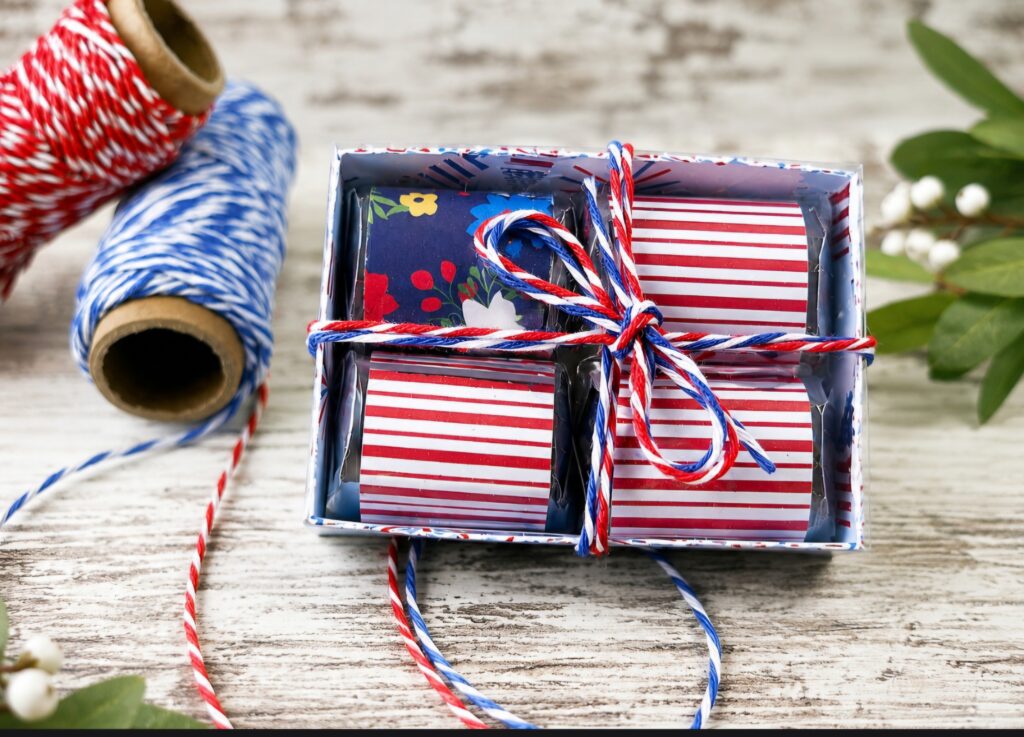
I wrapped my nuggets to resemble a flag using paper from Lori’s Echo Park Have A Holly Jolly Christmas and paper by Fancy Pants called Hometown Summer.
 

Thanks for stopping by and happy crafting.

DIY Patriotic Bouquet/Fun 4th of July Paper Craft

Hi everyone! I hope you are having a fun summer! Today I’m going to show you how to create a stunning 3D patriotic bouquet perfect for your 4th of July celebrations. I used the 3D Patriotic Bouquet from Lori Whitlock along with the Penny Slider Card Pinwheel for this project. I just love how the flower bouquet pops open for a darling 3D effect! I hope this 4th of July craft inspires you. Subscribe for weekly paper craft tutorials, and comment below to let me know which Lori Whitlock file is your favorite.

Happy crafting!

Holly

https://www.youtube.com/@SmilebyHolly

Lori’s Shop 3D Patriotic Bouquet (Silhouette)

Lori’s Shop Penny Slider Card Pinwheel (Silhouette)

A Basket Full of Strawberry Fields Forever

“Living is easy with eyes closed… “Well, maybe not when you’re trying to choose between all the adorable papers in Lori’s new Strawberry Fields collection!  From the sweet gingham patterns to cheerful strawberry prints, this collection instantly transported me to my own little version of Strawberry Fields.

I combined the Strawberry Fields Collection with two of Lori’s adorable files.  A charming berry basket that you can find here in the shop   and some little strawberry boxes that you can also find here in Lori’s Shop  Silhouette.  This project perfectly captures that carefree feeling of a sunny summer afternoon.

Start with your basket, this is really simple and comes together in seconds.  Cut, ink, fold, and adhesive and adhere together.  It is simplicity at it’s best.


Now for the strawberries, these were a bit tricky.  I think mostly because I scaled them down about 33% so that I could put quite a few in the basket.  I cut 7 strawberries and their tops.  I could do four different patterns at a time with the little 6×6 pad that comes in the collection.  You can see how they are cut here, then fold on score lines til you have the last shape on the bottom right.


So here we go with how to put these little cuties together.  I did have my hot glue gun out just in case I needed it.


1.  Start with a strawberry, fold along score lines…there is hole an all 6 tops for your brad.  Adhere the 1 st petal edge with the little flap to the 6th petal.


2. Insert a brad through one of the petals and begin shaping your strawberry…you simply pull each petal over the brad and practice patience here…lol, it took me a bit but I got it.  All six petals layer over that one little brad.

3.  Once you have all your petals overlapped, the strawberry begins to take shape into a little pouch or box. Open the brad prongs now and seal your little strawberry.

I glued my little tops on instead of messing and fighting with that little brad any longer.  The added buttons and twine to each one.  Adorable.


Now for the fun part.  Start embellishing your basket with all the fun elements from the collection.


The Beatles sang about Strawberry Fields Forever and while my version may be made from paper instead of growing in a garden, it has its own kind of magic.  Every fold, layer and embellishment are my escape to where creativity blooms.
Thanks for stopping by for my tutorial.
Cathy

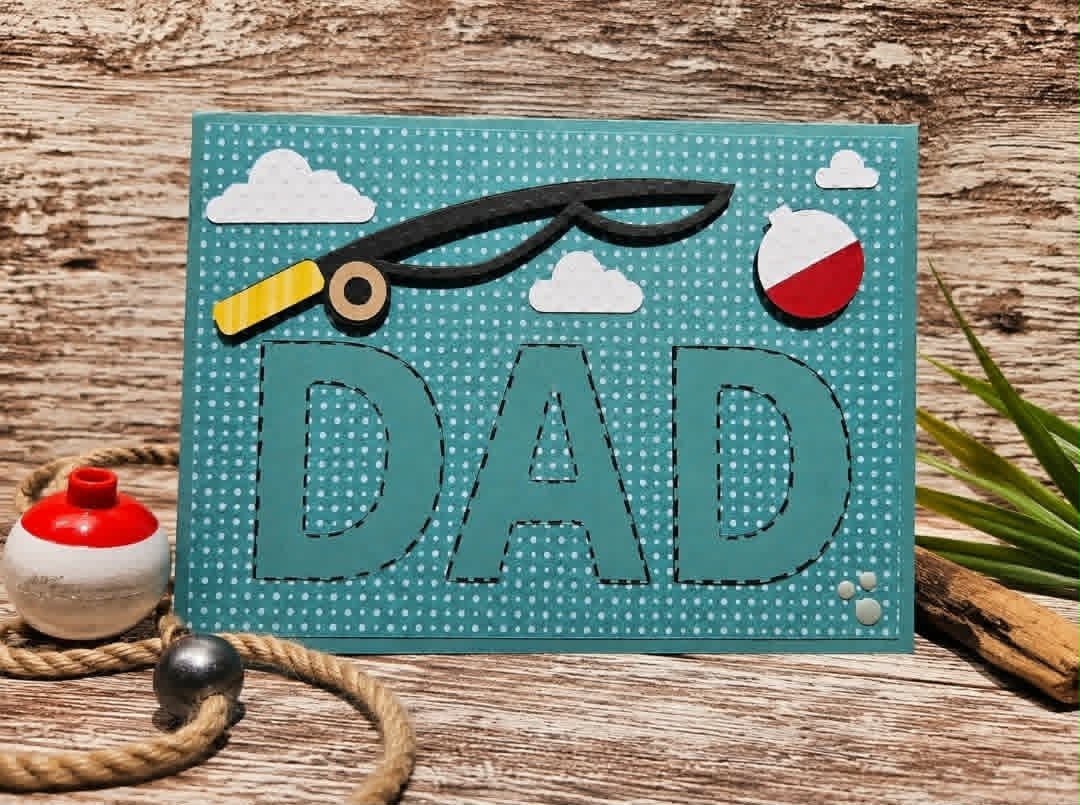
5×7 Pop Up Card Father’s Day Fishing

Happy Monday everyone! With Father’s Day right around the corner, I wanted to show off one of Lori’s amazing Father’s Day cards.

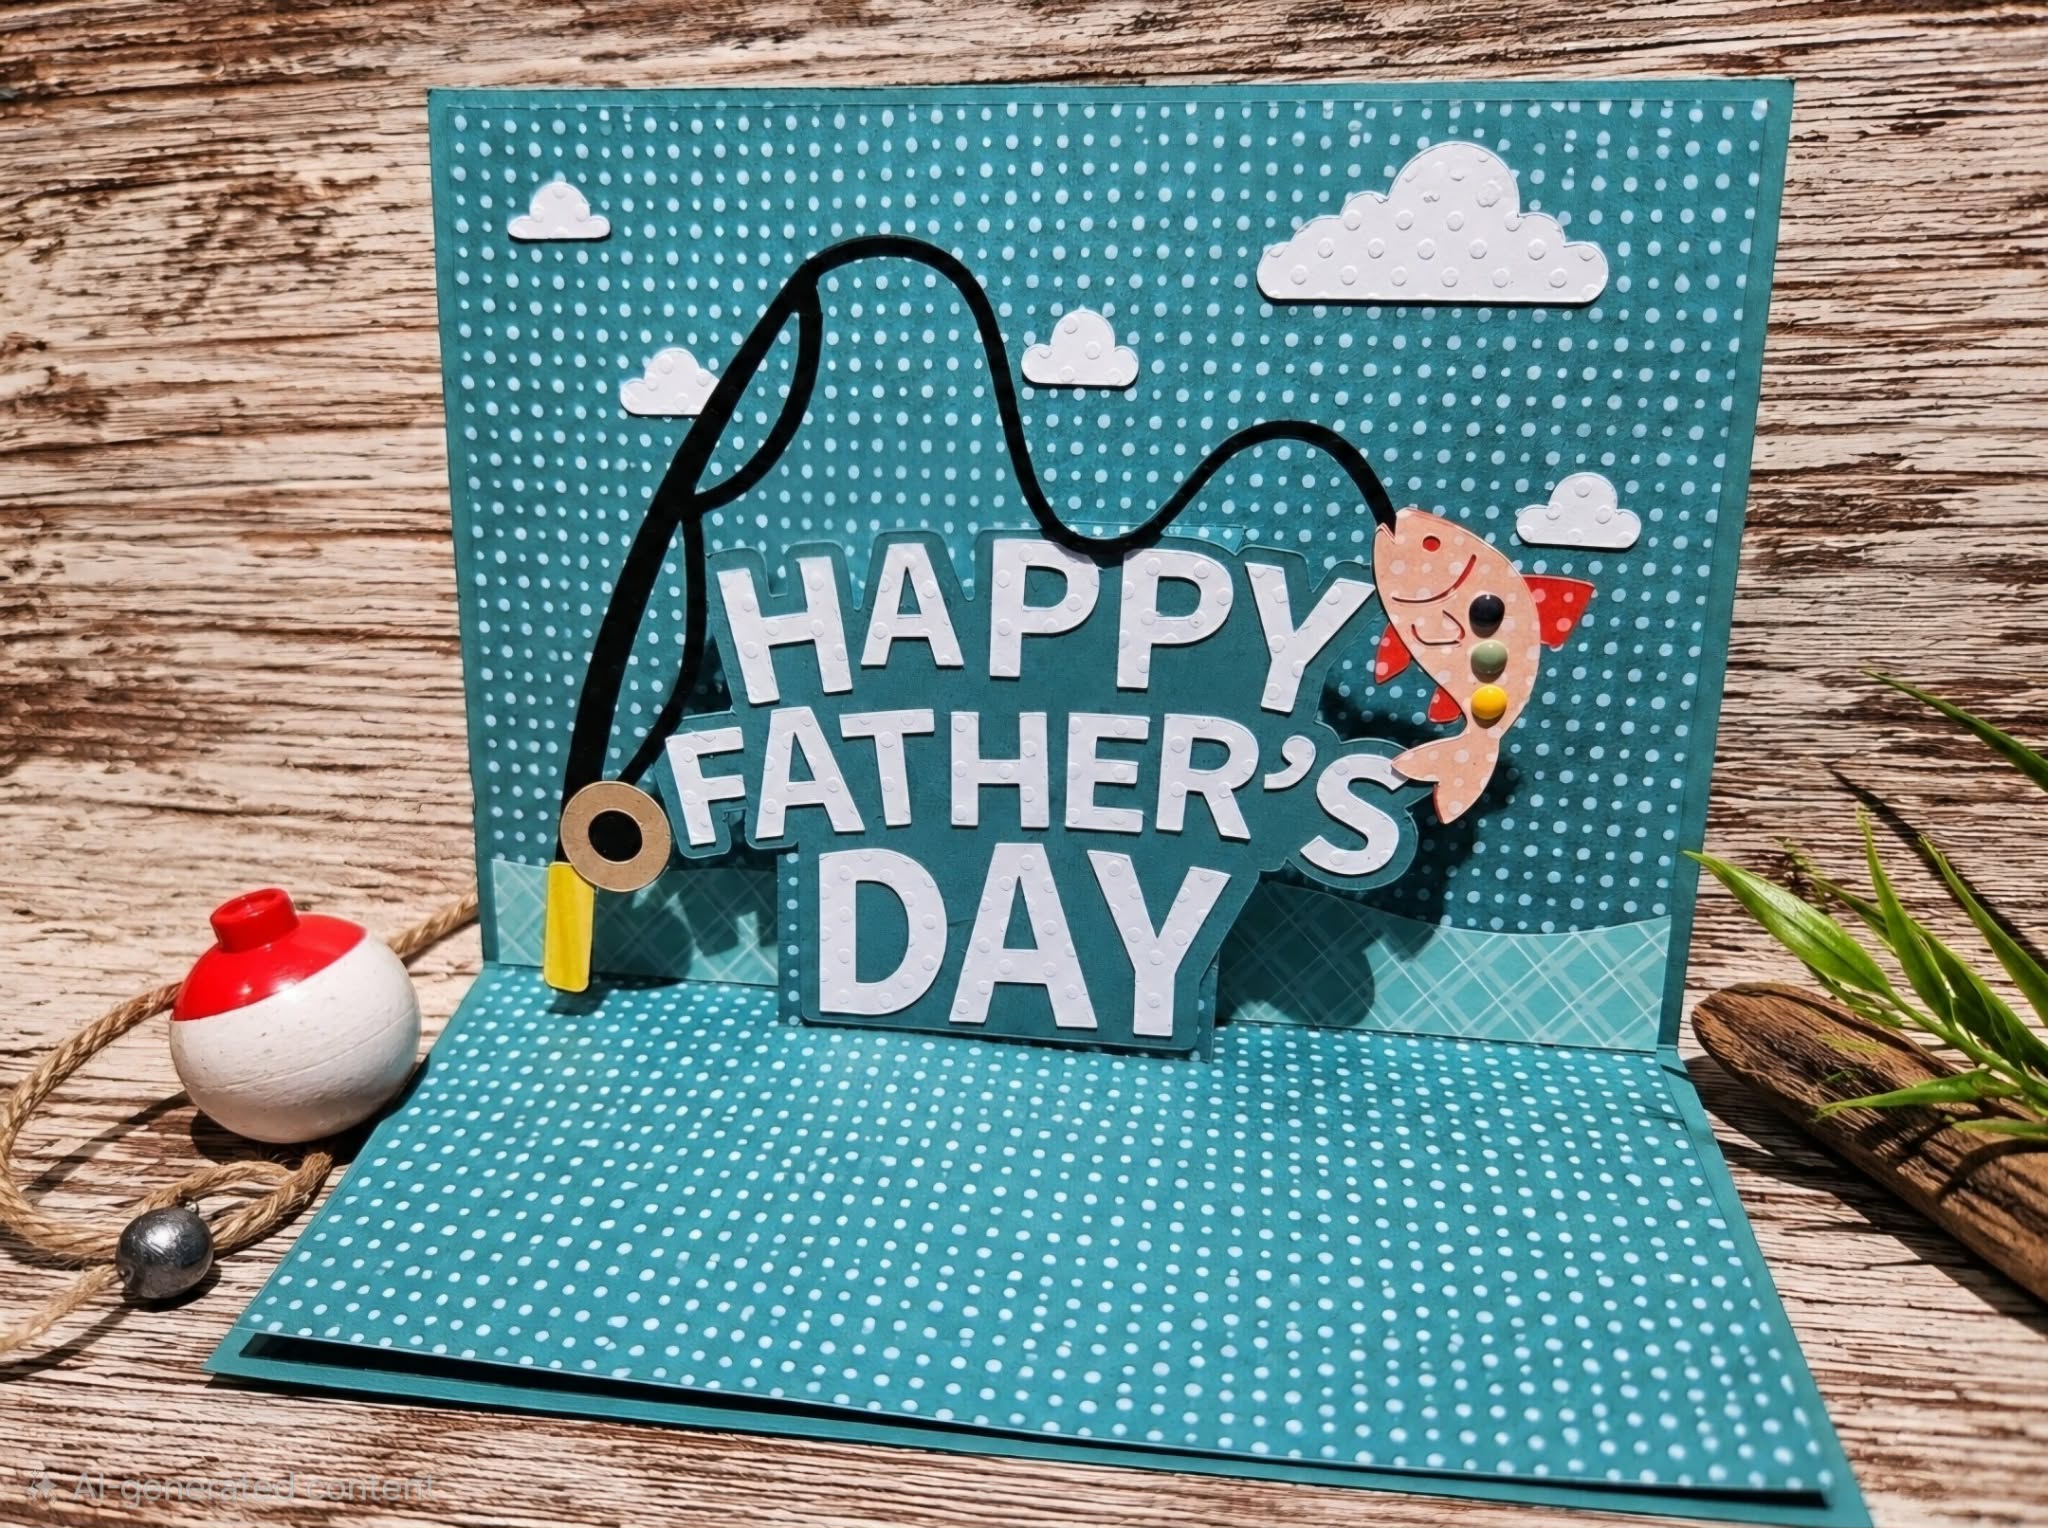
I used the 5×7 Pop Up Card Father’s Day Fishing found HERE. Silhouette

This was such a great card to make and add a few little elements to.

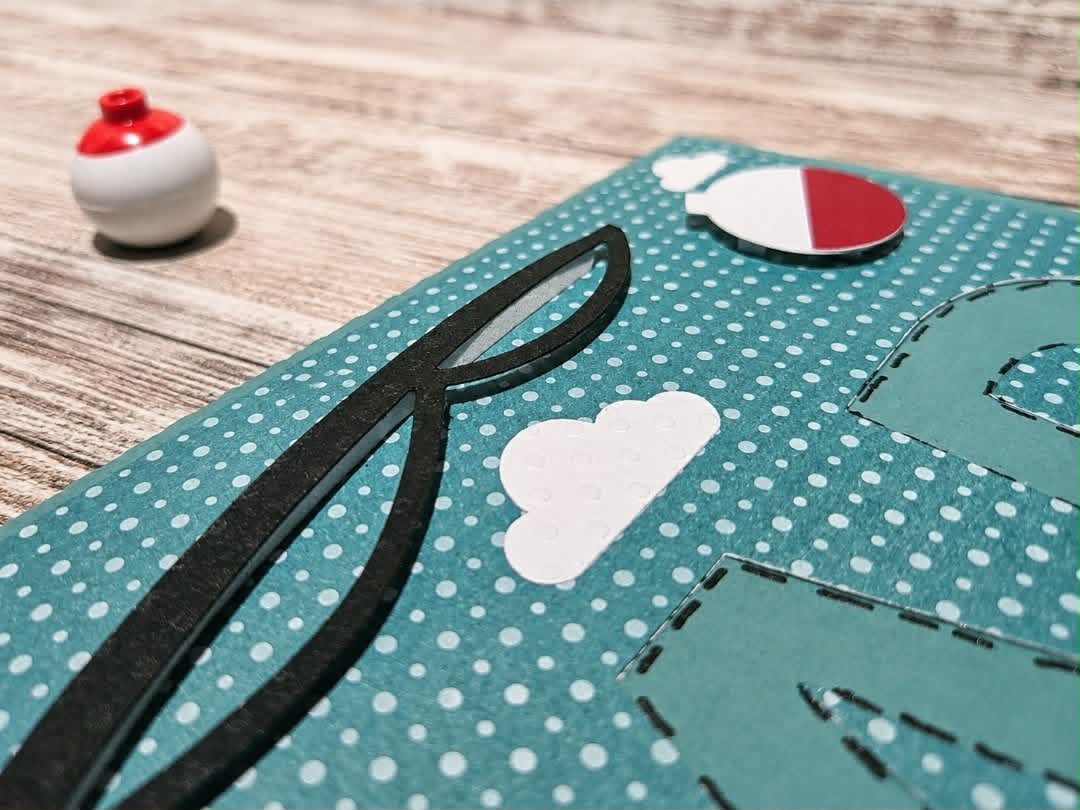
I used dimentionals on the fishing pole and bobber on the front. I also used a glitter pen to draw some stiching on to make my “DAD” pop a little more.

The inside is a nice surprise for the recipient. I added a few enamel dots to the fish to imply a rainbow trout which is what we have a lot of here in the Black Hills.

I hope you try this fun card.

Thanks for stopping by and happy crafting!

Rectangle Pop Up Card Sports Stand Tutorial

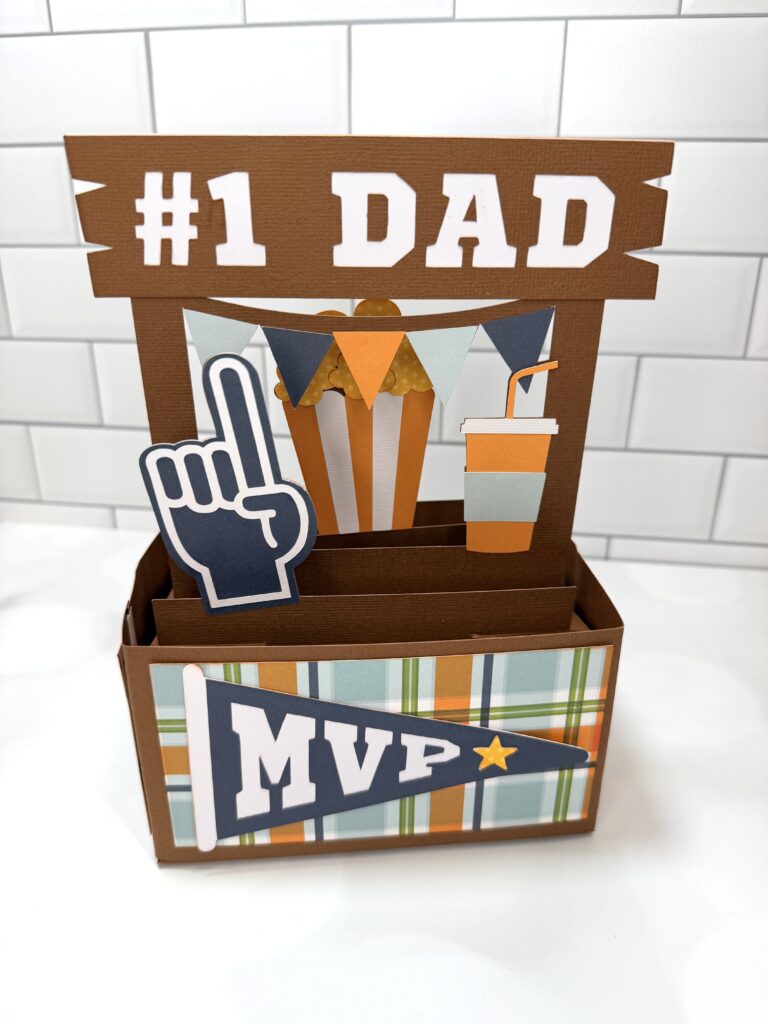
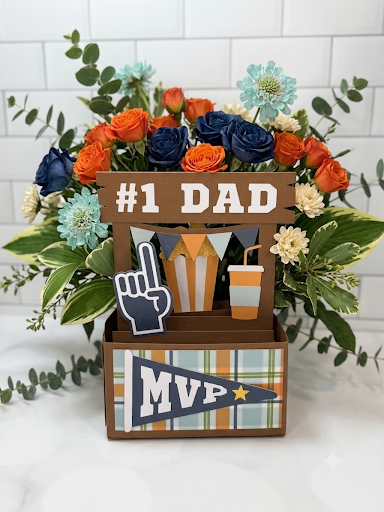
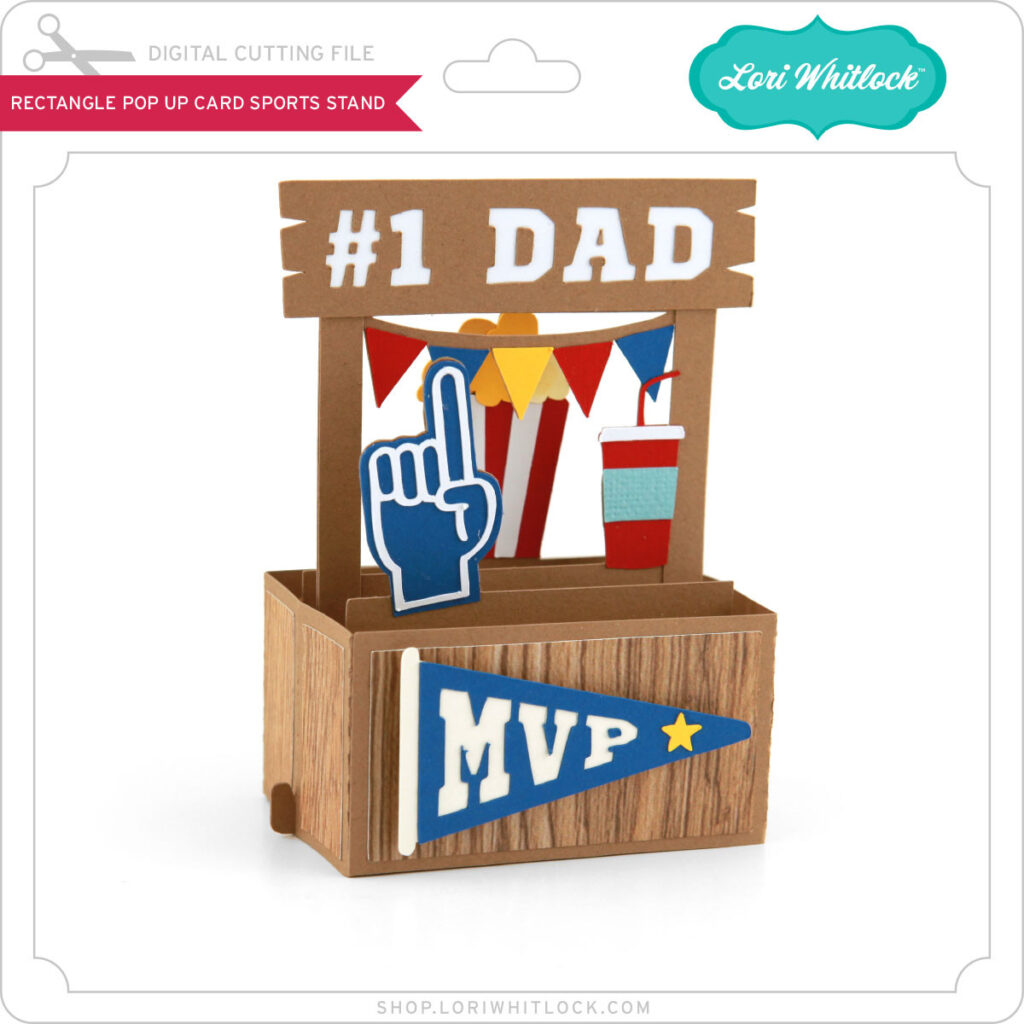
Hello, crafty friends! This is Lindsay, sharing a pop up card with you today. Father’s Day is just around the corner. I wanted to work with one of Lori’s newest files called “Rectangle Pop Up Card Sports Stand.” I used an Echo Park paper collection, also designed by Lori, called “Dino Mite.”  The colors were perfect for this masculine card. You can find the file here: svg, silhouette.

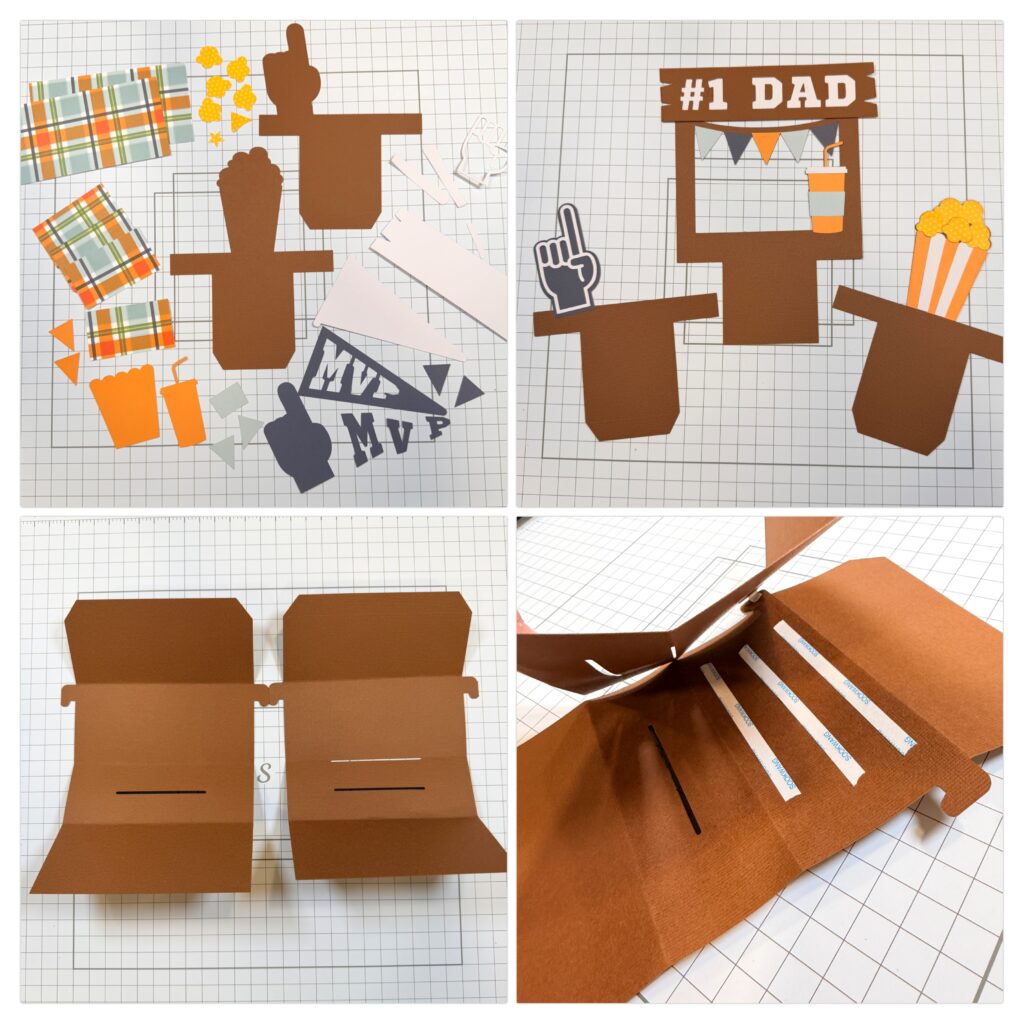
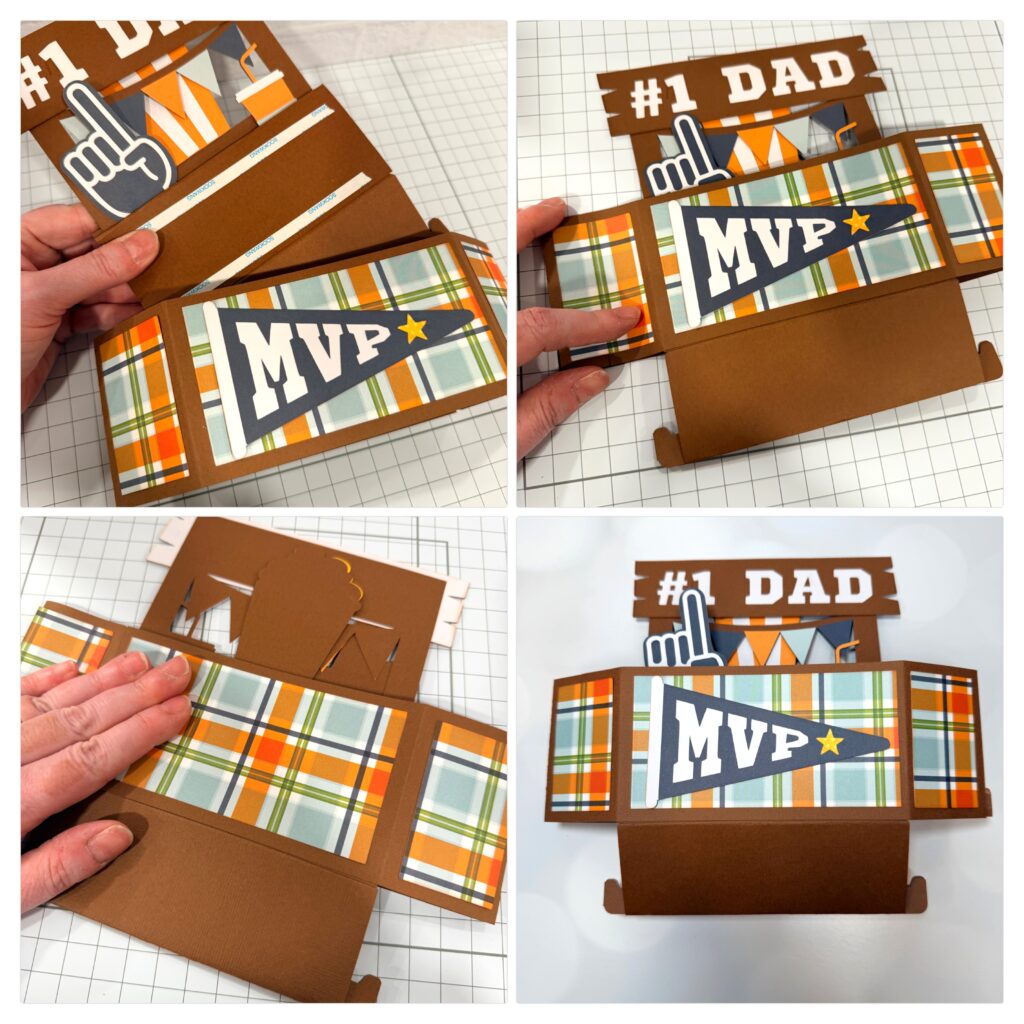
Begin by cutting all pieces you will need. I assembled each section of the card, as shown in photo 2. Next, I folded the large brown base pieces and adhered them back to back, as shown in photo 4.

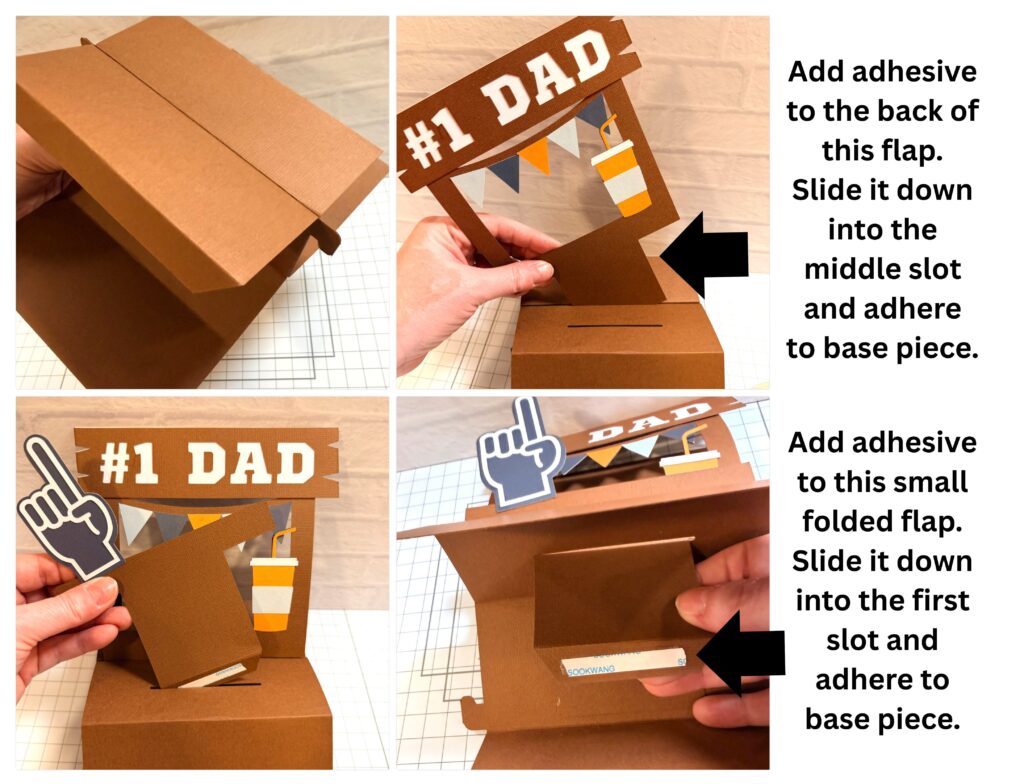
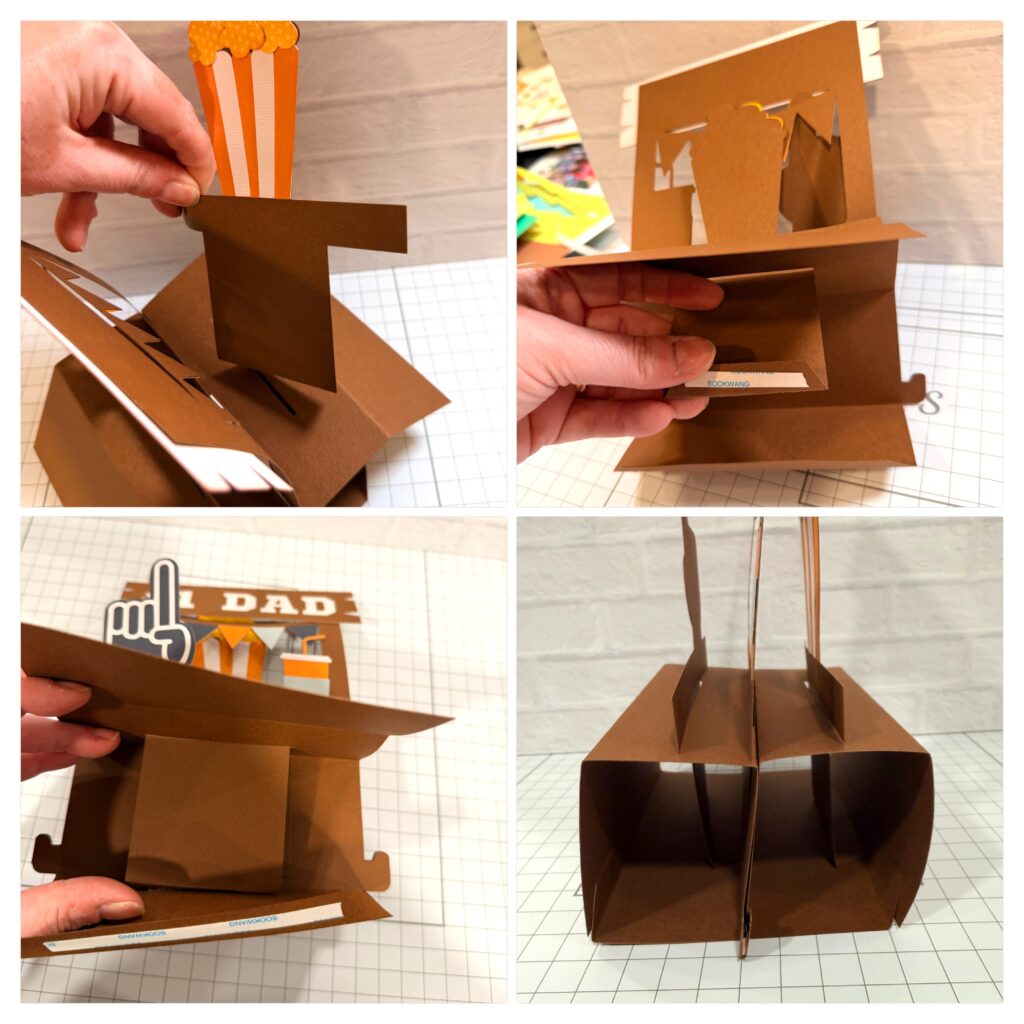
The first photo (below) shows the brown pieces adhered back to back, with the top flaps folded outward. Turn the pieces over to the side with the slots. I inserted the large banner/drink piece into the middle slot (photo 2 below), placing strong tape on the back of the large flap. This is adhered directly to the middle divider inside the card. You will repeat this for the foam finger piece and popcorn piece, placing tape on the small folded flap. Slide it down and adhere to base piece.

After inserting all 3 pieces into the slots, it’s time to close the base piece at the bottom with strong tape. Photo 4 shows a side image of the base once it has been sealed with strong tape.

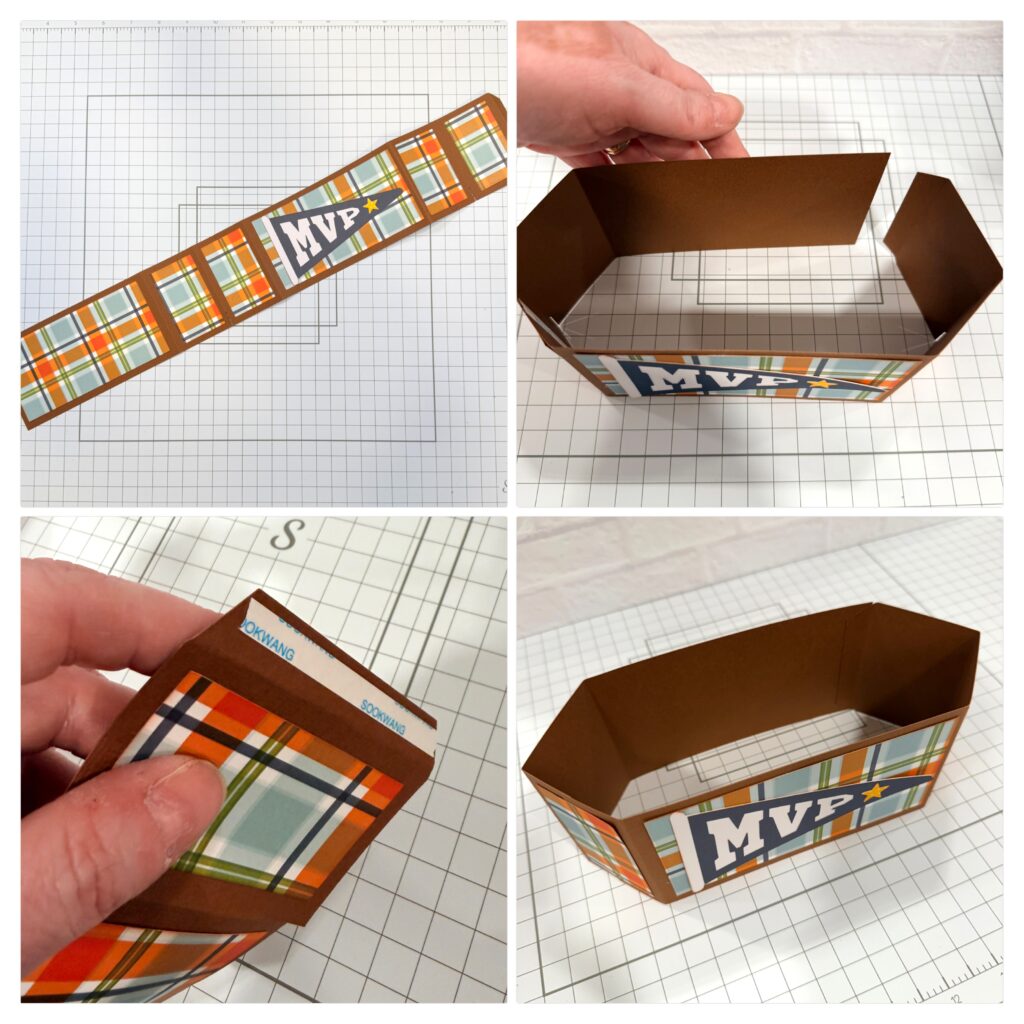
Now prepare the long belt piece by adding patterned paper and folding all score lines in the same direction. This piece will wrap around to form a box. Add adhesive to the small folded flap to complete the shape.

And now it all comes together! Slide the layered base piece into the completed belt piece. You will add adhesive to the upper middle part of the foam finger pieces and the back side of the popcorn piece. The area from the score line down to the small “feet” will extend below and should not have adhesive on it.

Once the base of the card is secured inside the belt, it’s time to open up the piece and reveal the amazing 3d design! The “feet” should fit into the small cuts on either side of the belt piece.

I hope this inspires you to create a pop up card! They are incredible designs that fit together like a die cut puzzle. Click on the picture below, and it will take you right to the file on Lori’s site. Thanks for stopping by the blog today! — Lindsay