Silhouette Cut Lines and SVG Files

Hi Everyone!  Currently, there is a glitch in Silhouette Studio that prevents the cut lines on some of the newer files from automatically being turned ON when you go to the SEND panel. You can tell that the cut lines are ON when they are bright red. Silhouette is aware of this and they working to fix the issue.  All of these files can still be cut, I have a quick work around for you.

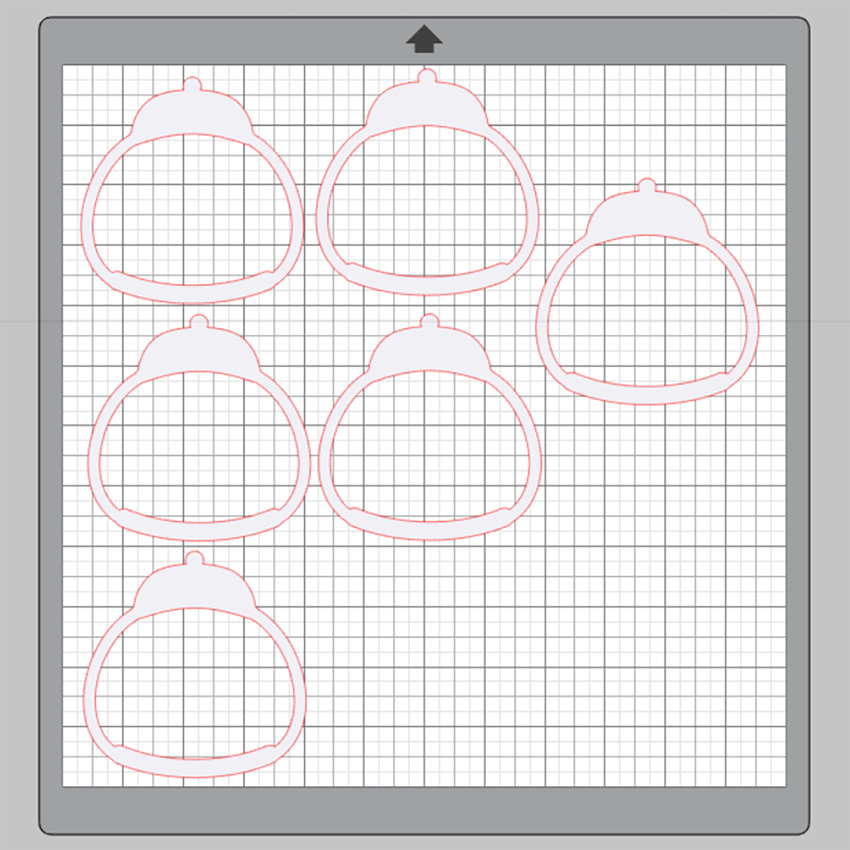
As you can see below, when I click send on this file, the red cut lines are missing and I’m not able to cut.

To remedy this, first click and drag around the elements on your mat so that they are selected.  You know they are selected if there is a bounding box around the shape.  (see red arrow)

Once your items are selected, navigate to the right side of the screen and click on the word cut. (circled below)

Once you click CUT, the red cut lines appear and you are ready to cut.  If any pieces still do not have a red line, click on that individual piece to select it and click CUT again. For print and cut pieces, you will need to click “Cut Edge.”

This process works with .studio files that you download from Silhoeutte AND SVG files that you import into Silhouette (SVG files can be used in Silhouette if you have the Designer Edition Upgrade of Silhouette Studio)

However, if you purchase SVGs from shop.loriwhitlock.com you can set it up so that the cutlines will automatically be set to CUT when you open them in Silhouette Studio.  Here is how you would do that…

Under the EDIT menu at the top of the Silhouette Studio Screen select PREFERENCES

On the top of the preferences screen click on IMPORT.  On the left side about halfway down under SVG click on the CUT LINES pull down menu and select CUT 0.1pt LINES.  Then click APPLY, then OK.

Now when you import any of the SVG files from shop.loriwhitlock.com into Silhouette, the lines will automatically be set to cut.

I hope this helps you with your Silhouette projects! Thanks for visiting the blog today! Please let us know if you need any help with your files. We want to make sure everyone is happy with their purchase. Have a great week! SHOP HERE

50% Off All SVGs Ends at Midnight

There’s only a few more hours to get 50% off in the Lori Whitlock SVG Shop! Use code 50PERCENT and get 50% off All SVG files, fonts  and commercial lLicenses! Don’t miss out, sale ends at midnight!

My SVGs can be used with Cricut Explore, Silhouette (DE upgrade required), Eclips, Brother Scan and Cut, and any other software that will open SVG files.  New to my shop?  Be sure to take a look at this post, it will help you with the process of downloading, and working with files from my shop!


Kissing Booth Cards

Have you seen the new Kissing Booth Cards in the Lori Whitlock SVG Shop and the Silhouette Store this week?  They are so cute and would make the perfect Valentines!  I made the Box Card Kissing Booth Cat (SVG, Silhouette) and Box Card Kissing Booth Dog (SVG, Silhouette)… take a peek…

These little box cards are so simple to assemble!  After piecing together the critters and gluing to the insert, just form a box shape using the crate piece.  Add adhesive to the tabs on the insert, insert into the “box” and press the tabs to the sides.  The top banner and heart are done using the print and cut feature of your cutting machine.  It even folds flat for mailing!

There are 3 other Kissing booth cards available as well..

Box Card Kissing Booth Gnome (SVG, Silhouette)
Box Card Kissing Booth Hedgehog (SVG, Silhouette)
Box Card Kissing Booth Panda (SVG, Silhouette)

That’s it for me today, thanks for stopping by to peek!

BLOG * INSTAGRAM

Valentine Gumball Shaker Card

Hi everyone!  Valentine’s Day is just around the corner and I fell in love with this little gumball box card that Lori created.  When I saw it I knew that I wanted to turn it into a shaker card.  You can find this file here in Silhouette Store or here in Lori’s SVG Shop.  It’s just way too cute!

To turn this in to a fun shaker, first cut all the pieces below. I cut a few extra gumball pieces just in case I wanted to add them to the shaker but they ended up being to big.


Next cut 12 more of these pieces.  You need this many to stack and create enough depth to hold the sequins and such.

After you have all these cut, start layering them and glue with a good strong adhesive.  Layer 10 of them together, then add a piece of transparency on the and the back side of your layered piece.  I used the same glue for this too.  Then add the 11th frame piece to finish the back side.  Fill with beads and sequins.  You can see the depth of your shaker window in the picture below.

Add another piece of transparency to the top and then the final frame piece to seal your the shaker pieces inside.  Assemble the Gumball Box card and Glue this shaker in place to the front piece of your gumball machine.

These are so much fun to give and receive and it will still fold fairly flat for mailing.

Thanks for joining us today!

~Cathy