Memorydex Cards have really made a comeback this year in the scrapping world, so I thought I would join in and create a bit. I used Lori’s new Echo Park collection Life Is Beautiful. Beautiful patterned papers, tons of embellishments, including puffy stickers. It was so much fun to play with this beautiful collection. I added my cards to a Heidi Swapp Memory Dex Spinner but Lori has a super cute Memory Dex box you can make, you can find it here in Lori’s Shop or here in the Silhouette Store.
My first set is the Memory Dex Scalloped Cards or here in the Silhouette Store. I added some stitching, lots of layers and lots of embellishments from the Life is Beautiful Collection.
Next are the Memorydex Envelopes or here in the Silhouette Store, again stitching and stuffed with embellishments…oh so much fun!
And one more set, Memorydex Foldover Cards or here in the Silhouette Store. There is also a bit of stitching on these and layered up with all the goodies. I had so much fun creating all of these. They are fast and fun. I can see why they are making a comeback. I hope you give them a try.
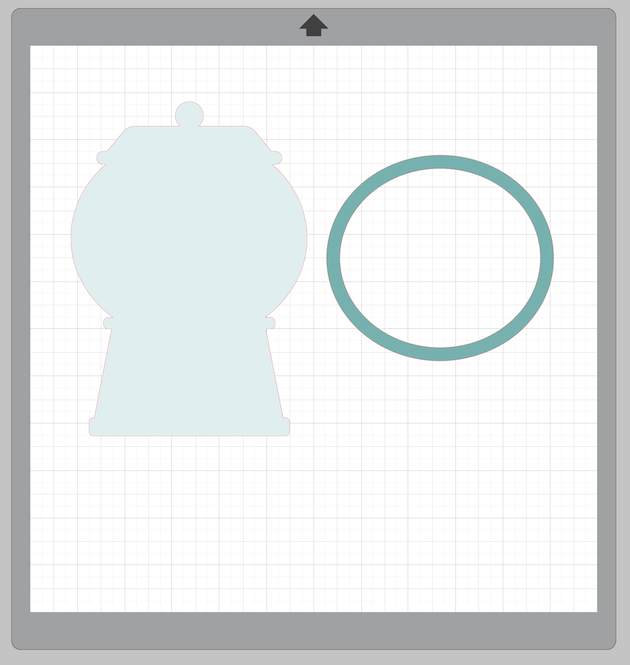
Have you ever seen a design that immediately made the creative side of your brain start sparking? That happened to me the minute I saw Lori’s cute birthday gumball machine (SVG, Silhouette) and I thought — shaker card! For some reason, the thought of buttons flying around in the middle of this card just made me happy! So here’s a quick tutorial on what I did …
First, I cut out all of the pieces as they were in Lori’s file. Then, I used the shape tool to create an oval. I hovered the oval over the gumball machine to get the right size, and then I did an offset of the oval to create a frame.
Once I had my frame shape, I cut it out 5 times from white card stock, and once from the light blue dot paper (Echo Park, First Responders, Emergency Vehicles paper). The 5 layers of white card stock ovals will give the frame thickness and dimension so that the buttons can move freely underneath.
I layered the five card stock ovals, added small foam adhesive as shown, and traced the shape onto a piece of clear acetate. Clearly, you don’t need to be accurate about this because you’re going to use scissors to cut inside the lines in order for your acetate to sit within the border of the oval frame. I used a thin line of liquid glue to adhere the acetate to the top of my white oval frame.
I adhered the light blue dot oval over the acetate and then adhered everything together. I layered the folded white card base, then the plain white template placed the buttons on the template, then added the oval over the template/buttons. Finally, I added the red top and bottom pieces (also paper from the Echo Park First Responders collection) with more foam tape and finished the card with the sentiment and remaining cut file pieces. The stripe is just a piece of scrap cut to 1/4″ thick to add along the bottom if desired.
Inside, the finishing touch was a cute little phrase that comes with the cutting file.
Thanks for stopping by Lori’s blog today! I hope this card will inspire you to think outside the box and create something fun with Lori’s wonderful cutting files! Until next time, happy crafting my friends!
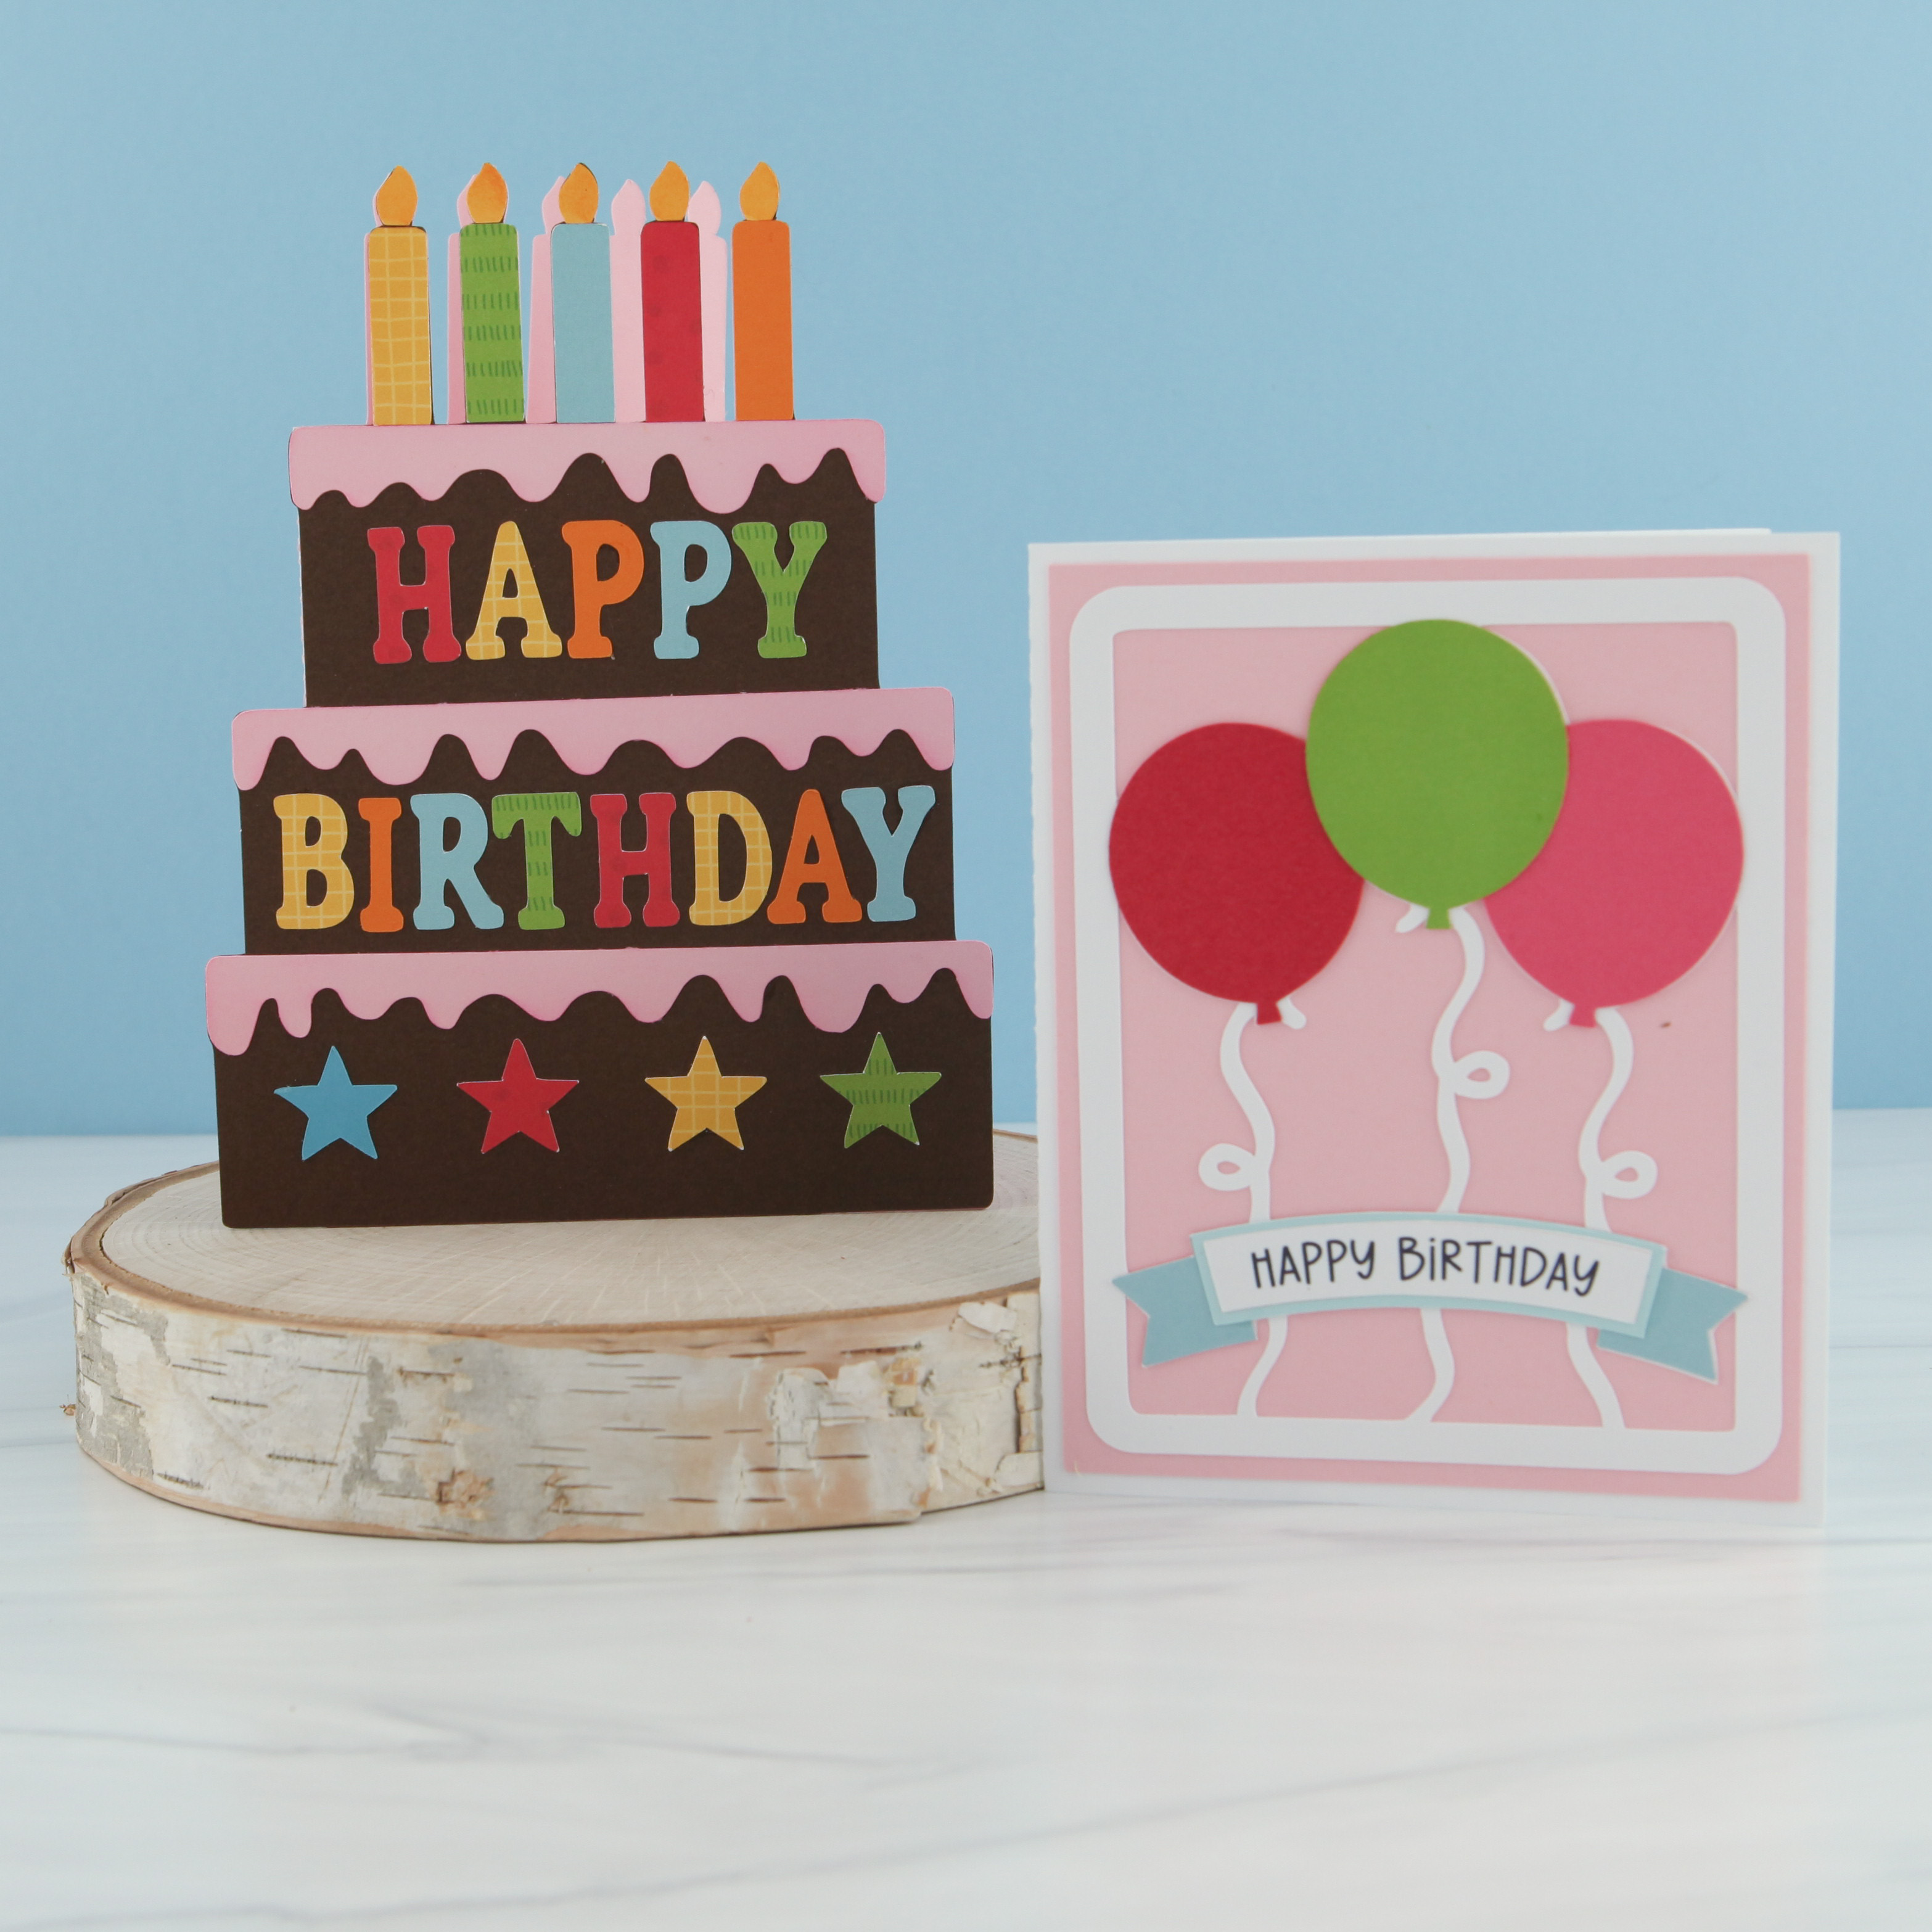
I am always looking for a fun and easy birthday card to put together for a friend or family member, so this week I designed a new bundle of 10 birthday cards. It’s called the FABULOUS BIRTHDAY CARD BUNDLE I am working on a video today that will show them off and help with assembly. The video will be posted later today. I’ll send out a link tomorrow morning. Take a peek at how much fun they are….
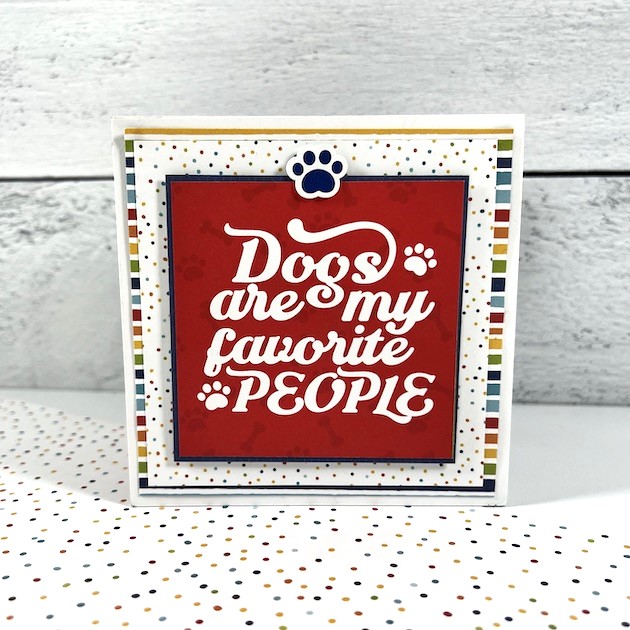
Hello friends! Traci here and today, I’m sharing a tutorial on how to make this fun envelope-style mini album! I love creating small scrapbooks so when I’m looking for a new idea, I know Lori will always have something awesome. For this project, I used her SVG cutting file called Silhouette, 4×4 Accordion Envelope Mini Album
I wanted this to have a dog theme so I chose the super cute Echo Park Pets Collection (also designed by Lori). I used the 6×6 paper pad, both sets of die-cut ephemera, and the 12×12 sticker sheet.
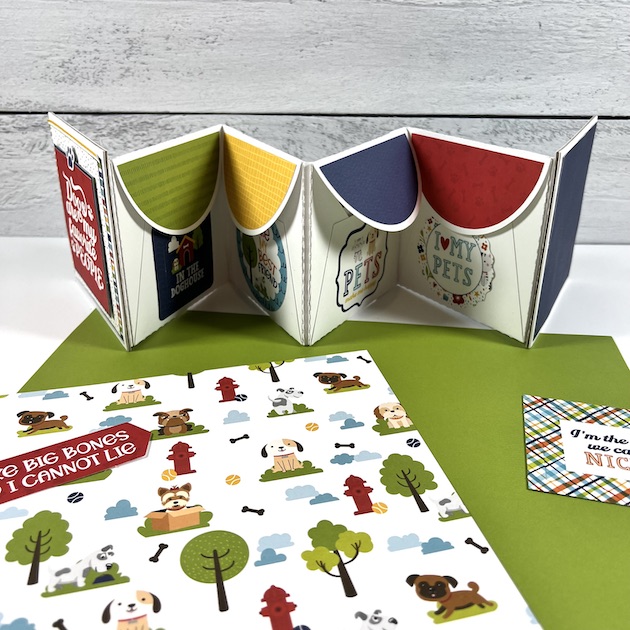
Here’s what this accordion-style mini looks like opened up. On one side there are envelopes where you can store photos and small memorabilia. On the back side, there are mats so you can add more pictures.
Here’s how I made it …
First, I cut out all of the pieces. There are 4 envelopes, 3 hinge pieces, 2 covers, and the pattern papers for embellishing. I used cardstock for everything except the cover pieces. I used chipboard for those.
Now that everything was cut, I created each envelope by folding the 2 sides in and the bottom piece up. I added
double-sided adhesive to the bottom portion to seal everything together, then adhered the colorful embellishment piece to the flap.
Next, I attached the 4 envelopes to each other using the 2.25″ x 4″ hinge pieces to create a row. Be sure to leave about 1/8″ in between the envelopes so that there’s room for the fold.
Now, it’s time to add the cover pieces to the first and last envelopes. Again, leave a little space in between for the pages to bend.
Once all of the album’s base pieces are adhered together … fold it, making sure to alternate the direction of each page to create the accordion shape. Now, it’s time to embellish!
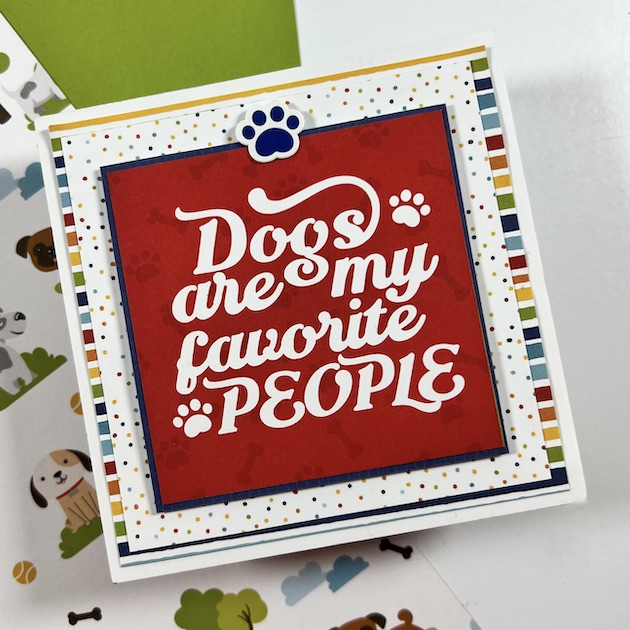
On the cover I layered the stripe, polka dot, navy blue print, and the 3×3 card on
top of each other. These are all from the 6×6 paper pad.
Inside for the envelope pages, I added cute stickers from the 12×12 sticker sheet and die cut
pieces from both packages of ephemera.
For the other side of the envelopes, I created photo mats for lots of cute puppy dog pictures. I added colorful pattern papers and more embellishments.
Lori has a great tutorial that shows you how to put everything together here:
This would make a great mini album for your pet’s photos or a sweet gift for
ANY pet parent. The Echo Park Pets Collection even has options for
cats, birds, hamsters, guinea pigs, lizards, fish, and rabbits!
Thanks for stopping by the blog today. I hope you’ll try this cutting file and wonderful paper line for your next project. Have a great day!
Valentine’s Day is only 6 days away! Time to get prepared. This week I designed 10 darling new 3×3 valentine pop up cards. These are perfect for making valentine’s cards with your kids. I also designed an adorable valentine “snail mail” box that you can make with your kids to send to school so they can collect all of their valentine’s from their classmates. You can buy the cutting files individually or in a bundle HERE and they are 25% off this week.
Below is an assembly guide for the valentine’s cards. Also, the box is designed to be assembled like the envelope box tutorial, however, I did have to make the sides be a separate piece so the box could be larger. When you assemble this valentine box, you’ll need to attach the sides with the glue tabs. The Valentine Snail Mail box measures 10”x7.4”x4” and the opening is large enough to accommodate most valentine treats including full sized candy bars, suckers, etc. Check them all out below….
Thanks for joining us today. Have a wonderful and crafty day!

.jpg)
.jpg)
.jpg)
.jpg)