4 Step Card Tutorial With Courtney

Hello! This is Courtney Lee from Court’s Crafts here with the 4 Step Card with Front Flap from Lori Whitlock!


Step 1: Cut out all the pieces. If you are using Cricut Design Space make sure to “ungroup” the images, highlight all of the brown piece you are going to cut including the small black lines and click “attach”. This will keep the image together and the scoring lines in place.


Here is the paper I chose as the card base so that these adorable glossy white bunnies would be the front of the card and the tone on tone would be the inside. Make sure to always check both sides of the patterned paper! 🙂 

Step 2: Score along all dotted lines. It doesn’t matter which way you score them. I ended up flipped mine over because it was easier to see them on the yellow side. 🙂

Step 3: Bend the left ones “up” and the right ones “down”. This is a side shot so you can see what I did. I bent them the wrong way first and then the right way so don’t stress about which way they go as long as they end up stepping “down” when you are done! I bend them both ways no matter what to make them a little more pliable. 🙂


Step 4: Sew. I decided to sew along all edges to create some visual borders. However, on the pink adorable lamb paper I only did the outsides to give it a continuous feel with the panel to the left to make it feel like it was one piece. Scroll down for the later pictures to see what I mean if that was confusing. Adhere all of these pieces down while the card is flat.


Step 5:  Time to decorate. The steps were just begging for something adorable.

I knew this was going to a great-grandparent so I decided to put a picture of the us on the left hand side.


I kept the front simple. There is a lot going on visually inside the card.


Here are some other angles of the card so you can get a feel for it. This is what it looks like when the stair step is still folded in when you open the card. Now you can see what I mean about making the lambs feel continuous with the stitching and I also did that by adding the grass at the bottom on both sides.

On this one my oldest said, “The bunny! I didn’t see the bunny before!” so I thought I would share this photo with you too.

Well, that is all for me today! I really hope that you have a wonderful day and that you make a special card to send to someone special using this ADORABLE Celebrate Easter collection by Lori Whitlock for Echo Park Paper!

4 Step Card with Front Flap in Lori’s Store

4 Step Card with Front Flap in Silhouette Store


Valentine Kisses Heart Box Tutorial with Kathy

Hi Everyone,  it’s Kathy today with a tutorial showing how to assemble the new Valentine Kisses Heart Boxes!  As soon as I saw this box, I had to make it, it’s such a cute little gift for someone special!  I made the Small box which holds four kisses, but it also comes in a larger size.  I’ve added links to both at the end of this post.

The boxes are really pretty simple to assemble.  These are the pieces that come with the small box.

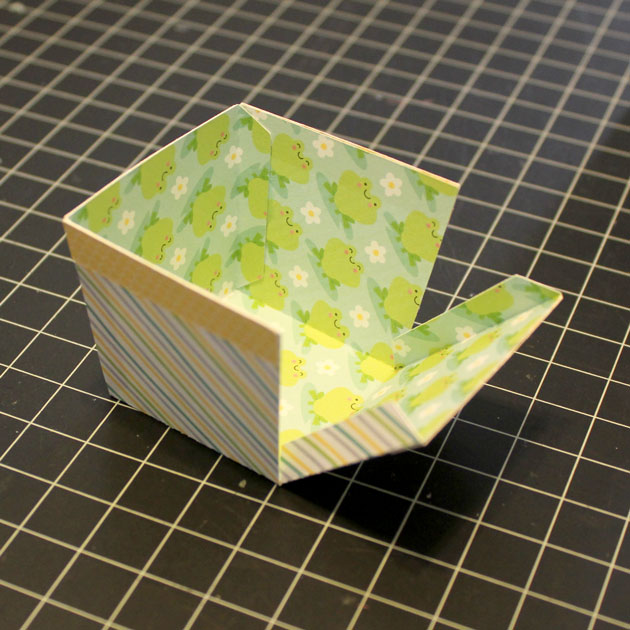
I started by assembling the box pieces that are attached to each of the hearts to form the bottom box and cover.  The bottom box has slightly higher sides when glued together.

For both the top and bottom, layer the hearts and glue together.

You will notice on each of the scalloped hearts small notches have been cut.  These are there to help guide the placement of the triangle boxes.  The two scalloped hearts are different, one has a slightly larger area designated by the notches.  This is the piece for the cover.  Glue the box with the shorter sides to this heart, and the taller sides to the other heart.

The next step is to assemble the insert pieces that will hold the kisses.  Glue these strips into little triangles.  I glued the tab on the outside.

Glue the little triangle pieces together so that the form the shape of the box bottom, then slide them into the box bottom.

All that is left is to add some kisses!

You can customize the top of your box with stickers, and other embellishments to make a one of a kind treat for someone special!

Here are the links to all of the Valentine’s Heart Boxes.  There is also a Valentine’s Nugget Box which I’ve included below.  The assembly is very similar, the difference is that the box pieces and inserts are square to fit a Nugget Candy.  The guiding notches on the scalloped hearts form a square.

Valentine Kisses Heart Box Small (In Silhouette Store here)  Holds 4 Kisses
Valentine Kisses Heart Box Large (In Silhouette Store here)  Holds 9 Kisses
Valentine Nuggets Heart Box (In Silhouette Store here)  Holds 3 Nuggets

That’s it for me today, thank you for stopping by to peek!


Valentine Gift Bag and Cookies with Anita

Hi Everyone!  Anita here with an easy and fun Valentine project that I created for my husband.  My daughter bought some items on Etsy and they came in this awesome cotton bag which I just needed to repurpose!

In addition to some twine, I used Printable Fabric from Cricut which is adhesive back and very easy to use.

I used two different files for this project.  The Valentine’s above are from a file called 3 Valentine’s Cards and you can find them here in the Silhouette Store.  I also used 2 Doily Hearts which you can find here in Lori’s SVG Store and here in the Silhouette Store.  I love using the print and cut feature because you are able to print exactly what you see and then cut it out perfectly.  Don’t forget to add  your registration marks to your mat before you print so your machine will know where the cut lines are.  When I cut the printable cotton canvas using my Silhouette,  I chose Printable Cotton Canvas Silhouette Brand from the media type, and used a cut depth of 5.  It worked perfectly.  The packaging gives directions for using a Cricut to cut the canvas and suggests Fabric, Printable (Cricut).

Make sure to position your printed cotton canvas fabric in the top left hand corner of your mat as in the photo, so that your machine can easily read the registration marks.

Here is what mine looked like after they were cut out.  I would suggest printing one on paper as a sample before putting  your canvas into the printer.

After I cut out the Doily Hearts,  I ran them through my Xyron to put strong adhesive on the back.  I wanted to make sure that they would adhere to the bag and stay in place once it was filled.

I added some twine to the string that was already in the bag.  I threaded the three colored pieces of twine through the same hole to match the embellishments on my bag.

Before I stuck everything down well I pulled the strings tight on the bag to see how the hearts and Valentine card would lay.

Lastly here is a photo of the completed bag with the sugar cookies that I made for my Valentine and I know that he will love them.  Hope you are inspired to start working on some Valentine’s for the loved one’s in  your life and that you will check out all of Lori’s wonderful cut files for what is one of my favorite holidays.

Hugs,

Anita

Peek a Boo Card Assembly with Corri

Hi everyone!  Corri here today sharing a quick assembly tutorial for the new Peek – a – Boo card.  I love these cute cards and there are several options available in Lori’s Shop.

When you cut the layers for the card, this is what you will end up with.

The navy layer is the card base.  Fold along the score lines so the circular tab fits inside the circle.

The two pattern papers I cut go on the card face.

The white layer is for the interior of the card.

Finally, the scallop circle is glue in place over the circular tab.  To finish your card you can use the print and cut hat included with the file or use elements from a paper collection like I did.  I used paper and stickers from the Echo Park – Little Man Collection.

Head over to Lori’s Shop to see all her new files.

Stacking Card Dot Base Birthday Card with Courtney

Hello Lori Whitlock fans!!!!!! Today is my short tutorial on focal points. This is Courtney Lee from Court’s Crafts here using two of Lori’s cut files and her awesome “I Love Family” collection for Echo Park Paper to make a birthday card for my dad!

There is this “rule of the triangle” in crafting that is supposed to draw your viewer to whatever your focal point is: your sentiment on a card perhaps or the picture on a scrapbook page. So when I am designing I remember this “rule” but like they say in Pirates of the Carribeanâ„¢ “They are more like guidelines anyway.” This one works for the triangle example though.

I created this look by doing four things to get my focal point across.

  1. First, I cut the smallest hole layer out of a lighter colored cardstock. This was actually a mistake. I meant to cut the most outside layer out of the white tone one tone paper, but I REALLY liked it afterwards. Score!

2. I used my sewing machine to create an “X” behind my sentiment but where you could still see it. This is the real “star” of creating the focal point on this card.

3. I used three enamel dots (tone on tone) to surround my sentiment. This isn’t a super noticeable addition but your brain notices it in the subconscious level and it draws the eye in.

4.  I used a contrasting color and a dark color for my sentiment. So the contrasting color to blue is orange and the dark is against the light background.

The “point” of the triangle is the top of these balloons. This was the VERY first cut file that I downloaded from Lori when I got on the Design Team. I LOVE these balloons and I am kind of a balloon cut file connoisseur. 😉

So there it is! In all of it’s glory! It’s one of those super simple cards that comes together very quickly but looks uber professional in real life. I hope you enjoyed my tutorial today on creating a focal point and I hope you have a VERY merry New Year!!!!!!!

Cut Files in Lori Whitlock’s Store (Cricut AND Silhouette users)
Birthday Balloons
A2 Stacking Card Dot Base

Cut Files in Silhouette Store (Silhouette users only)
Birthday Balloons
A2 Stacking Card Dot Base