Spring House Box Tutorial with Kathy

Hi Everyone!  It’s Kathy today with a tutorial showing how to assemble Lori’s new Spring House Box (here in the Silhouette Store).  This is such a sweet box that can hold a small gift or some treats!  Take a peek….

It looks like there is a lot to this house, but it’s really pretty simple to assemble.  First, cut all of the pieces…

Next, assemble the main box.  To begin, add the decorative panels, trim, door and window the box piece. It’s easier to do this before the box shape is formed.

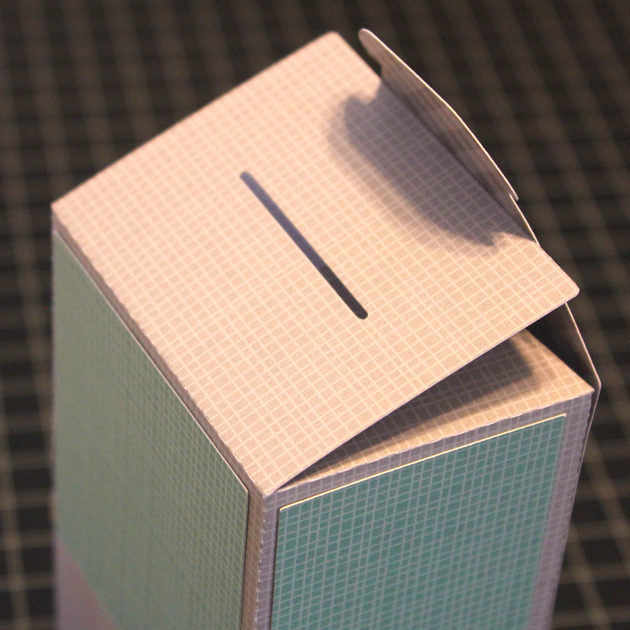
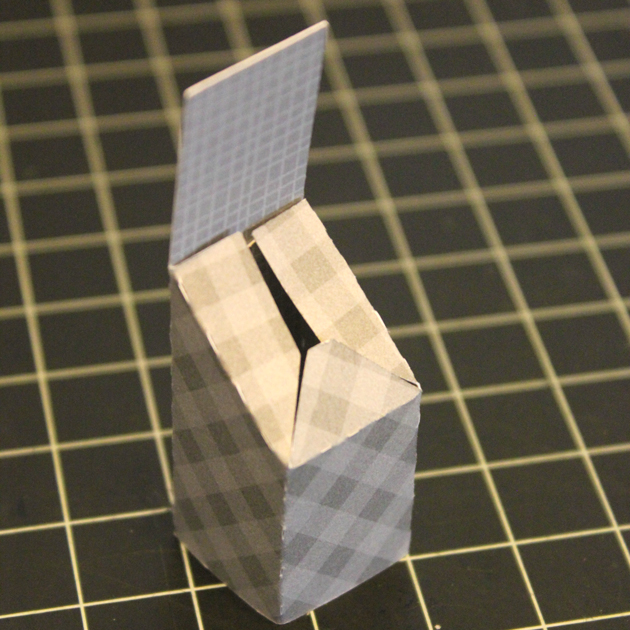
Fold the house on all of the score lines to form the box shape, here is a close-up of how the top of the box is folded.  It folds similar to a milk carton.

Glue the house box together, tab on the inside of the box.

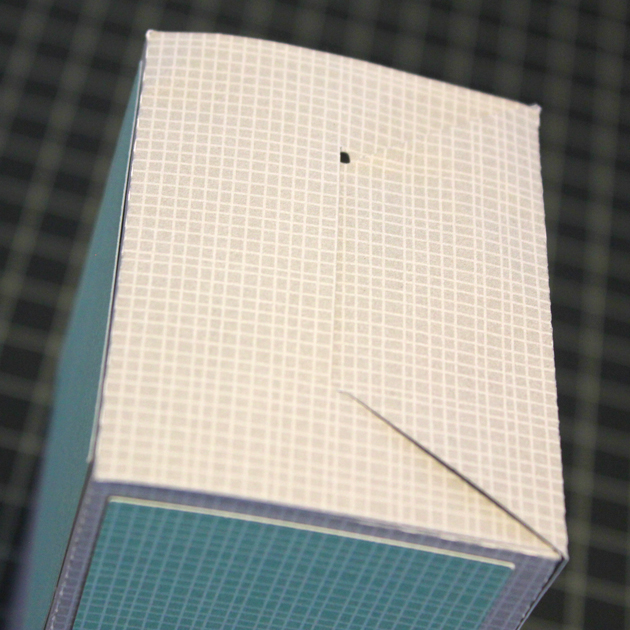
The bottom of the box is not glued, the flaps fold as shown, then the insert the tab into the slot to hold it shut.  This allows you to fill the box from the bottom.

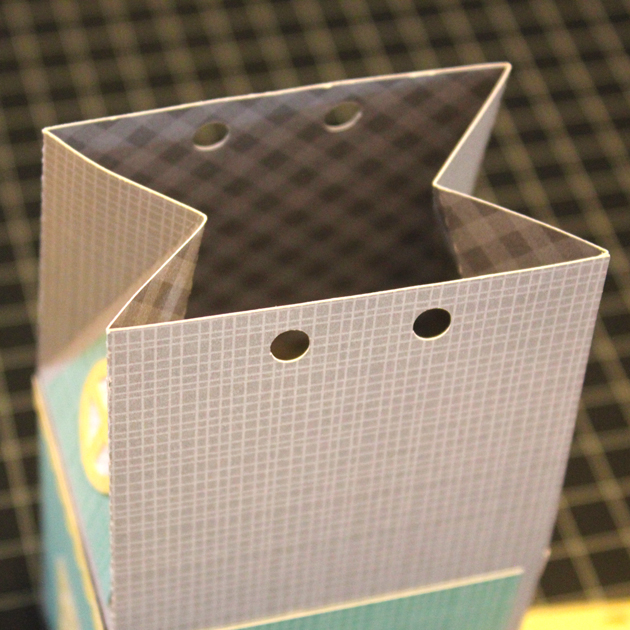
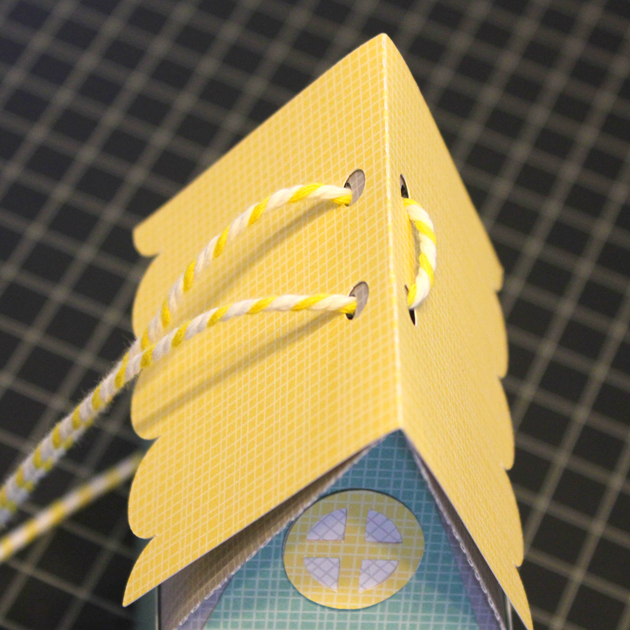
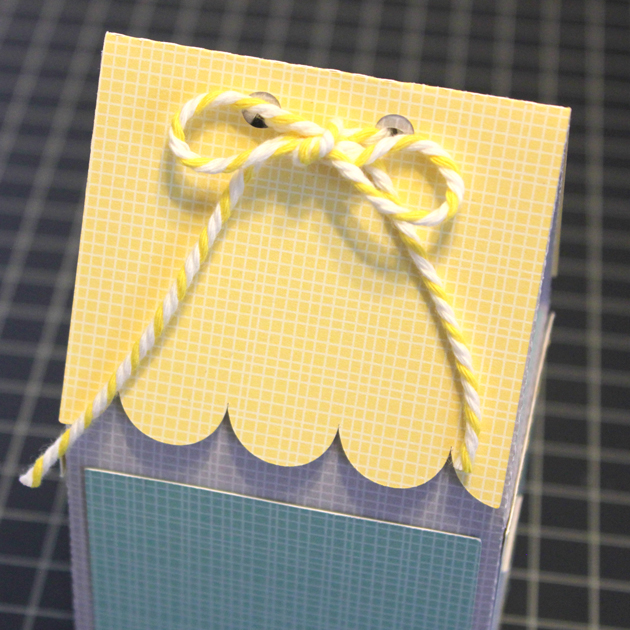
The top of the box is next.  Pinch the top of the box together as shown.  Fold the roof piece along the score line and place over the top of the box aligning the ribbon holes.  Thread a ribbon or twine through the holes and tie a bow to hold it together.

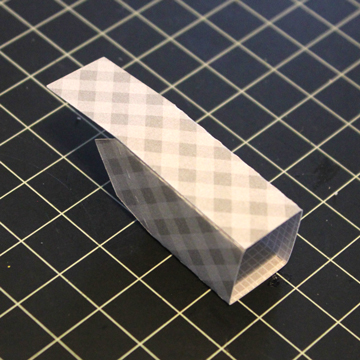
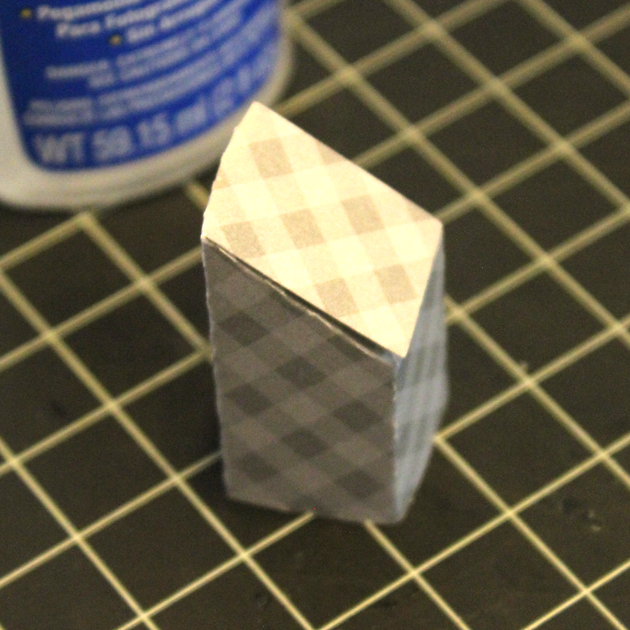
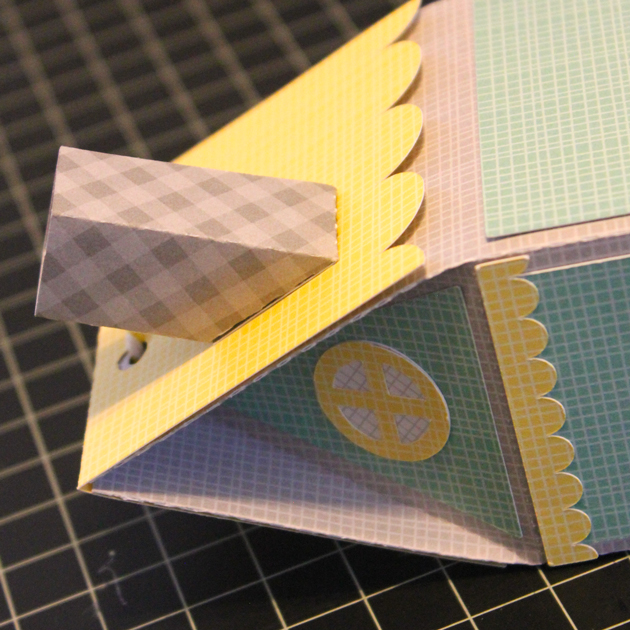
To assemble the chimney, fold the chimney piece into a box shape, and glue, tab inside.  Fold in the tabs on the bottom, and glue shut.  Glue the chimney to the side of the roof, slanted part against the roof.

Next assemble the trees.  The file comes with circles to fill the center of the flowers, I replaced them with enamel dots.

Glue the fence onto the front of the house as shown.  Add the smaller tree afterwards.

The larger tree is glued to the back of the house.  Half of the trunk should stick out on the right side of the house.  You may want to add a couple of glue dots to the branches where they meet the house roof.

And you’re done!

This box could be used for a number of occasions, including birthdays, Mother’s Day or just because!  That’s it for me today, thanks for stopping by to peek!


Summer Pinwheel

Hi:

Anita here with a fun and really easy tutorial to make this giant pinwheel.  It is part of a whole set of goodies that I made for my nieces to have a lemonade stand.  I used Lori’s Echo Park Collections called Celebrate Spring and Celebrate Easter.  The cut file that I used for the pinwheel is called 3D Double Pinwheel and you can find it here in Lori’s store and here in the Silhouette Design store.

Here is what the cut file looks like when you it open it in the Silhouette program.  You have to ungroup it as the pinwheels will only fit one to a page.

Here are the supplies that I used for the pinwheel.  You will need a hole punch that can go through the paper straw and a brad that has a long enough shank to make it through all the layers.  I used one of Lori’s Echo park I Love Christmas Decorative Brads.  I placed the sides of the paper that I wanted to see most of  facing up.  Two sided papers work beautifully with this project as you can see some of the other side when it is put together.

I used a paper straw and punched a small hole near the top of the straw.  Paper straws come in many different colors and look so cute with the pinwheel!
The first step in putting together your pinwheel is to put the brad through the two center pieces of the pinwheel.

You put it all together by pulling gently on the center piece that has the hole in it and pushing the brad through the hole.  Keep going until you have all the holes connected through the center brad.  Then push the brad through the straw.  Depending on how thick your paper is and how long your brad shank is you may have to fuss with this a bit.  I pushed it through with the assistance of my Tim Holtz pick and then bent the shank pieces down with a knife.

You can only see one tab of the brad but they are both there just underneath one another.  Turn the pinwheel over and you should be able to separate the two pieces to fan them out and show a bit more of the paper designs.

Here is a close up of the pinwheel.

I used a whole lot of Lori’s files to create this set and just love that huge pinwheel.  Have a great day and hope you have a chance to make something pretty today.

Hugs,

Anita


Guest Designer Mitsyana Wright

Happy Saturday! I hope everyone has had a great start to their weekend! I am Mitsyana Wright, from Up On Tippy Toes, and I am so excited to be guest designer for Lori Whitlock. I’ve always been a big fan of her unique and whimsical designs. And I am over the moon thrilled to be able to share with you this adorable Unicorn Card I made using her Center Box Card Unicorn.

I’m a card maker and obsessed unicorn lover, so this unicorn card was just up my alley! I started by opening the card file in my electronic cutting machine software. Because Lori Whitlock’s files are SVG format I am able to use them in a number of electronic cutting machines.

When I open the file in my software , all the shapes are grouped together like this…

I like to separate my shapes by like colors. Then I can place several different colored papers down on my cutting mat and cut them all at the same time.

Here are all the pieces for the card cut out…

These pieces go together very easily and you simply adhere them to the card base… this is totally cute as is but I like to add personal touch with shading and more dimension.  I like to add shading with a bit of airbrushing. It’s a great alternative to shading with ink pads and sponges.

After my pieces were all airbrushed I started on building the card…  I folded the card base on the score lines, making the center panel recessed.

For added dimension, I added embossing to these background panels, then distressed the top layer of the embossing off with a sanding block. This exposed the white paper core everywhere the embossing was raised.

Because of the added texture of the embossing, I ran my panels through my sticker makers for maximum adhesion to my card base.

Then attached them to the card base.

 I used a glue pen to piece the smaller parts and pieces together.

I folded the little score lines on the unicorn base and attached them into the inside fold of the card. and then attached the hills over top.

I added highlights with a white gel pen onto the unicorns main and tail, as well as the rainbow.

Then place my sentiment onto the lower left corner.

This card turned out fantastic! My only problem would be which one of my unicorn loving friends to give it to!  Hope you all enjoyed this project!!  Have a MAGICAL day!!

Mermaid Birthday- by Lezlye Lauterbach

Welcome to Lori’s Blog. Today, I’d like to tell you some of my little tricks for sprucing up my digital cut files.   I start by importing the SVG file into my Cricut Design Space just as is.   (Make sure to attach your score lines to each piece after ungrouping the design.)   The cutting on these files is really easy.  Just choose your paper colors and the Cricut Explore prompts you when to change the paper.

Here are all the pieces cut.

Now to personalize it a bit!  To add a little dimension to the background pieces,  I used a bubbles embossing folder.   Because the paper was larger than the folder I ran it through twice moving the paper to cover the whole piece.

I used a background wave stamp to add to the wave cuts with a white unicorn ink.  This gives it more of an ocean feel!

Now for some sparkle!  I used some Nuvo glimmer for the mermaid’s tail!

It’s easy to customize your cards, just add a little ink,  Stickles and/or glossy accents to dress up your pieces!

Thanks for stopping by..

You can find this fabulous file at the following links:

Little Mermaid Box Card Silhouette Here

Echo Park Papers

Easter Cross Card Tutorial with Courtney

Hello everyone! Courtney Lee from Court’s Crafts here with an A2 Pop Dot Easter Card tutorial!

This card is very special as my friend is being confirmed into the Catholic Church this Easter. She loves to travel and this season of her life has been such a journey. So there is so much symbolism here. I chose wood for the crosses. I put an airplane in with the flowers. I chose to emboss the whole thing with the world as Jesus came to save the world and there is a world map behind the crosses.

Without further adieu here is my tutorial! This is how it looks when you import it. I copied and pasted the layer with the three crosses as I wanted to cut it out of two different colors to make the crosses really stand out.

Here it is after I colored the layers how I was going to cut them out. I do this as I have three little “helpers” and it’s easy to forget which papers I picked out. 

This is what it looked like after I cut it out.

I used my X-acto knife to cut out the crosses.

I put all three layers together and embossed them at the same time with the world embossing folder from the Go See Explore collection for Echo Park Paper by Lori Whitlock.

Isn’t this world embossing folder fabulous? I just love it.

Here is what it looked like after it came out. I kind of had to pull it apart so I could put foam dots in between the layers.

I was careful how I aligned the embossing folder so that once the card was assembled you could tell that it was a world map.

I glued the crosses to the green layer.

I glued the world map to the back of the green layer. In hindsight I wish I would have popped that layer as well to give the crosses some depth.

Time to break out those pop dots!

These enamel shapes are awesome. I grabbed one for my sentiment.

Now it is time to decorate. Enamel shapes and dots galore.

I love these clouds and stars.

I tucked an airplane in the flowers.

Here it is all finished. I hope you enjoyed my tutorial today and that you make a special card for someone for Easter or to bring to Easter dinner as a thank you. This one is beautiful in all white or in many colors!


A2 Pop Dot Card Easter Cross in Lori’s shop

A2 Pop Dot Card Easter Cross in Silhouette shop