Christmas Countdown Step Card Tutorial

Christmas will be here before we know it.  To help count the days, I created this fun little Christmas Countdown Step Card (SVG, Silhouette ) for Lori, and it was released this week!  It’s such a fun card… you can make one for yourself, or mail one off (I recommend a 5×7 padded envelope) to someone special!  I pieced this one together using A Lumberjack Christmas from Echo Park Paper.  I put together an assembly tutorial below.

For the base of this card, you want to make sure you are using a good at least 80lb cardstock so it will retain it’s shape.

  1.  Start by cutting out your pieces.  The numbers and “days” until were done using the print and cut function of my cutter.  If you need help with that, we have a tutorial for Silhouette here and Cricut here.  I pieced together the Santa, Tree, presents and mouse.  I added some enamel dots to my tree for “ornaments.”  In addition to the file pieces you will need a mini clothespin.
  2. Fold the card base into the step card.  This picture shows the folds.
  3. Add the decorative panels to the card as shown, then the “days until” piece.
  4. Fold the pocket piece and glue.  Adhere to the back of the card.  This pocket holds the extra day numbers when not in use.
  5. Glue the Santa and tree to their steps as shown.  Be sure to only add adhesive to the parts that will be glued to the steps, nothing above the step “peak.”
  6. Add the Christmas word and mouse with present to the bottom front.
  7. Add the mini clothespin to the top center of the “days until” piece.  Make sure it doesn’t stick up higher than the peak.
  8. To clip the numbers, overlap them a bit, and secure in the clip

Now you’re ready for the countdown!  If you make one of these, please be sure to tag Lori Whitlock on Facebook and Instagram.  We always love to see your creations!  That’s it for me today, thanks for stopping by to peek!

BLOG * INSTAGRAM

Fox Tuxedo Box Card Tutorial

Hi there friends! Brandie here sharing an assembly tutorial for the Tuxedo Box Cards (SVG Bundle). I made the Tuxedo Box Card Fox (SVG, Silhouette). I love this fun twist on the standard box card.

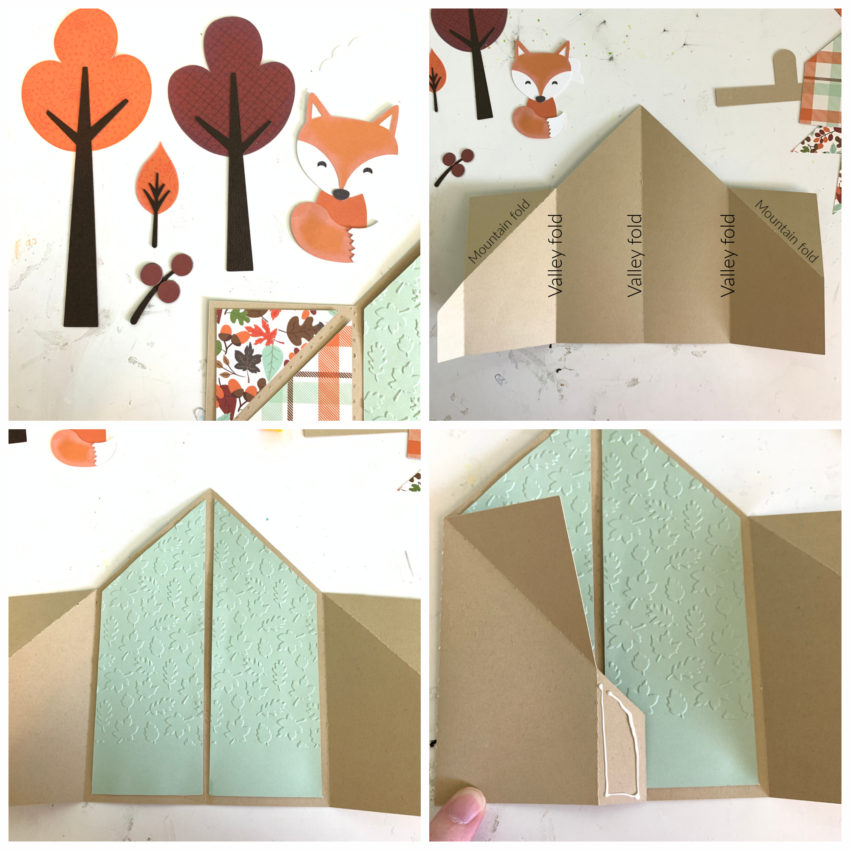
First assemble the decorative elements. Two trees, a fox, leaf, and berries. Then fold the card base on the score lines. Most of the score lines are valley folds. The two mountain folds are for the flaps. Next glue in the inside decorative panels. I ran my inside panels through a Fall leaf embossing folder. Once the panels are secure fold the left side over and add glue to the outside of the tab and fold right side over and press and hold until glue is set.

Then glue the outside decorative panels in place. Fold down the flaps and glue those panels in place. For the insert that the fox is glued on fold the tabs in and apply glue to the outside of the tabs.

While the card is laying flat slide the insert into the card base while holding the glue tab down lining it up to the center fold line. Press down on the card where the tabs are to help secure them. The tabs will be glued to the inside front of the card base. When the card is standing upright the inside tab forms a u shape. Glue the fox into place on the center of the tab. Then glue in the trees and cloud and decorate the front of the box with remaining elements.

I used papers and a couple of stickers from the My Favorite Fall collection by Echo Park Paper.

That’s it for me today! Thanks for stopping by.
Brandie

Sticky Note Calendar 2021 Tutorial

Hi there paper crafting friends!  It’s Michelle Starcher, aka the Bookish Designer, popping in on the blog to walk you through the steps to create Lori’s Sticky Note Calendar 2021  (SVG, Silhouette- coming soon). In this photo tutorial, I will break down the steps to create this super cute project to keep you on track in 2021.  I used papers from the Magical Adventure collection from Echo Park Paper Co.  The calendar goes perfectly with the organizers I made a few weeks ago.

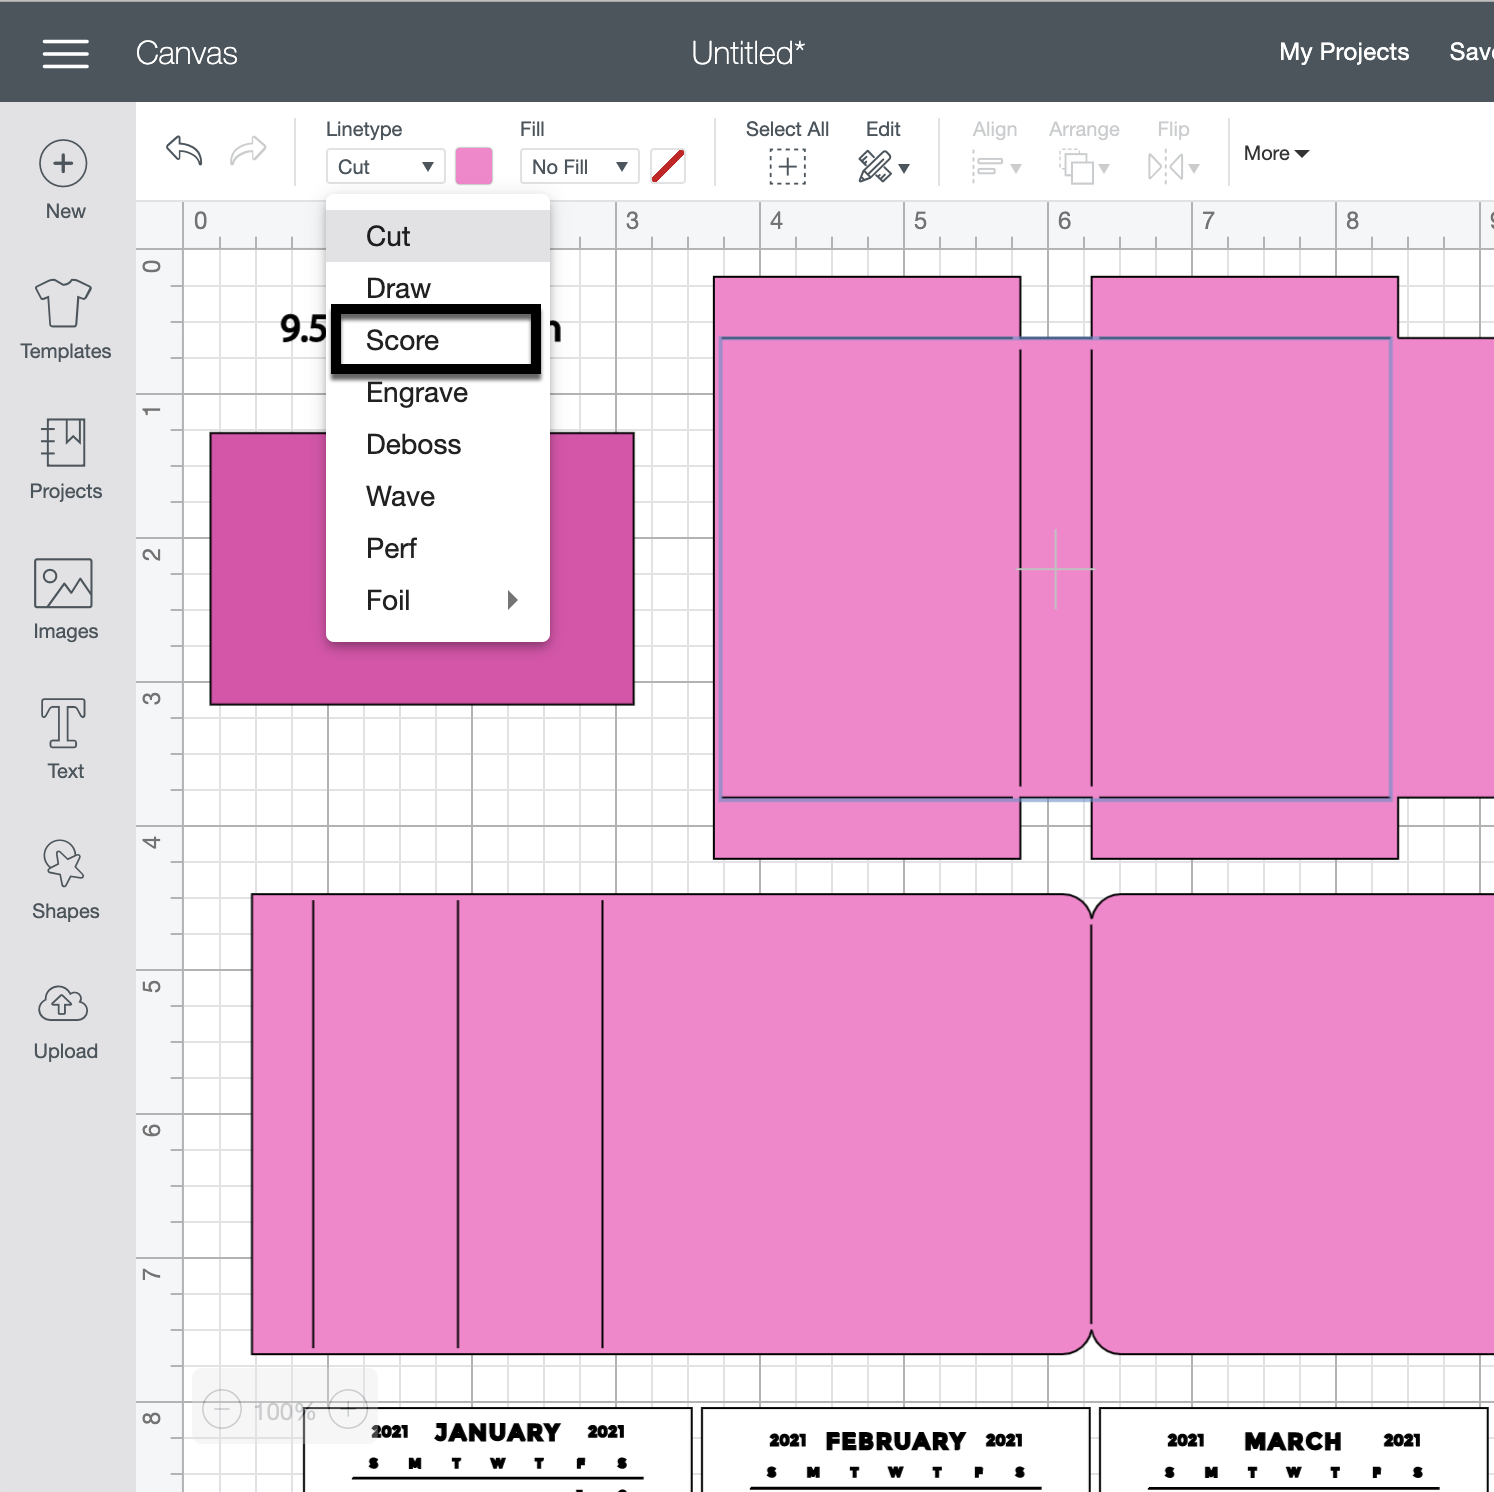
After uploading the SVG file to the Cricut Design Studio, I needed to make a few changes, so that it would cut correctly with my Cricut Maker. Below you will find the steps I took to prepare the file for cutting.  I opened the “solid” version of the SVG in Cricut so I could use my score tool.

Ungroup the SVG file.  Change the Linetype of the fold lines on the calendar base and sticky note holder to score marks. Attach the score lines to calendar base and sticky note holder pieces.  For help on this process, see this video on Lori’s YouTube Channel.

Next, change the Fill calendar pieces to Print.  You can save yourself some time by holding the control (PC) or command (Mac) key and clicking each month’s calendar.  Then change the Fill to Print for all 12 months at the same time.

The final step is to Flatten each calendar piece to the white rectangle below.  Unfortunately, you will need to do this 12 times.  Don’t forget to hide or delete the size note (9.5343 in =width).

You are ready to print and cut your project pieces.  Toggle off the Add Bleed option in the print window.  It will be grayed out when in the off position.  When I sent mine to the printer, it printed both pages.  After printing, it was time to cut all the pieces using my Cricut Maker.

After cutting all of the project pieces, I folded all the pieces with score marks and added adhesive to the joining tabs.

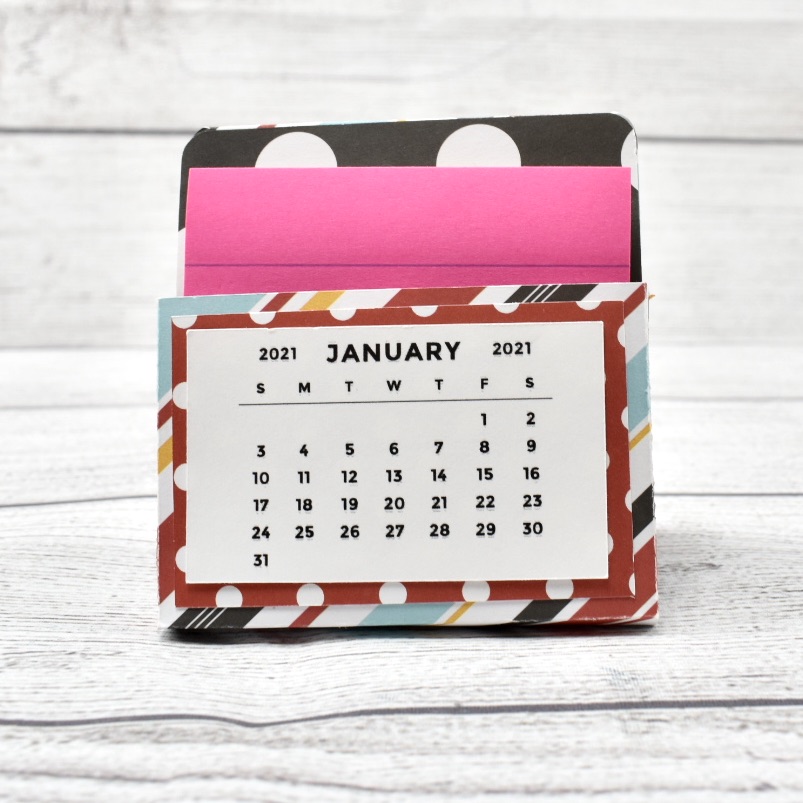
Then I adhered the calendar back (the red polka dot piece) to the front of the sticky note holder and added adhesive tape to the back of the sticky note holder.  Next, I assembled the stand and attached the sticky note holder to the stand.


I chose to attach the January 2021 calendar piece to the front of the sticky not holder and tucked the rest of the pieces behind my sticky notes.  I will add the new months to the front of the sticky note holder as the year progresses.  You can also staple the months together in a stack and add as a group to the front.


I hope you enjoyed making the Sticky Note Calendar 2021  (SVG, Silhouette) as much as I did! Looking forward to 2021 and using my sticky note calendar.

Until next time,

Michelle

Halloween Layered HTV Tutorial

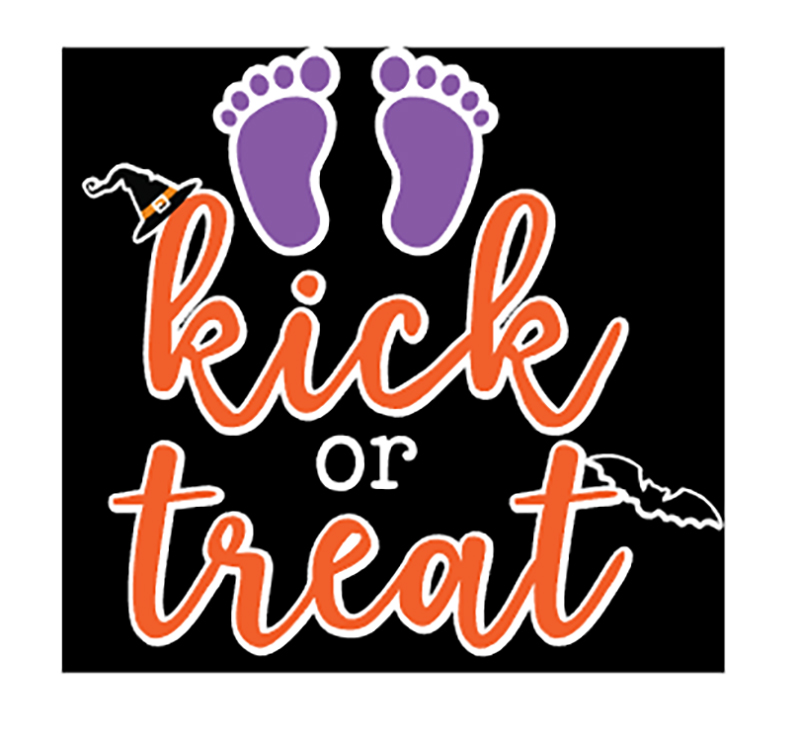
Welcome to Tutorial Thursday. Today I am sharing some HTV (heat transfer vinyl) tips with the Silhouette Studio software.  You can also cut HTV with other machines. Here is what we are making!

Let’s get started.  First, find your files and fonts to create your shirt.  I used these files for this shirt:

LW Longhand Font (SVG, Silhouette)
LW Perfect Type Font (SVG, Silhouette)
Feet from Coming Soon (SVG, Silhouette)
Halloween Witch Hat (SVG, Silhouette)
Halloween Bats (SVG, Silhouette)

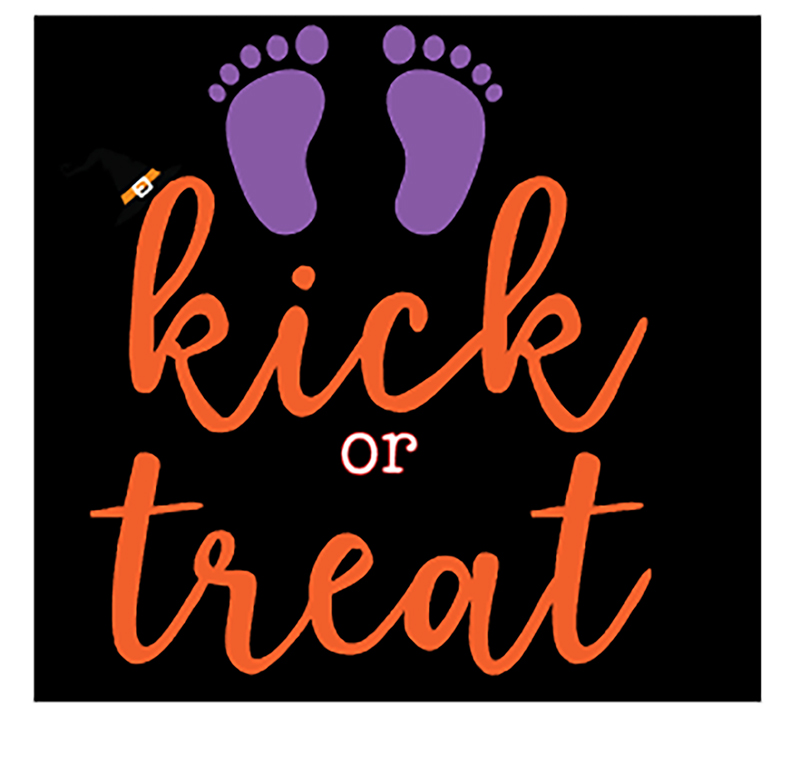
I typed Kick or Treat, and then added the other elements. In your design software, make a background box that will be the color of your project.  This will help you visualize the colors.

This looks ok, but I really wanted the colors to pop out more from the background.  This is where the Offset feature is used in Silhouette Studio.  I moved the background, and then selected the project. Then I used the Offset function which is the star Icon on the right side menu.  This is the Offset Settings Panel:


For this project I used Offset, changed the distance to 0.085 inches and selected the round option.  Click apply.


In this image, the red outline shows the offset.  Now it’s almost ready to cut.  Now separate each color and flip your project horizontally before cutting. The white offset layer is perfect in helping you line up all your other layers.

You will apply the HTV to your shirt or project working from the back color to the front with one color at a time. In this project, the first color to be applied is white.  I heat each layer for about 15 seconds instead of the full recommended time.  Then on the last layer, I apply heat for the full recommended time.  In my project the white layer is the largest, so I kept the clear transfer tape and used it to cover the whole project with each new layer. It is such a fun Halloween shirt for my sister!

You can create your own HTV project for less this week!  All SVGs, Fonts and commercial licenses are 30% off when you use code OCT2020 at checkout!

Have a great day!

Witch Hat Handle Box Tutorial

Hello everyone! Marcia here today. Are you one of those people that go all out for Halloween? I love decorating for Halloween! Since it’s almost October, I thought I would share a Halloween treat box with you today. This Witch Hat Handle Box can be found here (SVG / Silhouette ). I used the Echo Park I Love Halloween paper collection also designed by Lori for my box.

Let me show you how I put it all together. First select your papers and cut everything out. Before assembling, I like to ink the white edges of my pattern papers with ink. I do this with cardstock too if it has a white core.

When making a box, I prefer to adhere the panels to the box before folding on score lines and gluing the sides shut.

To add glitter to the witch hat star and buckle cut file pieces, run them through a sticker maker face down. You want the glue on the front side. I like to use a bone folder to rub across the back side of the pieces making sure all the glue transfers to the paper.

Sprinkle the glue side with glitter, or press the glue side down into the glitter in a container.

Assemble the witch hat and adhere to the front of the box along with the Eat If You Dare print and cut label. Fill with your favorite candy before gluing the handle together, a glue dot works well.   I love adding bling to projects to make them extra special!

There are four new Halloween themed handle treat boxes in Lori’s Shop and the Silhouette Store giving you lots of options. Go check them all out! Thanks so much for stopping by.
~Marcia