You’re The Best Pop – Tutorial

Hello everybody! Marcia here today. I thought I would do a tutorial on this adorable popcorn box card. I made this Father’s Day Popcorn box card (SVG, Silhouette) for my Dad. I have fond memories as a child of him taking my siblings and I to the movie theater. Now that he is older, I am the one who is taking him out to the movies.

This tutorial is based on Silhouette Studio, but there are parts applicable to all different cutting machines.

After opening the file in Silhouette, you will want to ungroup all the pieces. If there is a printable sentiment, set your print registration marks in the Page Setup Menu. This lets the software detect where your cut lines should be in reference to the printed text. Ungroup the text from the shape surrounding it and move the shape to cut outside of the print registration marks. Select the printer icon to send the text to your printer. After printing, mount the paper in the upper left corner of your mat and load the mat into your Silhouette. Move the shape to cut back around the text. Now select the text and move it away from the shape to cut. Send to Silhouette to cut. Cut the rest of the pieces from whatever desired cardstock or pattern paper you like.

Before assembling the pieces together, I like to ink the edges of some pieces to make them look more dimensional. I selected a yellow and light brown here for inking my popcorn edges.

After inking, assemble the popcorn box and the card inserts. I used pop dots behind some popcorn pieces for added dimension.

Adhere the card inserts to the inside of the popcorn box, placing the popcorn insert in front of the sentiment insert. Use more pop dots to adhere the filmstrip slightly behind the sentiment.

Lori has lots more Father’s Day cards in her shop. Go take a look. Thanks so much for stopping by.

~Marcia

Father’s Day Gift Set

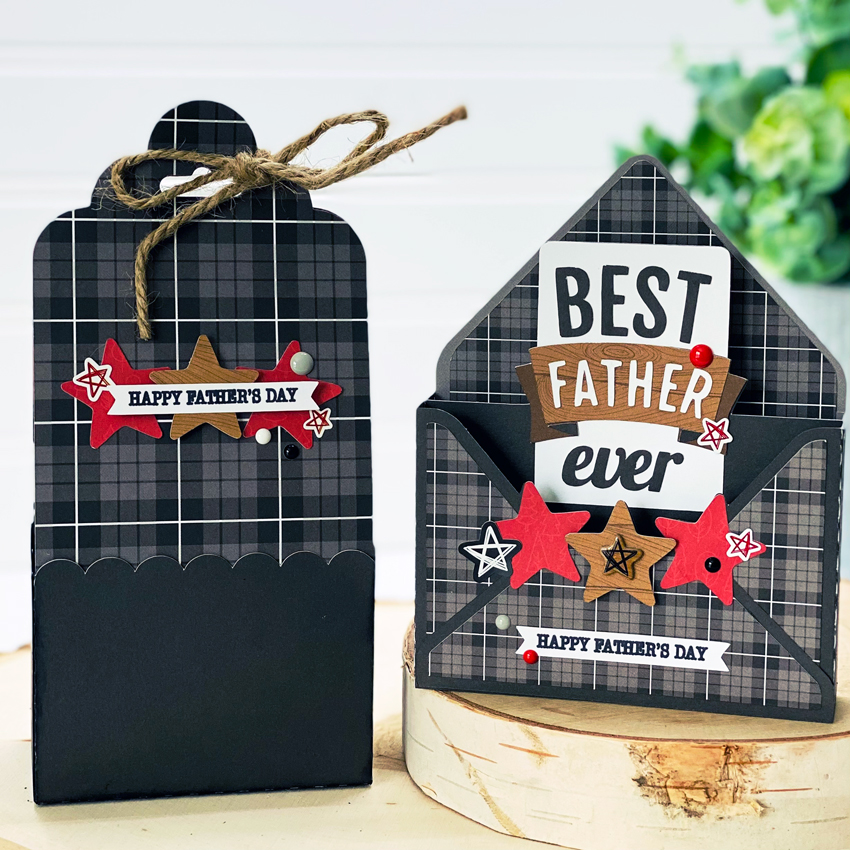
Hello crafty friends! We’ve already celebrated Mother’s Day and now it’s almost time to celebrate Dad! Aimee here with you and my tip for the day is take a minute to look at the svg files you have and see which ones can be matched up. And I also have a small tutorial on putting this adorable new box together for you.

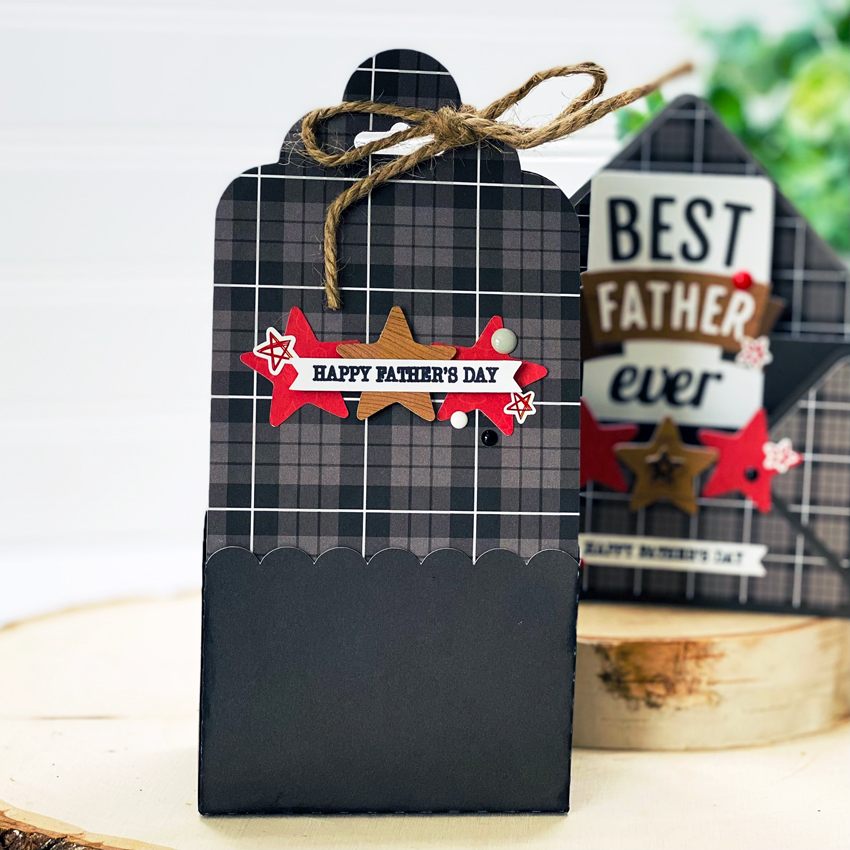
For my Father’s Day Gift set, I’ve used the Box Card Envelope Father’s Day (Lori’s SVG Shop, Silhouette) and Tag Wrap Gift Box (Lori’s SVG Shop, Silhouette). Instead of using the flower that came with the box file I decided I wanted to cut out some additional stars that came with the Father’s Day card file and make a small collage on the box so the two would match. I also used some fabulous papers and stickers from the Little Lumber Jack collection.

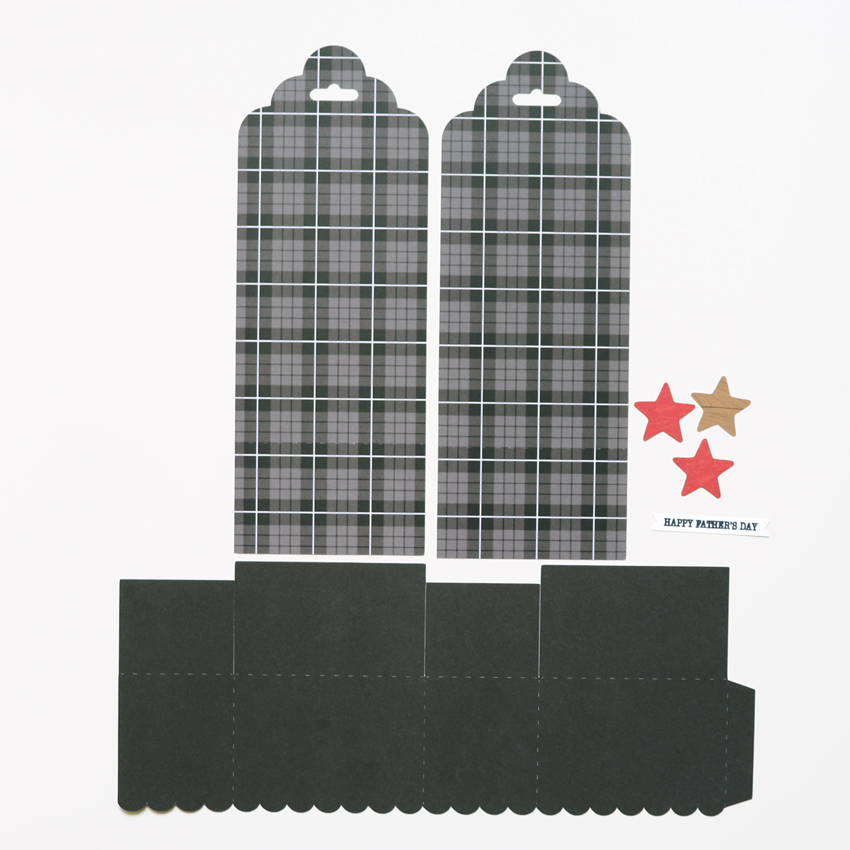
The assembly for the Tag Wrap Gift Box is very simple! I started off by cutting my papers and getting my adhesive ready. I wanted to point out that my box piece is upside down in the picture. So make sure when you are adhering the front and back piece to the box panel that the scallops are right side up.

Next thing to do is fold all of your cuts on the dotted lines. Then adhere the tag pieces to the box…scallop side up! Lol!

And then adhere the side tab and the bottom tabs as you would any normal box bottom. Now your box is ready for decorations.

When looking through my stash I found some rope twine that matches perfectly with the wood in the papers! And I added some enamel dots and star stickers to both pieces.

Now all I need to do is buy a gift for my hubby and I’m all set for Father’s Day! Hope this cute set gives you some ideas and inspiration for your Father’s Day gifts! Thanks for stopping by!

Aimee

Mickey Mouse 3D First Birthday Blocks Tutorial

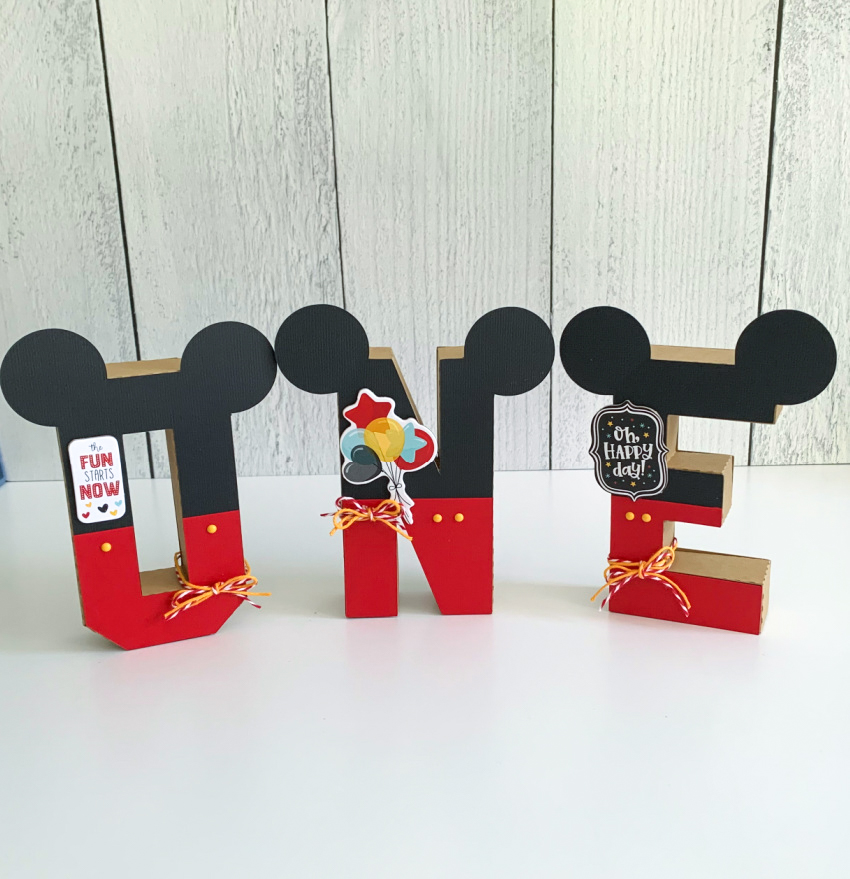
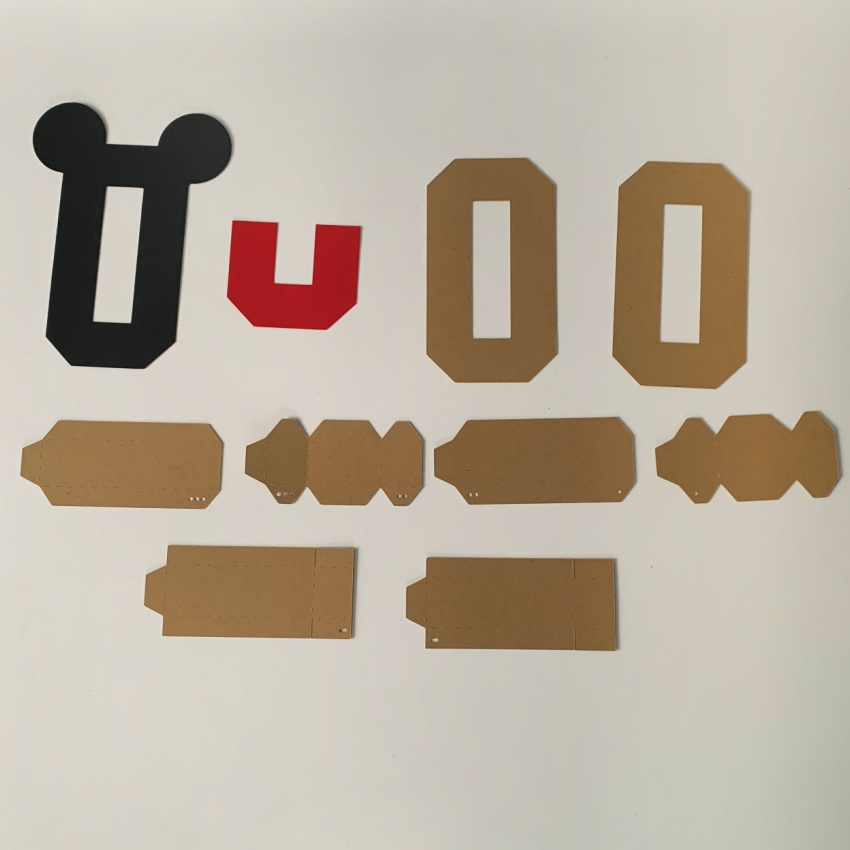
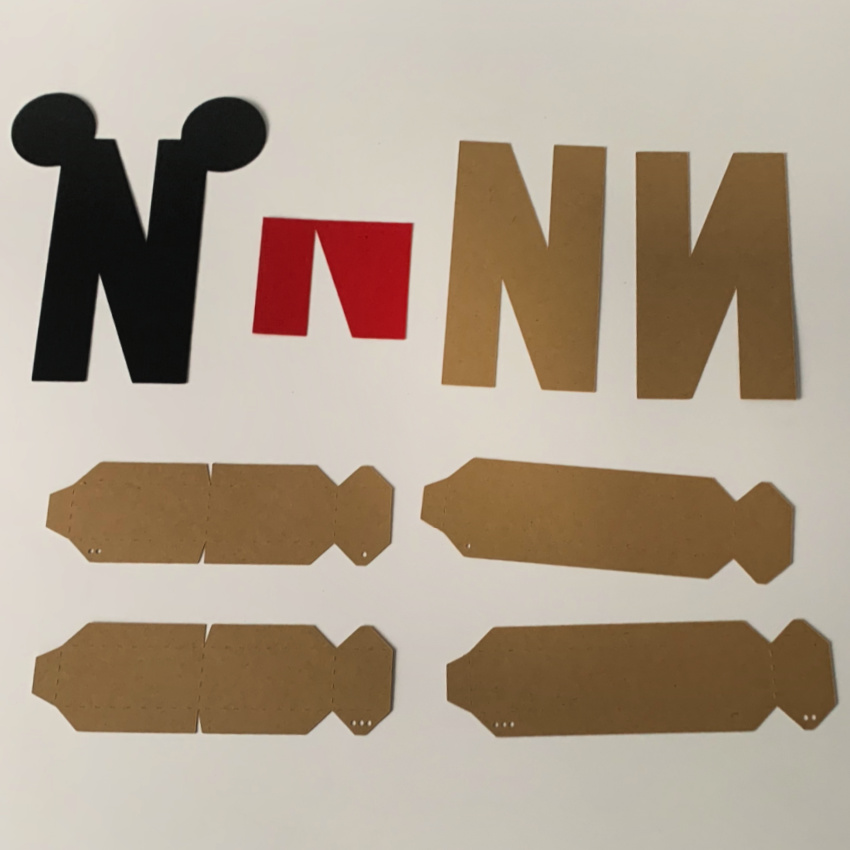
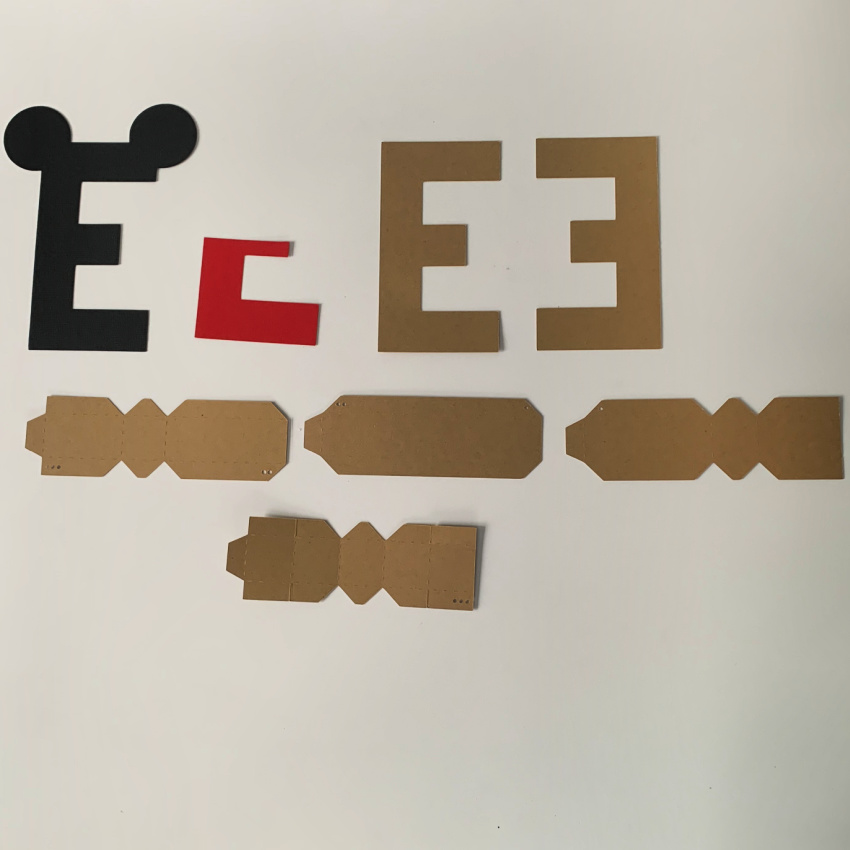
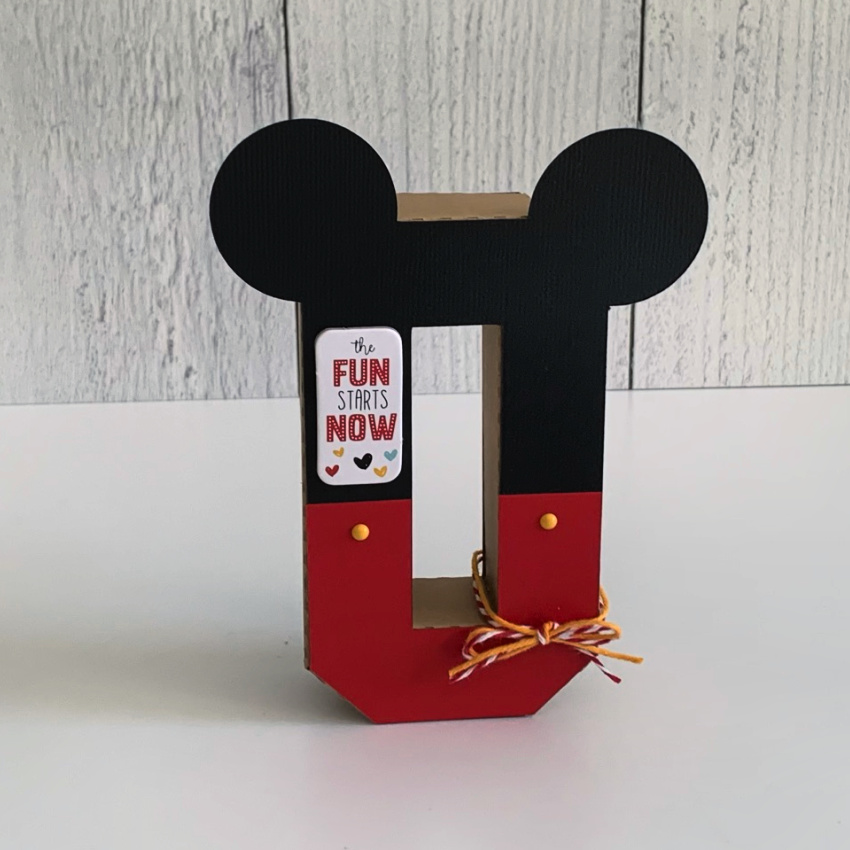
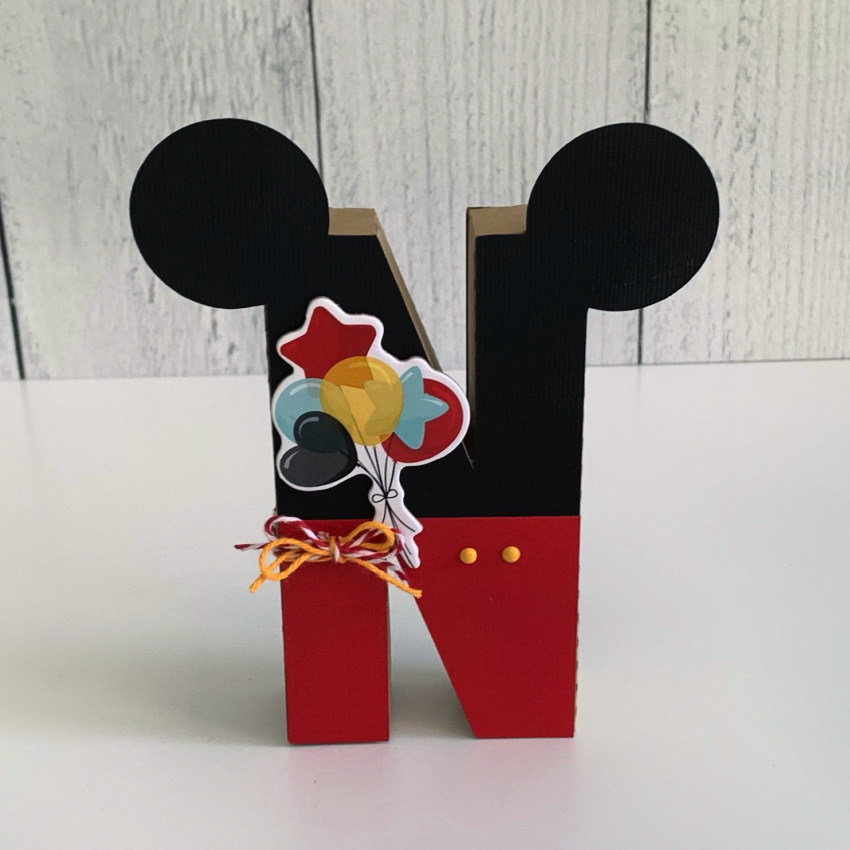
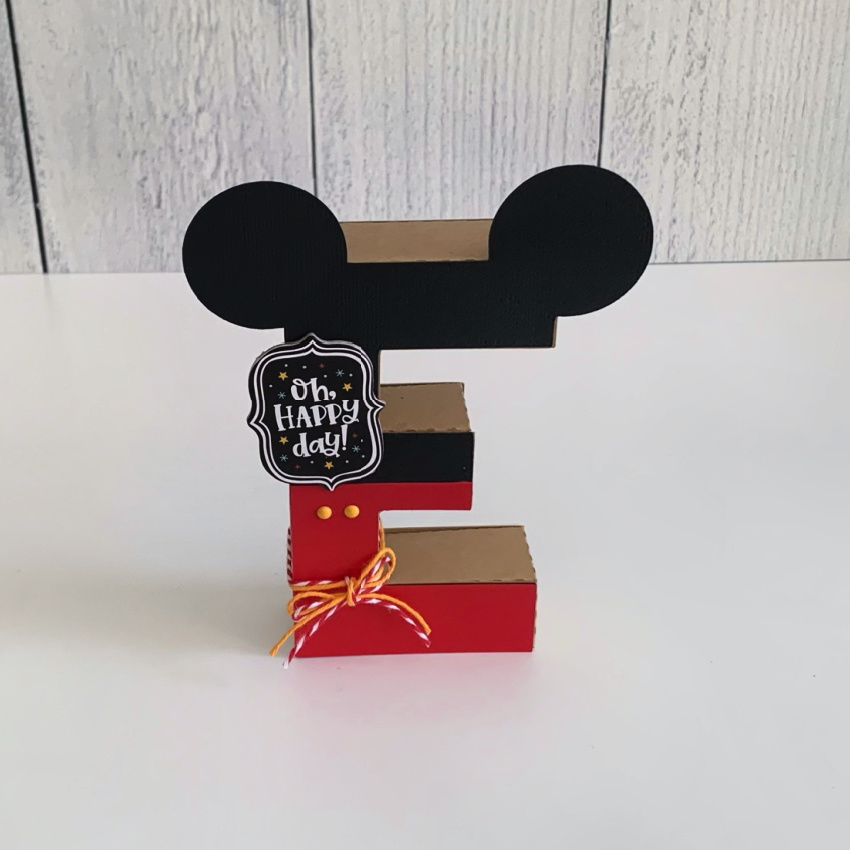
Anita here with a tutorial to show you how I made Mickey Mouse letters for my grandson’s first birthday party.  I used Lori’s awesome files for the 3D Letters, including the 3D Letter Alphabet O (SVG, Silhouette), the 3D Letter Alphabet N (SVG, Silhouette) and the 3D Letter Alphabet E (SVG, Silhouette).   Lori also has a wonderful tutorial on her YouTube page which you can watch here to assist with putting the letters together.

Here are all the pieces that I cut out to make my blocks.  I used kraft cardstock papers for assembling my letters.  I will describe what I did to create the Mickey ears at the top of the letter and cut an extra letter in the red, and cut it to fit near the bottom third of the letters.

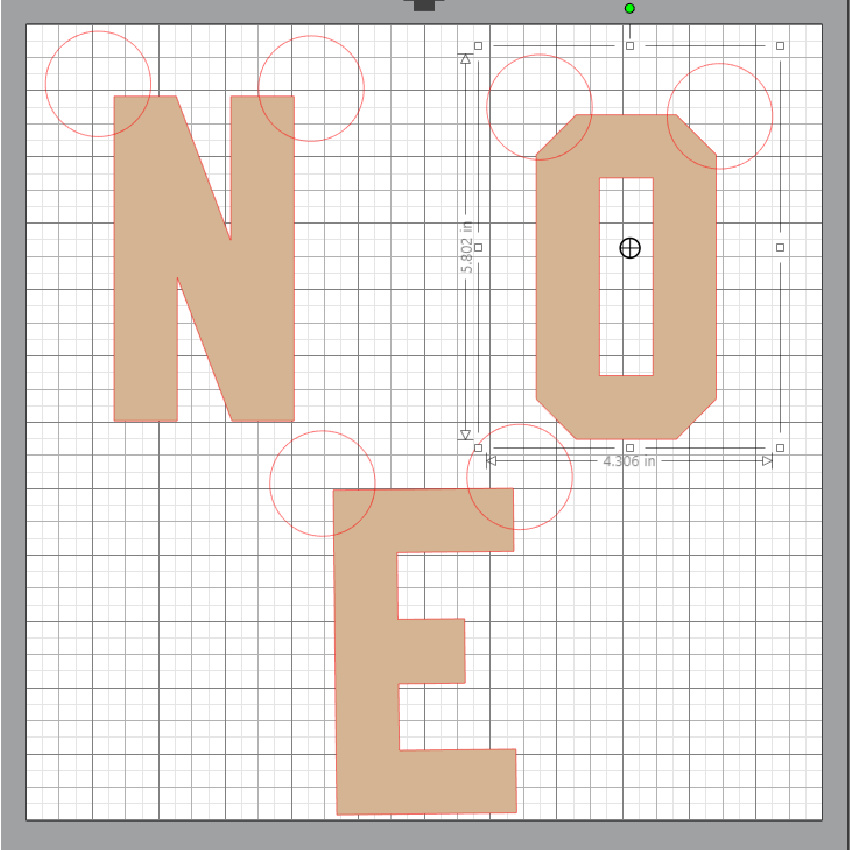
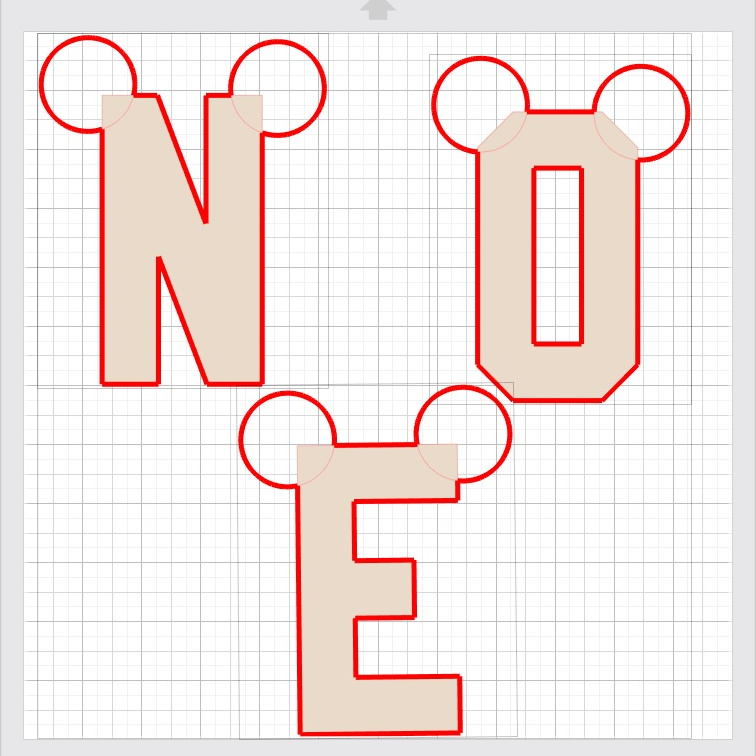
To create the ears, I used the shape tool in my Silhouette Studio software and created a small circles that were the size that I wanted for the ears.  I copy and pasted a copy of the larger front piece from the file as I didn’t want the layered look as shown in the original cut file.  Once I had all three of the letters on the mat I added two circles to each letter.  I then grouped each letter with the ears and arranged them on the mat so that they all fit.  I then sent the file to cut and selected each letter one at a time and then selected cut edge.  I sent it to my Silhouette and it came out perfect.

Thanks for looking and have a great day.

Hugs,

Anita

Impossible Card Ages 1-100 Resizing Tutorial

We’ve had a few questions recently on how to resize the numbers in the Impossible Card Ages 1-100 (SVG, Silhouette) so I thought I’d put together a quick tutorial showing how to resize in Silhouette, Cricut and Canvas.  If you’re not familiar with this card, it’s an awesome deal!  You basically get 100 cards in one.  The card comes with the base, and birthday numbers from 1-100.  To keep the file a reasonable size, the extra numbers have been downsized and need to be resized to use with the card.  How you resize depends on the cutting software you are using.

For my card, I chose the number 80 for my mom who is celebrating this milestone birthday this month.  I just love the little birdie!  Below I’ll outline how to resize in each of the 3 cutting programs.

Silhouette

Start by loading the file into Silhouette Studio.  As you can see, the majority of the numbers have been downsized to make the file more manageable.    Down towards the bottom of the file is a note which states to Scale desired number up 400%.

I selected the number 80 and deleted the rest, along with the note.  To resize, first click on the transform button on the right menu panel. Then click on the size button on the top row of the pop up window.  This will bring you to the resize window.

To upsize 400% add the number 400 into the scale section, then click apply.  Your number is now the correct size to use with the card.


Cricut

Upsizing in Cricut takes a bit more work due to the fact that there is not a way to upsize by a percentage in Cricut.  But it’s still relatively easy, you just need to do a little math.  Start by uploading the file into Cricut.  Delete all of the numbers you won’t be using and click on the numbers you will be using to get the width.  In this case, the width of the 80 is .883 inches.  To upsize 400%, you want to multiply the width by 4.  The resulting number is 3.532 inches.

To change the width, go to the size area in the top toolbar (if you can’t see this, make sure you have clicked on the number to select it)  You want to make sure the little lock is closed.  This will make sure that the file is resized uniformly.  Change the Width number to 3.532 and hit enter.  This will resize the number to the correct dimensions.


Canvas

Files that are imported into Canvas that are larger than the 12×12 mat are automatically resized to fit onto the mat.  Because of this, resizing the numbers in Canvas will require two steps. (for more information on resizing in Canvas, see this post)  First resize the file as a whole, then resize the number you wish to use on your card.

Start by importing the SVG file into Canvas. Next you want to select all the pieces, right mouse click and select group.  This way you can resize all of the pieces at once.   Click the edit button on the right menu panel and the sizing box will pop up.  Make sure the Maintain Aspect Ratio box is checked, then change the width to 16.529.  This is the correct width of the file when imported full size.  Click enter and your file will be sized correctly.

Ungroup the pieces of the file (right mouse click, ungroup) and delete the numbers you won’t be using along with the note on sizing.  Click on the number you are using to select it, then on the top menu select Edit, then Resize.

Like Silhouette, Canvas allows you to resize by percentage.  Make sure the Maintain Aspect Ratio Button is checked then change the width to 400%.  The piece is now resized to be used with the card.


All that is left now is to cut your pieces and assemble your card.  For a general assembly tutorial for Lori’s Impossible cards, head over to her YouTube Channel here.  One last note, Lori’s Impossible Cards all come with an envelope!  So it’s easy to create and send right out.

You can find all of Lori’s Impossible Cards here in her SVG shop, as well as in the Silhouette Store.  In addition, don’t forget about the May Sale happening now in Lori’s SVG Shop.  All SVG files are 30% Off when you use code MAY2021 at checkout!

That’s it for me today, thanks for stopping by to peek!

BLOG | INSTAGRAM

Making a Shaped Card in Cricut Tutorial

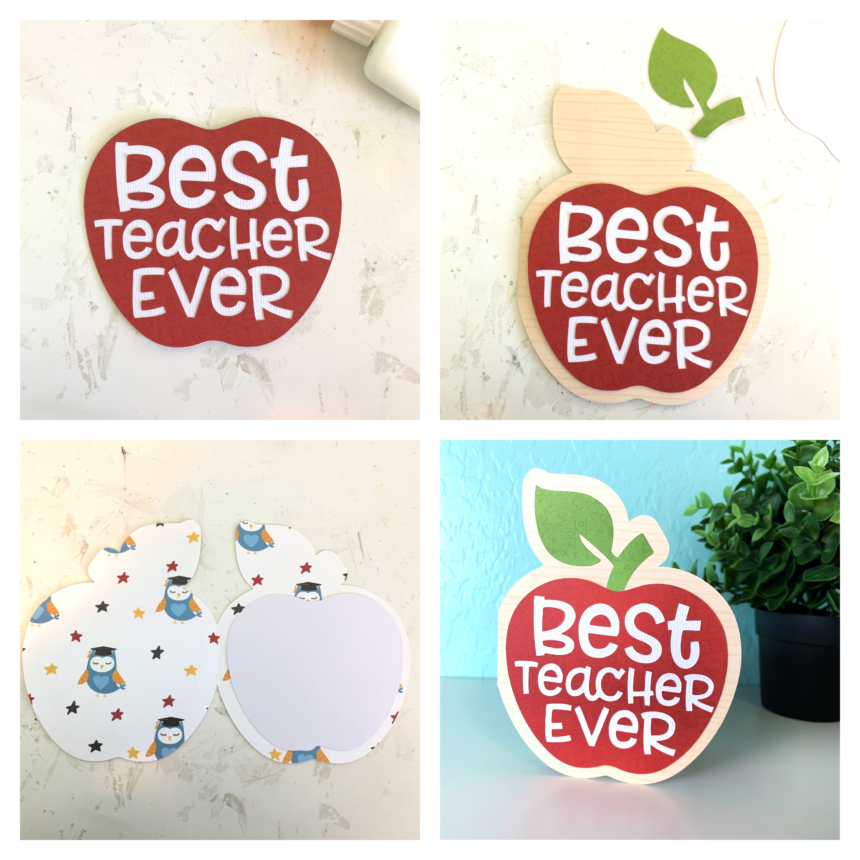
Hi friends! I have a quick tutorial on how I made a card with the Best Teacher Ever file (SVG, Silhouette). Now that Cricut has updated the design space software making a shaped card is easy!

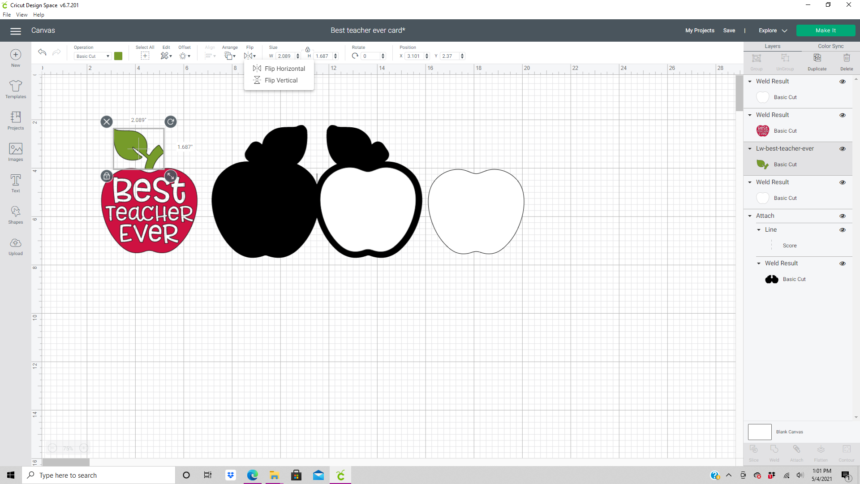
First I resized the apple and leaf to be 5 inches high which made the width 3.96 inches. This file uploaded into Design Space grouped together for me. If it isn’t grouped I recommend grouping it together before resizing.

With the apple selected select the offset feature on the edit tool bar. In the offset window I slid the distance bar to 0.25 inches, selected rounded corners, and left the weld offset box checked.

I then duplicated the offset and flipped one of them horizontally.

Next I moved the two offsets together so they are touching in the center. With the just the offsets selected I aligned them on the bottom and welded the offsets together creating one piece.

I added a score line to the center and aligned and attached it to the offset. (I changed the color from black to white for this picture.)

I needed a solid white apple for the inside of the card and the front of the card.  I duplicated the red apple and welded the image then hid all of the contours. I then duplicated the solid apple image so that I had two.

I also needed to flip the leaf  horizontally so that it would fit correctly on the front of the card. (If you use solid paper you don’t need to do this. I used double sided paper and wanted the green to show.)

Once everything was cut I glued everything together with liquid glue in a fine liner bottle.  (Be sure to keep all of the centers of the letters from the cutting mat.) I used papers from the School Rules collection by Echo Park Paper Co.

Thanks for stopping by!
Brandie