A2 Graduation Cap Card 2 Tutorial

Anita here with a tutorial for assembling Lori’s A2 Grad Cap Card (SVGSilhouette).  I also used a tutorial that one of my fellow Creative Team Members created to make the tassel for my card.  You can find Teri’s tutorial here.  Below are the pieces that you will need to cut out to make this card.

This is the card base and you will be closing the card by gluing on the tabs.
Next, we will fold the inner part of the card that makes the sentiment card base and grad hat shape.  You will want to flip your card over and fold across the score lines as shown below.
Flip the card back over with the right side facing up and fold on the diagonal score lines.  I did one fold to the left and then the next diagonal score line was folded to the right.
Once you have your card folded it should look like the card below.
I glued the tassel with a wet adhesive to make sure that it would stay in place.

Here is what the card insert looks like with the grad cap topper on the base and a brad through the holes.

Here is a photo of the pieces of the card pieces together and you are now ready to insert the card base into the envelope pocket.
That’s it for me today.  Be sure to check out all of Lori’s graduation cards.
Hugs,
Anita


NEW Summer Grid Cards 25% OFF!

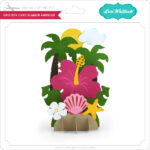
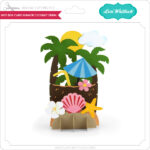
Did you see the new summer grid card SVG files that I designed and released this week? Summer is just around the corner and we can all use some fun summer themed cards for birthdays and celebrations this summer. They also make darling decor items for tiered trays, around the house, and more. All of these files come individually and in the Grid Box Card Summer Bundle. And, the best part is that they are all marked 25% OFF this week because they are brand new. Check them out….

Thanks for checking out the NEW FILES and be sure to go grab the freebie of the week.

I hope that you all have a wonderful day! Have fun crafting!

Lori


NEW SVGs 25% OFF + FREEBIE!

ALL WEEK, this SVG file is FREE with any $1.99 purchase!

Hi Everyone! We have a new FREE file with purchase this week! To get it, simply place an order of $1.99+ in the Lori Whiltock SVG Shop and this Double Slider Card Graduation file will automatically be added to your cart for FREE!  No coupon code necessary!  This offer is good through next Monday. This card is super fun to make – I created a tutorial for it that you can find HERE.


(Your cart must reach $1.99+ before the FREE file will automatically be added. The files will be available for immediate download after you pay for your order by visiting ORDERS > ORDER # > RED DOWNLOAD ARROW)

NEW FILES – 25% OFF this week!

Check out the new SVG files we have for this week! The NEW SVG files are ON SALE 25% OFF through Sunday at midnight in the SVG Shop. This week I designed 6 new grid cards with a summer theme for you.  We also have some super cute new SVG files from Dresden and Jillibean. Take a peek…

These downloads include SVG files that may be used with Cricut Explore, Silhouette (Designer Edition upgrade required), Eclips, Brother Scan and Cut, and any other software that will open SVG files. Be sure to go get them while they are on SALE this week.
Another deal we have going on right now is the FREE 2023 May Kit of the Month with any $20+ purchase (purchase must be in one transaction). Simply place your qualifying order in the Lori Whitlock SVG Shop and this file will be automatically added to your cart for FREE. No coupon code necessary. This offer is good through May 31, 2023.

(Your cart must reach $20+ before the FREE file will automatically be added. The files will be available for immediate download after you pay for your order by visiting ORDERS > ORDER # > RED DOWNLOAD ARROW)

Thanks for checking out the NEW FILES and be sure to go grab the freebies of the week/month with your purchase.

Have a great day!

Lori

Explosion Box Dinosaur

Hi friends! I’m dropping in today to share a cute card for a dinosaur lover.  This explosion box is fun and gives a little surprise when opened (SVGSilhouette). I love box cards like this they can serve as a cute shelf sitter and a fun birthday gift. I made this card for a little boy but I also have a niece that loves dinosaurs and this card would be cute made with pinks, purples, and yellows. I used papers from the All Boy collection and Birthday Boy collection by Echo Park Paper.


That’s all from me today, thanks for being here.

Brandie

You’re So Cool – Island Hut Box Card Tutorial

Hello friends, Marcia here.

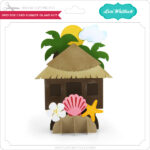
I have a tutorial for you today for this fun summer Island Hut Box Card (SVGSilhouette). I used solid pattern papers from the Here Comes The Sun, Bee Happy, and Pets collections. I love the beachy vibe of this card.
Box cards are actually much simpler to put together than you may think. Plus once you have done one, other cards will be so much simpler. Let me show you.

1. Pick out your colors and cut out all the pieces. I like using cardstock for my base as it is stronger than a pattern paper base. Lighter-weight pattern papers work better for the paper piecing layers that are added on top. Once I have all my pieces cut out, I like to ink the edges to add dimension.

2. Let’s do our card base first. Glue the door and windows on the front of the island hut as indicated in the photo below. Then adhere the two layers of grass roof, lining up the curve at the roof’s top.

3. Bend at the dotted lines to form a box. Glue the small tab to the back of the island hut’s front panel. Fold the card flat to ensure it will fold flat to fit in an envelope.

4. Let’s piece together the back panel next. Adhere the sun’s face to the black circle and then onto the sun rays. Glue this onto the card panel matching up the notches as best you can. Glue the palm tree trunk overlay to the palm tree trunk. Then adhere the palm tree’s trunk to the card base. Glue the palm tree leaves to the top of the palm tree and add the coconuts.

5. Bend the tabs of the back panel back and adhere to the card base lining up the edge of the tab to the back of the card base. After adhering both sides, ensure you can still fold the card flat.

6. The front panel is next. Adhere the orange beak piece to the black beak leaving the tip of the beak black. Glue the white eye on top of the black beak too. Adhere the beak in place on the parrot’s body. Glue the parrot’s wing in place. Adhere the parrot onto the card base. Glue the palm leaf on the card base too.

7. Bend the tabs of the front panel forward and adhere to the card base lining up the edge of the tab to the front of the card base. After adhering both sides, ensure you can still fold the card flat.

8.  Add embellishments if you want. I added the You’re so Cool! die cut ephemera piece from the Here Comes The Sun Frames and Tags ephemera pack and added a puffy flower sticker.

I hope you give assembling one a try. Thanks so much for stopping by.
~Marcia