Box Card Crate Pumpkins

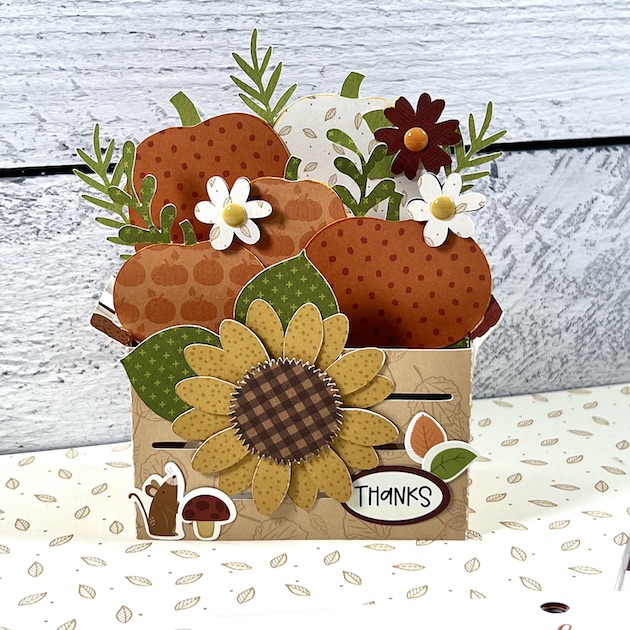
Hey crafters! Traci here and today, I’m sharing a fall card that I made using one of Lori’s fabulous cutting files called Box Card Crate Pumpkins (SVG, Silhouette). It’s perfect for the upcoming autumn season and, with a quick sentiment change … it can be given for lots of different occasions.

Fall Pumpkin Box Card made with a Lori Whitlock cutting file


I created this with Echo Park’s I Love Fall Collection designed by Lori. The earthy colors were perfect with rust, orange, green, golden yellow, and brown. 

I embellished the card with some enamel dots and a few really cute stickers from the 12×12 sticker sheet. I just love the little mouse sniffing that big sunflower. So cute!


3D Fall Card with pumpkins and a crate


I used a bunch of beautiful prints from the 6×6 paper pad for all of the pieces except for the crate. I used the 12×12 Autumn Woods print for that. 

Fall Pumpkin Card with flowers, a mouse, and a mushroom


The card folds flat for sending in an envelope or for storing as a wonderful memento.


I hope you’re looking forward to the change in seasons. It’s a great time to create new projects with Lori’s amazing cutting files and the I Love Fall Collection. Happy crafting!

 

Blog * Shop * Facebook * Instagram * Pinterest

Ferris Wheel Card Tutorial

Hello everyone, Marcia here today. With it being State Fair time, I wanted to make this fun Ferris Wheel Card (SVGSilhouette). This shaped card is perfect for your Midway or Theme Park-loving friends. I used the Echo Park Paper A Magical Place collection by Lori Whitlock to create mine.

This is an easy card to make. Let me show you how.

1. Choose your papers and cut out all the pieces. I like to ink the edges of my pattern papers to add more definition

2. Adhere the black ferris wheel base to the shaped card base. Then glue the star and layered heart in the middle of the wheel. Adhere the roof of the passenger cars to the bottom of the cars.

3. Use foam tape to adhere each passenger car to the wheel and embellish as you wish. I added a sentiment to the front of my wheel as well as some crystal gems for the sparkling lights.

I know this card will put a smile on someone’s face! Lori has lots of other fun theme park cards in her shop. Take a look.

Thanks so much for stopping by today.
~Marcia

5×5 Card Happy Birthday Words and Box with Handle and Wrap

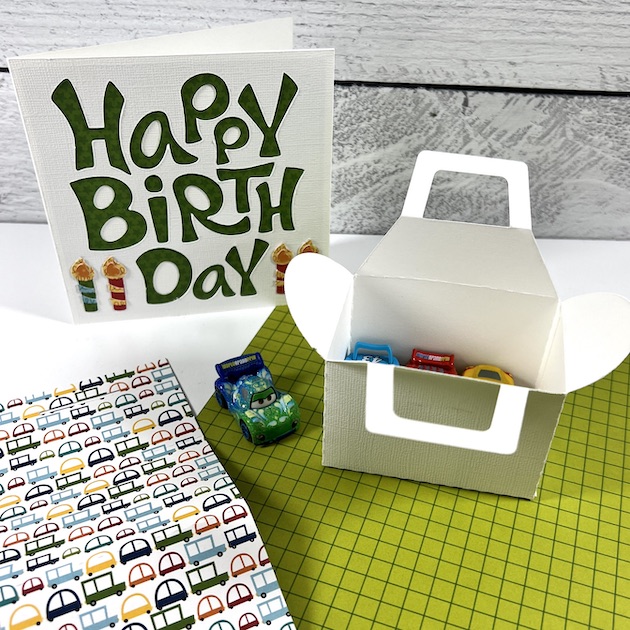
Happy Monday friends!  I needed a birthday card and small gift box for a little boy last week, so what better place to look than Lori’s site for some fun cutting files!? 

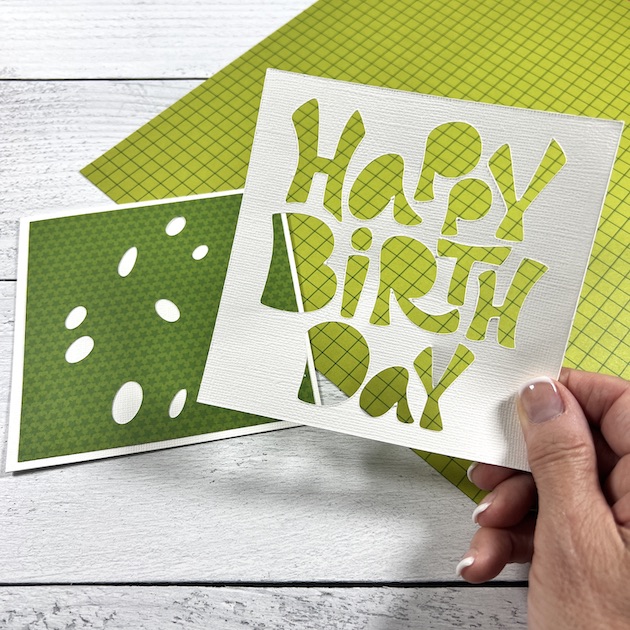
I love this super easy 5″ x 5″ birthday card because all the hard work is already done for you!  Placing individual letters like the sentiment above can take some time to get it right, but Lori has made this one easy! 

The green pattern has the cut outs for the letter centers, and then the Happy Birthday actually uses the negative space (save the letters that get cut out for a future project)!  

The box is made from two pieces of paper.  The base of the box folds up, and then there a a pattern piece that wraps around the box — almost like wrapping paper.  Isn’t that cute?  And so simple!


The box is the perfect size for a small gift, a gift card, or candy.  I know this car-loving birthday boy will love the surprise tucked into this gift.


To create a gift set like this, visit Lori’s SVG shop with the links below.  For the Silhouette shop, click here and here. Happy crafting!


Box Card Ice Cream Cherry Tutorial

Happy Thursday! I scream, you scream, we all scream for ice cream! It’s been so hot here in South Dakota that I needed a little ice cream to cool off. Today I’m going to walk you though how to create this cute little ice cream box card. You can find it here SVG or here Silhouette .

Before I started, I changed the sentiment phrase “You’re the cherry on top” to be written in pen rather than cut out. Then I cut all my pieces.

I inked some of my pices because I like the look it gives. Just an extra little pop. This is not necessary but does give a finished look to the card.
Time to start assembling the box. I love using score tape for thing like this. The hold is good and rarely comes apart like some glue. I added the score tape to the tab and created the box.
The next step is this little off white piece. Again, Score Tape on the flaps and center it in the box with the tabs just below the top of the box.
I then started to assemble to ice cream. I found that the Zig glue pen worked best with that little lattice for the cone. 
I added the ice cream scoop with the dip it in first. Then I added this cute sprinkle paper for the top layer.
Next I assembled this scoop of ice cream. I just layered the cherry over the stem piece and the stem piece over the matching spot on the scoop.
Add your sentiment piece to the cone piece without the notch.
 
Next I added Score Tape to both sides of my box.


Add the single scoop with the cherry to the center piece using Score Tape. And you have this cute little ice cream box card.

And it lays flat for mailing. I can’t wait to make someone’s day by sending this to them.

Happy Crafting!
Chelsea

New Back to School SVG files 25% OFF!

It’s that time of the year when the kids are headed back to school. Many of you know that my youngest is leaving for college on Saturday. It is such a bitter-sweet time at our house. Ashlyn is truly a delight and I can’t wait to see her flourish at college this year. I just might find some free time to do some fun new things with my business in the future. We will see — keep your eyes open. In honor of all those students and teachers that are headed back to school this week, I designed this CUTE School Project Bundle 2 with 5 super cute SVG files. These new files are available in the Lori Whitlock SVG Shop. And, the best part is that these new SVG files are all 25% OFF this week and they are available in a bundle and individually. Check them out….

Thanks for checking out the NEW FILES! Be sure to grab the weekly freebie with a $1.99 purchase and the FREE kit of the month SVG files for July with your $20 purchase.

I hope that you all have a wonderful day! Have fun crafting!

Lori