Don’t Miss This! ALL $5 Bundles Are Back!

Get ready to shop! It’s that time again – the return of our $5 bundles extravaganza! This weekend, we’re not holding back – every single one of our 186 popular Friday $5 Bundles has made a comeback! If you’ve been longing for any of our $5 SVG bundles, seize this golden opportunity to grab them! But act fast, because they’ll only be around until Sunday at midnight. Don’t miss out on this spectacular offer – once they’re gone, they’re gone!

SHOP ALL $5 BUNDLES HERE

Here are some of our customer favorites…

Friday $5 Bundle #65

Friday $5 Bundle #75

Note: These SVG files can be used with Cricut Explore, Silhouette Studio (with the Designer Edition upgrade), Scan N Cut, and any other cutter that will work with SVG files.

Have a great day!

Lori

Shadow Box Card Golf Cart Tutorial

   Hello! 

 I wanted to show you how I put together this Shadow Box Card.  I’m making this golf-themed card as a Thank You for my son-in-law. He’s celebrating the end of tax season (he’s a CPA) and can’t wait to hit the fairways! The addition of the sun on this card is my wishful thinking for warmer weather…it is unseasonably cold here.

  Shadow Box Card Golf Cart (SVGSilhouette)

This is a good-sized card and it folds down to fit in a 5 x7 envelope. There are many pieces but it assembles very quickly. FYI- You will need two 12 x 12 pieces of white cardstock for the main working panels of the card. 


These are the two main frame pieces. The slots will be on either side of the card.

These are the insert panels for inside the frame.


This is all the smaller pieces. The blue piece is optional, but I used it as a sky.  The sun is from the Summer Set file. You can also find it here.
 
 
This is what the panels should look like when the colored cardstock is glued on. 
 
 
A view of the panels stacked to reveal your golfing scene!
 
 
To assemble the outer frame you are going to glue the front frame to the back frame after you fold the small end flaps in and add glue.
 
 
Make sure to flatten out each frame piece and align at the bottom when you glue the flaps. This will ensure a nice fit for the inserts.

 Start by inserting the back panel in first, slightly bending the panel so that the top of the tab inserts into the side slit and then the bottom of the tab will follow easily. 


Here you can see the tabs after they were inserted into the side slots. Now you have a fun 3D diorama type scene!


A little tip. I bought some quarter-inch blue tape and stuck my little pieces on them. I always lose tiny pieces so I cut extras and add them to a piece of tape to keep them from escaping! 

I hope you will give this card a try-it was fun and easy to make. It would be perfect for any golfer in your life!

💕 Sue Kment


Birdhouse Bundle is LIVE! 25% OFF!!

Did you see our new release yesterday? This week I designed have a sweet collection of birdhouse SVG file projects just for you. With spring arriving and the sound of birds in the air, I just couldn’t resist designing these cut files. I hope you LOVE them as much as I do. Be sure to check out the 3D Birdhouse Bundle (each project is sold separately, also)! ALL new releases are 25% OFF until Sunday at midnight!

SHOP HERE


I hope you all have a beautiful day and that you get to make something wonderful today.
Lori

🌸Tuesday NEW SVG Files – 25% OFF!🌸

As the breeze gently rustles and the chirping of bird fills the air, it’s clear: spring has sprung, spreading its infectious cheer! Inspired by this joyful season, we’re super excited to share our newest creation of 3D birdhouse SVG files! Picture the smiles and warm fuzzies as you give these sweet creations to your friends and family. It’s not just crafting—it’s spreading the springtime spirit. So, let’s dive into spring together! Explore our 3D Birdhouse Bundle  and let your creativity take flight (each project is sold separately, also)! And, of course, the best part is: ALL new releases are 25% OFF until Sunday at midnight!

These downloads include SVG files that may be used with Cricut Explore, Silhouette (Designer Edition upgrade required), Eclips, Brother Scan and Cut, and any other software that will open SVG files. Be sure to go get them while they are on SALE this week.

ALL WEEK, this SVG file is FREE with any $1.99 purchase!

Hi Everyone! We have a new FREE file with purchase this week! To get it, simply place an order of $1.99+ in the Lori Whiltock SVG Shop and this French Door Easel Card Spring will automatically be added to your cart for FREE!  No coupon code necessary! This offer is good through next Monday.

(Your cart must reach $1.99+ before the FREE file will automatically be added. The files will be available for immediate download after you pay for your order by visiting ORDERS > ORDER # > RED DOWNLOAD ARROW)

Another deal we have going until the end of the month is the FREE 2024 April Kit of the Month with any $20+ purchase (purchase must be in one transaction). Simply place your qualifying order in the Lori Whitlock SVG Shop and this file will be automatically added to your cart for FREE. No coupon code necessary. This offer is good through April 30, 2024. Grab this one while you can.

(Your cart must reach $20+ before the FREE file will automatically be added. The files will be available for immediate download after you pay for your order by visiting ORDERS > ORDER # > RED DOWNLOAD ARROW)

Thanks for checking out the NEW FILES and be sure to go grab the freebies of the week/month with your purchase.

Have a great day!

Lori

Hidden Binding Telephone Mini Album

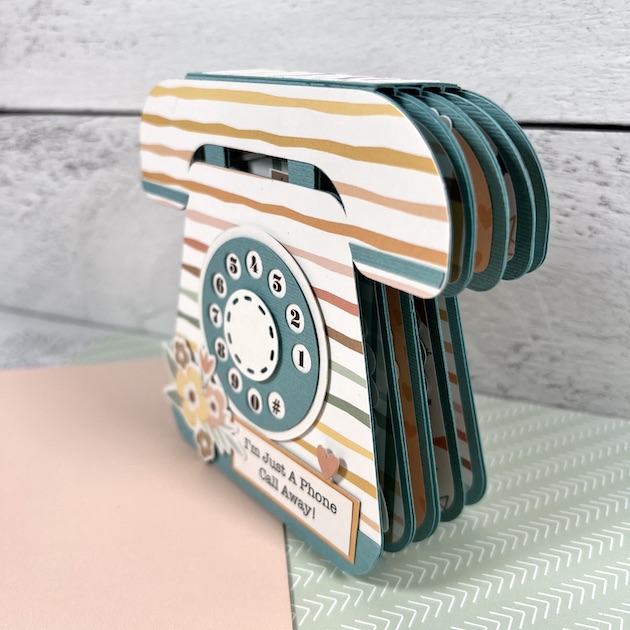
Hello crafters! Traci here and today I’m sharing a cute little scrapbook that I made with Lori’s new cutting file called Hidden Binding Mini Album Telephone (SVG, Silhouette). This Thursday (April 25th) happens to be National Telephone Day, so … I thought it would be a fun project to make!


Telephone Shaped Mini Scrapbook Album made with a Lori Whitlock cutting file


I started by using Bazzill card stock in whirlpool for the base, then added some pattern papers from Echo Park’s Our Baby Girl and Boy Collections. I used the generic prints from both so this album could be given to anyone. On the cover, I added a few stickers and a title next to the old fashion rotary dial. So cute!


Telephone Shaped Mini Scrapbook Album


This album uses a hidden binding technique to secure the pages and it allows enough room in between for pop dots and embellishments. It lays perfectly flat when closed. You can watch the assembly tutorial for it over on Lori’s YouTube Channel here.


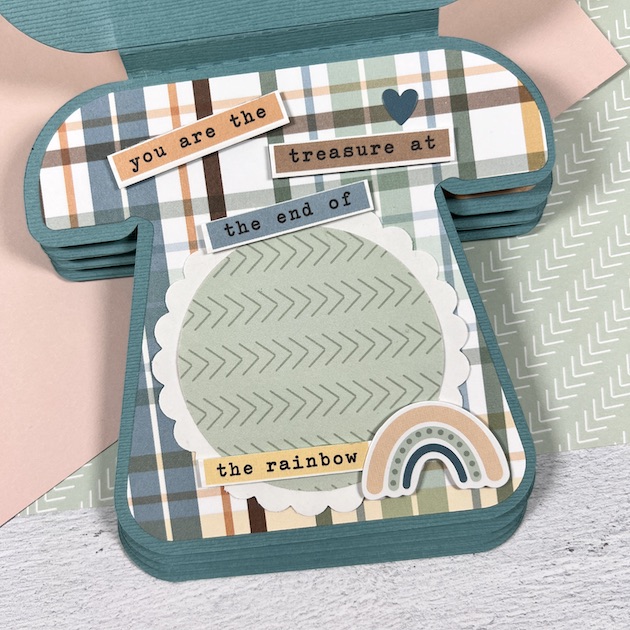
Telephone Shaped Mini Scrapbook Album page with a colorful plaid paper and a rainbow


There are 5 double-sided pages, including the front cover. I layered each one with a different patterned paper and some cute circular photo mats. I used a 3″ scalloped circle punch and a 2.5″ circle punch for those.


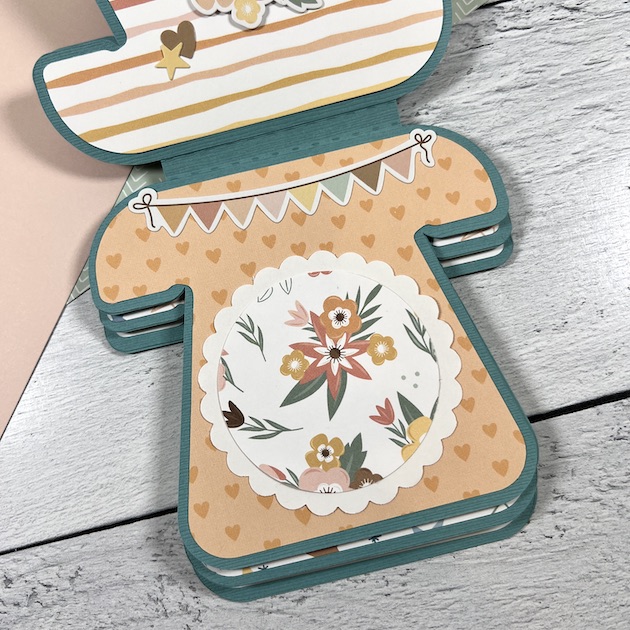
Telephone Shaped Mini Scrapbook Album page with journaling card, flowers, and a flag banner


I added a journaling card and some stickers on this page, but the next one is my favorite …


Telephone Shaped Mini Scrapbook Album page with hearts, flowers, and a flag banner


Isn’t she pretty? I love the soft feminine colors and the flowers paired with this fun, nostalgic shape.


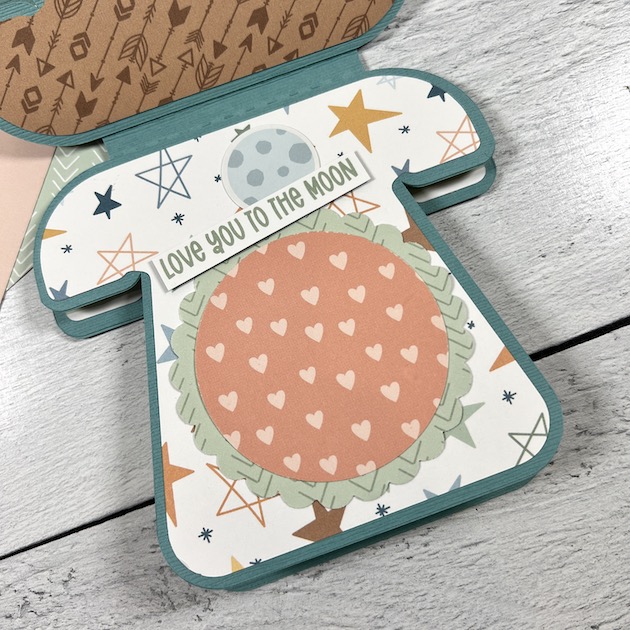
Telephone Shaped Mini Scrapbook Album page with stars, hearts, and a moon


This mini album would make a great gift idea for Mother’s Day or a birthday. Lori has other hidden binding mini album shapes too, like … a flower, mason jar, camera, bee, house, butterfly, and more! Be sure to check them out in her shop.


I hope you like my version of this cute little telephone scrapbook and it inspires you to create one yourself. I highly recommend!!

Blog * Shop * Facebook * Instagram * Pinterest