Christmas Countdown Book Tutorial

The Christmas Holidays will be here before we know it!  It’s the perfect time to create a fun countdown calendar! I first saw this type of Calendar on the Doodlebug Blog… it was created by their designer Nathalie Ounce who found the idea on YouTube here.   I thought it was the most fabulous idea and decided to create a cut file for it!  This Christmas Countdown Book (SVG, Silhouette) book holds 24 boxes which can hold a couple of Kiss size candies or small cookies.  Take a peek….

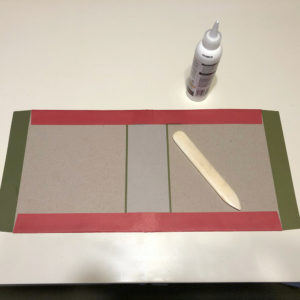
The book is fairly simple to assemble.  Besides paper, you will need some chipboard, I used Silhouette’s Chipboard,   You will also need a good liquid glue.  I used Scotch Quick Dry.

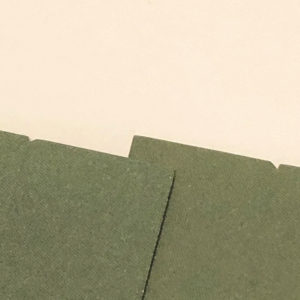
Start by cutting your pieces.  We are first going to assemble the book “binding”.  There are two pieces that will be used to cover the outside of the book cover.  These need to be glued together to form one sheet.  There are notches on each sheet that show wheret the overlap should be.  I drew a line on one of the papers on the “inside” (it won’t show when done) and glued them together using the line as a guide.

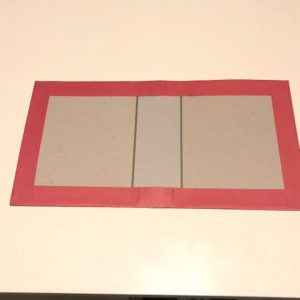
Next, you want to add the chipboard pieces to the inside of the book cover.  The corners of the larger chipboard pieces should be placed at the indented corners of the cover pieces.  I used a ruler to help make sure things were straight.  Glue these pieces down to the cover piece.  I then glued down the “spine” piece, centering it between the 2 cover pieces.

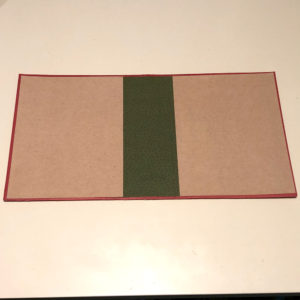
Next fold down the top and bottom flaps.  Make sure they are flush with the edge of the chipboard.  I used a bone folder to make sure the creases were crisp.  Glue the flaps to the chipboard.   Make sure the edges are completely glued and there are no gaps.  It does not matter if you get a little glue on the chipboard or the edge of the paper, it will be covered.  After you’ve done the top and bottom, repeat with the side flaps.  Allow this to dry.

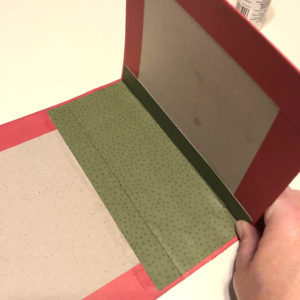
When adding the inside center piece, I found it easiest to glue the “center section” first.  To make sure it is lined up properly, you can fold up the side of the book and position it so that the score line is flush with the fold in the book.  Allow the center to dry, then glue the side flaps.  As you did with the cover, you want to make sure the edges of the paper are completely glued down.  This prevents any gapping or lifting.  Allow this to dry then add the inside covers.


If you are going to add ribbon to tie the book shut you would do this at this point.  (You could also tie a ribbon around the whole book as well if you prefer or skip this step entirely)  If you are adding ribbon to the book itself, you want to use a very thin ribbon.  I used some seam tape I had in my stash.  There isn’t much thickness to it so it was perfect.  I used a long ruler, placing it across the whole book to make sure my ribbon was straight.  I glued each piece about 3″ in.  Each of my ribbon pieces was about 9″ long.  Once the ribbon is dry you can add the outside covering panels, and the book binding is done!

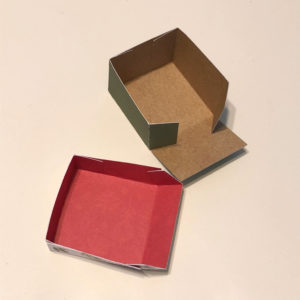
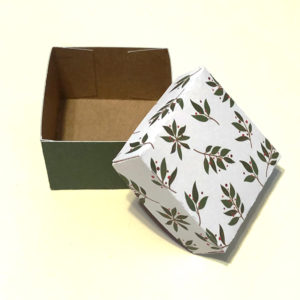
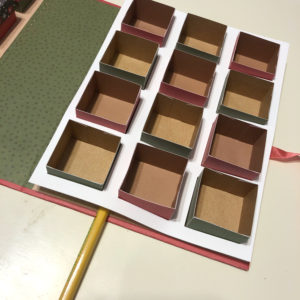
Next you want to assemble the boxes.  You will cut 24 each of the box tops and bottoms.  For both the bottom and cover, fold all the score lines in the same direction, and fold into box shape.  The tabs get glued on the inside.

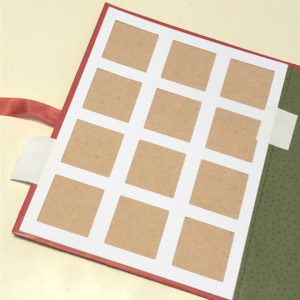
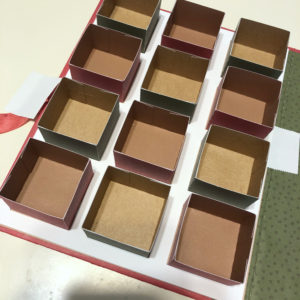
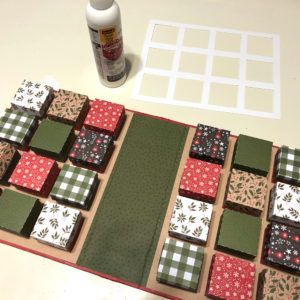
I’ve created a guide that will help you place all of the boxes into the book so they are all perfectly aligned.  Start by placing this guide on one side of the book.  I held mine in place with some Score Tape.  You can use a low tack tape or even a light washi tape.  You just want to be able to pull it off when done without ripping the paper.  Next glue the box bottoms into the book.  Make sure the glue does not seep out onto the frame, it will make it difficult to remove.  When you’ve completed one side, carefully lift the guide out.  I used a pencil to help lift it.  Then repeat with the other side until all the boxes are glued.  Add the covers and you’re done!

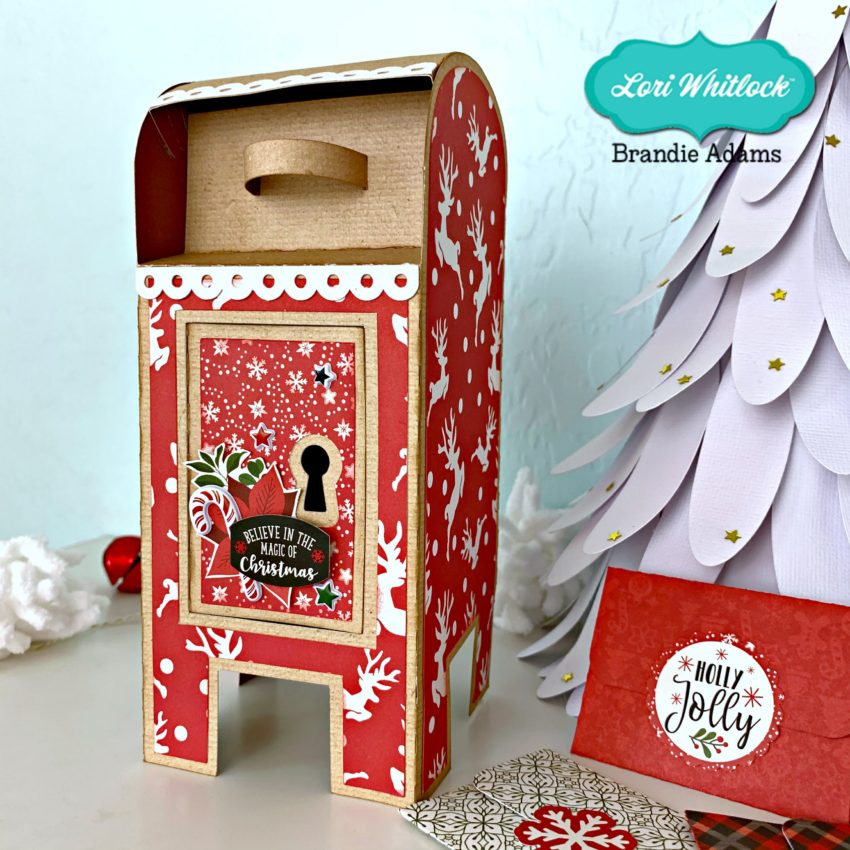
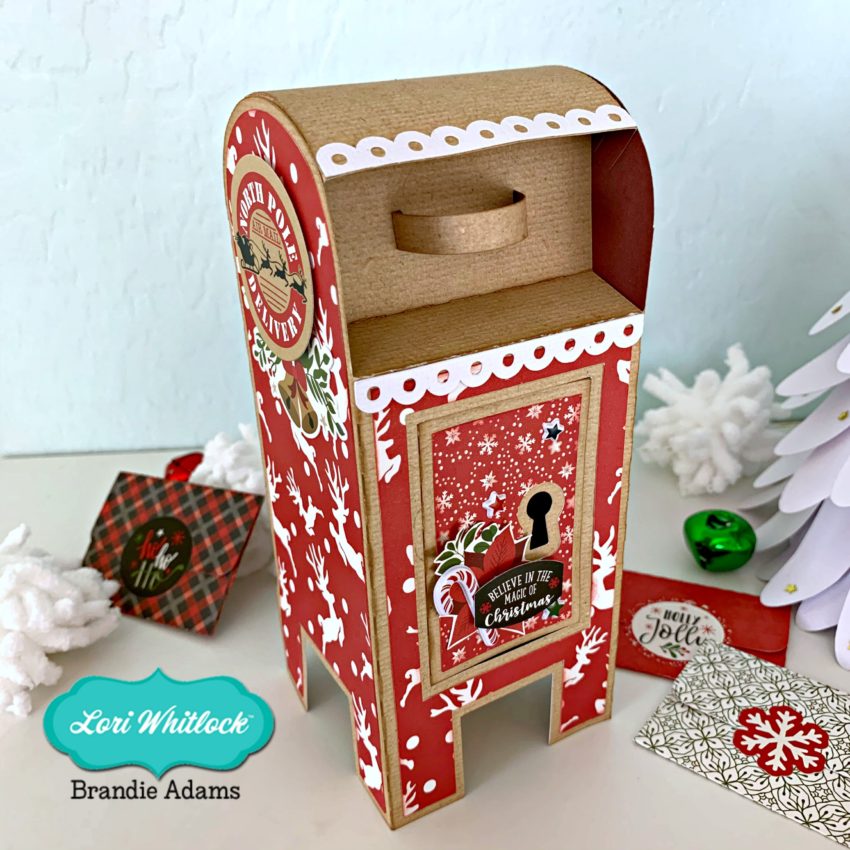
To finish my book I decorated it using a couple of files from my shop and some embellishments from the My Favorite Christmas Collection by Echo Park Paper. (Christmas Ornaments (SVG, Silhouette) and the greenery from the Shadow Box Card Holly Card (SVG, Silhouette)

If you use this file, we would love to see your creations! Make sure to tag Lori Whitlock on Facebook and Instagram so we can see!  Have a great day!

Pop Up Box Card for Veterans Day

Hi Everyone:

Veterans Day is a solemn day for me as I reflect on those men and women who are serving our Country.  This card is called Pop Up Box Card Military which you can find here in the Lori Whitlock SVG store and here in the Silhouette store.  It is very easy to put together and will surely let those serving currently or previously know that we value their service.  These cards lie flat for mailing and are so wonderful when opened.  Lori has many different styles of pop up box cards to choose from.  I used some of Lori’s Echo Park collections including Summer Adventure, My Favorite Fall and I’d Rather be Crafting.

Thanks for looking and have a great day.

Hugs,

Anita

Santa Divided Candy Box

Hello crafty friends! Aimee here and I say it’s never too early to get a jump start on Christmas gifts so today I have a tutorial for a small gift box that’s filled with Christmas yummies that is perfect to give to a teacher, neighbor, or co-worker.  I’ve used one of Lori’s new Divided Candy Boxes that has this adorable little Santa Claus face on the top of the box (Lori’s SVG ShopSilhouete Store). Lori also has a bundled set of these fun little candy boxes found here if you want all 4 because you have a hard time choosing just 1.

To get started, cut out all of your pieces from your chosen card stocks and patterned paper. You will need to cut out 9 of the little boxes that go inside the big box.

To get started, I glued all 9 boxes so they could dry while I was putting the main box together. A little tip to help you speed things up…use mini clothing pins to hold the sides together while the glue is drying.

For the main box, I folded on the score lines for both the top and the bottom pieces and then adhered the panel pieces to the top lid. Next I glued the sides together on both pieces.

For the Santa piece, I flipped the beard and face pieces over so I could line up the dark brown/black piece so the hole doesn’t cover the nose. The red from the bottom piece of Santa will show through for his nose.

To add some dimension, I took the mustache, lining of the hat and the pom pom of his hat and used pop dots. I also added some glitter to those pieces to make him a fun and glitzy Santa.

Lastly, I attached Santa to the top of the box, added the little boxes inside, and filled with some Christmas Rolos. The bite-sized pieces fit perfectly with 2 to each box.

These would be great to have on hand in case that unexpected Christmas guest stops by!

So why not get an early start on those Christmas gifts and make a few of these? They are so much fun!

Thanks for stopping by today!

Aimee

Fall Extreme Pop-up Card

As a young girl, I fell in love with origami. From folding paper, it was natural to love pop-up cards and books.  I just love that Lori has these fun Pop-Up Cards in her shop. I made the Fall pop-up card, and I changed the sentiment to be used as a Thank You Card.

The card file can be found in Lori’s SVG Shop and in the Silhouette Design Store.

For papers, I used the Echo Park’s My Favorite Fall Collection designed by Lori.  The inside pop-up part is done using the Print and Cut function of your cutting machine. Once cut, it all comes together easily.  For a tutorial head over to Lori’s YouTube Channel here.

Have a great day!

3D Pumpkin Tutorial

If you’re like me, you like to decorate your house for ALL THE HOLIDAYS!  Lori’s 3D Pumpkins would be so fun placed throughout your home or group several on your table for a fun centerpiece. They come in three sizes, Short (SVGSilhouette), Medium (SVGSilhouette), and Tall (SVGSilhouette). These are boxes as well, so they would make a great hostess gift with some candy inside.  I used Lori’s My Favorite Fall Paper Collection to make these pumpkins. I just love all the colors and patterns in this paper! Shown here are the 3D Pumpkin Medium and 3D Pumpkin Tall.  How fun are these?!

I’m using the 3D Pumpkin Medium for this tutorial.  First cut out all the pieces as shown.

To begin, assemble the base of the pumpkin by folding all score lines in.

Glue side tab to opposite side of base.

Add glue to bottom tabs…

and fold bottom of base onto tabs as shown.

Use your bone folder to curve the side panels of the pumpkin.  This will help give your pumpkin its curved shape.  For added interest, I sewed tulle to three of the side panels, added sequins and then sewed the bottom shut.

Next, glue the square end of the panels to the top of the pumpkin box.

Then glue the beveled tabs to the bottom of the pumpkin box.

Glue the hexagon piece to the pumpkin bottom to finish it off.

Next, fold all tabs on the pumpkin lid in, and adhere each tab to the panel next to it until the lid is formed.  Also, the leaves are very pretty as is, but for added interest you can drawn in or sew leaf veins.

Next, fold all tabs on stem inward and glue the tabs on the right to the middle tabs…

and repeat on the left side.

Add leaves and stem through the holes in the top of the lid…

and glue the vine to the top.

Turn lid over, fold leaves and stem tabs and glue down.

Next glue hexagon panel to inside of the lid to finish it off.

And we’re done!!!  Isn’t this beautiful?!

I had so much fun making these for my table centerpiece.  I filled them with caramels and they will be given out at the end of Thanksgiving as parting gifts for my friends and family. I hope you give this a try.

Thank you for stopping by!


xo,

Michelle H.