Fall Gift Card Box

It’s a beautiful Fall here in Michigan and I am enjoying every aspect of the gorgeous new place I live.  Lori’s My Favorite Fall collection from Echo Park is just simply perfect, all the pretty colors and Fall elements you need to create with this season.  I needed a fun way to give a gift card and Lori had the perfect new file to create the sweetest little gift card box.  The box is just simply adorable.  You can find the file for the Gift Card Holder here in Silhouette or here in Lori’s SVG shop.  Very quick and easy to put together.  There are just tons of elements to My Favorite Fall and I had so much fun with the new puffy stickers.  They are just too cute.  All the new Echo Park collections have these Puffy Stickers…hooray!

I forgot to take a picture that shows a gift card inside, but you can see just where it goes and then how fun to decorate underneath so that the recipient has a extra little bit of your creativity.  This little box is so versatile that you will be able to adapt and change it for every theme.  A quick and easy project that you will use time and time again.

Thank you for joining us today.  Make sure to stop by Lori’s shop and check out here new files at Silhouette Design Store too.  There is always just a ton of fun waiting for your die cutting machine with her files!

~Cathy

Shutter Card Halloween Scene


Happy October Everyone:

Anita here with a fun and easy tutorial to make this festive shutter card.  Lori’s cut files are so easy to work with and she has many different shutter cards for you to choose from.  I used her Shutter Card Halloween Scene which you can find here in her SVG store and here in the Silhouette store.  I used one of her wonderful new Echo Park Paper lines called My Favorite Fall.  I had fun adding embellishments from this collection to my card.

Here are the cut pieces that come with this file.

Next, are two photos showing the top down and straight on views of how you fold this card on the perforations.

Here is a photo of the card with panels glued on. You are going to glue the piece that will have your pumpkin and ghost on it to the left side front window of your card.

Lastly there is a photo of the card when it is closed and ready to be mailed.  That’s it for me today.  Thanks for stopping by and have a great day.

Hugs,

Anita


Stickers, Not Just For Planners!

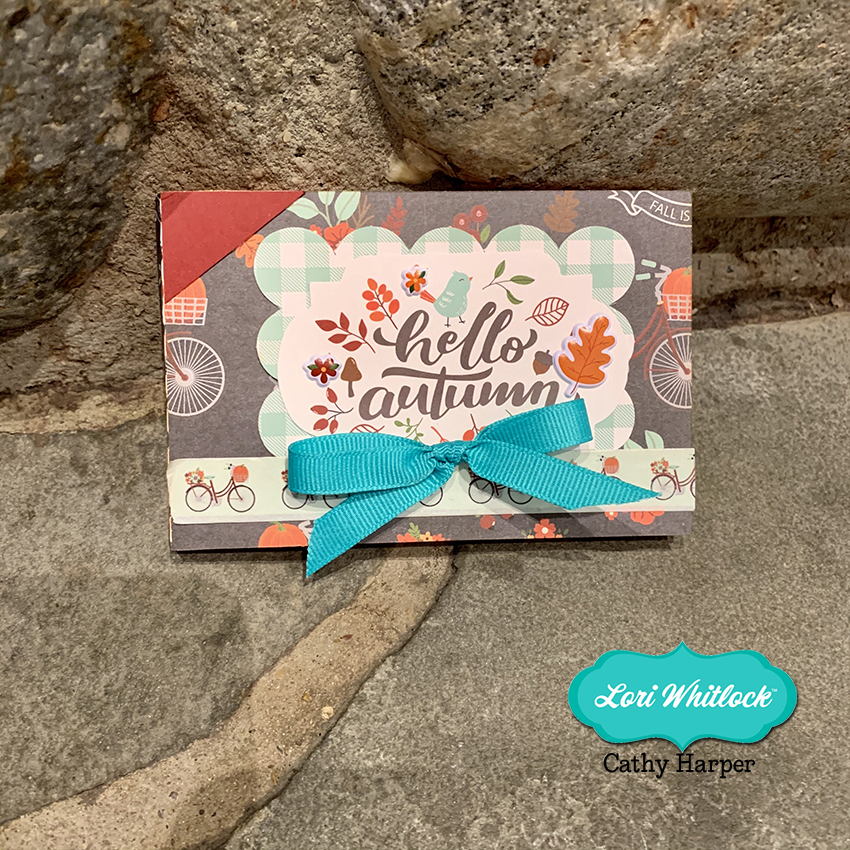
Have you seen the new sticker sets?  There are 2 new Birthday Sets (Birthday Stickers (SVGSilhouette), Birthday Stickers 2 (SVGSilhouette)) and a new set of Fall Stickers (SVGSilhouette).  These stickers can be used for a number of different projects… in addition to planners, you can use them on cards, gift bags, etc.  Individual stickers can be resized… larger for a gift bag for instance or you can print a few of the same stickers to make cards in multiples.  I used the new fall stickers to decorate a little gift bag.  Take a peek…

I started with The Gift Bag with Scalloped Handles (SVG, Silhouette).  I resized the bag to make it a bit larger. (11.75″ wide)  When resizing make sure that you do it uniformly by clicking the Lock Aspect Ratio in the top tool bar.  I pieced the bag together using some papers from Echo Park’s My Favorite Fall Collection.

I loaded the Fall Stickers into Silhouette Studio.  I only wanted to use some of them for the bag, so I started by ungrouping the stickers. (Lori has a print and cut tutorial for Cricut here)

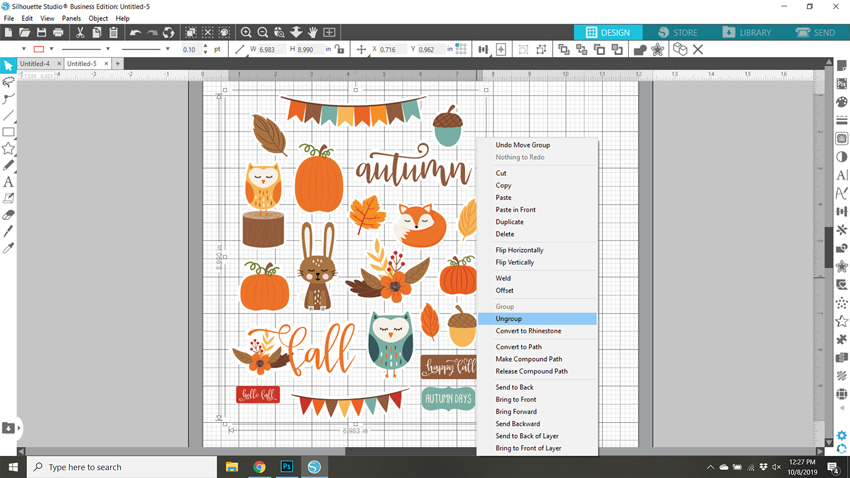
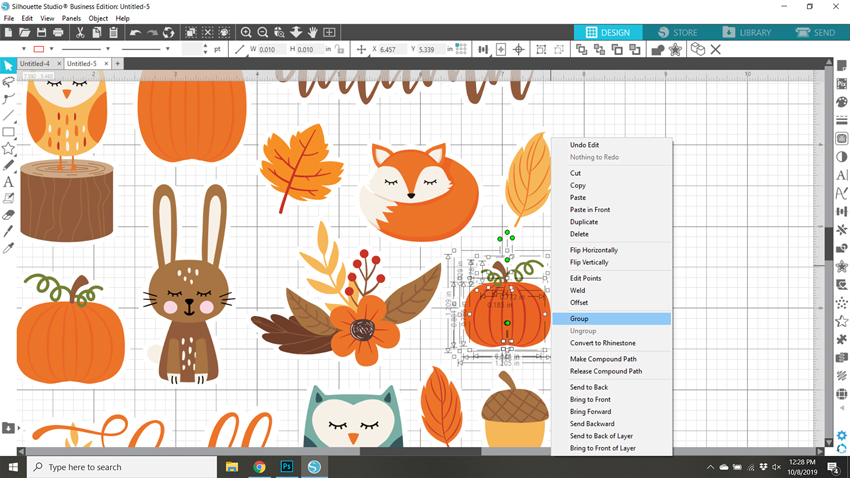
For this group of stickers, ungrouping also ungrouped the individual designs on each sticker.  I zoomed in on the stickers I wanted to keep, selected all of the sticker pieces, right mouse clicked and selected group.  I did this for each sticker I planned on using and deleted the rest.

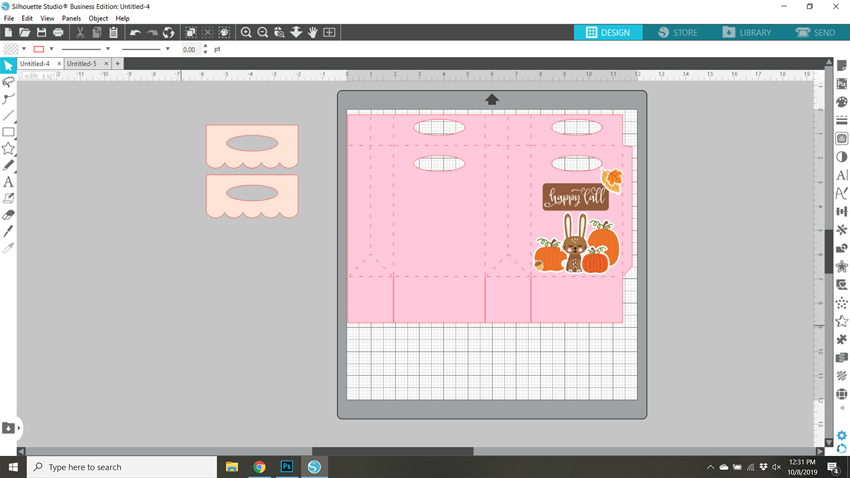
I knew I wanted to make a little scene, so I placed the bag file on my cutting mat and arranged the stickers as I wanted.  Some stickers I resized like the leaves and the acorn to make them smaller.  This allowed me to make sure everything would fit.

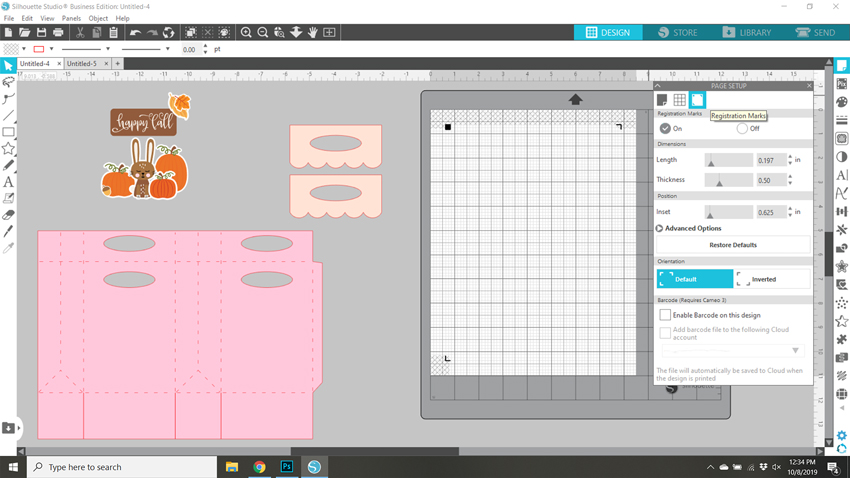
Once everything was sized as I wanted, I moved everything from my mat and set it up for print and cut.  First, using the page set up I set the media size to 8.5×11.  This is the size of my sticker paper.  I used Matte White Sticker Paper from Staples.

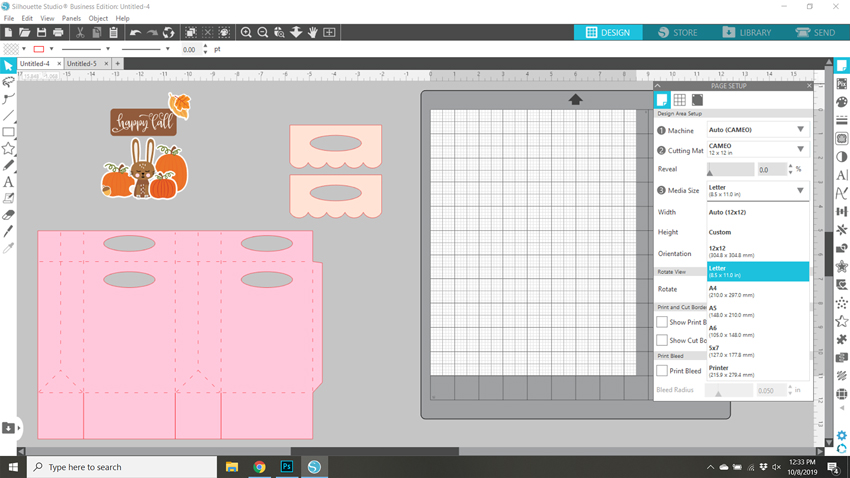
Next I turned on the registration marks.

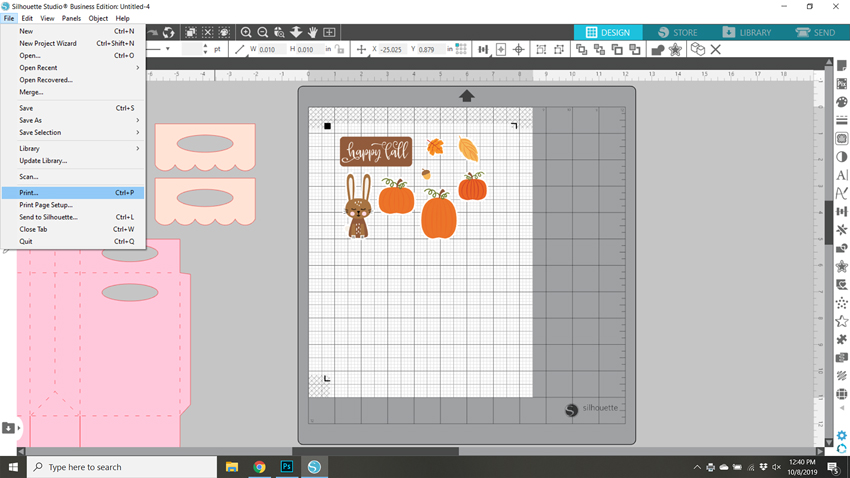
I then moved the stickers I wanted printed onto the mat, making sure each sticker was inside the registration mark area, then sent it to print.   It would be easy to make multiples of this bag by simply copying the stickers and fitting them on the page.

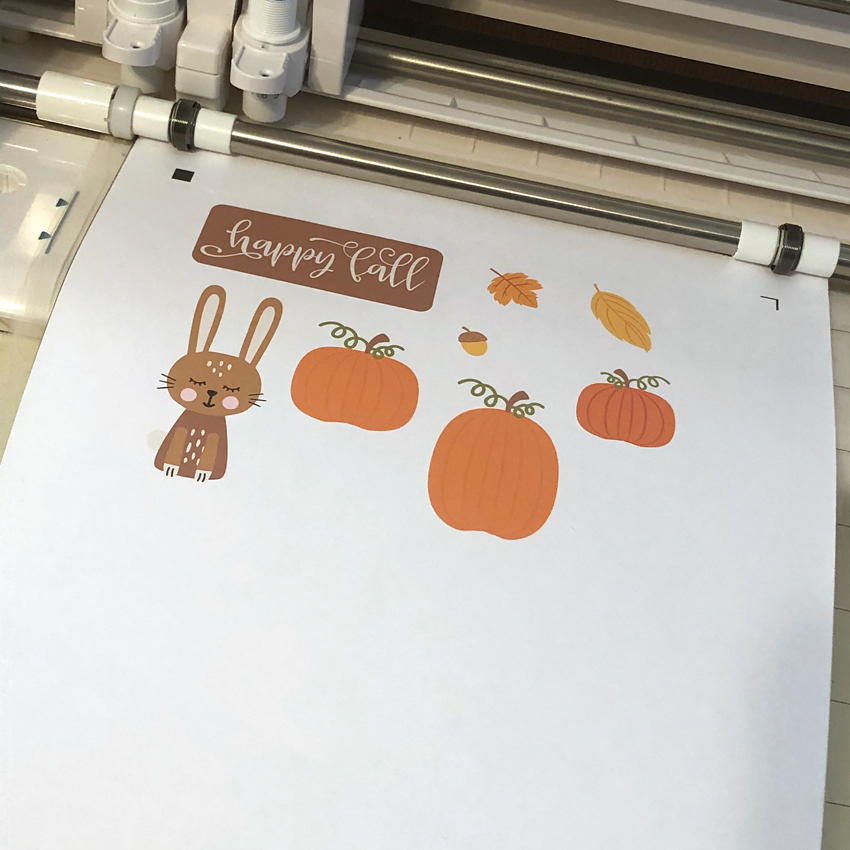
Once the stickers were printed I added the paper to my Silhouette mat and fed it into my machine.

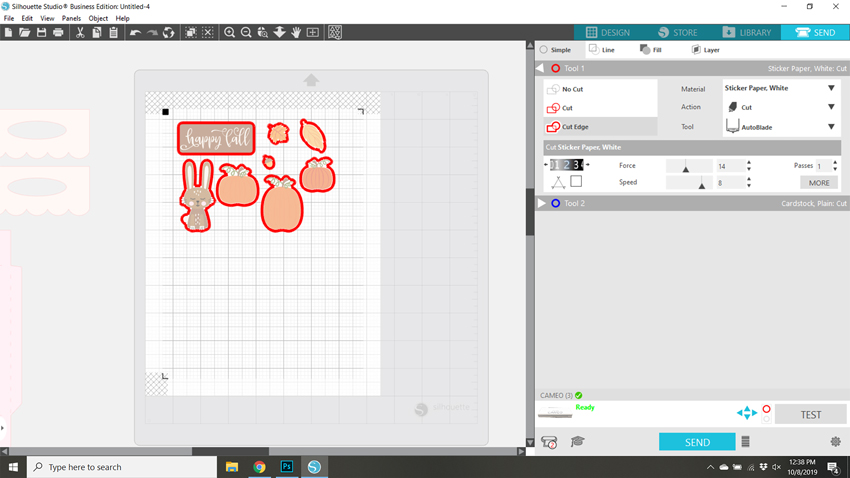
In my Silhouette software I clicked send then set up the cutting for Sticker Paper.  Make sure that Cut Edge is selected, so that only the edges are cut.  Then hit send.

A couple of notes if you’re having difficulty with the print and cut.  First, if your machine is not reading your registration marks, make sure you are running the most current version of Silhouette and that the paper you’re using is not colored. You can also try coloring over the square a bit with a black marker.  You may also have problems if the registration marks are smudged.   Some colored papers cause the marks to not be read.  Also, you can try shutting down your machine and computer and unplugging your Silhouette then start it all up again.  You would be amazed at the issues this can fix.  I also recommend the shut down process if your cut lines are out of sync with the designs.  Any time I have ever had issues with print and cut, the shutdown method has worked.

Once I had my stickers cut, all that was left was to add them to my bag!

If you use Lori’s stickers for any projects, make sure to tag her on Facebook and Instagram.  We would love to see your creations!  That’s it for me today, thanks for stopping by to peek!

BLOG * INSTAGRAM

Fall Gable Boxes

Hello crafty friends! Aimee here today to share some Fall goodies! I am so excited…Fall has begun!! So today I am sharing the 3D No Glue Tapered Side Gable Box (Lori’s ShopSilhouette Store) and how adorable it looks all decorated with the new My Favorite Fall collection.

These little boxes were easily put together and so much fun to decorate! There is just enough room on the front panel to add a sweet little animal chipboard piece, tag, and some enamel dots to make these boxes look inviting to open and reveal the Fall goodies you’ve placed inside!

Thanks for stopping by today and I hope everyone is enjoying this beautiful Fall season so far!!

Aimee

Pillar Sign Tutorial

Hi Everyone!  Corri here today with a quick assembly tutorial for the new Pillar Sign 4 x 4 (Silhouette, SVG).  This little sign is so cute and could be used for so many things!  You could use it for a buffet to mark the names of the food items, as part of your home decor or for a birthday party.

When you cut the sign you end up with these pieces plus some rectangles to cover the background if you choose.  I did not use those on my sign.

After you have the sign pieces cut, fold everything along the score lines.

Next, begin to apply glue to the glue tabs one section at a time.  Allow time for the glue to dry before moving on to the next set of tabs.

Continue gluing all the tabs in place until you have formed the pillar, sign background and top.

Next, glue the three pieces together and add your sign.  I trimmed one of the 4 x 4 cards from the Lori’s My Favorite Fall Collection from Echo Park.

This turned out so cute and was fun to put together!  There are so many uses for this project.  Head over to Lori’s Shop to see the other sizes!

Thanks so much for stopping by!