Vroom Mini Album

Happy Monday, friends!  I’m glad to be back on Lori’s blog with a new project for you!  Today I used Lori’s adorable Race Car Box card file (SVG, Silhouette) and the new paper collection she designed for Echo Park called Vroom, to create a new mini album.  I also used one of my Artsy Albums acrylic albums for the perfect size book for gift giving. 


How cute are these race cars?  I love how the tires are separate and you can see the pattern paper peeking from behind.  I added enamel dots to the tires for an extra pop of color and shine. 

Inside the album I used papers from the 6×6 paper pad and some super cute stickers.  Isn’t that little road sticker fun?  I like how it jogs around the photos.
The 6×6 paper pad comes with a smaller version of the cards that are part of 12×12 sheets, so I used “Be Brave Little One” on the front of this flippie, and one on the front cover (see pic below).   

Any little guy or girl who is into cars and racing would love this album, so head over to my blog to see more pictures of this project and learn about the instructions I’ll have have in my shop soon!  Until next time, happy crafting friends!

Big Box Card Lemonade Basket

Hi. Today I’m sharing a tutorial for this adorable Big Box Card Lemonade Basket (SVG, Silhouette). Like the title says, this project is big and so fun.  No problem cutting all the flower center pieces!

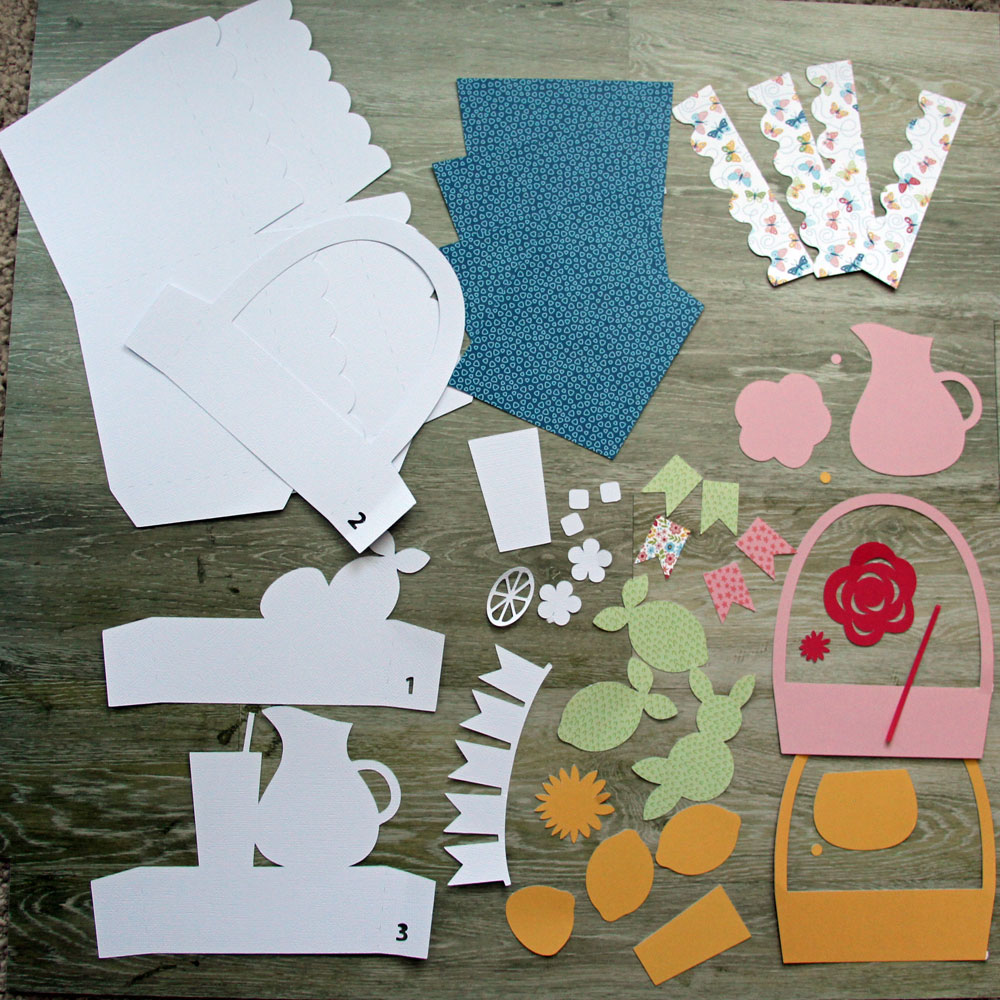
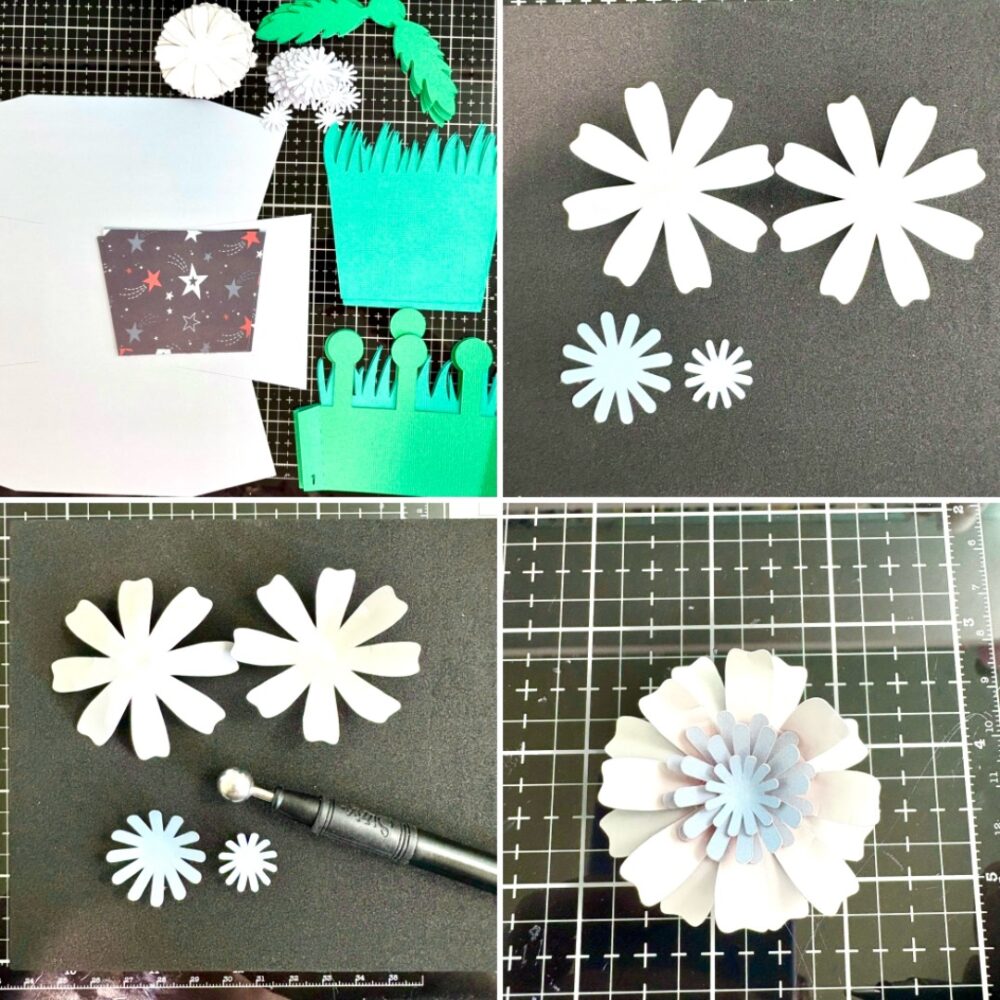
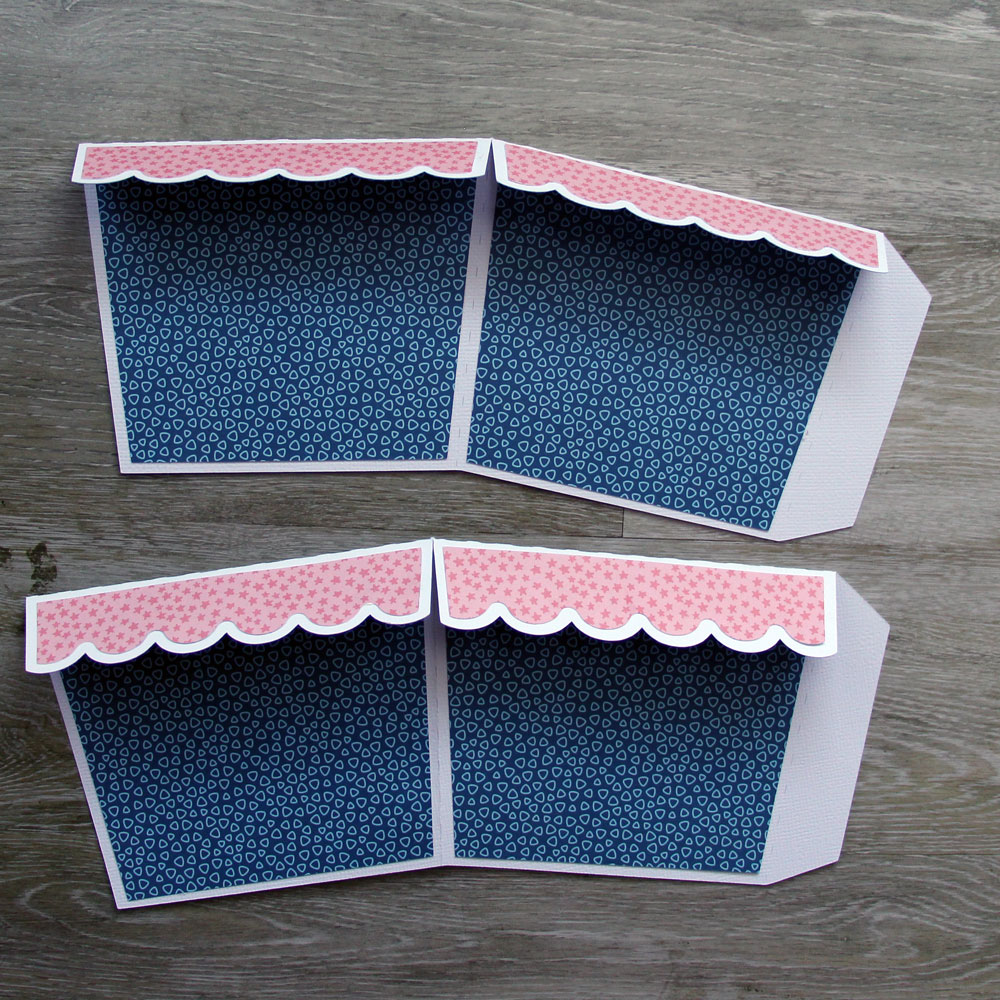
1. First cut all the pieces.  If you are working in Silhouette Studio, remember to find all the white pieces that may be hiding behind a layer. Also think about any patterns you are using in your paper, and place them accordingly.  Notice the direction of scalloped flap pieces.  In this picture those pieces are a butterfly pattern.  But you’ll notice later, I used the other side of the paper.

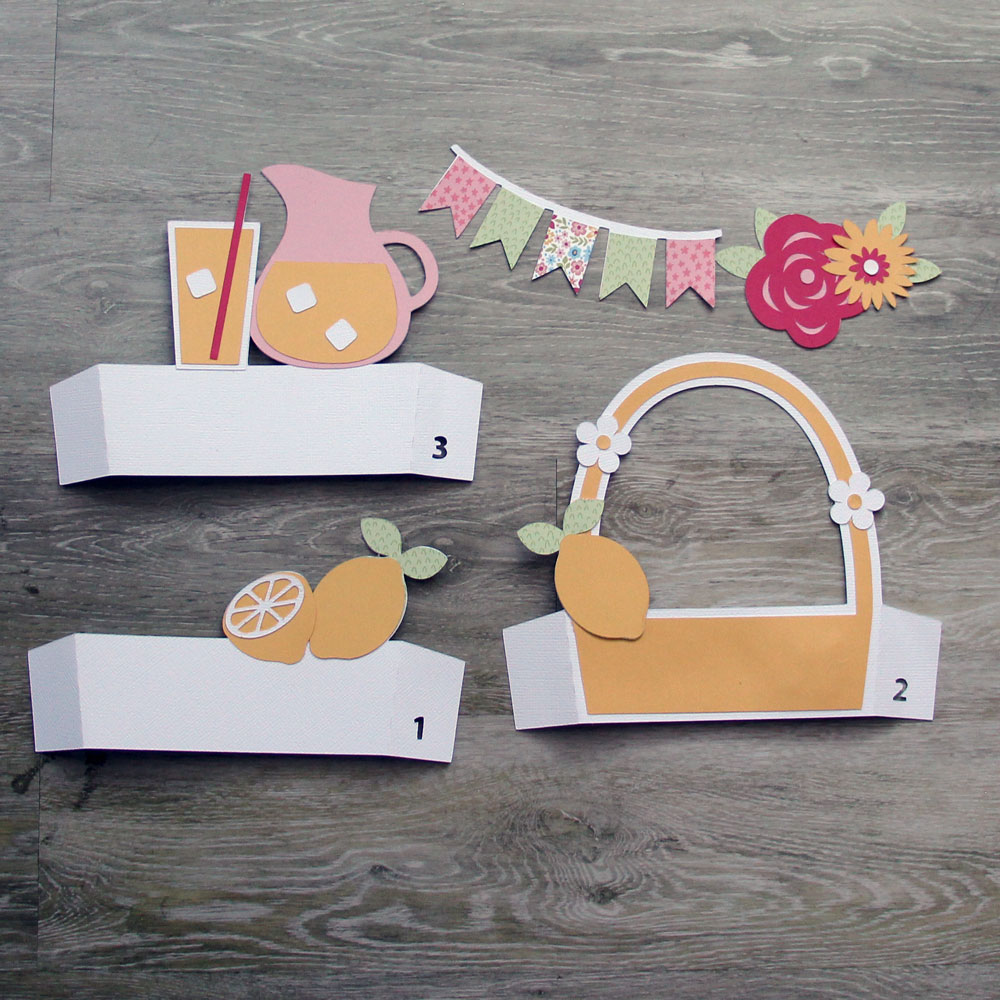
2. Layer all the pieces, using the finished project image as reference if needed. Aren’t the ice cubes so fun!

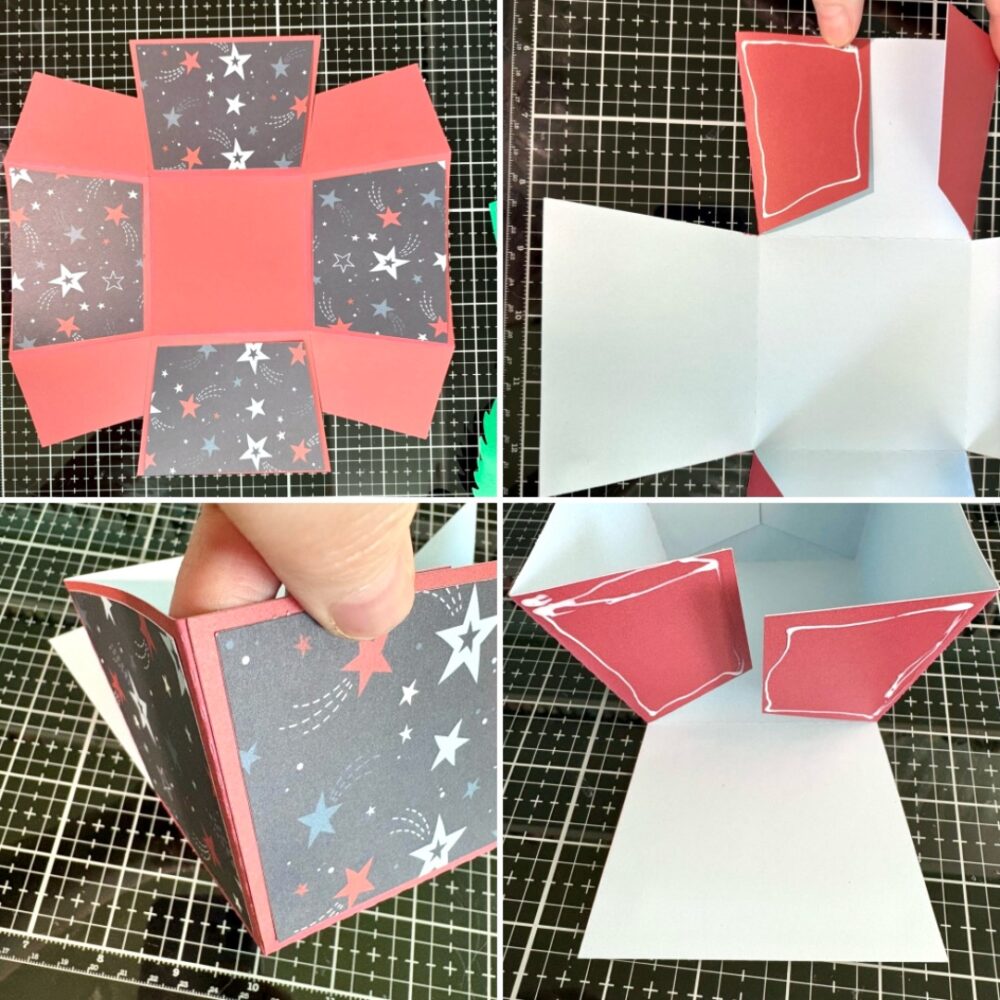
3. Adhere the basket panels onto the basket piece.  Notice here that you will first fold down the basket flaps, and then adhere the scallop panels to the folded side.  Here I decided to use the other side of the paper!  Luckily these pieces are symmetrical so they fit perfect.

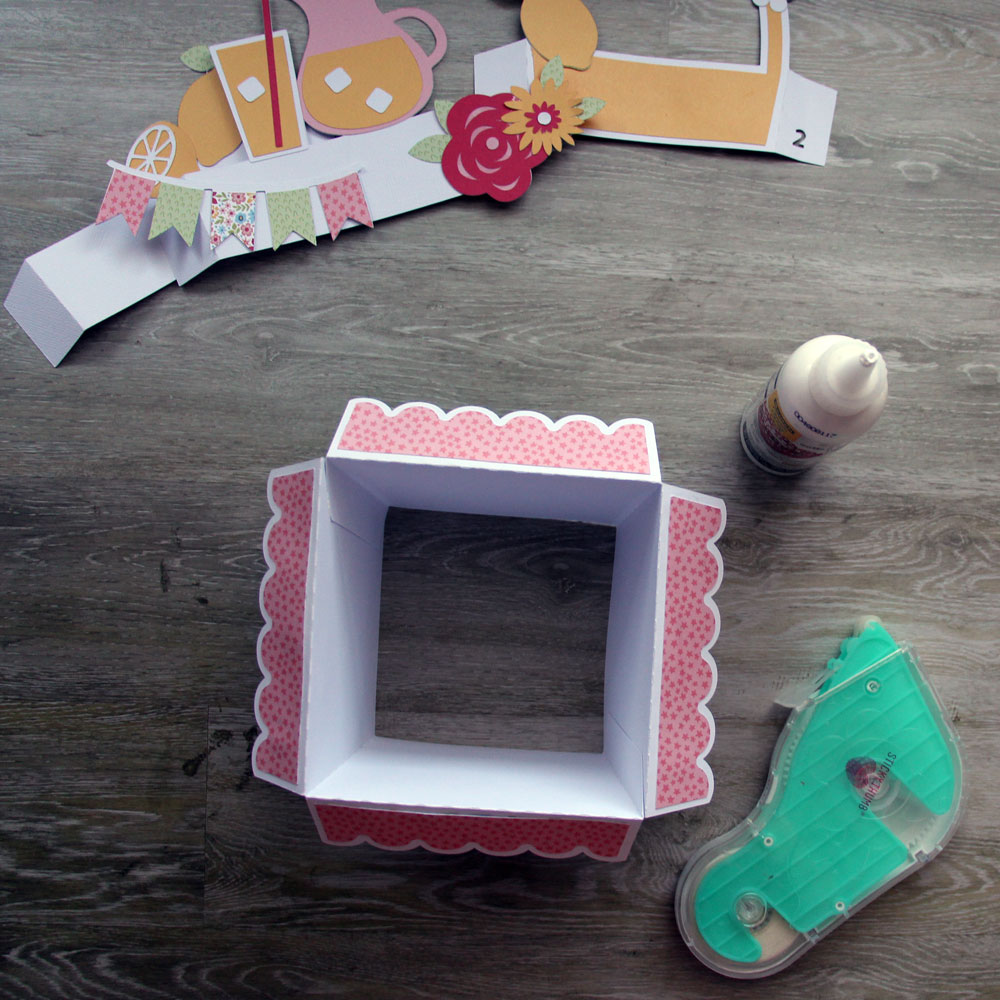
4. Time to assemble the basket.  Glue the flaps together to form the basket. I used liquid glue for the flaps.

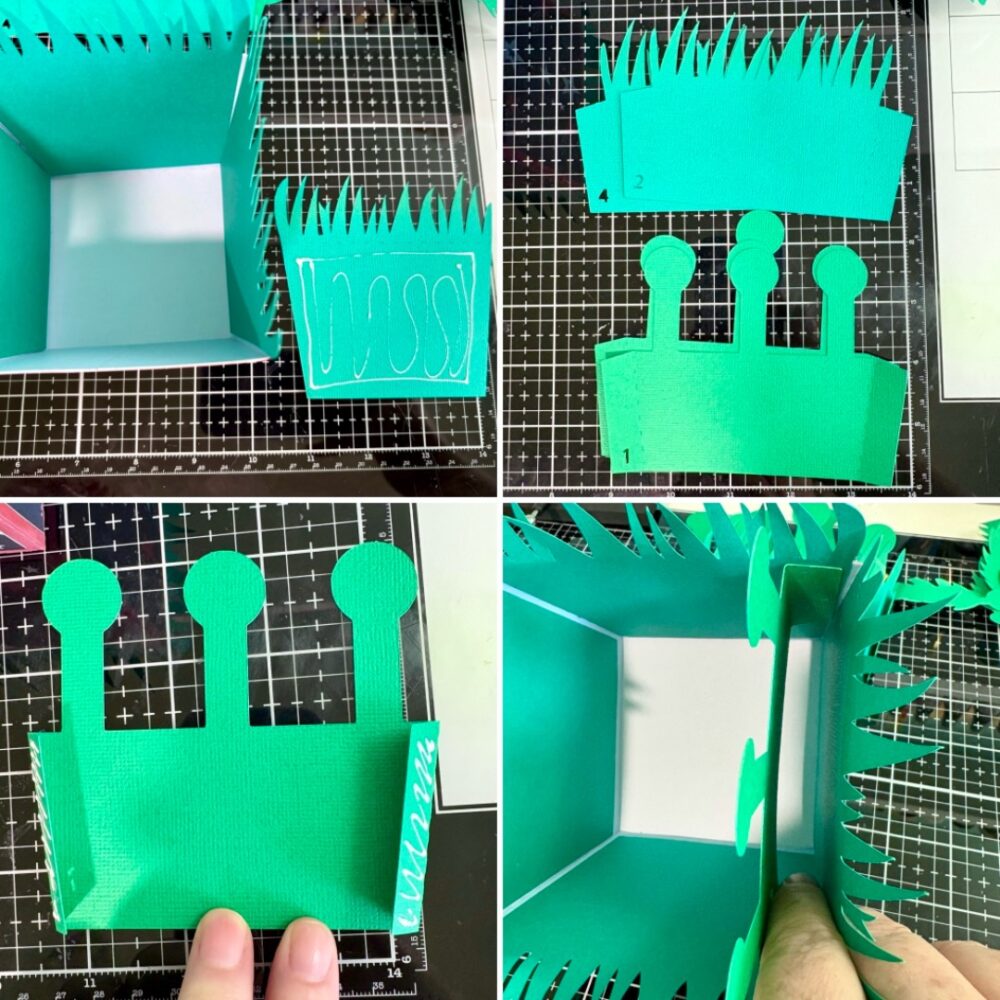
5. Now insert the pieces into the basket and glue the flaps to the sides.  Do your best to evenly space out these flaps. They are numbered 1,2,3, so you can easily place them in the correct order.

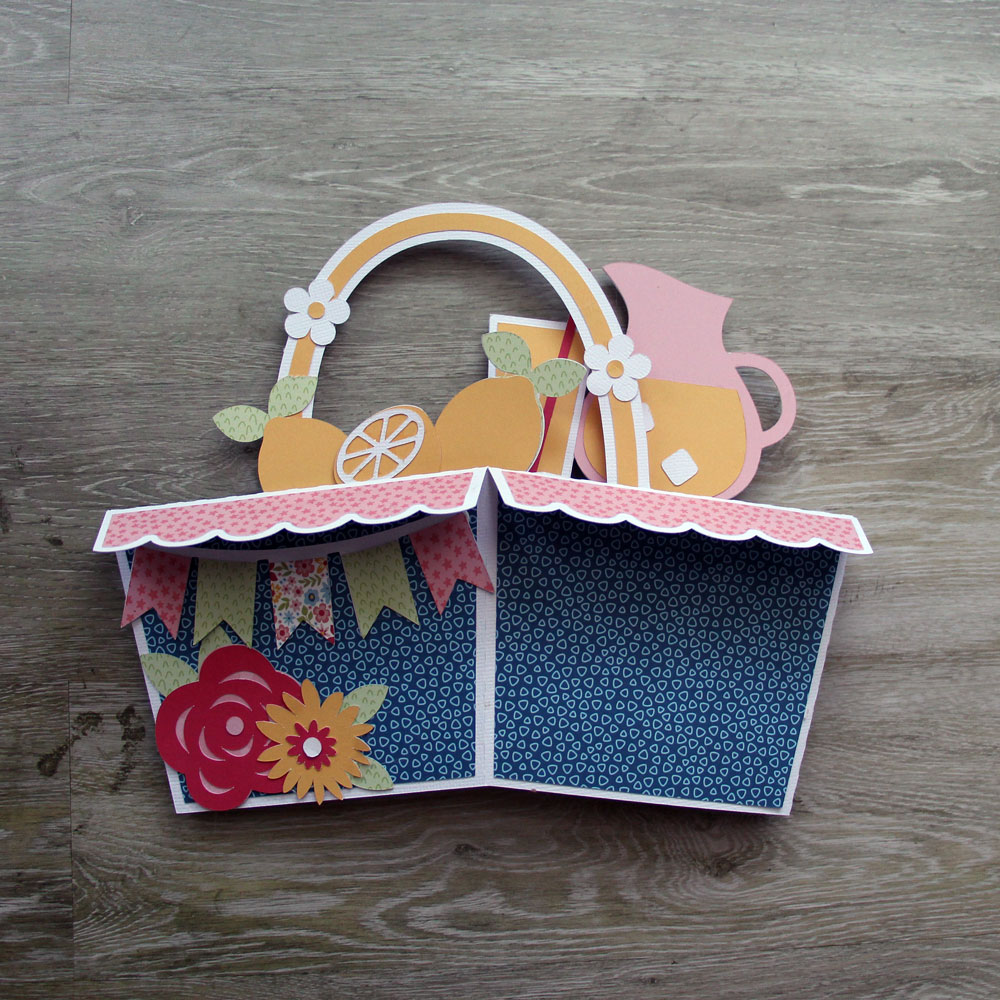
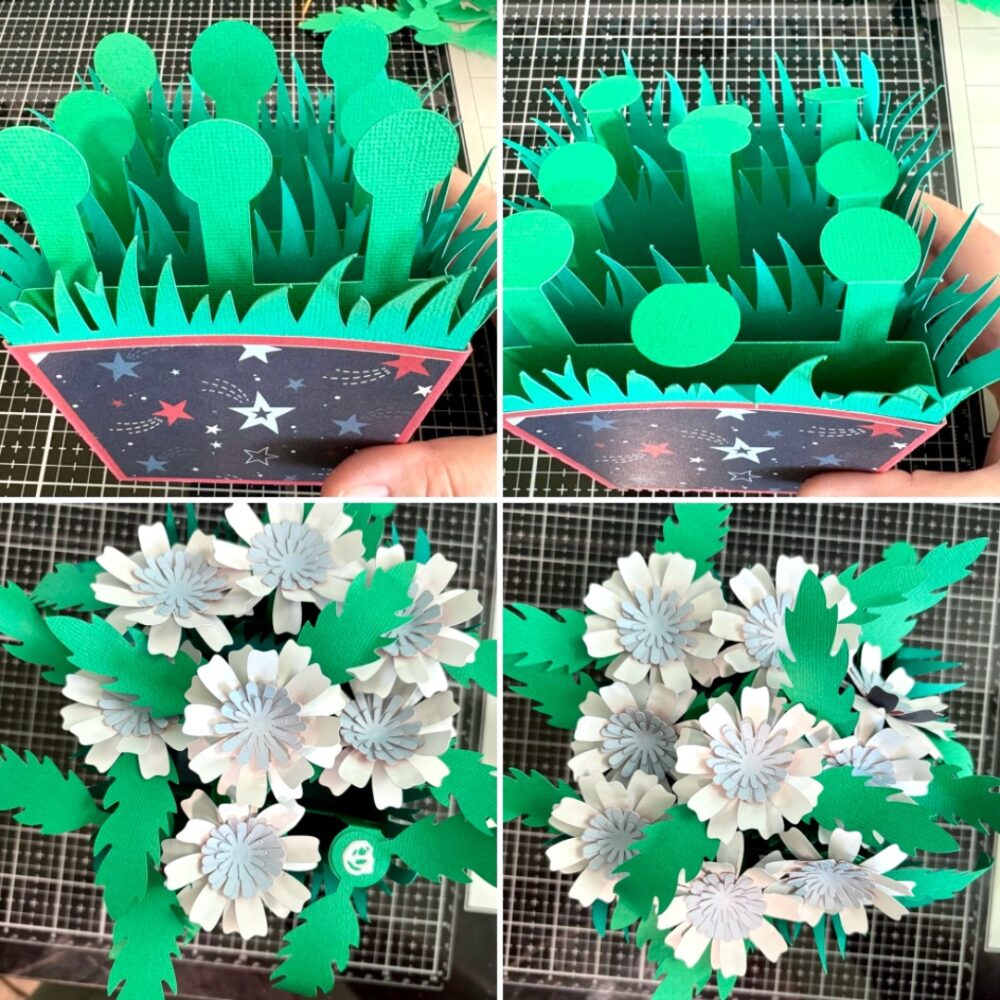
6. Flatten the project and make sure the inside glue tabs are adhered well.  And adhere the front banner and flowers on to the basket.  Noting which panel is the front before adhering.

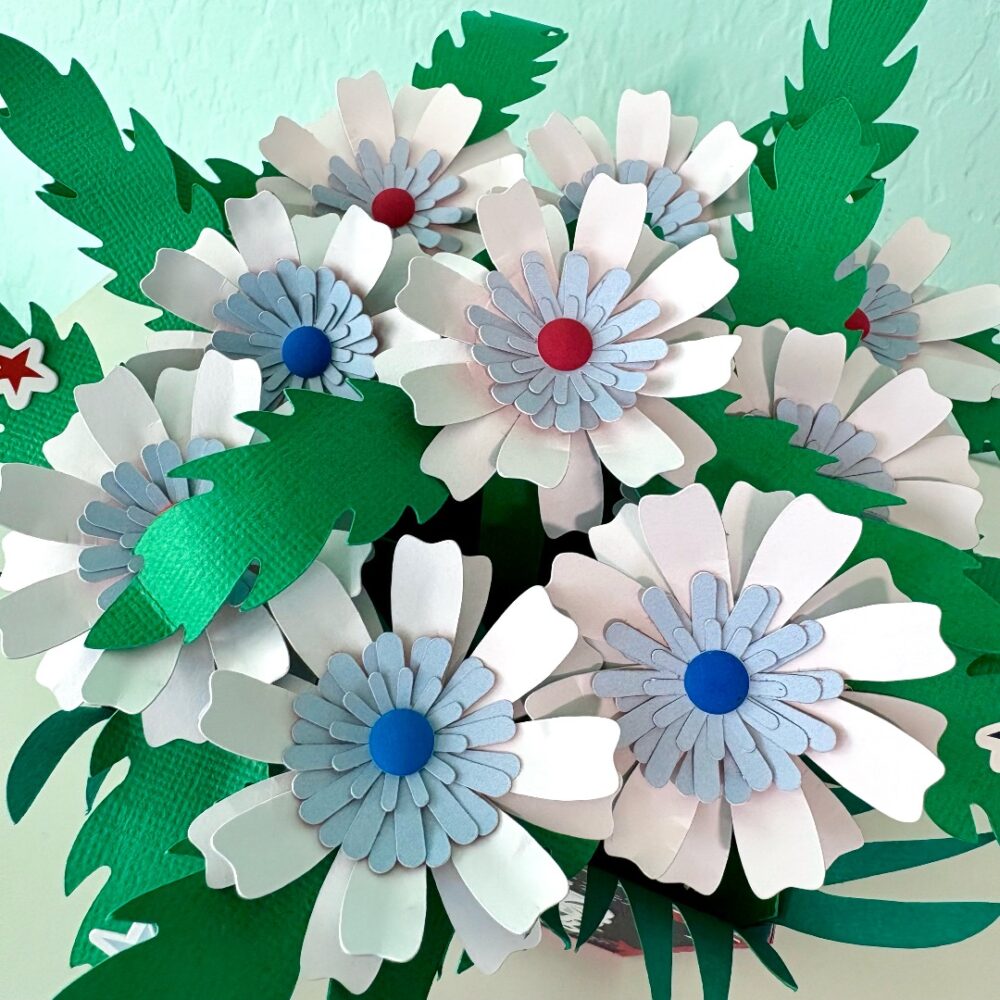
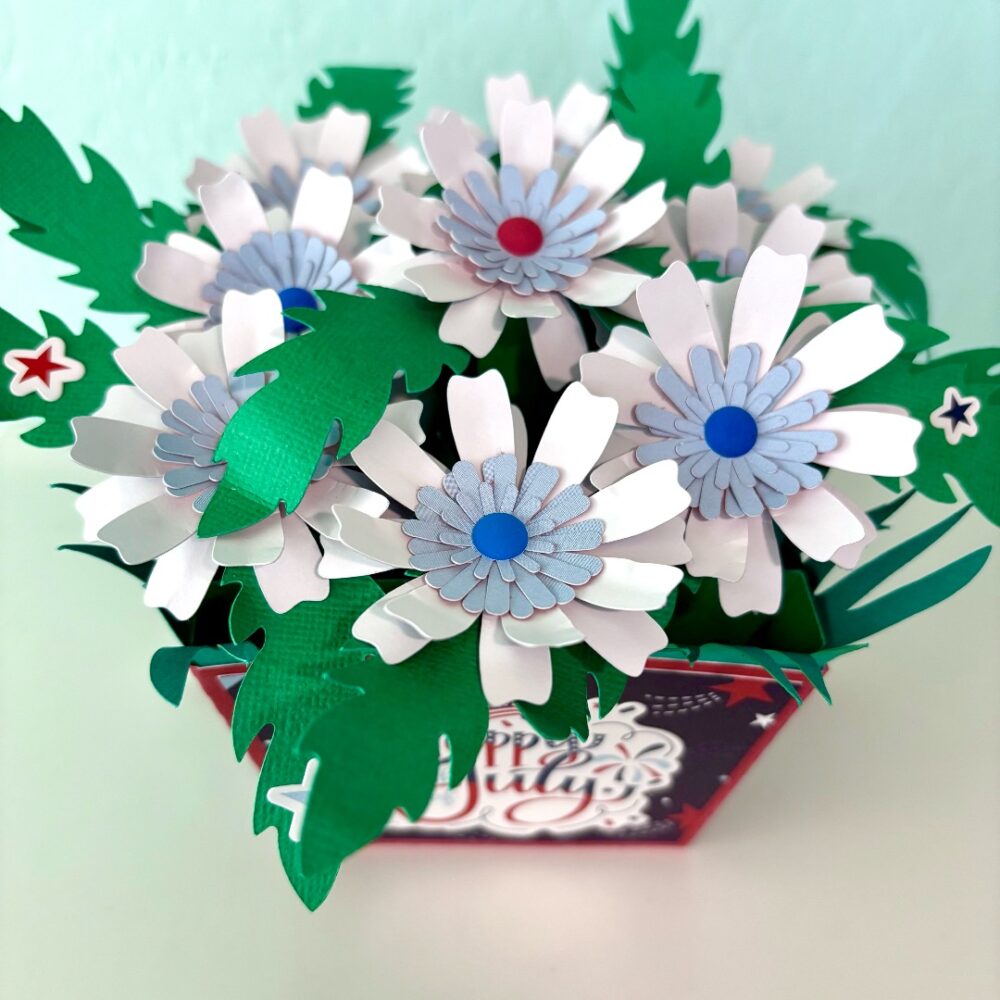
7. Tada!  Enjoy your finished project.  This is a fun one.  You can find some other of these Big Box cards in the Shop. I used Lori’s Have a Great Summer Collection. You can pick up your favorite Big Box card during Lori’s Sale!

Hope you are having a great summer!

3D Flower Pot Bouquet

Hi there, friends! Today, I am sharing a tutorial for the 3D Flower Pot Bouquet Daisies (SVG, Silhouette). This flower bouquet would make a perfect hostess gift, birthday gift, or a sweet pick-me-up for a friend. I used the Stars and Stripes collection by Echo Park Paper Co for a patriotic theme.
To begin this project, I cut all the flower pieces first so that I could shape the flowers while my Cricut cut the remaining pieces. The flowers have five layers total. Two of the layers make the flower, and three for the centers. I used a stylus tool and a foam mat to shape my flowers. This process takes a little time, but it wasn’t complicated.

For the pot I folded all of the score lines into mountain folds, inked the edges, and glued the decorative panels in place. Two of the sides of the pot have two large tabs each. I added glue to one tab at time and made sure to line everything up with the edge of the pot. I repeated this process for all four corners.

I then glued into place the four grass panels to the inside of the pot, one on each side. For the inserts I folded all of the tabs into a valley fold and added glue to outside of the tab. I eyeballed this part but I tried to make a sure the number three insert was in the middle of the pot.  There is five inserts total, three for the flowers and two grass inserts. I inserts are numbered which makes gluing them in order easier.

With all the inserts glued into the pot I folded down the round heads for the flowers and leaves. I glued the leaves on first then glued the flowers on top of that.

I embellished my pot with a sticker from the collection and added enamel dots to the centers of all of the flowers.

This was a fun little project and would be cute in any theme. I think my next one is going to be back to school themed, since my kid goes back in three weeks!
Thanks for stopping by.
Brandie

An Oldie but a Goodie- The Side Step Card!

I was paging through my library of Lori’s files on my Silhouette, pages and pages, mind you.  And I came across this side step card and I remembered how I used to love to create these as you can enhance with all the embellishments for Lori’s collections.  So, I just had to give it a try again with Lori’s Echo Park Firefly Collection.

The Step Card Side file is here in Lori’s Shop  or in the Silhouette store.  I used the Firefly card stock for the base and papers from the 6×6 pad for the accent papers, a bit of the washi tape, several pieces of the chipboard, stickers, a tag and enamel dots.  You can simply create a scene with these little step card bases and all the embellishments.  Tons of fun to just start layering and see what you come up with.  I adore this collection and how this card turned out.


Thanks for joining us today!

~Cathy

3D Flower Pot 6

Hello! Today I am sharing one of the new 3D Flower Pots. I made the 3D Flower Pot 6 (SVG, Silhouette). I included a Thinking of You sentiment and added a battery powered light to the inside of the flowerpot. This little flower pot is perfect to give to someone who needs a little pick me up. I used papers and embellishments from the Firefly collection by Echo Park Paper.

Thanks for stopping by!

Brandie