3D Coffee Cup Tutorial

Hello crafty friends! Hope everyone had a beautiful Christmas and is settling down into Winter.  If you have a coffee-lover friend’s birthday coming up soon, this is a perfect way to give them a gift certificate to their favorite coffee store. I used the adorable 3D Coffee Cup (Lori’s SVG ShopSilhouette Design Store) and it looks even more adorable cut from the Echo Park My Favorite Winter.

Today I have a tutorial for you on how to put this little guy together! So if you’re ready let’s go!

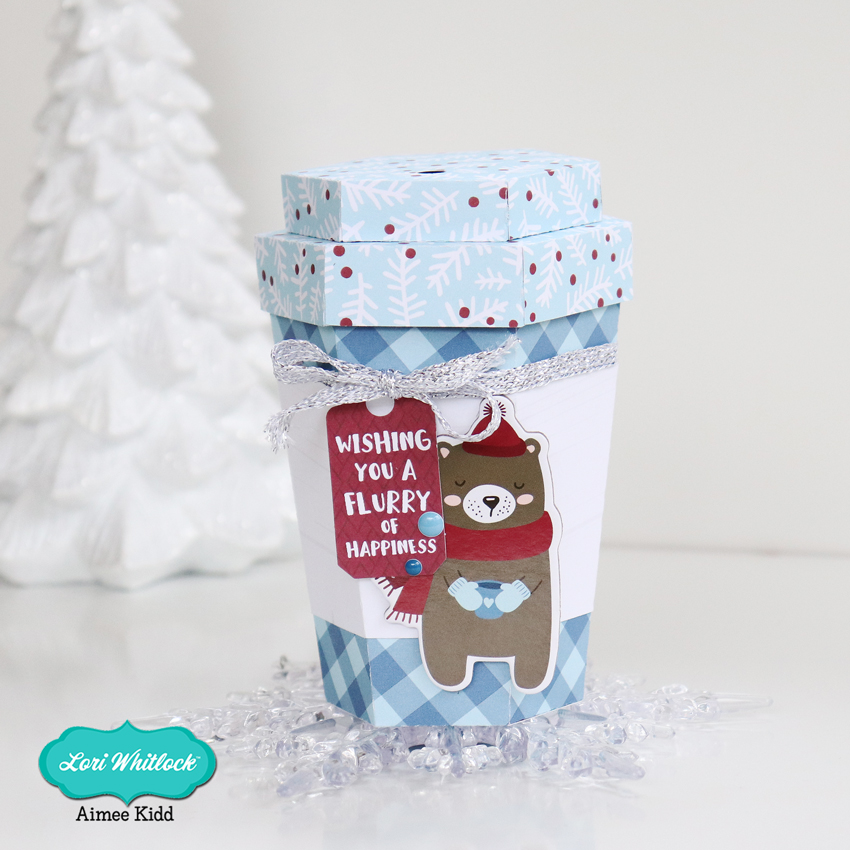
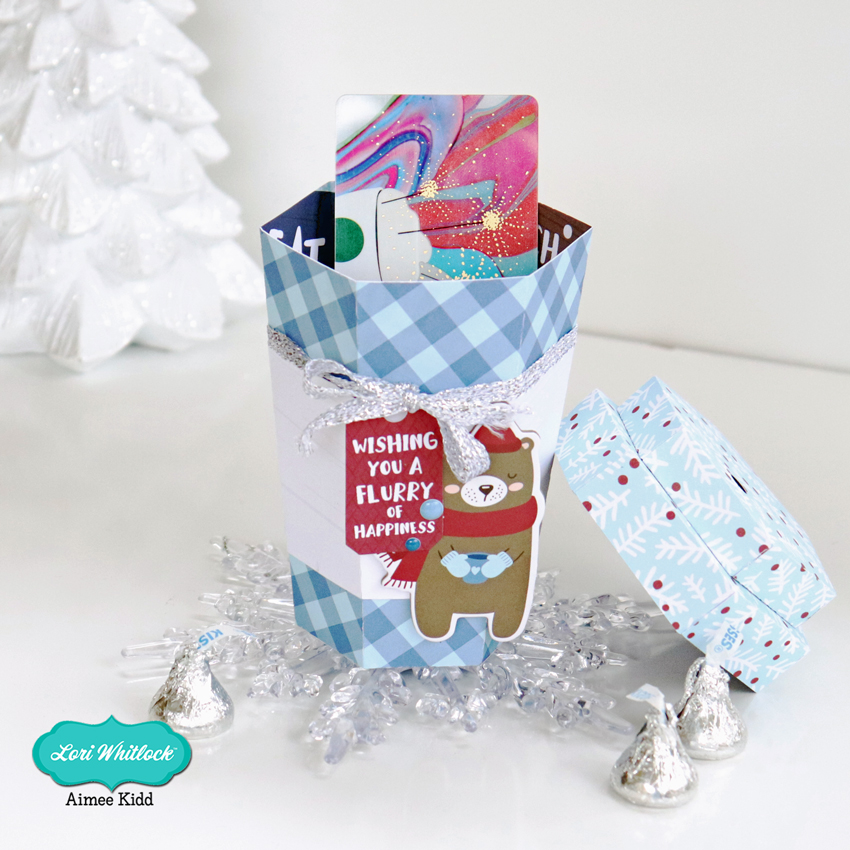
This little cup is plenty big enough to add a gift card along with some candy. It measures just under 5 1/2″ completed which leaves you lots of room to add many goodies.

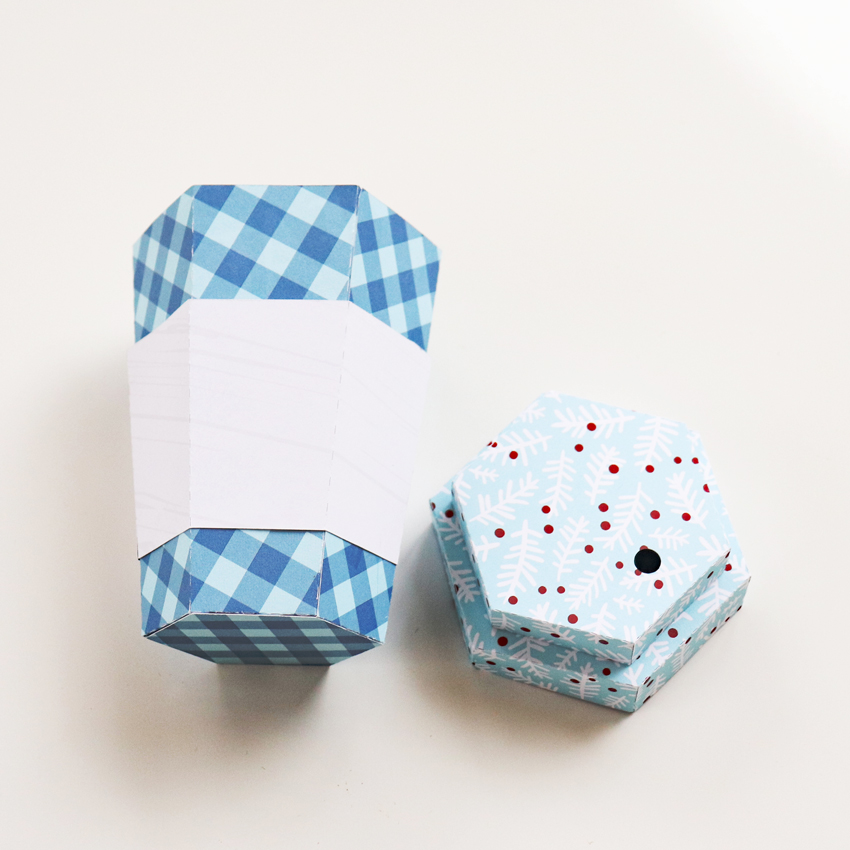
The first thing you need to do is to choose your papers and cut out all of the pieces

For the lid: fold on all of the perforated lines and adhere all of the tabs to the underside of the neighboring piece.

Add your adhesive to the tabs shown in the picture. Flip both pieces over and adhere the smaller piece in the center of the bigger piece. This will complete the lid to the coffee cup.

For the body: Fold on all perforated lines for the cup and the sleeve. Adhere the tabs to the main part of both pieces.

Next you will need to adhere the bottom piece to the tabs.

This will complete both pieces of the coffee cup. When I added the sleeve to the cup I added some adhesive to make sure it doesn’t come off.

And the last thing to do is have fun decorating your coffee cup! There are so many great pieces in the ephemera packs, chip-boards, and sticker sheet of the My Favorite Winter collection to make your coffee cup look fun and festive! I can’t wait to give this little cutie away…I know it will make someone’s day!

So that’s all from me today! Hope you give this a try and hope everyone has a beautiful day!

Aimee

Snowflake X-Card

Have you guys tried the X-Cards? They are so fun and make a cute display for the recipient.  Lori has several versions (SVG) and a tutorial that makes assembly easy. I love how easy they are to customize with the print and cut feature. I made the A2 X-Card Snowflake (SVG, Silhouette) with papers from the My Favorite Winter by Echo Park.
I hope you give this card a try and thanks for stopping by!
Brandie

Gift Card Holder Tutorial

Got Gift Cards to give?  Why not personalize the gift with a fun holder?!  Lori’s Gift Card Holder (SVG, Silhouette) is an easy way to package up a gift card, and it can be decorated to suit the occasion and the recipient!  I also like that it’s a “box” and you could wrap it if you wanted.  Take a peek…

How fun is this?   You can decorate the front and then add a sentiment on the inside.  This is super easy to assemble… I’ve outlined the steps for you below…

  1.   These are the pieces that come with the file.
  2.  Start by folding the score lines on the main piece.  All lines are folded in the same direction.
  3.   The “inside” score lines are folded in and under as shown.
  4. On the solid side of the box, fold up the sides and glue in place.  Tabs go on the inside.
  5. Repeat for the tabs and sides on the other end.
  6. Add adhesive to the inside tabs.
  7. Fold the box over so that it closes.  Glue sides down.
  8. Tuck the inside tabs “in” and press to adhere.
  9. Fold the cover along the score line and add adhesive to the inside of the tab.
  10. Glue the tab to the outside edge of the box so that when folded over it covers the gift card insert area.
  11. Add the panels to the inside cover and on the front of the cover. (for mine, I flipped one of the pieces to be blue)

Now all that is left is to decorate!  I added some embellishments from Lori’s My Favorite Winter Collection for Echo Park Paper.  That’s it for me today, thanks for stopping by to peek!

BLOG * INSTAGRAM


Gingerbread Dollhouse

Do you love making gingerbread houses this time of year? Have you tried making any of Lori’s Paper Houses? They are so much fun to make. This cute gingerbread dollhouse has been added to Lori’s shop and Silhouette this week!


I used Lori’s Little Lumberjack collection from Echo Park to make my rendition of the Gingerbread Dollhouse.

There is still time to make some cute houses!  Have fun!

Ashley


Gatefold Wreath Card Tutorial

Hello Everyone:

I hope that everyone is enjoying the most magical time of the year.  I have a tutorial for all of you today on how to put together Lori’s Gatefold Wreath Card.  I love Lori’s Gatefold cards and even used one of hers to make all the wedding invitations for my son and daughter-in-law.  They are so elegant and so easy to put together.  You can find this Gatefold Wreath Card file here in Lori’s store and here in the Silhouette store.  I used one of Lori’s new Echo Park Paper collections called My Favorite Christmas.

Here is a photo of the cut file pieces.  You want to start by adding the square insert inside the folded card base.

Here are the ribbon pieces folded along their score lines. Glue together the overlapping ends of the bow. Next glue the flat ribbon segment to back of the formed bow and lastly wrap the center around both piece using a tiny bit of glue on both sides.

I slipped the band on the folded card and added some embellishments which are a wonderful part of this collection.

Here is the last photo which is a close up of the embellishments.

That’s it for me today.  Have a great day and be sure to check out Lori’s gatefold card cut files.

Hugs,

Anita