🎄NEW SVG Files-25% OFF-New Freebie!🎄

All New Release SVG Files are 25% OFF this week!

Happy Tuesday, everyone! Can you believe that Christmas is just ONE week away? That means it’s crunch time. One thing that I love to give is money because the recipient can use it to buy whatever they need and want. Do you like to give the gift of money? If so, are you looking for a creative way to package it? If so, I’ve got you this week! I designed some darling money holders and some super cute money envelopes. These money holders are so quick and easy to assemble and your loved one will think it’s such a creative way to receive their favorite gift.

You’ll also see some new SVG files in the shop this week from Jillibean, Pebbles, and Quietfire. Be sure to check out the cute 3D train by Quietfire. So cute! All new releases are ON SALE 25% OFF through Sunday at midnight in the Lori Whitlock SVG Shop. Take a peek at a FEW of the new releases (be sure to visit the link below to see them ALL)…

These downloads include SVG files that may be used with Cricut Explore, Silhouette (Designer Edition upgrade required), Eclips, Brother Scan and Cut, and any other software that will open SVG files. Be sure to go get them while they are on SALE this week.

ALL WEEK, this SVG file is FREE with any $1.99 purchase!

Hi Everyone! We have a new FREE file with purchase this week! To get it, simply place an order of $1.99+ in the Lori Whiltock SVG Shop and this Gnome Treat Box will automatically be added to your cart for FREE!  No coupon code necessary! This offer is good through next Monday.

(Your cart must reach $1.99+ before the FREE file will automatically be added. The files will be available for immediate download after you pay for your order by visiting ORDERS > ORDER # > RED DOWNLOAD ARROW)

Another deal we have going until the end of the month is the FREE 2023 December Kit of the Month with any $20+ purchase (purchase must be in one transaction). Simply place your qualifying order in the Lori Whitlock SVG Shop and this file will be automatically added to your cart for FREE. No coupon code necessary. This offer is good through December 31, 2023. Grab this one while you can.

(Your cart must reach $20+ before the FREE file will automatically be added. The files will be available for immediate download after you pay for your order by visiting ORDERS > ORDER # > RED DOWNLOAD ARROW)

Thanks for checking out the NEW FILES and be sure to go grab the freebies of the week/month with your purchase.

Have a great day!

Lori

Big Tea Towel Bundle Christmas Gifts

Happy Monday everyone! I needed some quick office gifts so I ran to the Dollar Tree for some pot holders and whisks and made these cute little pocket pot holders.
I used Lori’s Big Tea Towel Bundle (SVG) Sillhouette doesn’t have the bundle but the 2 that I used were Whip It (Sillhouette) and Cooking Smoke Alarm (Sillhouette).
I used some gold and silver iron-on material for the images. Don’t forget to mirror your images.


I plopped in a little whisk and some cookie mix for a cute little gift for my co-workers.


Happy Crafting and Merry Christmas!
Chelsea

✨✨30% OFF Vanishes at Midnight!✨✨

It’s the last day of the 30% OFF all SVG files sale! That’s right you have until midnight to save 30% off with coupon code: DEC2023 in the Lori Whitlock SVG Shop. Go stock up on your last minute Christmas projects. 

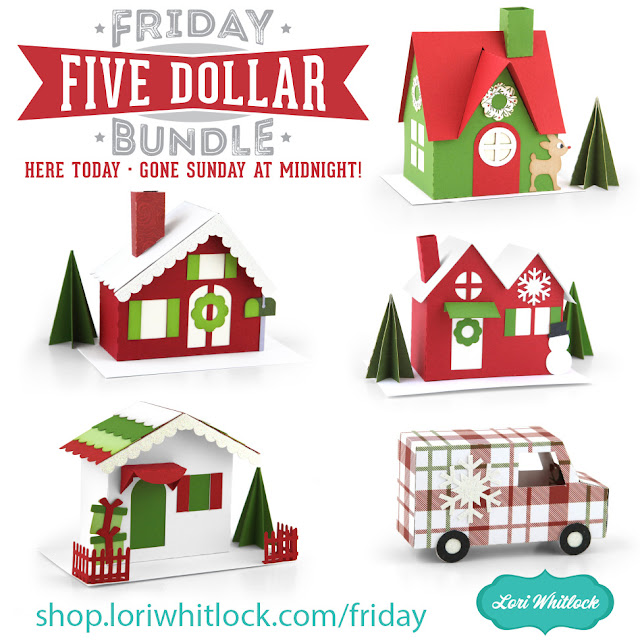
Also, This weekend we have a NEW Friday $5 Bundle which includes the SVG files to make the cutest little Christmas Village for just five bucks. These village pieces are so fun to make for the holidays. Make this project with your kids or teenagers. This deal is only available until Sunday at midnight, so don’t wait! Take a peek…

Be sure to go grab these SVG files while you can. 

** Because Friday $5 Bundles are already heavily discounted they are not eligible for further discounts including monthly, seasonal and flash sales.

Shop Friday $5 Bundle HERE

Thank you for joining us today! Have fun crafting this weekend!!!

~Lori


30% OFF Sale + Friday $5 Village Bundle!

Quick reminder that all SVG files are 30% off until Saturday at midnight with coupon code: DEC2023 in the Lori Whitlock SVG Shop.

Also, This weekend we have a NEW Friday $5 Bundle which includes the SVG files to make the cutest little Christmas Village for just five bucks. These village pieces are so fun to make for the holidays. Make this project with your kids or teenagers. This deal is only available until Sunday at midnight, so don’t wait! Take a peek…

Be sure to go grab these SVG files while you can. 

** Because Friday $5 Bundles are already heavily discounted they are not eligible for further discounts including monthly, seasonal and flash sales.

Shop Friday $5 Bundle HERE

Thank you for joining us today! Have fun crafting this weekend!!!

~Lori


Lighted Shadowbox Decor Santa Tutorial

 Hello friends, Marcia here. I am sharing a tutorial on the blog today for the new Holiday Lighted Shadowbox Decor pieces. You can purchase a bundle Here that includes a Turkey, Santa, Reindeer, Elf, Snowman, and a Nativity Scene. I made the Santa (SVGSilhouette) and boy is he spectacular!

These are pretty easy to assemble. Let me show you how.

1. Cut out all the pieces from the desired pattern paper or cardstock. Be sure to scroll in Silhouette Studio to see all the pieces. There are 4 inserts, side panels, and a decorated front and back. We will assemble the side and back first Adhere your pattern paper panels to the cardstock back and sides.

2. Glue one side panel in place, adhering it to the tab with the four slits and then each tab working your way around to the other tab with four slits on the opposite side

3. Let’s assemble the front panel. We are going to start with Santa’s face. The white paper goes behind the black. That goes behind the flesh-colored face. Last, attach his eyebrows over each eye.

4. Adhere the black belt pieces on each side and the bottom of the beard. This allows you to fit the face piece in just so tucked under the mustache. Once the face is in there, go ahead and adhere the hat brim down along with the white pompom. Lastly, add the mustache.

5. We are ready to assemble the inside of the shadowbox. Take the back panel with the moon and start and slide the tabs through the slit in the back on each side. You want the hole in the back piece to be on the bottom.


6. Repeat with the other inserts.

7. Once the inserts are in place we can adhere the final side in place the same as the other side.


8. Adhere the front Santa panel to the front of the shadowbox. I did this a few tabs at a time. Then your Santa is ready for some lights or if you prefer you can leave it as is.


Thanks so much for stopping by. Be sure to check out all of Lori’s latest designs in her shop.
~Marcia