Box Cards for Guys

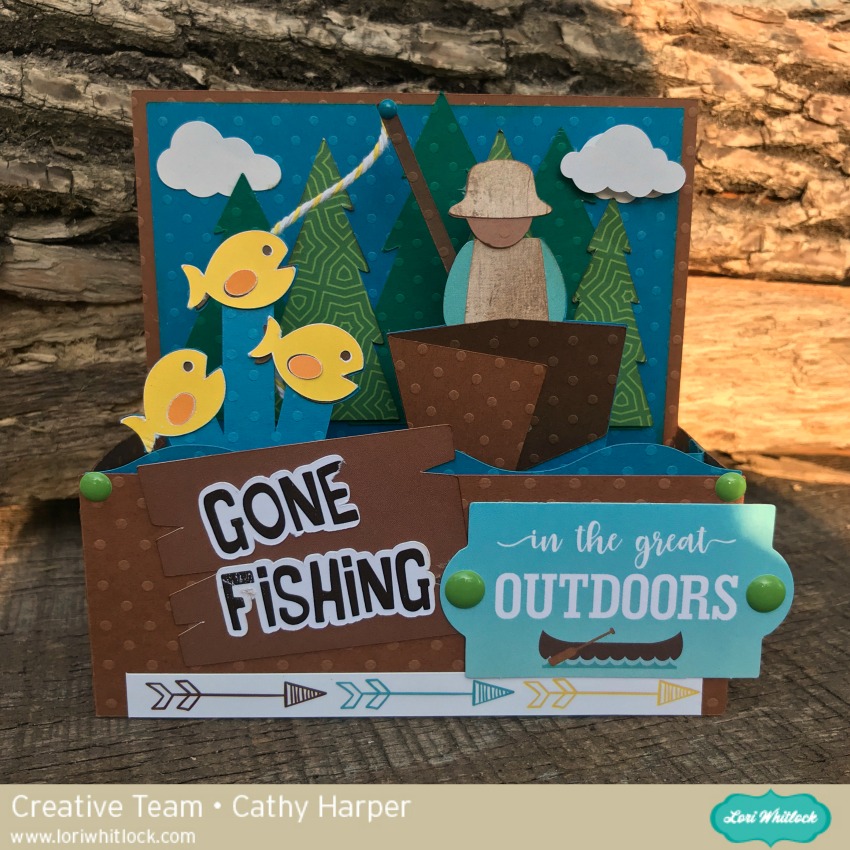
Hi everyone! Cathy here with you today and I am sharing a couple of Lori’s Box Cards that are perfect for the guys in your life. I used Lori’s Echo Park Summer Adventure collection to create these cards. Lot’s of fun elements and out door prints to create all of her new files. First, I have the Gone Fishing Box card, you can find it here on Silhouette or here at Lori’s store.

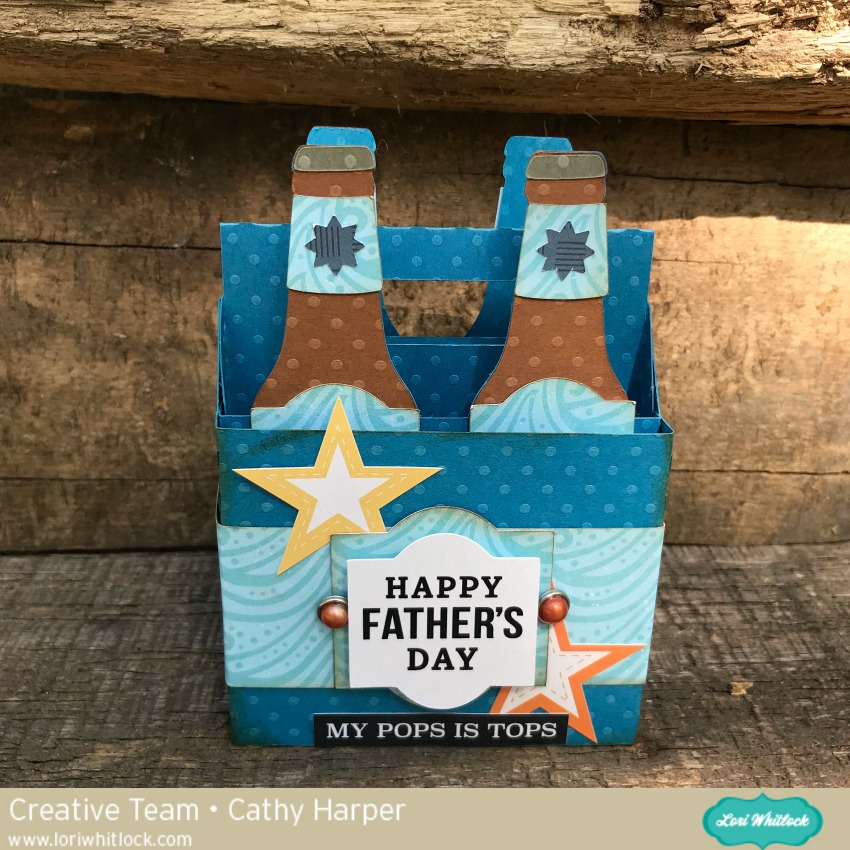
You can find the bottle box card here in Silhouette and here in Lori’s SVG Shop. These cards are super easy to cut out as Lori color codes her files, all you have to do is sort and pick out your patterns. Then once they are cut out it’s super easy to put together as all the inside pieces are numbered for you. A little scor-tape and your done. You can easily switch out the print and cut tags for whatever occasion you need…these would be perfect for Happy Birthday or just thinking of you cards. Lori has tons of fun fonts to try out.

Thanks for joining us today! ~Cathy

Doodlebug Design Cut File Feature

Hi Everyone!  Today I’m showcasing another fabulous project using Doodlebug Design’s cut files!  This fun seasonal welcome sign was created by Kathy Skou for Doodlebug Design.

Kathy used the Christmas Town – Snowman Look Up , French Kiss – Strawberries, Shamrocks – Happy Go Lucky , Hoppy Easter Chick in Egg, Simply Spring ButterflySimply Spring – Bird on Branch 2, 4th Heart- Yankee Doodle, Sweet Summer- Watermelon, Sunflower – Flea Market, Pumpkin Party – Pumpkins, Fall Leaves – Flea Market, and Christmas Town – Christmas Tree files to embellish her sign.

For more details, you can see her original post here.   New Doodlebug Design SVG files are being added to the Lori Whitlock SVG Shop on a regular basis, so stop by to see all of the fun SVG files HERE!

Have a great day!

Baby Shoe Cut File Tutorial

Looking for a really cute Baby Shower Favor?  How about this adorable little Baby Shoe (SVG, Silhouette).    

This little shoe is easy to assemble and can be made in any color to match your shower theme! 
Start out by cutting the pieces.  You have 2 bottom pieces (each the same size) and the top of the shoe.

On the “wrong” side of one of the bottom pieces, I measured up about one inch from the heel and drew a line. (the bottom pieces both have a wider end which is the top of the shoe, and a narrower end which is the heel.)  You don’t need to do this part, I just found it easier to place where to start gluing on the shoe top.

Starting at the 1″ mark, glue the top of the shoe to the bottom piece going in the direction of the top of the shoe.

Continue all the way around the shoe, making sure there are no gaps.   When  you  are  done, there will be an overlap of one tab.

Add a little adhesive in the overlap of the top piece and secure.

Add the second bottom piece to the bottom of the shoe to cover the tabs.

All that is left is to glue the shoe strap  down and decorate!  I added a button to the strap and a little bow to the shoe top.  Now to fill it with a sweet treat!

This tutorial will also help with the assembly of the Explosion Box Baby Shoes File (SVG, Silhouette).  That’s it for me today, thanks for stopping by to peek!

BLOG * INSTAGRAM