Happy Halloween with Courtney

Hi everyone! Happy Halloween! Courtney from Court’s Crafts here with Lori’s new Haunted House Box 2!!!! It is NOT too late to add this to your home decor for tonight or to make one and fill it with treats for the party you are headed too! You could also make these for the grandkids!

I added some cute critters and embellishments since we don’t really do “spooky” at our house. The patterned papers you choose really make this house. Match it to your mood!

I added some stitching to the tree to give it personality. And I stitched around the house pieces as well.

Honestly, this chimney had me at hello. I loved it in green for the example and wanted to keep it that way. Its wonky nature and how the owl is looking scared of the spider = LOVE. I would advise cutting the back tree out of chipboard or thick cardstock a could of times. I want to reinforce mine before giving it to the kids! 🙂

Here it is! Check it out in Lori’s store HERE and whip one out for tonight! You could easily adapt this for Thanksgiving using fall papers! You can grab it from the Silhouette Store HERE.

Guest Designer Jennifer Beason

Hello, everyone. I’m so happy to be back and sharing another project featuring Lori Whitlock’s cutting files with you. With Halloween just a few days away I thought why not make these fun witch boots with stockings. They can be used as Halloween decor or you could fill them with some yummy treats.

I enlarged the boots to 18″ tall. The image was cut into two sections, then pieced back together, since my cardstock and mat were only 12×12.

I used the boot cut out, as a stencil.  After tracing out the boots (2 for each boot) on foam board, I used a craft knife to cut them out. For the sides, some thin chipboard was used. Here’s what they looked like once put together.

The boots and stockings were then covered with fun Halloween papers.

A few more of Lori’s files were used to finish off the piece. The skull and crossbones on the knee high socks.

The bat on the back of the boot and some webs on the cuff and toe of the boots.

Trick or treat, smell my feet, give me something good to eat!!! 🙂

Thanks so much for joining me today.  I hope you all have a Happy and safe Halloween!:)  Jennifer

Files used:
Don’t Mess With The Shoes
Cats Ghosts Webs
Halloween Words
Halloween Titles and Skull

Halloween Candy Huggers with Kathy

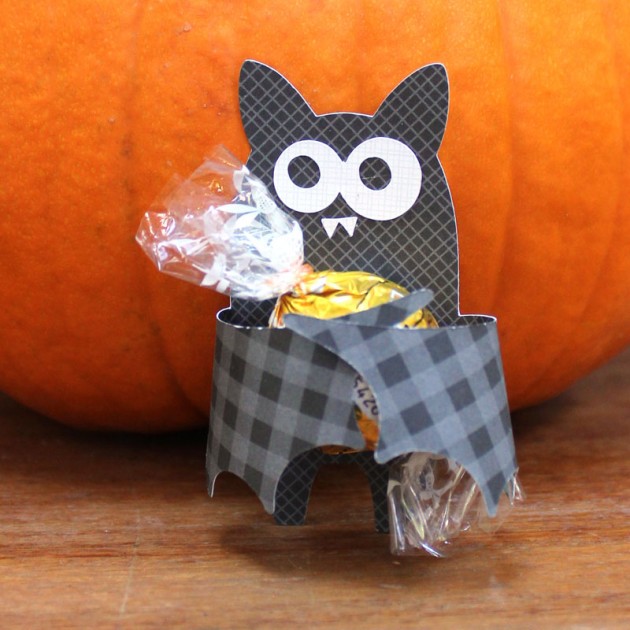
Hi Everyone!  It’s Kathy today with some ADORABLE Halloween themed Candy Huggers!  I just love these cute little critters!  It’s such a fun favor for a party, whether the kids are little or big!  Take a peek…

These huggers are the perfect size to hold a fun sized candy bar or something smaller such as a chocolate Kiss or Rolo.  They go together so quickly too! I just used an extra strong glue dot to hold the candy in place in the arms.  Here are some close-ups…

Halloween Cat Candy Hugger ( Silhouette Store)

Ghost Candy Hugger (Silhouette Store)

Bat Candy Hugger (Silhouette Store)

There is also an adorable Halloween Witch Candy Hugger and a Halloween Frankenstein Candy Hugger!  Perfect for all you Halloween party needs!  That’s it for me today, thanks for stopping by to peek!

A New Friday $5 Bundle!

Hi Everyone! Today we have a new Friday $5 Bundle! It will ONLY be available until Midnight Sunday and when it’s gone it’s gone. These SVG files can be used with Cricut Explore, Silhouette Studio (with the Designer Edition upgrade), Scan N Cut, and any other cutter that will work with SVG files. In order for Friday $5 Bundle program to be successful I need your help spreading the word so please tell your friends and announce it on social media. If we have enough of interest, we’ll keep the program going.

Now through Sunday, you can pick up this Halloween themed bundle including seven beautiful SVG files for just $5!
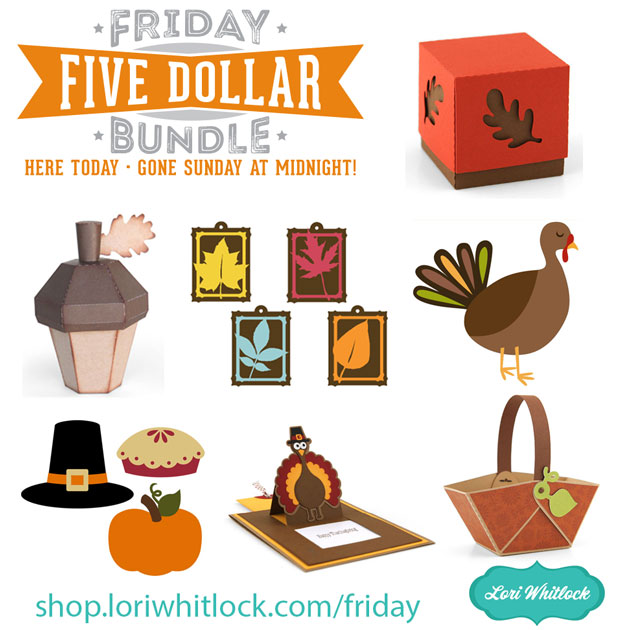
 

The cost of this bundle is $5, for $13.43 worth of SVG files, over a 62% savings! These files are perfect for Halloween crafting! But don’t wait, this bundle will only be around until Sunday at midnight!

Have a great day!


I Love Warm Hugs with Lezlye

Welcome Lori Whitlock Fans! Lezlye, here today with and adorable snowman card and a quick tutorial for you newbies to Lori’s files.

When you first import the file it is all together and black, if you were to size it all together and click cut using the cricut explore it would put all these on a black mat.

You need to click on the layers and un-group them once you have your desired size set.

Hit the layers button and each individual piece and then add the color you want to cut. Now it will cut them all individually on your desired colors.

This is just one way to do it. Now on to the card…

I used the I Love Winter 6 x 6 Pad that Lori designed for Echo Park Paper, along with the coordinating embellishments. I love to bling up my cuts with stickles and dimensional buttons or gems.

My card measures 5.5 x 5.5

Files and Products used:

Snowman

Nesting Banners

I Love Winter by Lori Whitlock for Echo Park

Have a great Day!


Save