3D Graduation Bouquet Tutorial

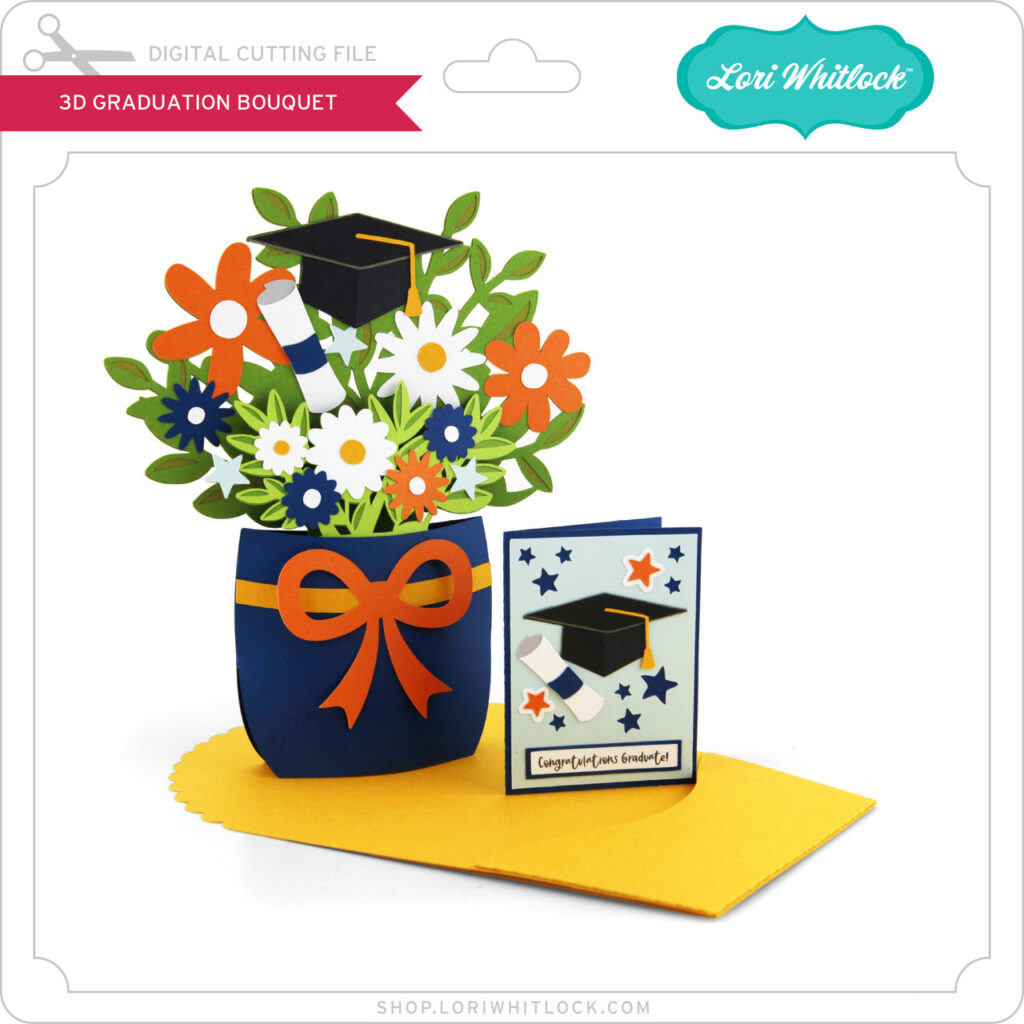
Hello, crafty friends! This is Lindsay, sharing a fun graduation project with you today. My oldest daughter graduated this past weekend, and we have been on the grad party circuit as we celebrate with her friends. It’s so fun to see how each party is uniquely decorated. We’ve also handed out a lot of cards and gifts at each stop. This project makes a beautiful centerpiece or card for that special graduate. The file is called “3D Graduation Bouquet,” and it includes the flowers, envelope, and a mini greeting card (svg, silhouette).

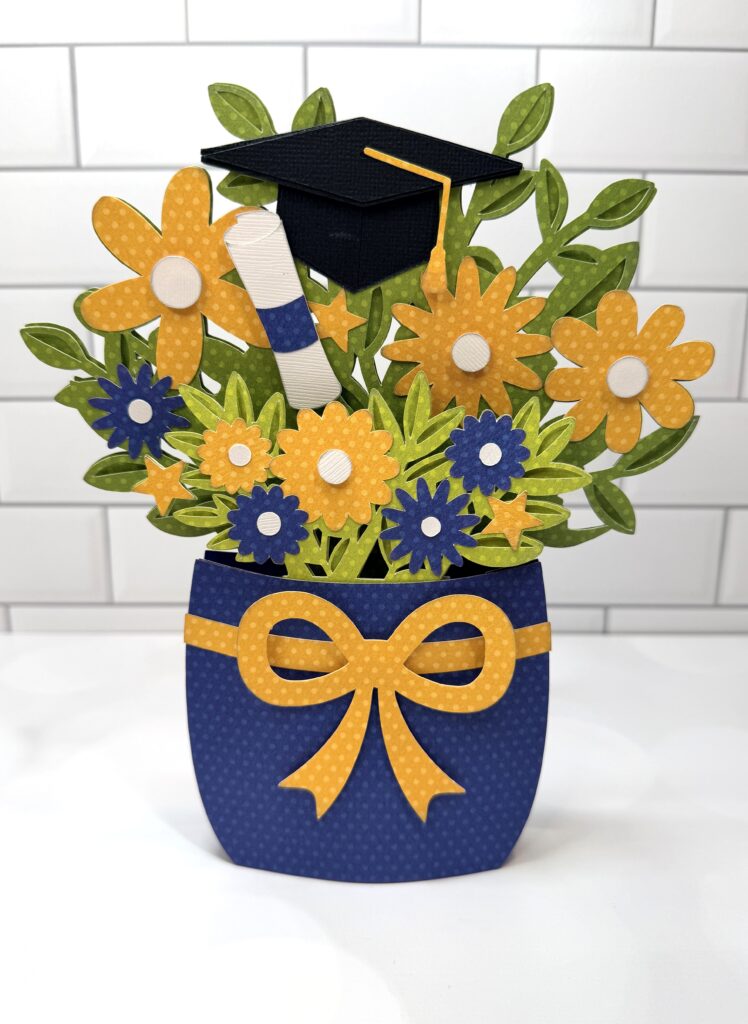
After I uploaded the file into Design Space, I decided to change the flowers to blue and yellow. All of the flower centers are white. This fits with the color scheme for the college that my daughter will be attending in the fall.

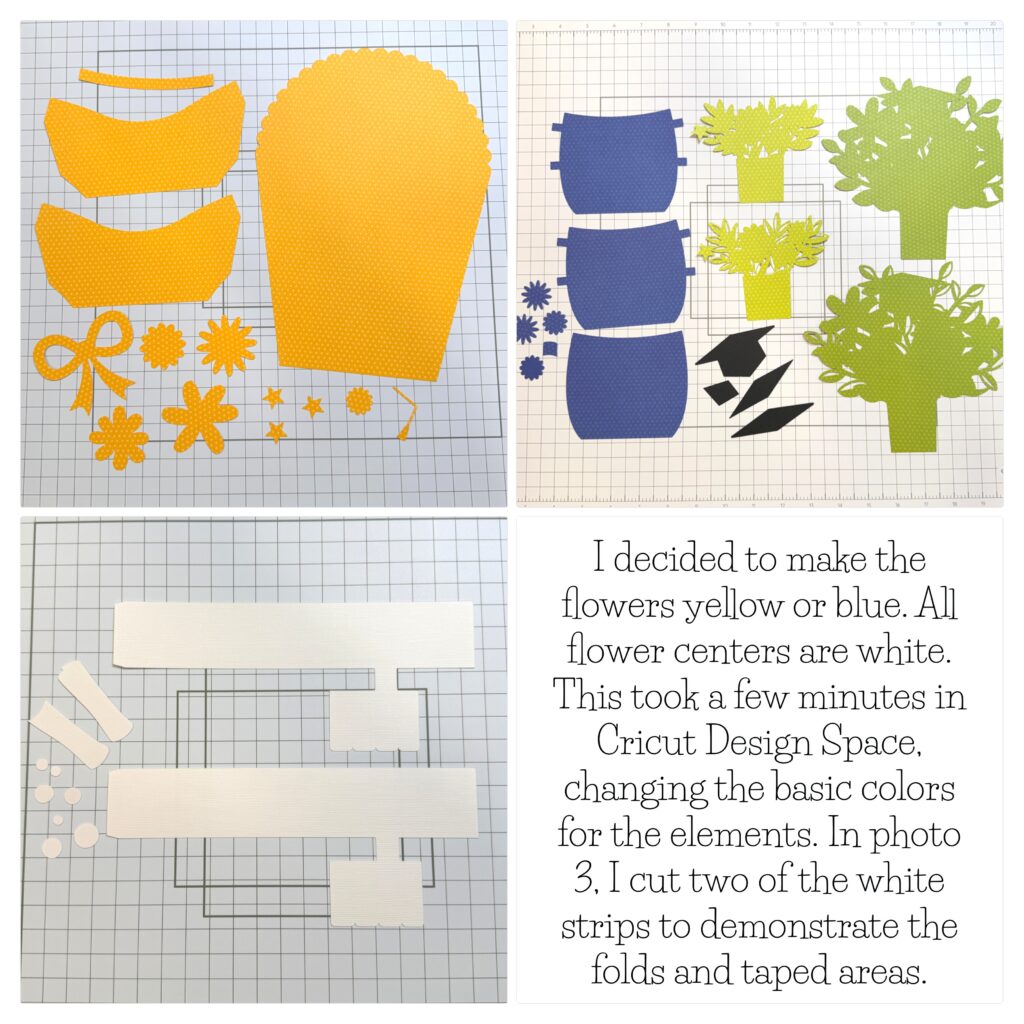
I began by assembling each layer. I used foam adhesive for extra dimension on the bow, flower centers and grad hat. I also popped up the top green layer for each floral bundle.

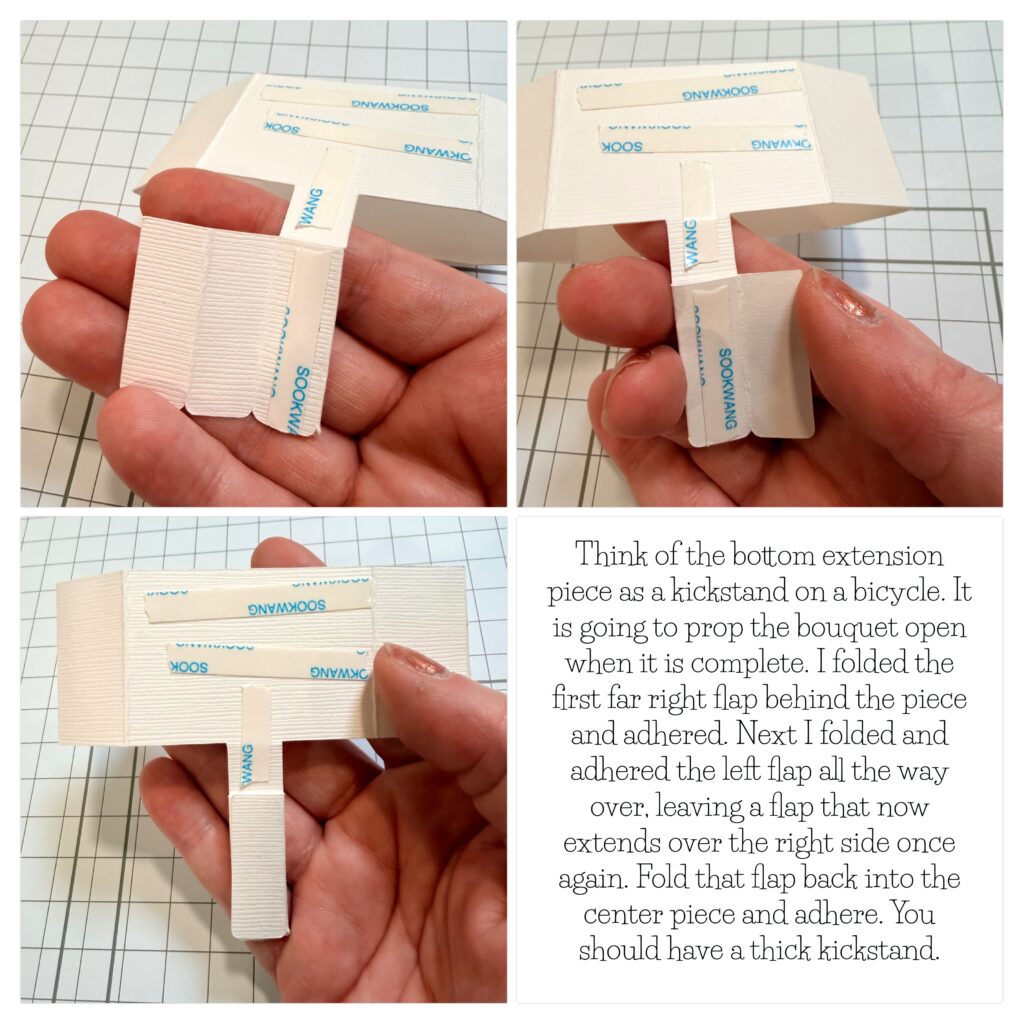
Next I shifted my focus to the white folding mechanism. This piece helps the bouquet flatten into an envelope, and it also uses a kickstand to keep the bouquet open and standing–perfect for a centerpiece! I used strong tape to hold the pieces together.   

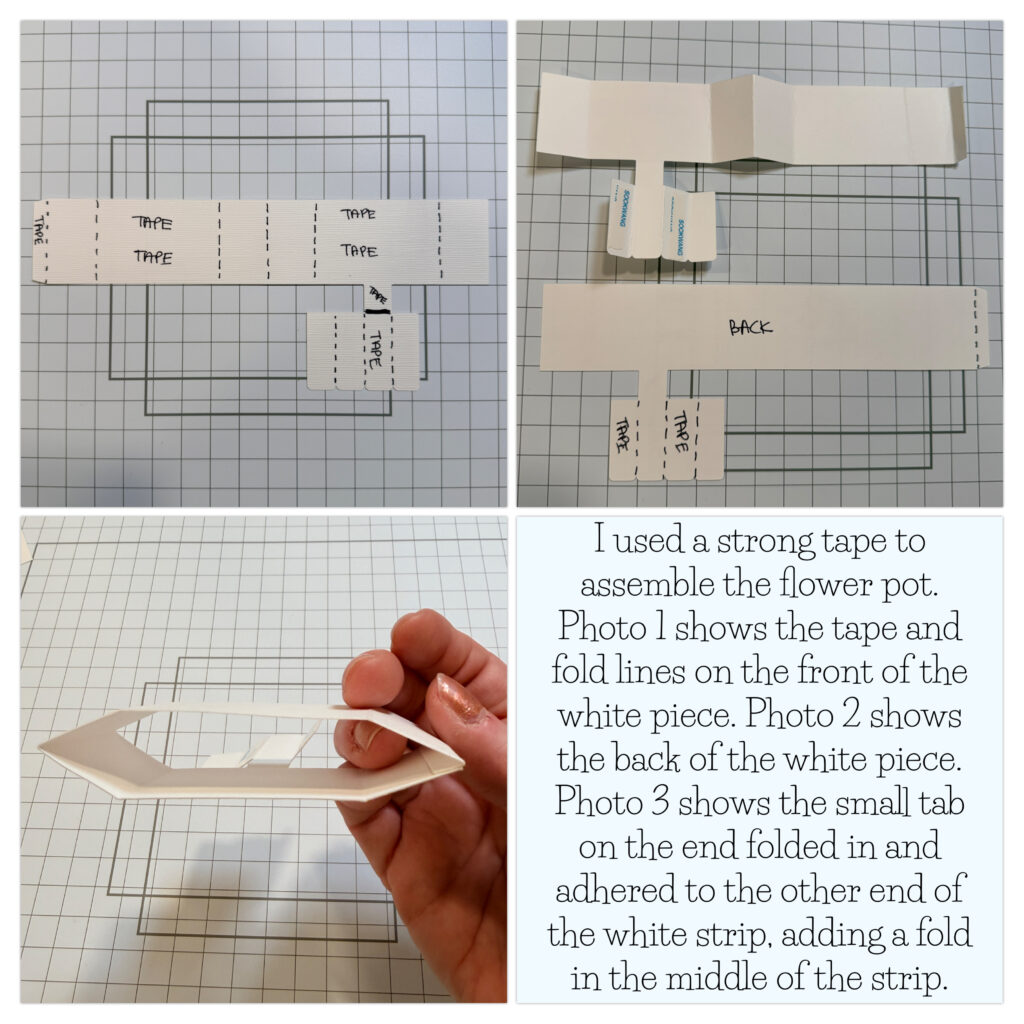
Moving right along, I folded the piece that extends down from the long white strip. I refer to this piece as the kickstand. You will basically accordion fold the tabs until you have one sturdy piece.

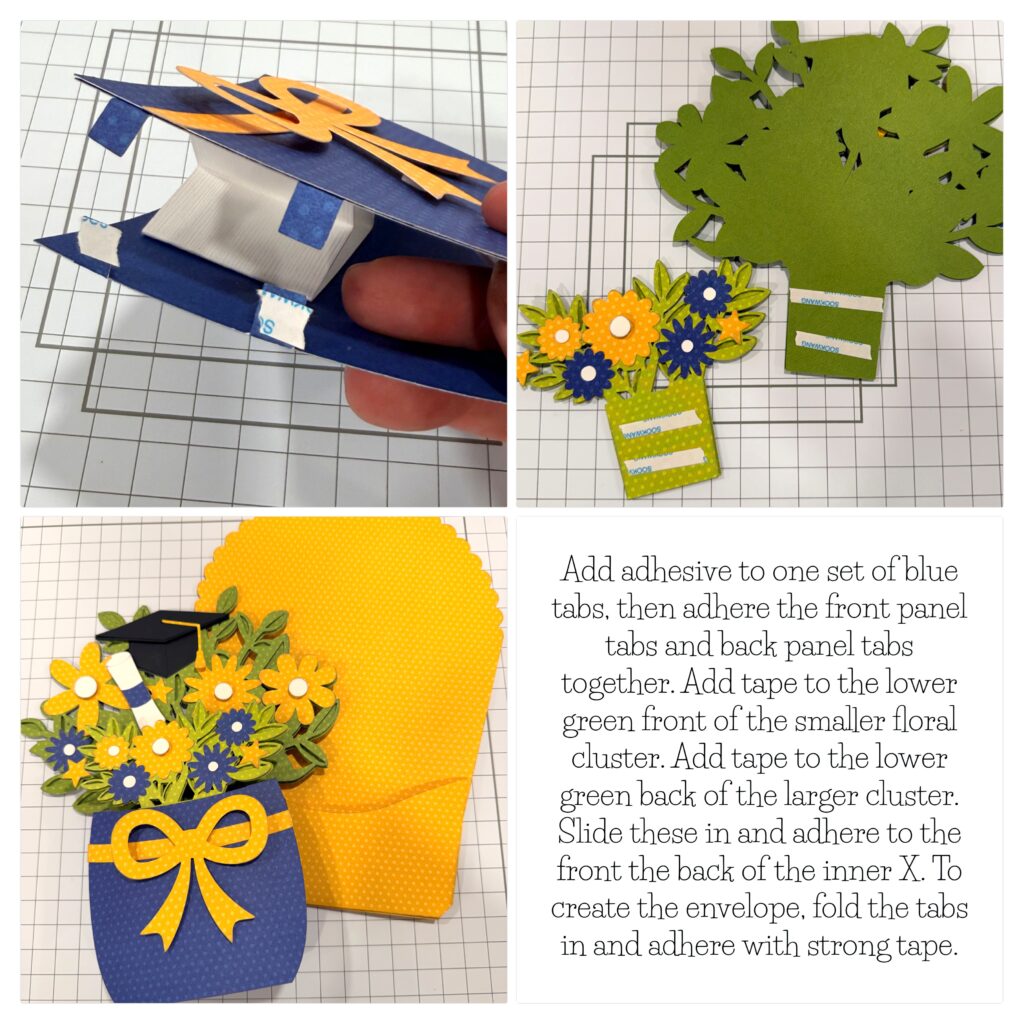
Now it’s time to fold the larger part of the white mechanism and attach it to the blue vase/flower pot base pieces. The kickstand will be even with the bottom of the blue base, but it is not adhered.

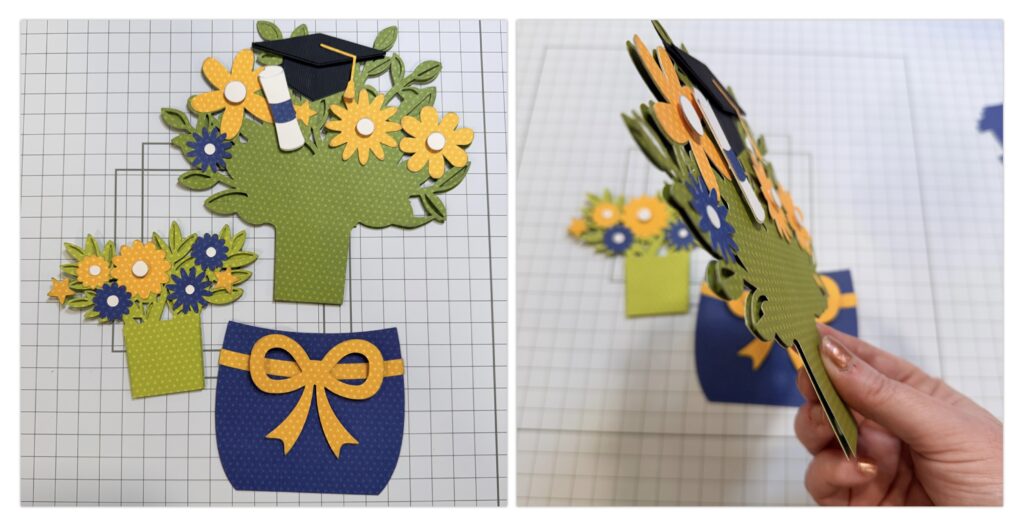
Finally, it all comes together! I added adhesive to one set of the blue tabs, connecting the front and back tabs. I also added adhesive to the front of the smaller floral cluster and the back of the larger floral cluster. These get adhered to the front and back of the white X piece, which is now sandwiched between the blue vase.

I hope this inspires you to create a bouquet card or centerpiece today! This file truly has a wow factor when it is assembled! Click on the picture below, and it will take you right to the file on Lori’s site. Thanks for stopping by the blog today! — Lindsay


Strawberry Jam Shaker Card

Happy Monday everyone! With spring right around the corner I’m starting to think of gardening and canning. My favorite times of the year. With that being said I created this great little You’re Sweet shaker card using the A2 Strawberry Jam Card cut found in Lori’s Shop or at Silhouette.

A2 Strawberry Jam Card

I turned the file into a shaker card. I did a tutorial awhile back how to turn most cut files into a shaker card. That tutorial can be found HERE.

I embossed my “fabric” top and added some bakers twine to the top. I also popped my strawberries with dimensionals. I cut extra strawberries to put on the bottom corner.

I used just some basic sequins for shaker bits with some little strawberries and paper buttons.

Thanks for stopping by and happy crafting!

Box Card Hedgehog Tulips Tutorial

Hello, crafty friends! This is Lindsay, and I’m here today sharing my first ever tutorial for the Lori Whitlock design team. I am so excited to share my projects with you. I use my electronic cutting machines (yes, plural!) on a daily basis. For today’s project, I have created the most adorable card using the Box Card Hedgehog Tulips file (svg, silhouette). I used the You Are My Sunshine collection from Echo Park and some additional cardstock.

After cutting all of the pieces, I started assembling the card in sections. First up is the hedgehog. I used brown ink to distress the edges of each piece. I used liquid adhesive to add the black oval behind the face of the hedgehog, then adhered the face layer onto the cream layer. After that, I assembled the small flower and added the arms to the hedgehog. I then used foam adhesive to attach the body of the hedgehog to the dark brown layer. Finally, the entire animal is adhered to the green base layer. I folded along the scored tabs and added strong tape to either side.

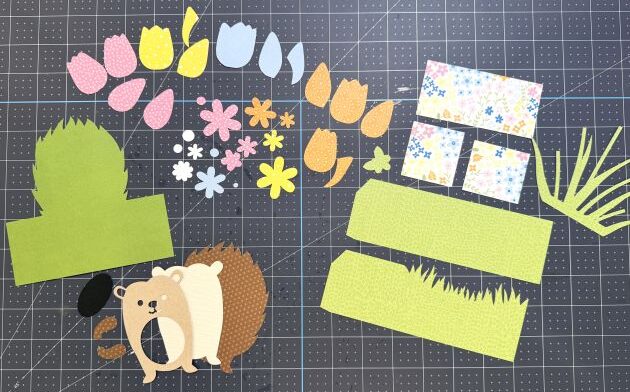
The next section is the tulips. Using liquid adhesive, I added the grass/leaves layer first. Next, I assembled each flower and adhered to the green base piece. I folded along the scored tabs and added strong tape to either side. It helps to have the sample image pulled up on Lori’s website. That way you can zoom in and piece the flowers together easily.

The final section is the box portion of the card. It is two large pieces that will come together to form the box. I added floral patterned paper as a cute accent.  I assembled all of the flowers and adhered them with foam adhesive just under the grass border. I added a sentiment sticker that says “Sending Sunshine.” Then I folded along the score lines and added strong tape to each tab.

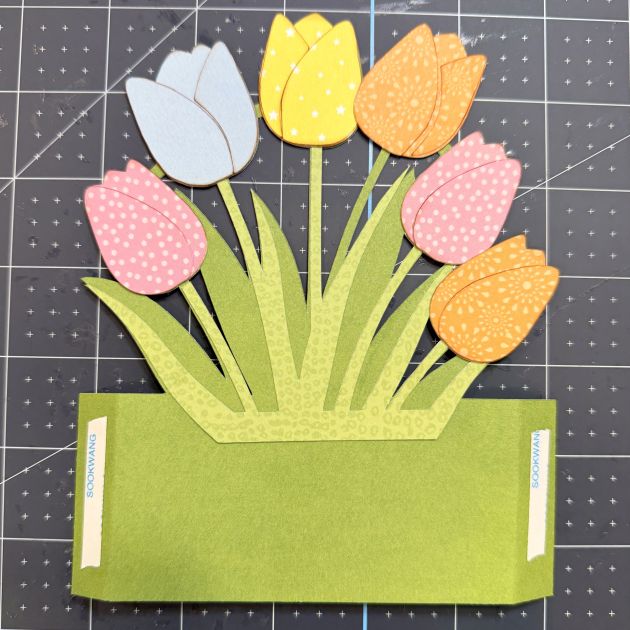
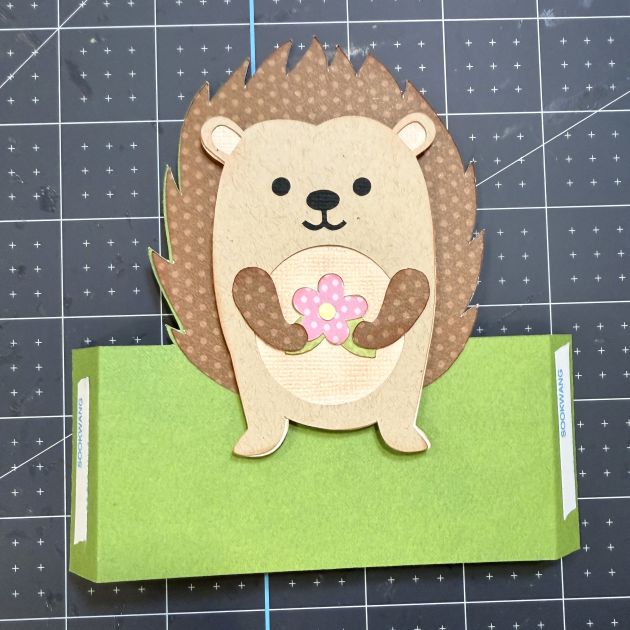
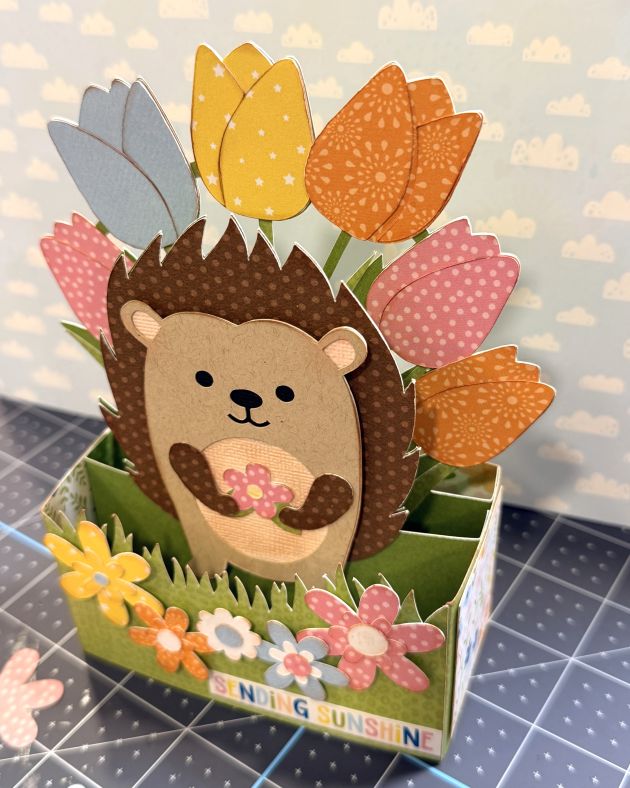
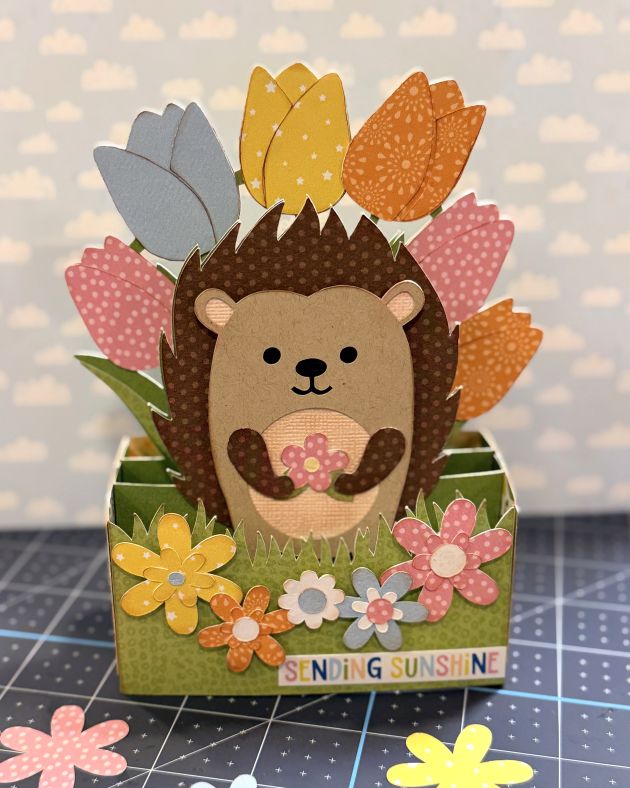
Now it’s time to put it all together. I connected the two box pieces, peeling just one tab, to create one long strip. I did not adhere the final tab just yet. Once I had the box shape in place, I added the tulip layer. I peeled off the tape on only one side and lined up the tabs so that they touched the back of the box card. Next, I peeled the tape off one side of the hedgehog layer and adhered the tab directly in front of the tulips section. I peeled off the other side of the tulip and hedgehog sections and attached them to the side of the box. Finally, I closed the outer box card. I’ve added an image that shows what the bottom of the card looks like. You can see how the sections stack on top of each other like tables.
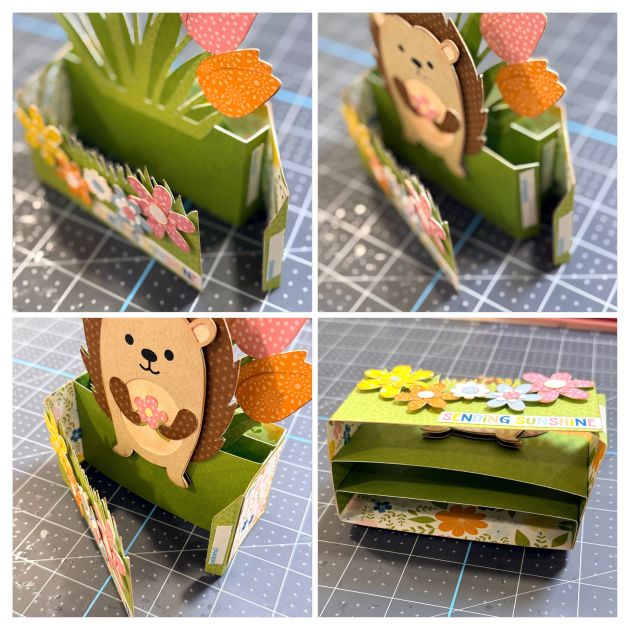
The end result is an adorable card that will fold flat into an envelope! You could easily tuck a gift card behind the hedgehog and use this for a birthday card.

I hope this inspires you to create today. Thanks for stopping by! Happy Spring!

Lindsay


Special Announcement! New Design Team Member

We’re excited to announce our newest team member, Lindsay Wahl. She joins our creative team and you will start seeing her posts tomorrow as she will provide us with her first tutorial. Let’s give her a warm welcome!

Here is her introduction:

Hello, crafty friends! My name is Lindsay Wahl of Lindsay’s Layouts. I enjoy teaching at scrapbooking events, and I am known for my layout and card kits. I’m so excited to be joining this amazingly talented design team. I have been a fan of Lori’s files and paper collections for years, and I use her files at most of my events. If I’ve ever given you a handmade paper gift, it’s likely a Lori Whitlock design that I have cut on my die cut machine! I can’t wait to share my creations with you.

I live in Fort Collins, CO, with my husband and three girls. I’m a Midwest girl at heart, growing up in central Illinois. When I’m not crafting, I’m reading, organizing or spending time with my family.

My Wonderful Family

One of my Favorite Designs

My Adorable Critters

We’re so happy you’re here with us, Lindsay!

12×12 Heart Background Page

Hello, crafty friends! Traci here and today, I’m sharing a 12×12 scrapbook layout that’s perfect for your Valentine’s Day photos. I created it with one of Lori’s gorgeous cutting files called Square Background Set 2 (SVG, Silhouette). It’s filled with the cutest heart cutouts and ohhhh, how I love it! 


12x12 Love Bug Valentine's Day Scrapbook Layout with heart cutouts, flowers, a rainbow, and a ladybug

I used the file to create the beautiful white heart border / background. Then, I added square photo mats made from pattern papers and embellishments from Doodlebug’s Lots of Love Collection.  


12x12 Love Bug Valentine's Day Scrapbook Layout with heart cutouts and pretty flowers

To make it, I started with a sheet of 12×12 red Bazzill cardstock as the base. I cut Lori’s file out of white cardstock and a blue pattern by Doodlebug called Buffalo Check and Woodgrain in the swimming pool color. 


12x12 Love Bug Valentine's Day Scrapbook Layout with heart cutouts and pretty flowers

Next, I layered the white paper on top of the base cardstock. I love how the red shows through the cutouts. But for a little more color, I glued the little blue hearts from my second cut all around the edge. 


12x12 Love Bug Valentine's Day Scrapbook Layout with heart cutouts, flowers, a rainbow, and a ladybug

The heart cutouts are perfect for my Valentine page and I love how they can be customized. You could make all of the hearts different colors or every other heart a different color.  

Here’s what the file looks like … 


Lori Whitlock Square Background Set 2 Cutting File


So gorgeous! And it’s definitely not just for Valentines Day – hearts can be used for anything! With a different paper collection, you could use this file for birthday, wedding, family, pets, etc. The possibilities are endless!

Lori has lots of amazing background cutting files in her shop and they’re so fun to create with. I hope today’s layout inspires you to use one in your next project. Thanks for stopping by the blog and happy scrapping! 

Blog * Shop * Facebook * Instagram * Pinterest * YouTube