Eye Candy by Mendi and Joy

Today we have 2 of our talented ladies on the blog, Mendi and Joy. Mendi is up first with an adorable Easter layout…
“Well, as promised I challenged myself to use Lori’s new Echo Park collections to create an Easter layout. What took me by suprise though was that rather than going with the more girly “Sweet Girl” line, I ended up using her “About A boy” line almost exclusively. Just goes to show how versatile these papers can be for all sorts of themes including a girly project.   When it came to embellishing my page I turned to Lori’s fun spring shapes.  I think one of my favorite things about diecutting my own embellishments (aside from saving loads of money) has to be dressing them up. With the help of some chalk ink, hand stitching, foam tape and buttons, Lori’s flower, chicks & butterflies totally came to life!   I used her LW Happy font for my title, topped with some Glossy Accents. I love how doing this gives you the feeling of a fancy alphabet sticker, but the beauty is it’s always the perfect size to fit your space and you’ll never running out of vowels”.   🙂
For today’s layout I used the following cutting files:
Also don’t forget that today is the last day to get all these great shapes and many more for 25% off using the promo code “March25” at checkout.

Next we have Joy with the cutest gift’s. Joy says…

These purse toppers are so cute!  Cut them to fit any bag you already have to turn it into an adorable gift holder.  It’s such a versatile file.  You can dress it to fit any occasion.  Use it to hold gift cards, candy and more!

Card and Chick by Christine

Today we have Christine showcasing her talents with us…
I love making Easter projects and as soon as I saw the Chick Candy Dispenser, I knew that I just had to cut it out.
I followed Lori’s instructions here on her YouTube Channel to put it together and then added a few of my own embellishments.  Don’t you just love googly eyes?  I think that they add so much personality to my little chick.
The front of the box opens up to reveal your treat of choice.  I had just picked up these yummy Hershey’s Kisses in Easter colors. The front will close and then you carry the box around by the handle at the top.
I added the feathers on the back of the box.  I had to use some really good glue to get them to stick but once they were dry everything was fine. I used orange glitter paper on the beak and the feet.  Sometimes, those little details can really make a project pop!
You can’t have a treat box without a card, can you?  So I looked through Lori’s card files and found this one which I think is perfect.  It gave me a way to incorporate the cardstock that I used on the chick into the card so everything is matching!!  I love how simple it is too.

And since it was so easy to cut out this card, I decided to make a matching envelope.  Again, I used the same yellow cardstock to cut it out.   What fun to have a bright yellow envelope.  I used the fancy envelope.  I love the beautiful flap.  Because I wanted to dress it up even more, I cut out a mat for my flap.  If you want to learn how I did that, please stop by my blog and I will show you how.  It’s really easy!

Supplies used:
Card Kit Happy Easter- Silhouette Store, Design Id #8564
5-Card Kit Elegant Envelope- Silhouette Store, Design Id #7680
Other Supplies:
Bo Bunny Double Dot Cardstock
Stampin Up! White Cardstock
Glitter Cardstock Die Cut With A View
Hershey Kisses  🙂

Card by Corri

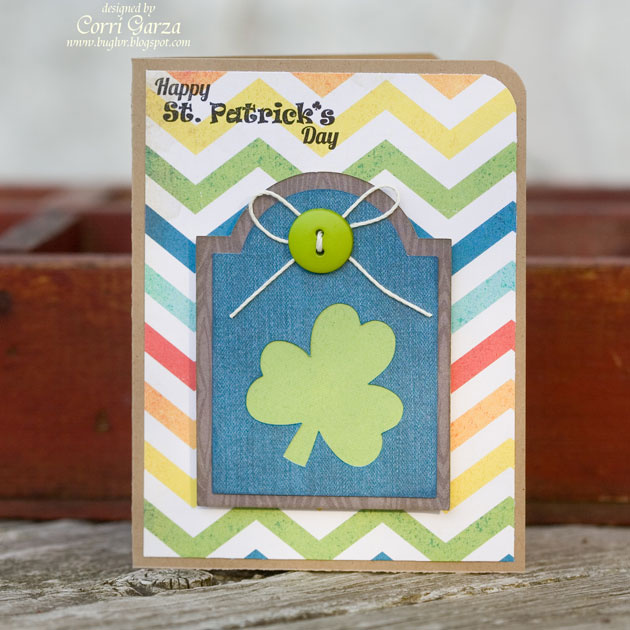
Today on the blog we have an adorable St. Patrick’s Day card by Corri, she says…

Hi everyone!  I have a quick St. Patrick’s Day card to show you today that made with files from Lori Whitlock.

I aligned one of the shamrocks from this set on one of the labels from the 6 Label Shapes set.

The paper is from Echo Park – All About a Boy collection that Lori designed.  I love this rainbow chevron paper….I think I need to stock up on it.  The sentiment is from Scrappy Moms Stamps.

Easter Card by Christine and Spring Frame by Natalie

I LOVE Spring/Easter decor. It is a great reminder that this cold, ugly snow will go away someday. Christine is first to share the joy today, she says…
Easter comes early this year so I wanted to get a head start on my Easter cards.  This pretty little basket filled with eggs is just the perfect focal point for my round card.  Check out the envelope too.  It’s so fancy with a matching rounded flap.
Files I used:
Easter Basket in the Silhouette store  #7909
Elegant String Tied Envelope in the Silhouette store #6239
Next up is Natalie with an adorable Easter Frame…
Hello everyone, I am starting to think spring might be around the corner.  We had a glorious weekend here, and we are actually starting to see patches of grass around.  So I guess that means it is ok to start decorating for spring.  I love spring, I love the flowers it brings and the colors of all the decorations.  So I decided to make a cute little shadow box with this cute little bunny I found in Lori’s shop.
To make this, I used Lori’s 5×7 shadow box frame found here, which also includes a tutorial with it, that came in handy when assembling it.  I also used her bunny silhouette found here, and her Hello Summer collection from Echo Park.
Once the frame was all built, I added the bunny with a little foam adhesive and added a little cotton to the tale.  I think it turned out great, clean and simple and ready to make my house happy with spring!


Hexagon Card by Mendi and Frame by Joy

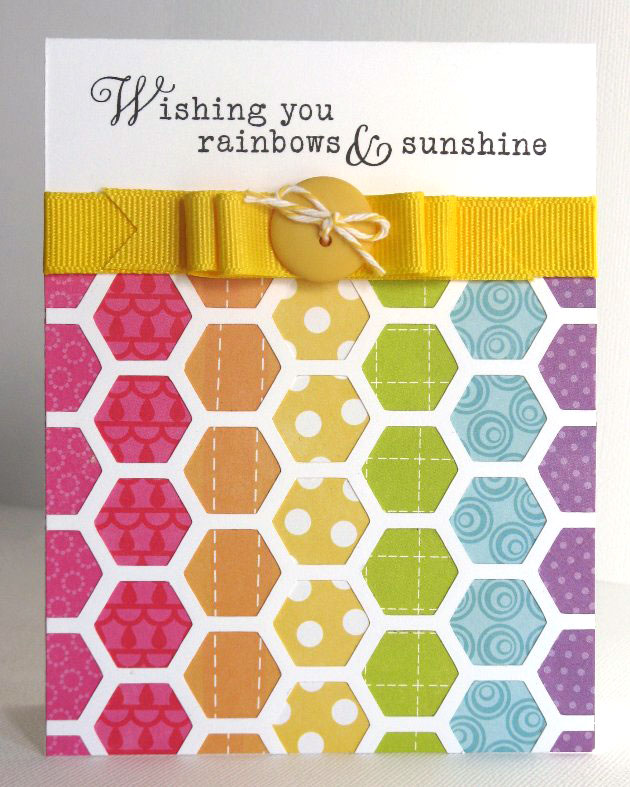
I always love to see what our Creative Team has done and today is no different. Look how fun and bright this cute card is. I agree with Mendi, I am ready for Spring right now, how about you? Mendi says…

“I don’t know about you, but I’m seriously ready for some sunshine so for today’s card I altered Lori’s Hexagon Card cutting file to form my card’s rainbow background pattern (using my favorite Summer Days paper collection which Lori designed for Echo Park).    I hope it shows that with some great basic shapes and a little creativity, you can really get a lot of mileage and different looks from a single cutting file!  Hop over to my blog today where I am sharing a video tutorial to better explain how I used Lori’s file to create my card.”

Next up is Joy. She is so great and creating decorative items for her home.

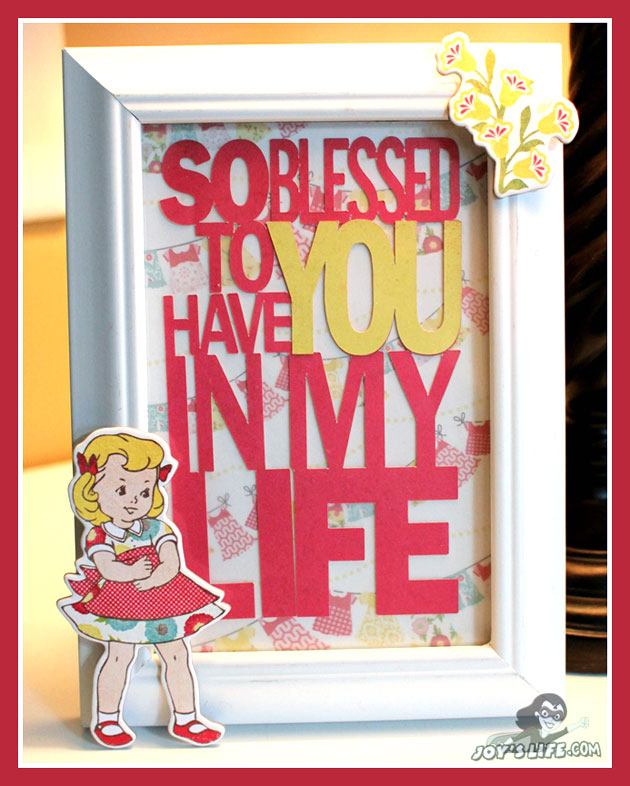
When I saw Lori’s Family Word Art Titles file in her store, I just had to have it!  This phrase is something that I tell my husband and children all the time, so it is especially meaningful to me.  I did something very, very simple.  I used my Cameo to cut the phrase out.  Then I cut a piece of paper from Lori’s new Sweet Girl paper line to use as the background.  There’s a trick though!  The patterned paper was just what I wanted to use, but the brightness of it competed with the phrase.  To solve this, I covered it with a piece of vellum.  Problem solved!  It muted the print just enough to make sure that the saying really stood out.  I put everything in the frame and added those precious chipboard images from Lori’s Sweet Girl embellishments.  I hope you’ll come by my blog for more projects and ideas.  Here are some things I’ve pinned on Pinterest that I made using Lori’s great files.  Happy crafting!