Box Card Pineapple Drink Tutorial

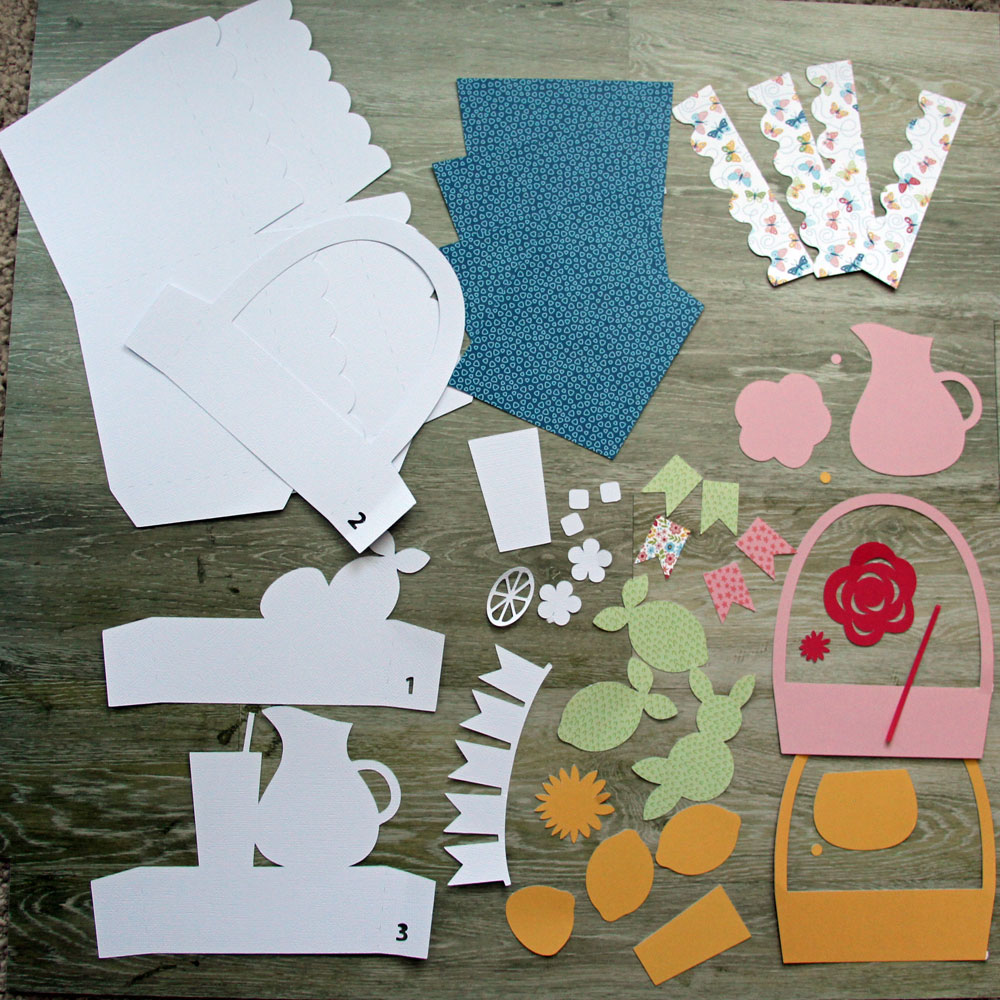
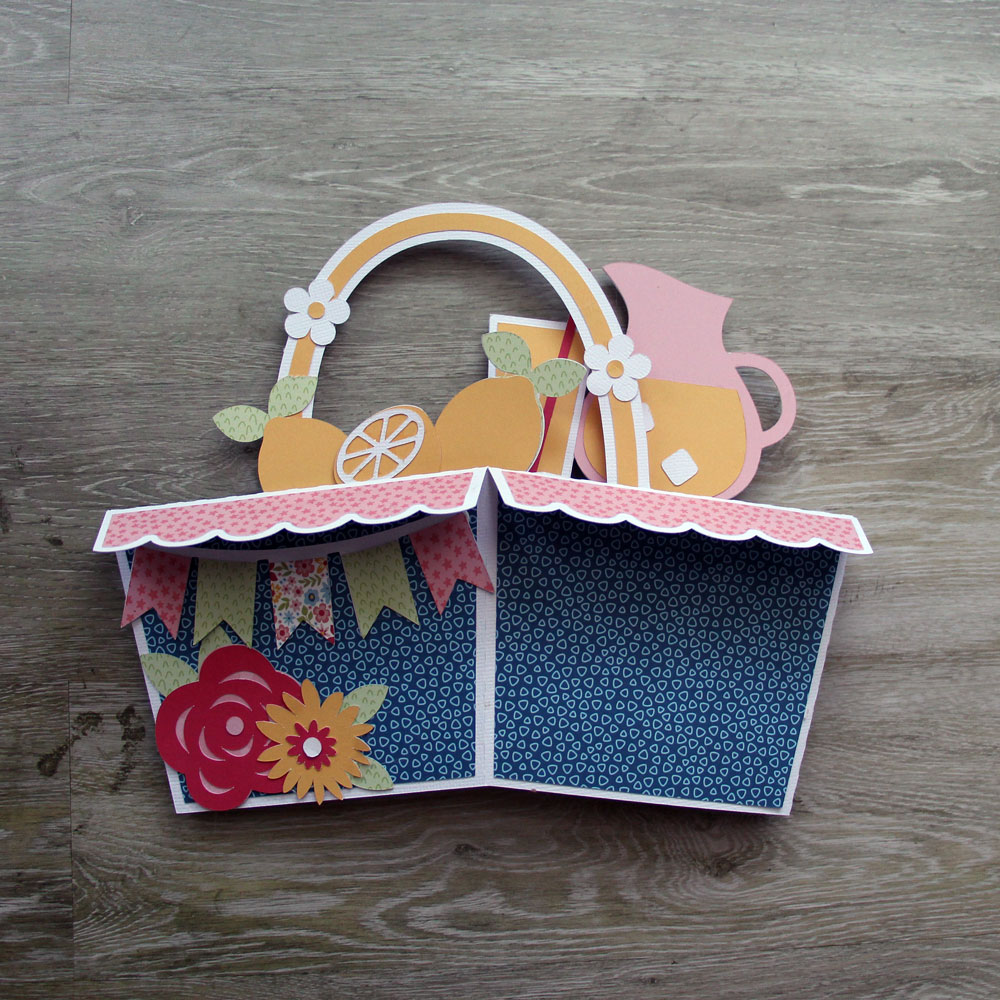
Good morning!! Today is National Refreshment Day. This beverage holiday toasts those moments of ice, cold refreshment. So what a better time to send one of these cute pineapple drink cards?!  Today I will walk you thought the assembly. First cut allyour pieces and lay them out.

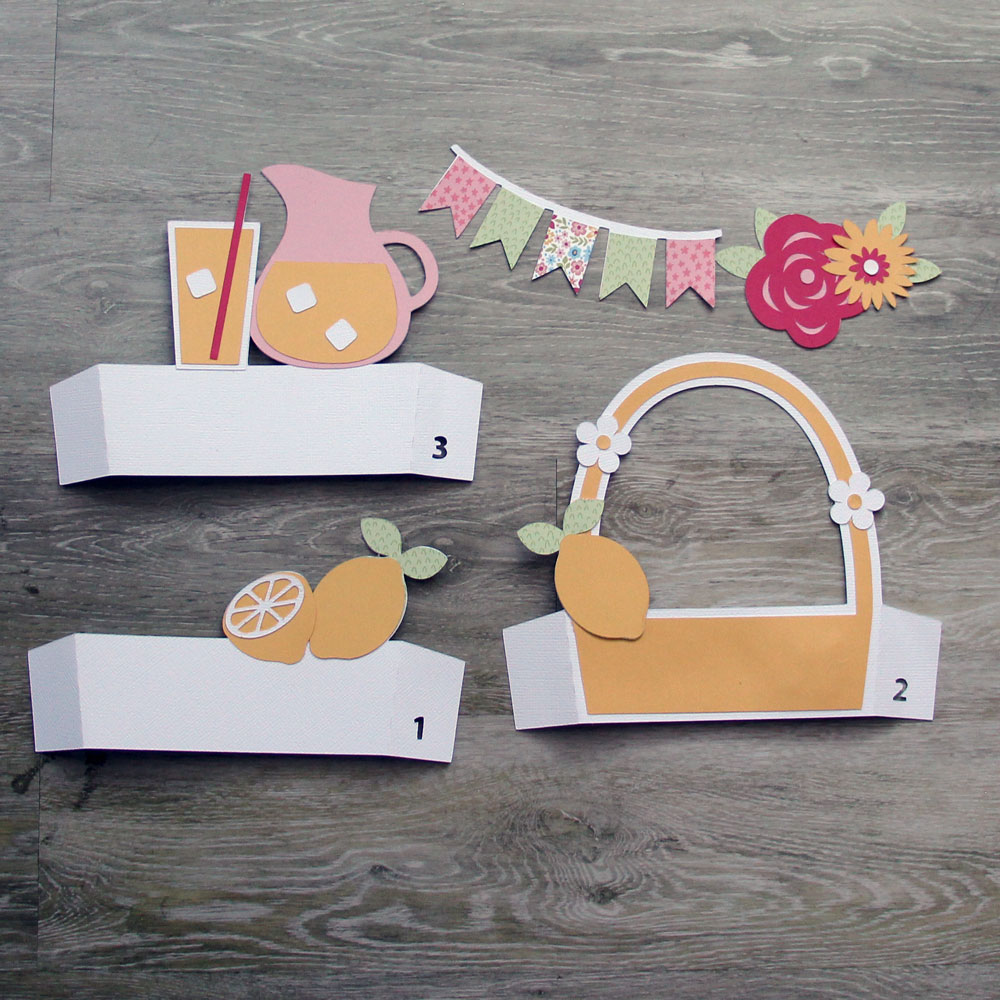
First I assembled the fruit and added score tape to the tabs. My paper is from Echo Park’s Little Things Mean A Lot collection.

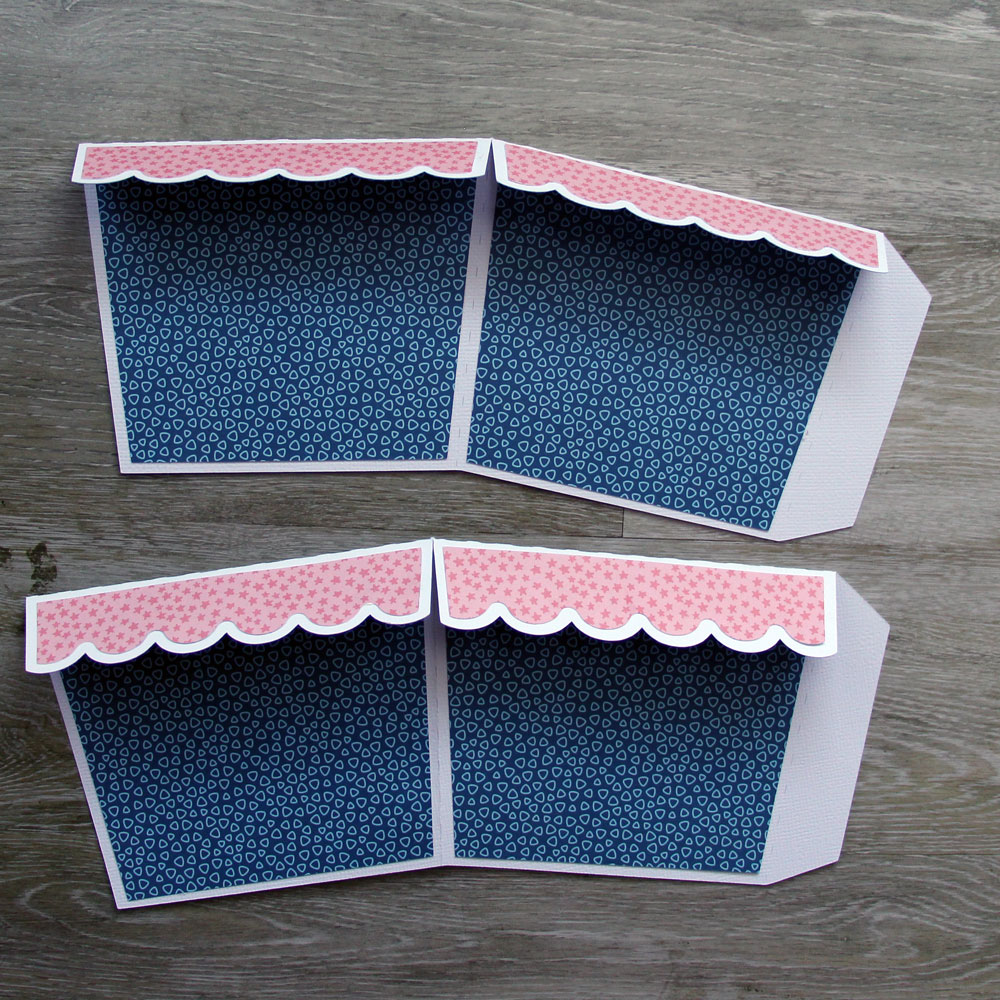
Next is the base, add score tape to the tab like in the photo below.

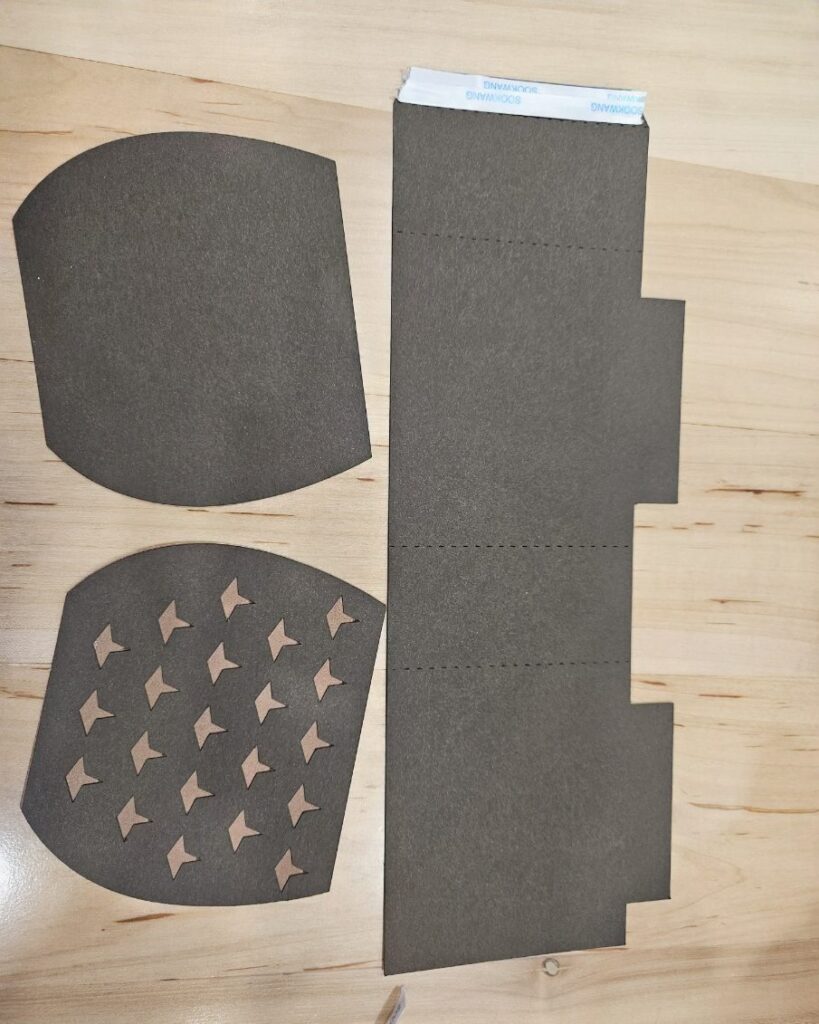
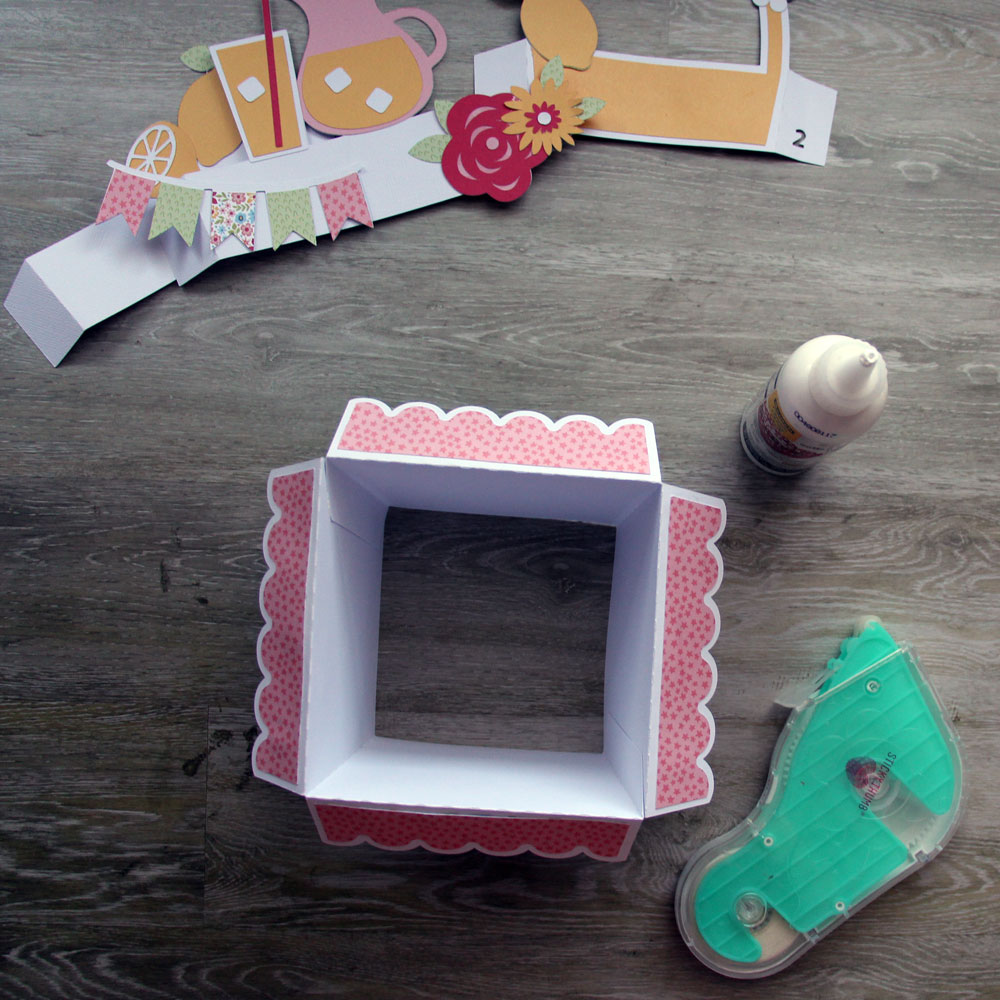
Make your box by folding where the perforations are and adhering your score tape to the inside of the neighboring flap.

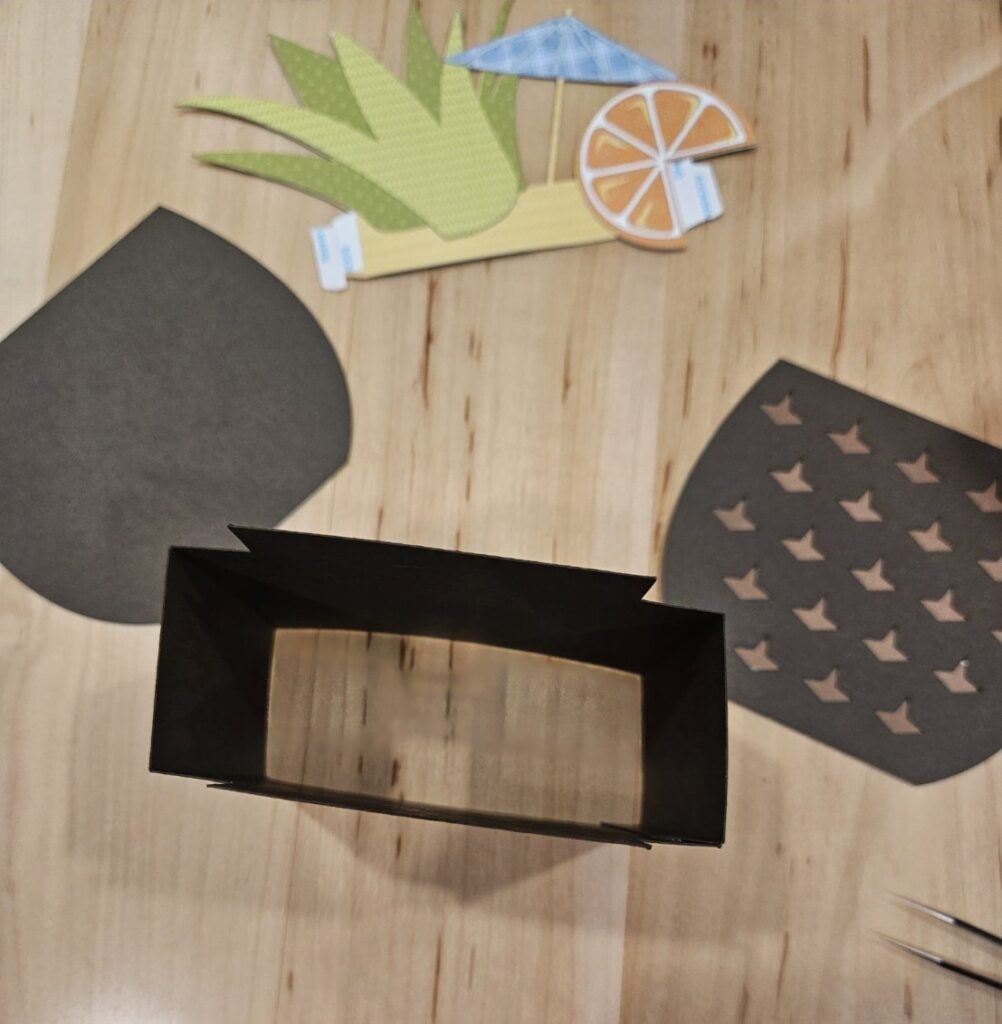
Add your dark brown piece to the light brown piece and then add both the back and front to the box making sure the small portion is on the bottom like below.

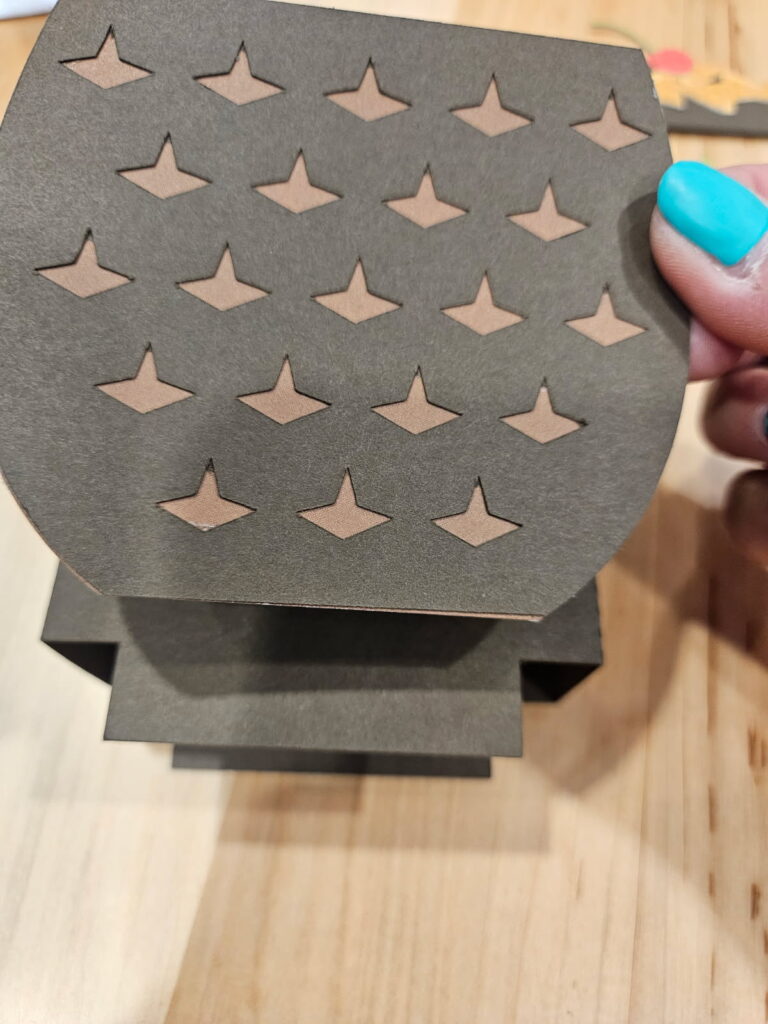
Once you have your front and back attached, fold the perforated tabs and line the top of the inset up with the top of the pineapple and adhere to the sides with your score tape.

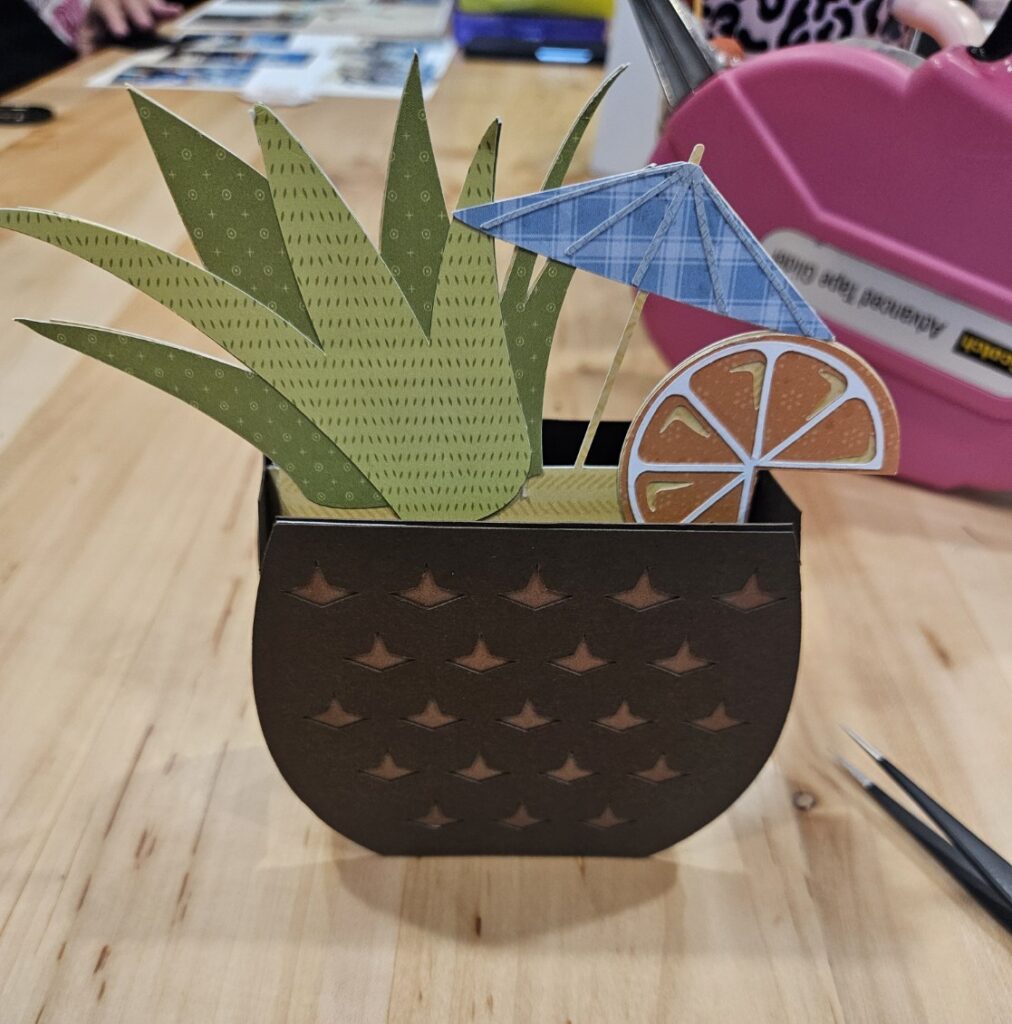
Add the second insert and get ready to mail your refreshment!

Thanks for stopping by and happy crafting!

Shadow Box Card BBQ Invitations

Summer Vibes & BBQ Invitations!

The first week of the summer holidays is behind us here in the Netherlands, perfect timing to dive into some summer creativity!

What better way to celebrate the summer than with good food, great company, and a little handmade magic? That’s why I created the “Shadow Box Card BBQ” – a fun and festive card that’s just bursting with summer vibes!

You can buy the file HERE in Lori her webshop, and its available in the Silhouette shop

This card is perfect for wishing someone a happy holiday, but let’s be honest… it’s even more fun to use it as a BBQ invitation for your friends and family! Imagine their faces when they open this cheerful card, packed with grill-goodness – it’s a guaranteed succes!

I absolutely love cards that are 3 dimensional and still fold flat to be sent in the mail, don’t you?!

So fire up the barbecue, grab your craft supplies, and let the summer fun begin. Whether you’re heading to the beach or staying close to home, there’s always room for a little handmade sunshine & good food with friends and family ☀️

Happy summer & happy crafting!
Tamara

A “Chickens” Mini Cookbook

 Hi everyone!  I have a fun little mini album to share with you today.  I created it with Lori’s new Echo Park Chickens collection.  I used every element of this collection, from the 12×12 paper pack, the frames n tags, the ephemera, enamel dots, matching cardstock and the 6×6 pad.  How blessed I am to have all this at my fingertips to create with.


I started by choosing four patterned papers to create envelopes.  I used this envelope, Nesting Window Card Envelope in Lori’s Shop.  I cut them and assembled, just ATG tape was used to adhere.
I then took all four and used my Cinch binding machine to create the little book with a spiral binding.
After I had my pages bound I then used this fun elements sheet to make 4 mini cards to go inside the envelopes. I cut my card stock 8.5 x 4. 25 inches and scored in the middle to make the little cards.
Simple little cards, my plan is to add my daughter’s favorite chicken dish recipes to these.  Hand written is the goal.
Next, I cut four library pockets and I just adhered these with ATG adhesive as well.
Next, four tags cut from an elements page to go inside my four pockets.  Again, I will add more hand written recipes.
I adhered the library pockets onto the back of the envelopes as you can see in the following photos.


This is a darling collection and just so perfect for creating a cookbook.


Thank you for stopping by!

Vroom Mini Album

Happy Monday, friends!  I’m glad to be back on Lori’s blog with a new project for you!  Today I used Lori’s adorable Race Car Box card file (SVG, Silhouette) and the new paper collection she designed for Echo Park called Vroom, to create a new mini album.  I also used one of my Artsy Albums acrylic albums for the perfect size book for gift giving. 


How cute are these race cars?  I love how the tires are separate and you can see the pattern paper peeking from behind.  I added enamel dots to the tires for an extra pop of color and shine. 

Inside the album I used papers from the 6×6 paper pad and some super cute stickers.  Isn’t that little road sticker fun?  I like how it jogs around the photos.
The 6×6 paper pad comes with a smaller version of the cards that are part of 12×12 sheets, so I used “Be Brave Little One” on the front of this flippie, and one on the front cover (see pic below).   

Any little guy or girl who is into cars and racing would love this album, so head over to my blog to see more pictures of this project and learn about the instructions I’ll have have in my shop soon!  Until next time, happy crafting friends!

Big Box Card Lemonade Basket

Hi. Today I’m sharing a tutorial for this adorable Big Box Card Lemonade Basket (SVG, Silhouette). Like the title says, this project is big and so fun.  No problem cutting all the flower center pieces!

1. First cut all the pieces.  If you are working in Silhouette Studio, remember to find all the white pieces that may be hiding behind a layer. Also think about any patterns you are using in your paper, and place them accordingly.  Notice the direction of scalloped flap pieces.  In this picture those pieces are a butterfly pattern.  But you’ll notice later, I used the other side of the paper.

2. Layer all the pieces, using the finished project image as reference if needed. Aren’t the ice cubes so fun!

3. Adhere the basket panels onto the basket piece.  Notice here that you will first fold down the basket flaps, and then adhere the scallop panels to the folded side.  Here I decided to use the other side of the paper!  Luckily these pieces are symmetrical so they fit perfect.

4. Time to assemble the basket.  Glue the flaps together to form the basket. I used liquid glue for the flaps.

5. Now insert the pieces into the basket and glue the flaps to the sides.  Do your best to evenly space out these flaps. They are numbered 1,2,3, so you can easily place them in the correct order.

6. Flatten the project and make sure the inside glue tabs are adhered well.  And adhere the front banner and flowers on to the basket.  Noting which panel is the front before adhering.

7. Tada!  Enjoy your finished project.  This is a fun one.  You can find some other of these Big Box cards in the Shop. I used Lori’s Have a Great Summer Collection. You can pick up your favorite Big Box card during Lori’s Sale!

Hope you are having a great summer!