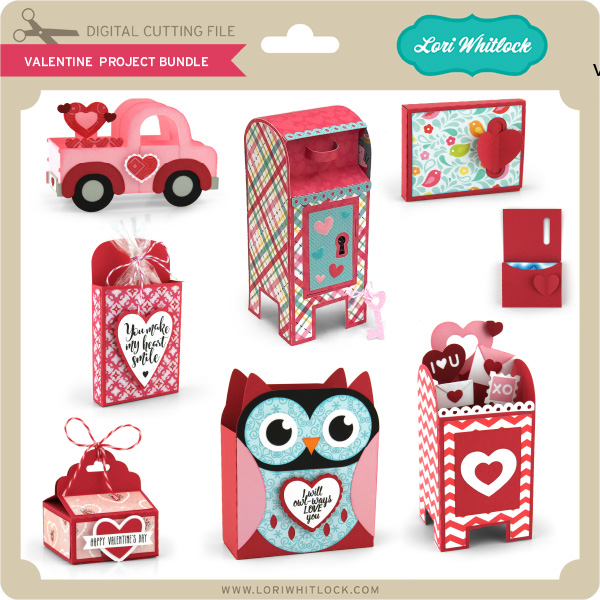
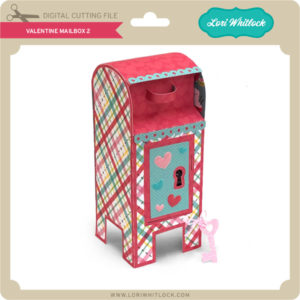
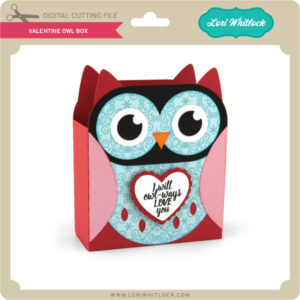
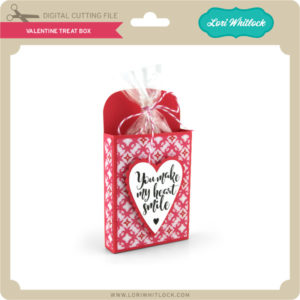
3D Pumpkin Box by Brigit

Hello everyone, I’m so happy fall is right around the corner, it’s my favorite season I just love making projects this time of year! Today I’m sharing the 3D Small Pumpkin box I made, it’s one of the items in the Kit of the Month for September at Lori’s shop, check the product description for details. You can pick up the Silhouette version of the file here.

The paper collection I used is called Celebrate Autumn by Echo Park, it’s designed by Lori, I absolutely love it! The orange cardstock and twine are from Doodlebug Design.

The stem comes with layer pieces but I wanted to show more of this burlap paper, it looks so real.

Sentiment sticker is also from the collection. There is also a 3D Large Pumpkin that matches this one, makes a nice set.

Thanks for stopping by and have a wonderful day!

Birthday Gift Card Bag with Corri

Hi everyone!  Corri here today sharing a quick project that I made for my daughter’s birthday which is actually yesterday!  I needed a last minute gift card holder and Lori’s Birthday Gift Card bag was perfect (Silhouette, SVG),


I usually love cutting out all the elements of the cut files, but since I am running a little behind getting things ready for her Birthday, I saved myself some time by just cutting the bag.

To assemble the bag, just apply glue to the glue tabs and gently bend the edges into place.  Since this design has a curve, it helps to hold it in place until the glue sets completely.  Next, attached the handles with brads.


To embellish my cute little bag in a hurry, I turned to elements from Lori’s Happiness is Homemade Collection from Echo Park.  There are so many cute pieces in the collections to easily make a simple project beautiful when you are in a time crunch.

Thanks so much for stopping by!

September Creative Team Blog Hop and 30% Off All SVGs and Commercial Licenses!

Welcome to our September 2018 Creative Team Blog Hop! The creative team has been working hard on some new projects to share with you that will get you in the crafting mood. We also have a big release of new SVG files for you this week and a GIVEAWAY! Be sure to check them out below. Oh, and there is also a FREE FILE for you!

This week we have a 30% OFF SALE going on at Lori’s SVG SHOP. ALL files (and commercial licenses) from Lori Whitlock, Kolette Hall, Doodlebug Design, Dresden Carri, Paige Evans, Rivka’s Renditions and SAS Creative are on SALE now through Saturday, September 15th! Be sure to use coupon code: SEP2018 (case sensitive) at checkout in the SVG SHOP. (Only one coupon code per order allowed)

To thank you for joining us in the hop today and sharing the hop with your friends, we have a gift for you! TODAY ONLY, You can download this Autumn Fall Harvest Gratitude file absolutely FREE! Be sure to go grab it while you can.

We have some super fun new files this week! Be sure to go shopping while all files are 30% off this week when you use code SEP2018 in my SVG Shop!  And, as always, my new files are available in the Silhouette Design Store as well.  This week we have the new So Much Pun Collection from Doodlebug Design!


a Rafflecopter giveaway
 And, last but not least… would you like to see what our amazing team has created? Click the links below for some wonderful inspiration. If you get lost come back here to get on track Lori Whitlock,  Kathy Skou, Anita MulcaheyBrandie AdamsBrigit Mann, Michelle Zerull,  Aimee KiddAshley Cook, Cathy Harper and Corri Garza!! Thanks again for dropping by! Have a GREAT day!

A New Friday $5 Bundle

Hi Everyone! Today we have a new Friday $5 Bundle! It will ONLY be available until Midnight Sunday and when it’s gone it’s gone. These SVG files can be used with Cricut Explore, Silhouette Studio (with the Designer Edition upgrade), Scan N Cut, and any other cutter that will work with SVG files. Help spread the word by telling your friends and announcing it on social media!

Now through Sunday, you can pick up this Fall Card bundle including 5 SVG files for just $5!

The cost of this bundle is $5, for $9.95 worth of SVG files, over a 49% savings!  But don’t wait, this bundle will only be around until Sunday at midnight!

Have a great day!

Bless This Home Sign Tutorial with Cathy

Hi everyone!  I have a super simple tutorial to share with you…adding vinyl to create your own wooden sign.  It’s been quite a while since I have created with vinyl and I thought maybe that is so for some of you or this is an easy way to give it a try.  This was super simple and quick to do, and it turned out perfectly.  It will make the perfect gift or I just might keep it for myself.  Lol.

First, gather your supplies.  I use Orcal vinyl 651 in mattle black, a 10 x 10 white washed wooden canvas from Jillibean Soup, cricut transfer tape and some fabric flowers.  I chose fabric flowers over paper crafted flowers just so might sign would last longer and I wouldn’t have to worry about the flowers being fragile.

Then I picked a beautiful design from Lori, wreath bless this home, silhouette store or wreath bless this home in Lori’s Store.  I just love all of these different wreathes she has designed…simple and gorgeous.  I sized it down on my silhouette to be approximately 8 x 8 so that I could center it on my wooden canvas.

I then cut it out with my setting set on 2 for the blade and 8 for speed, it cut perfectly.  Next weed your design, I just use a little paper piercer to weed mine.  The paper piercer is sharp and small enough to get into the delicate pieces to weed.

Your next step is to layer your weeded design with transfer tape.  I cut mine to exactly the size of my weeded design, 8×8.  Peel back transfer tape and carefully adhere to your design.  Rub over it firmly, making sure your design adheres to the transfer tape.

Carefully place onto your wooden canvas and then burnish.  I used a plastic hotel key, like a credit card to burnish the vinyl.  It took me a bit to do as the wood was a bit rough and took a little extra effort to get the vinyl to adhere.  Once your design is adhered, slowly pull back the transfer tape.  Have your credit card handy to burnish some places a tad more if you see any of the vinyl not sticking.

Once my design was adhered, then I added the flowers, Echo Park Celebrate Autumn enamel dots, a little twine, a few buttons….but it still need more.  I then added some paper leaves that I cut with Lori’s  Thankful Leaves Die Set using the Celebrate Autumn Solids Paper Pack.

Loving how this turned out, I will be trying another one soon and maybe even try stenciling a design with one of Lori’s amazing files very soon!