Last Day to get 50% Off SVGs- Black Friday Sale Ends at Midnight!

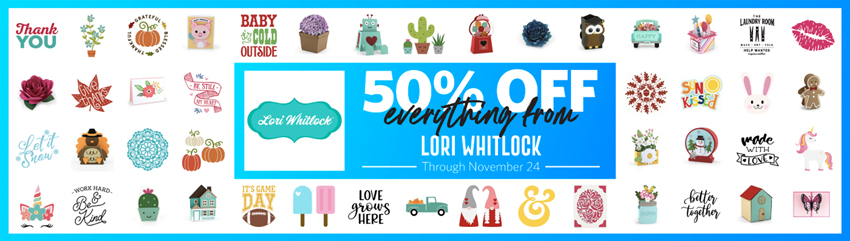
Today is the last day of our Black Friday sale in the Lori Whitlock SVG Shop!  Get 50% Off All SVGs, Fonts, Pattern Fills and Commercial Licenses when you use code BLACK2020 at checkout!  It’s the perfect time to get those items on your wish list!

Don’t miss out on this fabulous deal!  SVG Sale ends at MIDNIGHT!

( These downloads include SVG files that may be used with Cricut Explore, Silhouette (Designer Edition upgrade required), Eclips, Brother Scan and Cut, and any other software that will open SVG files. )

And are you looking to get a new cutting machine?  Make sure to check out the Black Friday Deals over at Silhouette!  Each of the Cameo and Portrait bundles come with 100 Exclusive Lori Whitlock Designs!  Be sure to use Code LORI at checkout to take advantage of these fabulous deals!  Don’t wait, Silhouette’s Black Friday Sale ends December 7th!

And here is a peek at the Lori Whitlock Designs that are available EXCLUSIVELY with these Portrait and Cameo Bundles!

Have a great day!

Black Friday Sale – All SVGs in the Lori Whitlock SVG Shop 50% Off

We have a great Black Friday sale happening now through Monday in the Lori Whitlock SVG Shop!  Get 50% Off All SVGs, Fonts, Pattern Fills and Commercial Licenses when you use code BLACK2020 at checkout!  It’s the perfect time to create some holiday cards, tags or boxes!

Don’t miss out on this fabulous deal!  SVG Sale ends Monday, November 30th.

( These downloads include SVG files that may be used with Cricut Explore, Silhouette (Designer Edition upgrade required), Eclips, Brother Scan and Cut, and any other software that will open SVG files. )

And are you looking to get a new cutting machine?  Make sure to check out the Black Friday Deals over at Silhouette!  Each of the Cameo and Portrait bundles come with 100 Exclusive Lori Whitlock Designs!  Be sure to use Code LORI at checkout to take advantage of these fabulous deals!  Don’t wait, Silhouette’s Black Friday Sale ends December 7th!

And here is a peek at the Lori Whitlock Designs that are available EXCLUSIVELY with these Portrait and Cameo Bundles!

Have a great day!

Lumberjack Santa Tuxedo Box Card

Hello everyone and Happy Thanksgiving! Marcia here today. I have to admit, I slacked off in sending Christmas cards the past few years. Sometimes life is just so crazy busy! I want to rectify that this year. With Covid restrictions going back into place, it doesn’t look like I’ll get to see distant family for a while. Plus I should have lots of time on my hands since I won’t be going out anywhere. I love making box cards because they do double duty as Christmas decor. Don’t worry, these do fold flat for mailing! I was drawn to the new Lumberjack Santa Tuxedo Box Card cut file because I thought it would appeal to the young and old alike. This cut file can be found here (SVG / Silhouette ).

I used the Lori Whitlock A Lumberjack Christmas collection to create my card. The woodsy pattern papers are perfect! I added a just few stickers to embellish. Santa would look awesome in a plaid shirt too, I think. I’ll have to make another card and try out that look. For an assembly tutorial, see Lori’s YouTube Channel here.

There are lots of Holiday themed cut files available in Lori’s shop. Go check them out and join me in my card making frenzy. Thanks so much for stopping by.
~Marcia

Thanksgiving Turkey Décor Tutorial

Hello crafty friends! Aimee here with a tutorial on this sweet little 3D Turkey 2 (Lori’s ShopSilhouette). Is he not the cutest?!?! I made 2 of these guys…meet Tom Turkey and Timmy Turkey. I will be proudly displaying them on my dining room table this Thanksgiving!

Today I have a tutorial all set up if you are planning on making this little guy or guys for your Thanksgiving table. First thing is picking out the papers and fire up your paper cutting machine.
Cut out all of your pieces and get ready to assemble.
 Adhere all of the box together but NOT THE TOP PIECE.
The wings are next. Turn the box where the lid faces you, slide the wing tabs into the slits in the box and adhere the tabs to the inside.
Adhere together all of the pieces for the head. I used some pop dots on the back side of the hat for some dimension. Also, I used some black enamel dots for the eyes. Then fold on the perforated neck line backwards.
Next thing to do is slip the head tab into the slit in the top of the box and adhere it to the inside of the box. Then adhere the top of the box to the rest of it.
Now your turkey should look like this…
I also used some pop dots on the feet to make it look like they are somewhat sticking out.

Glue the tail to the back of the box and your Tom Turkey is complete and ready to adorn your Thanksgiving table!!
And we are done! I made a “baby” turkey too by downsizing the original file.  Like I said, are they just the cutest?!?! I know they aren’t the traditional colors but I really love the warm green tones against the orange!
Thanks for stopping by today! Wishing everyone a Thanksgiving full of love and thankfulness!
Aimee