Hi friends! Traci here and today, I’m sharing a cute travel mini album that I made using Lori’s NEW cutting file titled Hidden Binding Mini Album Suitcase. (Silhouette) The fun shape is so versatile and can be made with any paper collection for your vacation needs. Since summer is ahead, I created it with a sunny beach theme.🌞
Lori has designed a bunch of these hidden binding shaped albums and I love them! I’ve made the rectangle, apple, house, flower, telephone, and tag shape. Today’s mini is about travel, so the suitcase shape is perfect!
For this “fun in the sun” project, I used the Doodlebug Design Seaside Summer Collection. But it would also be great for winter skiing, a visit to the lake, a cabin in the mountains, a road trip, a cruise, or any vacation.
Let’s take a quick look inside, then I’ll explain how I made it.
I decorated each page with 6×6 inch papers, fun die cuts, cute stickers, and a few enamel dots.
Isn’t this cute? Such a colorful little scrapbook. For larger photos and details of each page, visit my blog here.
Now, for the tutorial …
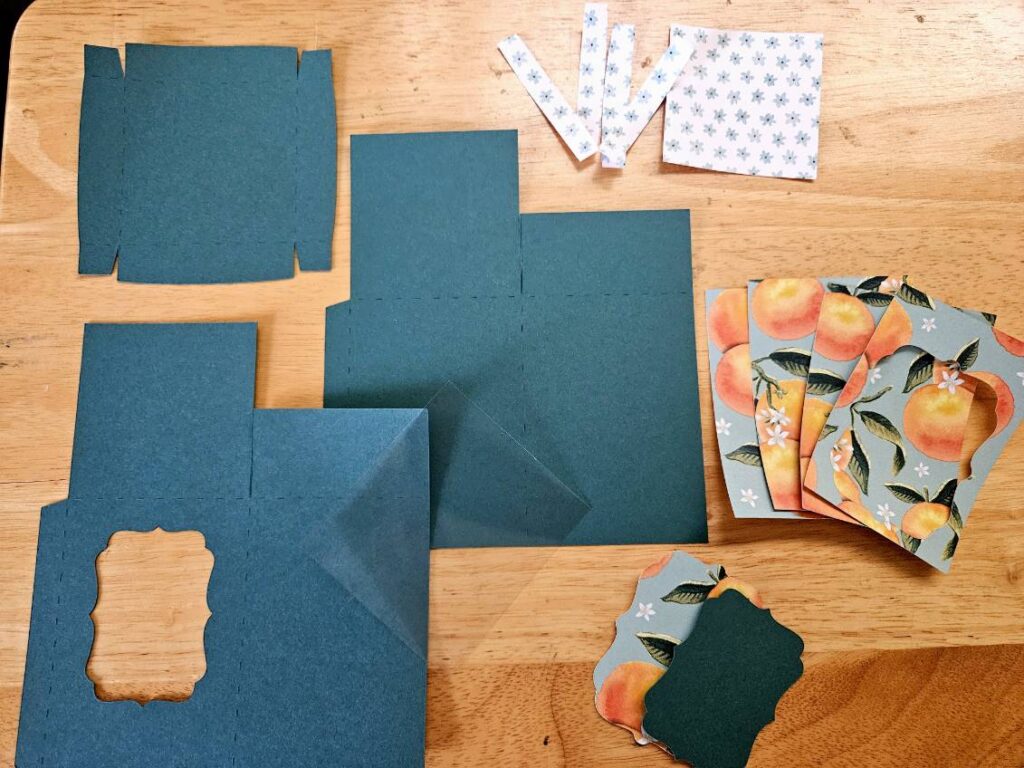
1. First, I cut out the pieces. Since all of the suitcase shape pages are sandwiched using 2 pieces, I needed 10 total … 2 for the front cover, 2 for the back cover, and 6 for the 3 scrapbook pages inside.
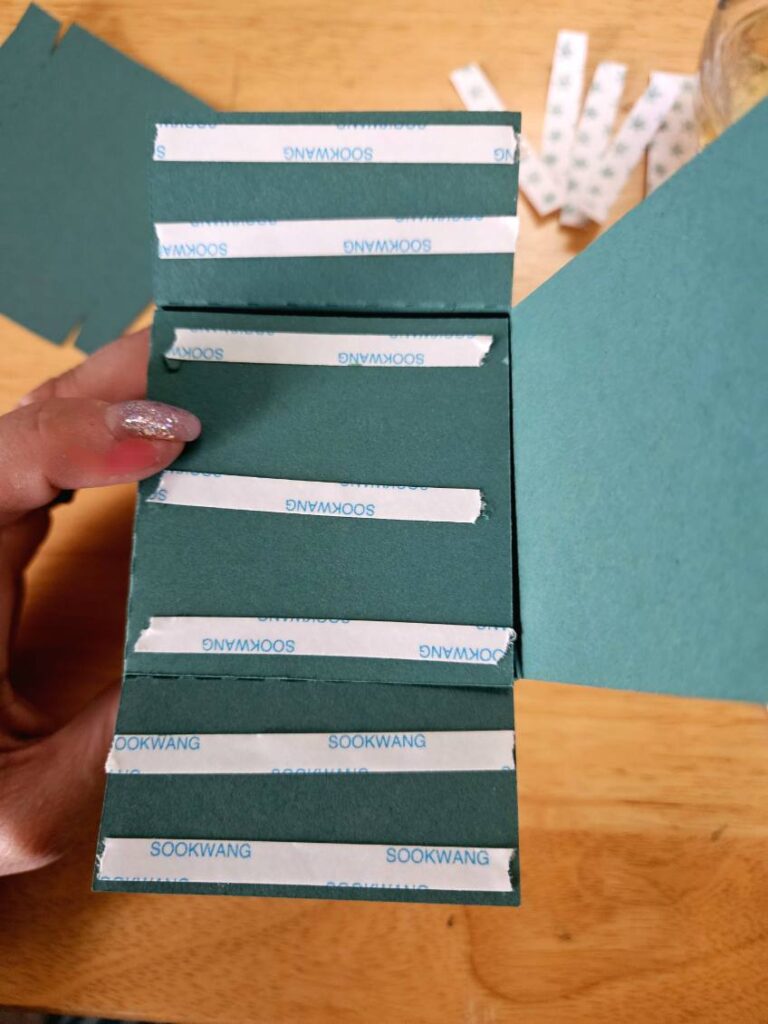
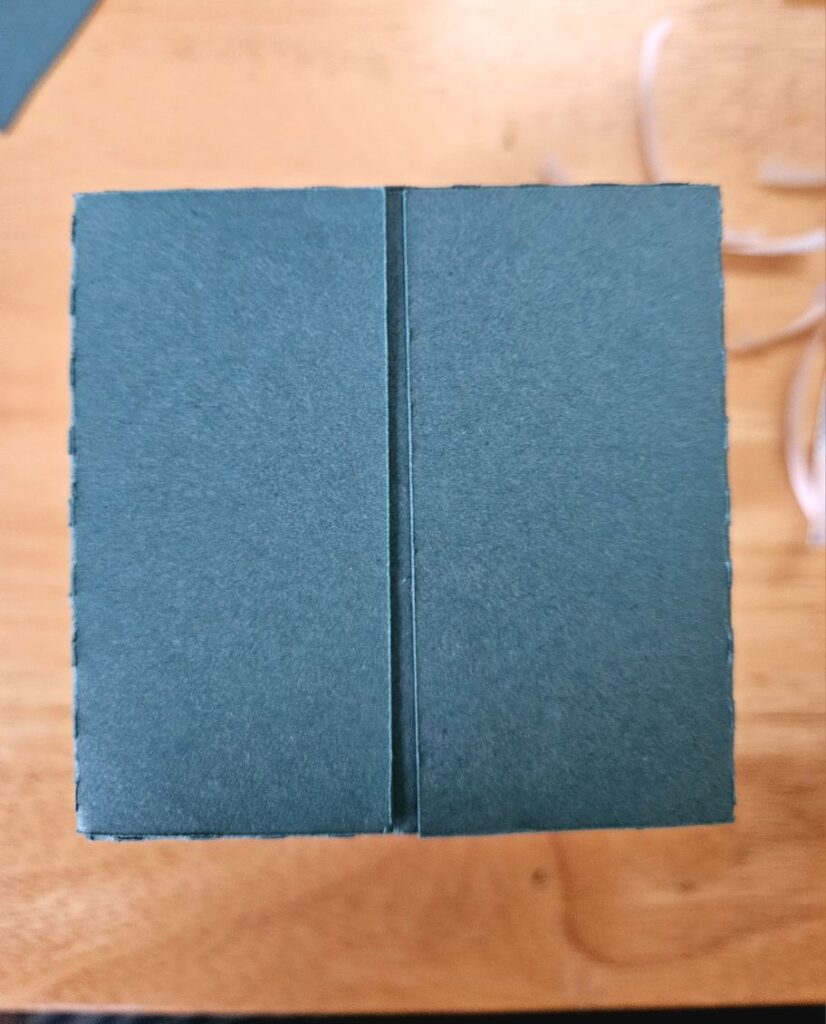
2. Note that the center piece is scored for the binding. The score
lines are a bit hard to see on the brown image 😊. I folded along each
of the score lines to create “mountains” and “valleys”.
3. Then, I added adhesive inside the “valleys” and stuck the sides together.
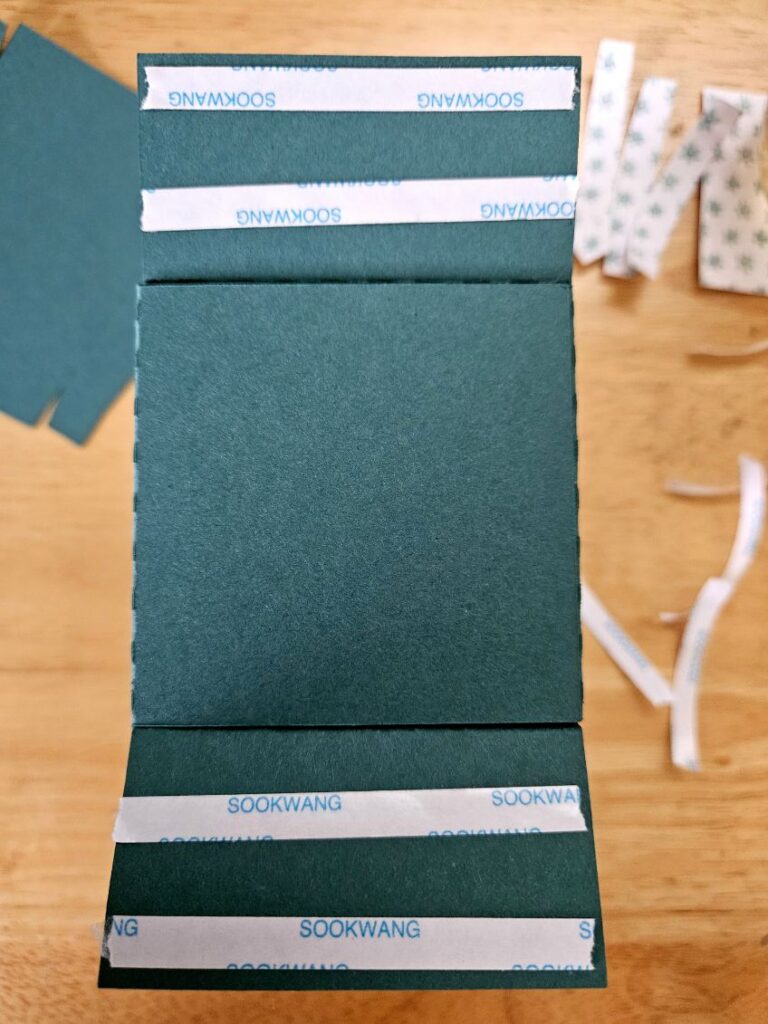
4. Once the binding piece is adhered, it should look like this ^.
5. And the back side (the spine) will look like this ^.
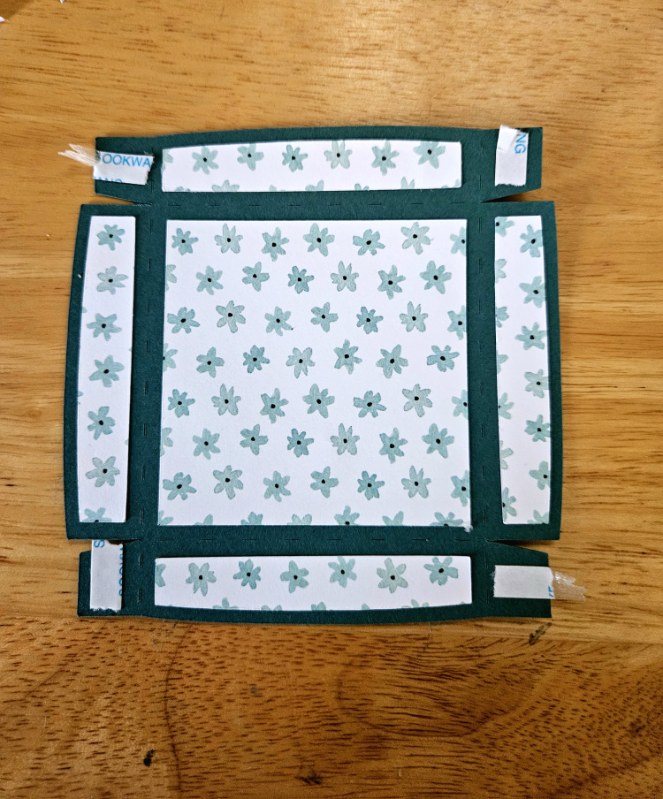
6. Next, the cutting file comes
with pieces for the pattern paper that goes on top of the white spine, front and back covers, and suitcase shaped pages. I chose the blue waves print and adhered it to one side only of the exterior pieces.
7. Once that was done, I adhered the front cover to the front of the first
spine fold. Then, the back cover to the back of the last spine fold. When it’s opened up flat, the
album covers and spine should look like this ^ on the outside.
… and like this ^ on the inside.
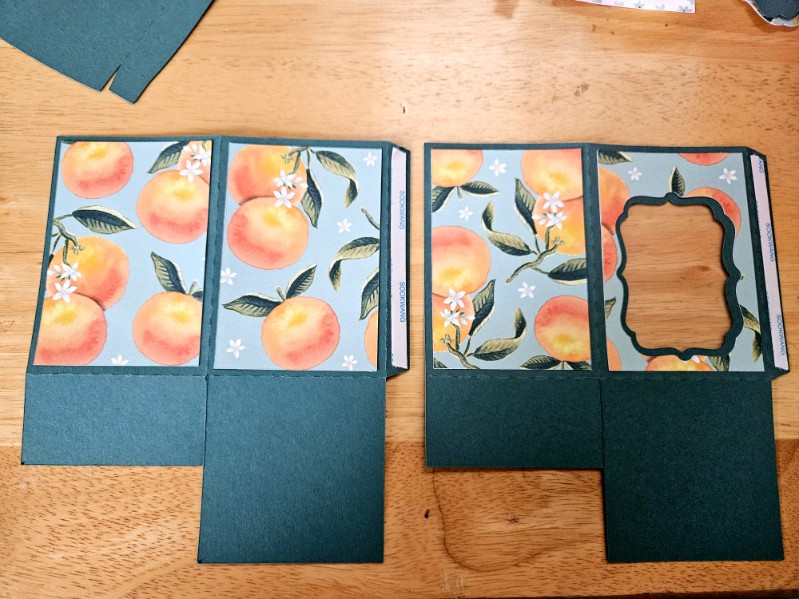
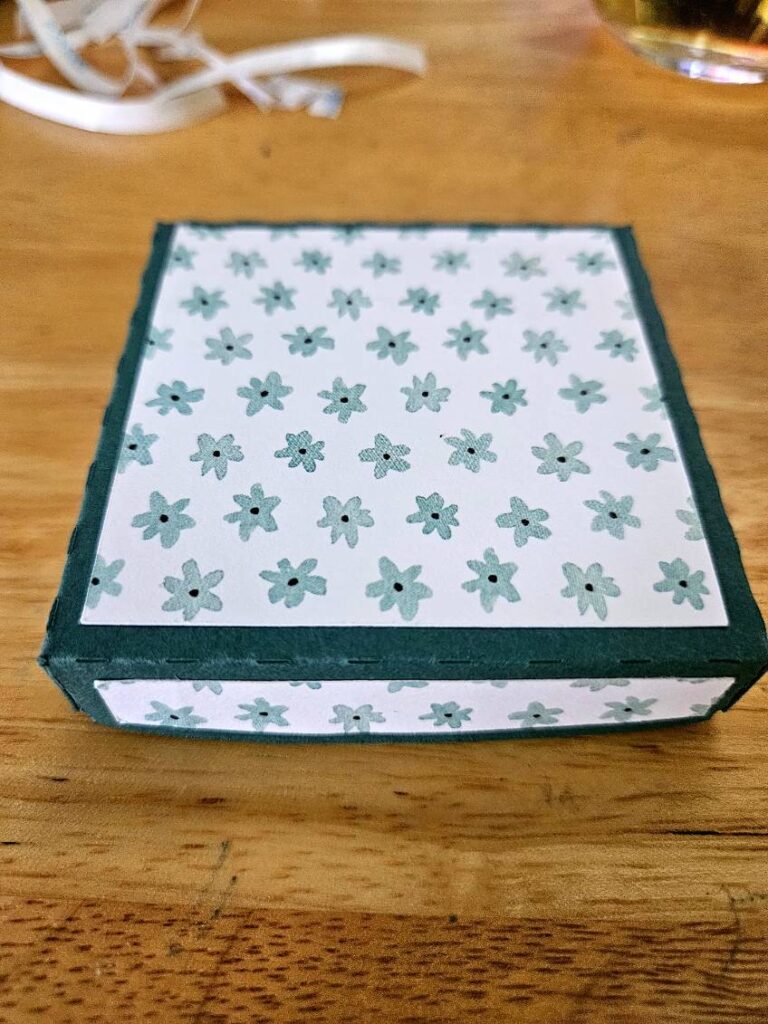
8. Next, I adhered pattern paper to ONE SIDE ONLY of the 8 remaining
suitcase shapes. Since these will be stuck back to back to another suitcase page, only one
side will show.
9. Now it’s time to assemble the album. I adhered one suitcase page to the inside of the front and back covers. Then, I added one to the front and back of each spine fold … sandwiching them on the
“mountain” and creating 3 double-sided pages (6 individual pages). Including the inside covers, this gives you 8 scrapbook pages in total.
I hope you’ll try this fun project made with Lori’s Hidden Binding Mini Album Suitcase (Silhouette) cutting file. It’s perfect for your vacation photos, or … it makes a wonderful gift idea. Have a great day! 😊
Blog * Shop * Facebook * Instagram * Pinterest


%20LW(11).png)
%20LW(9).png)
%20LW(14).png)
%20LW(15).png)


%20LW(16).png)


