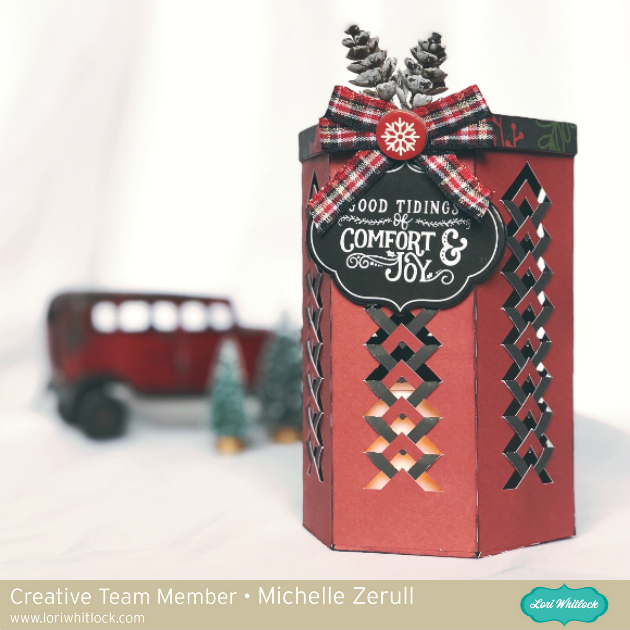
Can you believe that it’s November already? I love November! I love that I can craft Fall projects, as well as Holiday projects. Today I would like to share a tutorial for the Hexagon Fold and Tuck Lantern Found in the Lori Whitlock SVG Shop as well as the Silhouette Design Store. It’s my first Holiday project of the season!
 This is such a fun project. The lantern looks difficult, but it’s not. It is an easy project. Let me show you step by step, how to put it together.
- Using your electronic cutting machine, cut all three paper elements. Double sided paper looks wonderful with this project since you will be seeing the underside.
- Using the main large piece, the body of the lantern, carefully lift the chevron elements to a vertical position, as shown. I like to do one row at a time.
- Take the last vertical chevron piece and tuck the arrow portion under the empty piece behind it as shown in the photo. Continue tucking the chevron arrows until you complete the row.
- Repeat steps 2 and 3 until all rows are completed. Doesn’t that look awesome?
- Fold along all score lines. There is a large glue tab at the end. Apply your adhesive along that tab and glue the ends together to form a tube. Sit the tube aside to dry completely.
- Now you will form your lid. Fold along all score line. Apply a small dot of glue to one of the triangle tabs and glue it to the lip of the lid as shown. Continue gluing the triangles one at a time until the hexagon lid is formed. Sit the lid aside to dry completely.
- Now it is time to attach the base to the bottom of the lantern. Fold along all score lines. Place the inside color up facing you. Working quickly, apply a bit of glue to all tabs.
- Take the hexagon body tube and place it right over the base as shown from the top view.
- Using a pencil or bone folder, make sure the tabs are securely attached to the inside of the base as shown.
- Allow your lantern to dry completely before decorating.
Now that’s finished, you can have fun decorating it! Using hot glue, I added a tiny spray of pinecones and chipboard elements from the Echo Park Paper Celebrate Christmas collection. I also put a battery-operated LED light inside. It makes a beautiful display of light and shadows! Remember to never use a real candle. The paper will burn!

Thanks for visiting today. Don’t forget to share your own Hexagon Fold and Tuck Lantern with us on the Lori Whitlock Facebook page or post it on Instagram and hashtag it #loriwhitlock so we can see what you’ve made.
Have a great day!
Michelle