Box Card Spring Flower Pot Tutorial

Hello crafty friends! Today I have a quick assembly tutorial for one of the new Flowerpot box cards. I used the Box Card Spring Flower Pot file (SVG, Silhouette). This file is so bright and cheerful. It has several print and cut sentiments so that it can be used for any occasion. I used the Happy Birthday sentiment, and the papers are from the Our Happy Place paper collection by Echo Park Paper Co.

The box part of this card comes in two separate sections with two decretive panels on each. These two sections are glued together side by side. It also has two rim pieces that will be glued on the front and back of the card. The rim pieces hang over the edge of the pot a little so be sure not to add glue all the way to the edge of the paper. I glued the pot all together forming the square before adding the inserts this time as well.

Before the inserts are added to the box card the flowers need to be assembled. All of the flowers have multiple layers for added dimension. The file does come with centers for the flowers, but I used enamel dots for mine. After all of the flowers are assembled I added them to the inserts. Inserts one and two are the only ones with flowers. The third insert is plain green.

The tabs on all of the inserts are folded into valley folds and glue added to the backs of the tabs. I held the tabs folded down and slid the insert into the box, made sure the top of the tabs was flush with the top of box and front of the tabs was flush with the front of the box. After I had the tabs lined up, I folded the box card flat in both directions to make sure everything would lay flat. I then added the remaining inserts the same way but using the insert in front as the guide.

With the inserts all in place I then glued the flower and sentiment to the front of the box.

I love how versatile this box card can be. I hope you give it a try. Thanks for stopping by today!
Brandie

March Creative Team Blog Hop

We’re so excited to kick off the March 2025 Creative Team Blog Hop and get this month rolling with lots of crafting inspiration! Our talented team has been busy creating beautiful new projects that will spark your creativity throughout this season.

To make this month extra special, we’re offering an exclusive 30% OFF SALE at Lori’s SVG SHOP on all digital files and commercial licenses until Saturday, March 15th! Simply use the code MAR2025 (it’s case-sensitive!) to grab your favorites at a fantastic price.

We’ve also got a special freebie and an exciting giveaway waiting for you! Keep reading…

As a big thank you for joining the hop and spreading some March/springtime cheer, we’ve got a special gift just for you! For TODAY ONLY, you can grab this adorable Happy St. Patrick’s Day SVG file completely FREE. Just add it to your cart, and it’s yours at checkout—no strings attached!

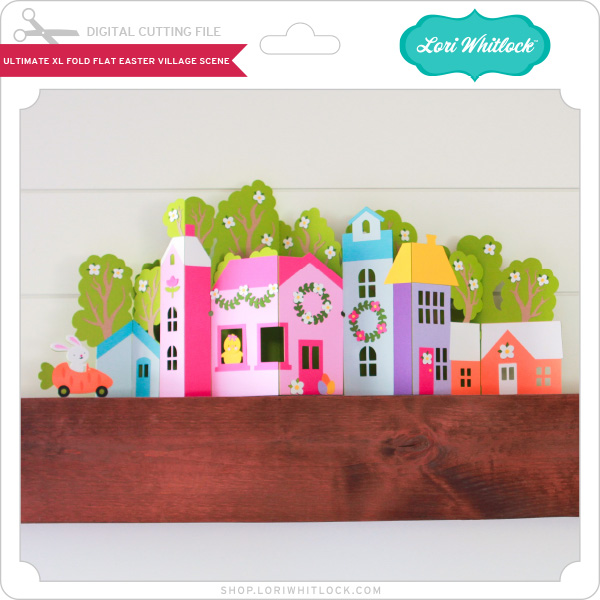
This week I designed an Easter version of the ultimate XL fold flat village scene. It is just the cutest project! I hope you love it as much as I do. What a perfect project to make at this time of year. Bring festive cheer to your home with this charming Easter Village Paper Project, measuring 24″ wide by 11″ tall when assembled. Featuring interlocking 3D village houses, this whimsical scene includes the Easter Bunny riding a carrot car, an Easter chick peeking out of a window, and spring trees in full bloom as the backdrop. The clever design allows the houses to fold flat for easy storage, making it a perfect space-saving decor item for your mantle, shelf, or tabletop. Ideal for Easter and spring, this delightful piece adds a playful and vibrant touch to your home year after year. Grab it 30% off this week with code MAR2025.

***CLICK HERE TO GO TO THE SHOP***

How about a giveaway? You’re in luck! Enter our giveaway below, and we’ll announce the winner on the entry form right here on this blog post. Keep an eye on your inbox—you might be the lucky winner!


And, last but certainly not least… ready for some amazing inspiration? Check out the creative projects from our talented team! Just click the links below for some wintery crafting magic. If you get lost, no worries—just come back here and pick up where you left off: Lori Whitlock (you are here), Traci Penrod, Ashley Cook, Cathy Harper, Chelsea VanWyk, Sue Kment, Noelene Apap. and Tamara Tigchelaar.

Thanks again for dropping by! Have a GREAT day!

~Lori


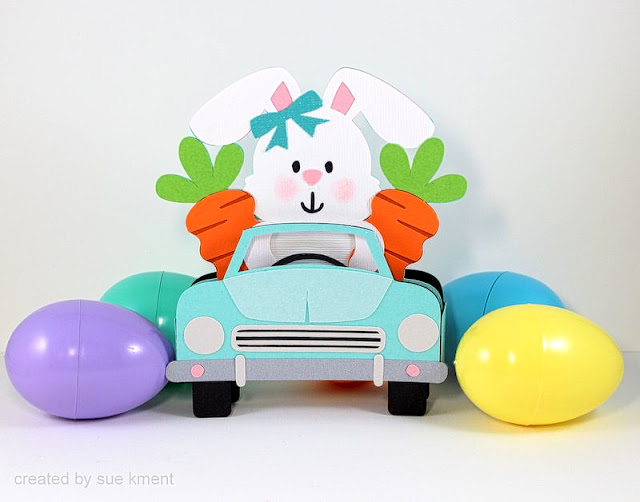
Box Card Easter Bunny Car

Happy Monday! I’m here to share this cute project with you.
 
Such a fun little bunny box card to m
ake…and I love the carrot passengers!
 
Back in the days of stamping expo’s, my thing to collect was carrots-don’t ask me why, who knows??? I still love anything to do with carrots. 
 
This is such a super cute creation, I can’t wait to pop it in the mail!

 
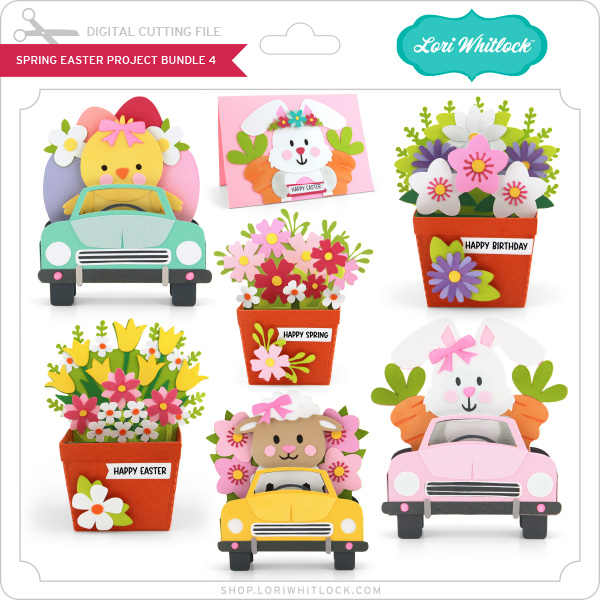
Spring Easter Bundle (all seven files)
***
Easter is right around the corner!  Time to get a head start!
Lori has these new files in her store and they are just adorable!
 
Enjoy!  💕 Sue

Happy Easter Mini Album Tutorial

Hello everyone! Traci here and today, I’m sharing a Happy Easter Mini Album I made with two of Lori’s fabulous cutting files and the Echo Park, Our Happy Place Collection. It’s filled with spring colors, flowers, and beautiful prints. This little album is perfect for holiday photos and it makes a sweet handmade gift!


Happy Easter Scrapbook Mini Album with a rabbit, a basket, eggs, and flowers


To create this, I used the A2 Easel Card Easter Bunny Basket File (SVG, Silhouette) for the design on the front cover and the Hidden Binding Mini Album Rectangle (SVG, Silhouette) for the actual book.

Here’s the simple tutorial …

1.  I resized the Hidden Binding Mini Album‘s pieces to create a book that would be 4.75″ wide x 7” tall. I chose this size so that I wouldn’t need to resize
the Easter basket file.

2.  Next, I cut out all of the pieces for both files.

Happy Easter Scrapbook Mini Album Tutorial


3. I assembled the card first. The Basket file comes with a base “grass” background that is shaped to help you know where to layer each of the pieces. I added the pink shape on top of the green base.  

Happy Easter Scrapbook Mini Album Tutorial


Happy Easter Scrapbook Mini Album Tutorial

4. Then, I layered the yellow basket on next.

Happy Easter Scrapbook Mini Album Tutorial
5. I adhered the little eggs in place, tucking them in behind the yellow basket.
Happy Easter Scrapbook Mini Album Tutorial
6. Then, I added the pieces of the bunny’s body.
Happy Easter Scrapbook Mini Album Tutorial

7. How cute! I used some foam tape underneath the feet and tail to give them some dimension.


Happy Easter Scrapbook Mini Album Tutorial

8. You can see in this picture that the pink base helps you know exactly where to adhere the flowers.


Happy Easter Scrapbook Mini Album Tutorial

9. I added some pretty colored enamel dots to the center of the flowers and the bow for a bit of shine.


Happy Easter Scrapbook Mini Album Tutorial

10. Once the card was assembled, it was time to build the album. Above, are the pages
and the binding piece. The binding piece is scored, so I folded along the
score lines to create “mountains” and “valleys”. 


Happy Easter Scrapbook Mini Album Tutorial

11. I added adhesive inside the “valleys” and adhered the sides together.

Happy Easter Scrapbook Mini Album Tutorial

The outside of the binding now looked like this. The cutting file includes a separate piece that will be glued
over these folds to create the album’s spine.

Happy Easter Scrapbook Mini Album Tutorial


12. This is the inside of the binding. To add the pages, I adhered one page piece to the front of the first spine fold and a second one to the back … sandwiching them on the “mountain”.


13. I continued to add the rest of the pages until the book was complete.

Happy Easter Scrapbook Mini Album Tutorial

14.  To decorate the cover, I adhered the Easter basket piece to the front and added my title. 

Happy Easter Scrapbook Mini Album Page with flowers, a scalloped photo mat, and a pretty plaid paper

15. Inside, I embellished the pages with lots of pretty papers, stickers, enamel dots, and photo mats. To see more of the inside pages … hop over to my Artsy Albums blog.

I hope this Happy Easter Mini Album gives you a little holiday and spring inspiration! Whether you love making scrapbooks or greeting cards, you should definitely give these cutting files a try. I love them! 


Blog * Shop * Facebook * Instagram * Pinterest

Fun with Patterned Paper

Hi everyone!  I have some cards to share with you today.  They all were created using Lori’s Echo Park Our Happy Place.  I used the 6×6 paper pad to create these, enamel dots and stickers from the sticker book. I just want to show what a different look you get to these cards when you use patterned papers instead of plain colored card stock.  It makes even the cutesiest of cards have a whole different look.  Some what of softer and bit more sophisticated  look.  I love how these all turned out, this collection has the softest colors and darling little patterns. I am all set for my Easter cards with these being finished now.  

I will have a list at the bottom, in order, of the files I used for these.  


The two bunny shaped cards can be found in this bundle:
And the last one here:
 
Thanks for joining us today!
~Cathy